
Algorithm
연속합
문제
n개의 정수로 이루어진 임의의 수열이 주어진다. 우리는 이 중 연속된 몇 개의 수를 선택해서 구할 수 있는 합 중 가장 큰 합을 구하려고 한다. 단, 수는 한 개 이상 선택해야 한다.
예를 들어서 10, -4, 3, 1, 5, 6, -35, 12, 21, -1 이라는 수열이 주어졌다고 하자. 여기서 정답은 12+21인 33이 정답이 된다.
입력
첫째 줄에 정수 n(1 ≤ n ≤ 100,000)이 주어지고 둘째 줄에는 n개의 정수로 이루어진 수열이 주어진다. 수는 -1,000보다 크거나 같고, 1,000보다 작거나 같은 정수이다.
출력
첫째 줄에 답을 출력한다.
예제 입력 1
10
10 -4 3 1 5 6 -35 12 21 -1
예제 입력 2
10
2 1 -4 3 4 -4 6 5 -5 1
예제 입력 3
5
-1 -2 -3 -4 -5
코드
import java.io.BufferedReader;
import java.io.IOException;
import java.io.InputStreamReader;
import java.util.StringTokenizer;

//https://www.acmicpc.net/problem/1912
public class two1912 {
    public int solution() throws IOException {
        BufferedReader reader = new BufferedReader(new InputStreamReader(System.in));
        int n = Integer.parseInt(reader.readLine());
        int[] numbers = new int[n];
        StringTokenizer numberToken = new StringTokenizer(reader.readLine());
        for (int i = 0; i < n; i++) {
            numbers[i] = Integer.parseInt(numberToken.nextToken());
        }

        // 여태까지의 수열의 합 중에서 i 번째 숫자는 무조건 포함한 수열의 최대값
        int[] dp = new int[n];
        dp[0] = numbers[0];
        int max = numbers[0];

        // 직전 거와 비교하기 때문에 1 부터
        for (int i = 1; i < n; i++) {
            // 지금까지의 합 + 현재 숫자 vs 현재 숫자
            dp[i] = Math.max(dp[i - 1] + numbers[i], numbers[i]);
            max = Math.max(max, dp[i]);
        }
        return max;
    }

    public static void main(String[] args) throws IOException {
        System.out.println(new two1912().solution());
    }
}
스티커
문제
상근이의 여동생 상냥이는 문방구에서 스티커 2n개를 구매했다. 스티커는 그림 (a)와 같이 2행 n열로 배치되어 있다. 상냥이는 스티커를 이용해 책상을 꾸미려고 한다.
상냥이가 구매한 스티커의 품질은 매우 좋지 않다. 스티커 한 장을 떼면, 그 스티커와 변을 공유하는 스티커는 모두 찢어져서 사용할 수 없게 된다. 즉, 뗀 스티커의 왼쪽, 오른쪽, 위, 아래에 있는 스티커는 사용할 수 없게 된다.

모든 스티커를 붙일 수 없게된 상냥이는 각 스티커에 점수를 매기고, 점수의 합이 최대가 되게 스티커를 떼어내려고 한다. 먼저, 그림 (b)와 같이 각 스티커에 점수를 매겼다. 상냥이가 뗄 수 있는 스티커의 점수의 최댓값을 구하는 프로그램을 작성하시오. 즉, 2n개의 스티커 중에서 점수의 합이 최대가 되면서 서로 변을 공유 하지 않는 스티커 집합을 구해야 한다.
위의 그림의 경우에 점수가 50, 50, 100, 60인 스티커를 고르면, 점수는 260이 되고 이 것이 최대 점수이다. 가장 높은 점수를 가지는 두 스티커 (100과 70)은 변을 공유하기 때문에, 동시에 뗄 수 없다.
입력
첫째 줄에 테스트 케이스의 개수 T가 주어진다. 각 테스트 케이스의 첫째 줄에는 n (1 ≤ n ≤ 100,000)이 주어진다. 다음 두 줄에는 n개의 정수가 주어지며, 각 정수는 그 위치에 해당하는 스티커의 점수이다. 연속하는 두 정수 사이에는 빈 칸이 하나 있다. 점수는 0보다 크거나 같고, 100보다 작거나 같은 정수이다.
출력
각 테스트 케이스 마다, 2n개의 스티커 중에서 두 변을 공유하지 않는 스티커 점수의 최댓값을 출력한다.
예제 입력 1
2
5
50 10 100 20 40
30 50 70 10 60
7
10 30 10 50 100 20 40
20 40 30 50 60 20 80
코드
import java.io.BufferedReader;
import java.io.IOException;
import java.io.InputStreamReader;
import java.util.StringTokenizer;

// https://www.acmicpc.net/problem/9465
public class one9465 {
    public void solution() throws IOException {
        BufferedReader reader = new BufferedReader(new InputStreamReader(System.in));
        int testCases = Integer.parseInt(reader.readLine());
        StringBuilder answer = new StringBuilder();
        for (int i = 0; i < testCases; i++) {
            int n = Integer.parseInt(reader.readLine());
            int[][] stickers = new int[2][n];
            for (int j = 0; j < 2; j++) {
                StringTokenizer stickerToken = new StringTokenizer(reader.readLine());
                for (int k = 0; k < n; k++) {
                    stickers[j][k] = Integer.parseInt(stickerToken.nextToken());
                }
            }
            answer.append(solve(n, stickers)).append('\n');
        }
        System.out.println(answer);
    }

    private int solve(int cols, int[][] stickers) {
        if (cols == 1) return Math.max(stickers[0][0], stickers[1][0]);
        int[][] dp = new int[2][cols];
        // 첫 번째 배열은 스티커값 그대로
        dp[0][0] = stickers[0][0];
        dp[1][0] = stickers[1][0];
        // 두 번째 열은 자신의 값 + 왼쪽 대각선
        dp[0][1] = dp[1][0] + stickers[0][1];
        dp[1][1] = dp[0][0] + stickers[1][1];
        // 나머지 만들기
        for (int i = 2; i < cols; i++) {
            dp[0][i] = Math.max(
                    // 왼쪽 아래 대각선 활용
                    dp[1][i - 1] + stickers[0][i],
                    // 왼쪽 왼쪽 아래 대각선 활용
                    dp[1][i - 2] + stickers[0][i]);
            dp[1][i] = Math.max(
                    // 왼쪽 위 대각선 활용
                    dp[0][i - 1] + stickers[1][i],
                    // 왼쪽 왼쪽 위 대각선 활용
                    dp[0][i - 2] + stickers[1][i]);
        }
        return Math.max(dp[0][cols - 1], dp[1][cols - 1]);
    }

    public static void main(String[] args) throws IOException {
        new one9465().solution();
    }
}
구간 합 구하기 5
문제
N×N개의 수가 N×N 크기의 표에 채워져 있다. (x1, y1)부터 (x2, y2)까지 합을 구하는 프로그램을 작성하시오. (x, y)는 x행 y열을 의미한다.
예를 들어, N = 4이고, 표가 아래와 같이 채워져 있는 경우를 살펴보자.
| 1 | 2 | 3 | 4 |
|---|---|---|---|
| 2 | 3 | 4 | 5 |
| 3 | 4 | 5 | 6 |
| 4 | 5 | 6 | 7 |
여기서 (2, 2)부터 (3, 4)까지 합을 구하면 3+4+5+4+5+6 = 27이고, (4, 4)부터 (4, 4)까지 합을 구하면 7이다.
표에 채워져 있는 수와 합을 구하는 연산이 주어졌을 때, 이를 처리하는 프로그램을 작성하시오.
입력
첫째 줄에 표의 크기 N과 합을 구해야 하는 횟수 M이 주어진다. (1 ≤ N ≤ 1024, 1 ≤ M ≤ 100,000) 둘째 줄부터 N개의 줄에는 표에 채워져 있는 수가 1행부터 차례대로 주어진다. 다음 M개의 줄에는 네 개의 정수 x1, y1, x2, y2 가 주어지며, (x1, y1)부터 (x2, y2)의 합을 구해 출력해야 한다. 표에 채워져 있는 수는 1,000보다 작거나 같은 자연수이다. (x1 ≤ x2, y1 ≤ y2)
출력
총 M줄에 걸쳐 (x1, y1)부터 (x2, y2)까지 합을 구해 출력한다.
예제 입력 1
4 3
1 2 3 4
2 3 4 5
3 4 5 6
4 5 6 7
2 2 3 4
3 4 3 4
1 1 4 4
예제 입력 2
2 4
1 2
3 4
1 1 1 1
1 2 1 2
2 1 2 1
2 2 2 2
코드
import java.io.BufferedReader;
import java.io.IOException;
import java.io.InputStreamReader;
import java.util.StringTokenizer;

//https://www.acmicpc.net/problem/11660
public class one11660 {
    public void solution() throws IOException {
        BufferedReader reader = new BufferedReader(new InputStreamReader(System.in));
        StringTokenizer infoToken = new StringTokenizer(reader.readLine());
        int size = Integer.parseInt(infoToken.nextToken());
        int points = Integer.parseInt(infoToken.nextToken());

        int[][] board = new int[size + 1][size + 1];
        for (int i = 1; i <= size; i++) {
            StringTokenizer rowToken = new StringTokenizer(reader.readLine());
            for (int j = 1; j <= size; j++) {
                board[i][j] = Integer.parseInt(rowToken.nextToken());
            }
        }
        int[][] dp = new int[size + 1][size + 1];
        for (int i = 1; i <= size; i++) {
            for (int j = 1; j <= size; j++) {
                // 전체 구간 합 구해 두기
                dp[i][j] = board[i][j]
                        + dp[i - 1][j]
                        + dp[i][j - 1]
                        - dp[i - 1][j - 1];
            }
        }
        // 구하고자 하는 점들마다 결과 확인
        StringBuilder answer = new StringBuilder();
        for (int i = 0; i < points; i++) {
            StringTokenizer pointToken = new StringTokenizer(reader.readLine());
            int x1 = Integer.parseInt(pointToken.nextToken());
            int y1 = Integer.parseInt(pointToken.nextToken());
            int x2 = Integer.parseInt(pointToken.nextToken());
            int y2 = Integer.parseInt(pointToken.nextToken());
            int sum = dp[x2][y2] - dp[x2][y1 - 1] - dp[x1 - 1][y2] + dp[x1 - 1][y1 - 1];
            answer.append(sum).append('\n');
        }
        System.out.println(answer);
    }

    public static void main(String[] args) throws IOException {
        new one11660().solution();
    }
}
평범한 배낭
문제
이 문제는 아주 평범한 배낭에 관한 문제이다.
한 달 후면 국가의 부름을 받게 되는 준서는 여행을 가려고 한다. 세상과의 단절을 슬퍼하며 최대한 즐기기 위한 여행이기 때문에, 가지고 다닐 배낭 또한 최대한 가치 있게 싸려고 한다.
준서가 여행에 필요하다고 생각하는 N개의 물건이 있다. 각 물건은 무게 W와 가치 V를 가지는데, 해당 물건을 배낭에 넣어서 가면 준서가 V만큼 즐길 수 있다. 아직 행군을 해본 적이 없는 준서는 최대 K만큼의 무게만을 넣을 수 있는 배낭만 들고 다닐 수 있다. 준서가 최대한 즐거운 여행을 하기 위해 배낭에 넣을 수 있는 물건들의 가치의 최댓값을 알려주자.
입력
첫 줄에 물품의 수 N(1 ≤ N ≤ 100)과 준서가 버틸 수 있는 무게 K(1 ≤ K ≤ 100,000)가 주어진다. 두 번째 줄부터 N개의 줄에 거쳐 각 물건의 무게 W(1 ≤ W ≤ 100,000)와 해당 물건의 가치 V(0 ≤ V ≤ 1,000)가 주어진다.
입력으로 주어지는 모든 수는 정수이다.
출력
한 줄에 배낭에 넣을 수 있는 물건들의 가치합의 최댓값을 출력한다.
예제 입력 1
4 7
6 13
4 8
3 6
5 12
코드
import java.io.BufferedReader;
import java.io.IOException;
import java.io.InputStreamReader;
import java.util.StringTokenizer;

//https://www.acmicpc.net/problem/12865
public class five12865 {
    public int solution() throws IOException {
        BufferedReader reader = new BufferedReader(new InputStreamReader(System.in));
        StringTokenizer infoToken = new StringTokenizer(reader.readLine());
        int itemCount = Integer.parseInt(infoToken.nextToken());
        int totalWeight = Integer.parseInt(infoToken.nextToken());
        // 가방의 무게 - 고르는 아이템 종류
        int[][] dp = new int[itemCount + 1][totalWeight + 1];
        // 아이템 저장 공간
        int[][] items = new int[itemCount + 1][];
        for (int i = 1; i <= itemCount ; i++) {
            StringTokenizer itemToken = new StringTokenizer(reader.readLine());
            items[i] = new int[] {
                    Integer.parseInt(itemToken.nextToken()),
                    Integer.parseInt(itemToken.nextToken())};
        }
        for (int itemNumber = 1; itemNumber < itemCount + 1; itemNumber++) {
            int itemWeight = items[itemNumber][0];
            int itemValue = items[itemNumber][1];
            for (int currentWeight = 0; currentWeight < totalWeight + 1; currentWeight++) {
                // 지금 무게에서 현재 살피고 있는 물건을 추가할 수 없으면
                if (itemWeight > currentWeight)
                    dp[itemNumber][currentWeight] = dp[itemNumber - 1][currentWeight];
                else dp[itemNumber][currentWeight] = Math.max(
                        // 이전 아이템 까지만 고려했을 때의 현재 무게에서의 최대 가치
                        dp[itemNumber - 1][currentWeight],
                        // 이번 아이템을 넣어보고, 그에 따라서 추가할 수 있는 가치를 이전에서 살펴본 결과
                        itemValue + dp[itemNumber - 1][currentWeight - itemWeight]
                );
            }
        }
        return dp[itemCount][totalWeight];
    }

    public static void main(String[] args) throws IOException {
        System.out.println(new five12865().solution());
    }
}
TDD
Test Driven Development
일반적인 개발의 흐름은 다음과 같다. 요구 사항에 대한 설계를 하고, 코드를 개발한 뒤 테스트를 한다. 이 방향성을 바꿔서 TDD는 요구사항을 기반으로 하는 테스트를 작성하고 테스트를 통과하는 코드를 작성한 뒤 통과한 코드의 품질을 향상시킨다. 즉, 요구사항에 대한 향상된 이해를 바탕으로 테스트를 기반으로 설계하는 방법론이다.
TDD(Test Driven Development)
일반적인 개발의 흐름인 코드를 작성한 뒤 테스트를 한다가 아닌, (실패할) 테스트 코드를 먼저 작성하고, 해당 테스트를 통과하는 최소한의 코드를 작성한 뒤 리펙토링을 진행하는 형태의 개발 방법론이다. 유닛 테스트 코드를 먼저 작성하는 연습을 통해 요구사항에 대한 더 상세한 이해를 추구하는 개발 방법론이다.
일반적인 TDD의 경우 다음과 같은 단계를 통해 진행된다.
- Red - 아직 작성되지 않은 기능에 대하여 테스트 코드를 작성한다. 작성하지 않은 기능에 대한 테스트이기 때문에 실패하는게 당연한 테스트다. 일반적으로 IDE 들이 실패한 테스트에 대해서 붉은색으로 표시해 주기 때문에 Red 단계라고 부른다.
- Green - 테스트를 통과할 정도의 코드만 작성해 준다. 이 단계에서는 코드의 품질은 신경쓰지 않는다. 테스트가 통과하게 됨으로, Green 단계라고 부른다.
- Refactor - 테스트가 통과하였다면 이제 코드의 품질을 개선한다.
궁극적으로 필요한 최소 수준의 코드만 작성하기 때문에 지속적인 리팩토링을 통해 코드의 품질을 향상하고 장기적으로 보기에는 개발 비용이 감소한다. 하지만 동작하지 않는 코드를 작성해야 한다는 것에 대한 거부감이나 초기 단계 테스트 작성에 대한 시간이 소요되는 단점이 있다.
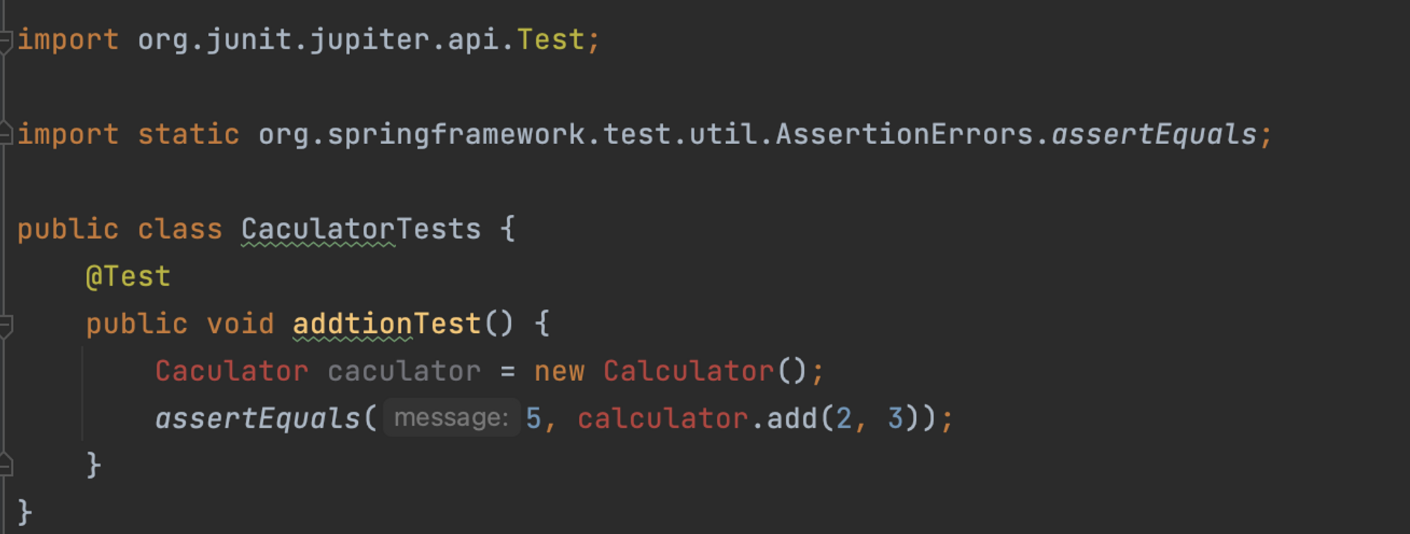
CaculatorTests
간단한 계산 기능을 검사해 보는 테스트 코드를 작성하면 다음과 같다.
public class CaculatorTests {
    @Test
    public void addtionTest() {
        Caculator caculator = new Calculator();
        assertEquals(5, calculator.add(2, 3));
    }
}
IDE를 보면 아직 Red 상태로 빨간 줄이 뜨는 것을 볼 수 있다.
이후 빨간 줄을 없애 준다.
public class CaculatorTests {
    @Test
    public void addtionTest() {
        Calculator calculator = new Calculator();
        assertEquals(5, calculator.add(2, 3));
    }

    private class Calculator {
        public int add(int a, int b) {
            **return 5;**
        }
    }
}
이때 return a + b;가 아닌 5를 입력한 이유는 테스트 코드는 최소 한도의 코드만 작성하기 때문이다. 가짜 구현 기법이라고도 한다. 일단 이 케이스를 통과시키도록 코드를 작성한 뒤, 다른 예시 코드들도 통과시키도록 리팩토링하는 것이다. 하지만 이제 더했을 때 5가 아닌 값들이 나오는 테스트 케이스 추가 경우에 대해서는 해당 코드가 작동하지 않는다. 두 가지 이상의 샘플 케이스에서는 가짜 구현이 이루어지지 않는다. 이런 경우를 삼각 측량 기법이라고 한다. 두 개 이상의 테스트 케이스를 동시에 만족시킬 수 있도록 코드를 수정해 주는 것이다.
public class CaculatorTests {
    @Test
    public void addtionTest() {
        Calculator calculator = new Calculator();
        assertEquals(5, calculator.add(2, 3));
    }

    private class Calculator {
        public int add(int a, int b) {
            **return (a + b);**
        }
    }
}
이번에는 조금 더 발전시켜서 0으로 나누려고 시도하는 경우 에러를 발생시키는지 테스트 코드를 작성해서 확인해 보자.
public class CaculatorTests {
    @Test
    public void dividedTest() {
        Calculator calculator = new Calculator();
        assertEquals(3, calculator.div(6, 2));
        assertThrows(IllegalStateException.class, () -> calculator.div(6, 0));
    }

    private class Calculator {
        public int div(int a, int b) {
            if (b == 0) {
                throw new IllegalStateException();
            }
            else {
                return (a / b);
            }
        }
    }
}
ArticleRepositoryTests
JPA만 테스트하기 위해 @DataJpaTest를 붙여 준다. 의존성 주입이 잘 이루어지는지도 확인해 보기 위해 @Autowired 어노테이션을 사용해 확인해 본다. 먼저 의존성을 주입할 Article Entity와 ArticleRepository 클래스를 만들고 해당 저장소가 비어 있지 않은지부터 검사한다.
import org.junit.jupiter.api.Test;
import org.springframework.beans.factory.annotation.Autowired;
import org.springframework.boot.test.autoconfigure.orm.jpa.DataJpaTest;
import static org.assertj.core.api.Assertions.assertThat;

@DataJpaTest
public class AlticleRepositoryTests {
    @Autowired
    private ArticleRepository articleRepository;

    @Test
    public void articleRepositoryIsNotNull() {
        assertThat(articleRepository).isNotNull();
    }
}
이후 빨간색 줄을 없애기 위해 ArticleRepository를 만든다.
import org.springframework.data.jpa.repository.JpaRepository;

public interface ArticleRepository extends JpaRepository<Article, Long> {
}
이후 빨간색 줄을 없애기 위해 이제는 Article을 만든다.
import jakarta.persistence.Entity;
import jakarta.persistence.GeneratedValue;
import jakarta.persistence.GenerationType;
import jakarta.persistence.Id;

@Entity
public class Article {
    @Id
    @GeneratedValue(strategy = GenerationType.IDENTITY)
    private long id;
}
이후 given when then 구조를 사용해서 테스트 코드를 작성할 수 있다.
@Test
    public void createArticle() {
        //given
        //기본 배경

        //when
        //테스트하고 싶은 기능

        //then
        //테스트의 동작이 기대한 대로 이루어지는지
    }
@Test
public void createArticle() {
//given
//기본 배경
Article article = new Article();
article.setTitle("Hello");
article.setContent("new content");
//when
//테스트하고 싶은 기능
Article result = articleRepository.save(article);
//then
//테스트의 동작이 기대한 대로 이루어지는지
assertThat(result.getId()).isNotNull();
assertEquals(result, article);
}이후 빨간 색이 뜨는 부분을 수정하기 위해 title, content를 추가하고 setter, getter를 구현해 준다.
@Entity
public class Article {
    @Id
    @GeneratedValue(strategy = GenerationType.IDENTITY)
    @Getter
    private long id;

    @Setter
    @Getter
    private String title;

    @Setter
    @Getter
    private String content;
}
같은 느낌으로 내가 검색한 문자열이 포함된 제목을 가진 글이 있는지 확인해 보는 테스트 코드를 작성해 보자.
	 @Test
    public void findByTitleContains() {
        // given
        Article article = new Article();
        article.setTitle("Hello");
        articleRepository.save(article);
        article = new Article();
        article.setTitle("Yellow");
        articleRepository.save(article);

        // when
        List<Article> result1 = articleRepository.findAllByTitleContains("ell");
        List<Article> result2 = articleRepository.findAllByTitleContains("He");
        List<Article> result3 = articleRepository.findAllByTitleContains("A");

        // then
        assertEquals(2, result1.size());
        assertEquals(1, result2.size());
        assertEquals(0, result3.size());
    }
이후 빨간 줄을 없애기 위해 findAllByTitleContains 함수를 만들어 준다.
import java.util.List;

public interface ArticleRepository extends JpaRepository<Article, Long> {
    List<Article> findAllByTitleContains(String title);
}
ArticleServiceTests
이번에는 서비스를 테스트하는 코드를 작성해 보자. Service 테스트는 Unit Test를 할 것이기 때문에 존재하지 않는 가상의 객체를 만들어야 한다. 이를 위해 @ExtendWith(MockitoExtension.class)를 넣어 준다.
import org.junit.jupiter.api.Test;
import org.junit.jupiter.api.extension.ExtendWith;
import org.mockito.junit.jupiter.MockitoExtension;
import java.util.Collections;
import static org.mockito.Mockito.when;
import static org.junit.jupiter.api.Assertions.*;

@ExtendWith(MockitoExtension.class)
public class ArticleServiceTests {
    private ArticleService articleService;
    private ArticleRepository articleRepository;

    @Test
    public void searchByTitle() {
        // given
        String query = "Title";
        Article found = new Article();
        found.setTitle("Title here");
        found.setContent("Test Content");

        // mock
        when(articleRepository.findAllByTitleContains(query))
                .thenReturn(Collections.singletonList(found));

        // when
        // ArticleService가 어떻게 동작했으면 하는지
        List<ArticleDto> articleDtoList = articleService.fingbyTitle(query);

        // then
        assertEquals(1, articleDtoList.size());
        assertTrue(articleDtoList.get(0).getTitle().contains(query));
    }
}
빨간 줄을 없애기 위해 ArticleDto부터 만들어 준다.
@Data
public class ArticleDto {
    private long id;
    private String title;
    private String content;

    public static ArticleDto fromEntity(Article article) {
        ArticleDto articleDto = new ArticleDto();
        articleDto.setId(article.getId());
        articleDto.setTitle(article.getTitle());
        articleDto.setContent(article.getContent());
        return articleDto;
    }
}
이후 Red 상태를 해소하기 위해 Service에 기능을 만들어 준다.
@Service
@RequiredArgsConstructor
public class ArticleService {
    private final ArticleRepository articleRepository;
    public List<ArticleDto> findByTitle(String query) {
        List<ArticleDto> articleList = new ArrayList<>();
        for(Article article:articleRepository.findAllByTitleContains(query)) {
            articleList.add(ArticleDto.fromEntity(article));
        }
        return articleList;
    }
}
이때 의존성 주입을 Mock으로 하기 위해 테스트 코드에 어노테이션을 추가해 준다.
@ExtendWith(MockitoExtension.class)
public class ArticleServiceTests {
    @InjectMocks
    private ArticleService articleService;
    @Mock
    private ArticleRepository articleRepository;

    @Test
    public void searchByTitle() {
        // given
        String query = "Title";
        Article found = new Article();
        found.setTitle("Title here");
        found.setContent("Test Content");

        // mock
        when(articleRepository.findAllByTitleContains(query))
                .thenReturn(Collections.singletonList(found));

        // when
        // ArticleService가 어떻게 동작했으면 하는지
        List<ArticleDto> articleDtoList = articleService.findByTitle(query);

        // then
        assertEquals(1, articleDtoList.size());
        assertTrue(articleDtoList.get(0).getTitle().contains(query));
    }
}
ArticleControllerTests
Controller 테스트를 위해서는 MockMvc를 주입시켜 줘야 한다. MockMvc는 HTTP 요청을 보낸 척을 담당해 주는 애이다. 얘는 처음에 생성한 뒤 설정을 해 줘야 한다.
import org.junit.jupiter.api.BeforeEach;
import org.junit.jupiter.api.Test;
import org.junit.jupiter.api.extension.ExtendWith;
import org.mockito.InjectMocks;
import org.mockito.junit.jupiter.MockitoExtension;
import org.springframework.test.web.servlet.MockMvc;
import org.springframework.test.web.servlet.setup.MockMvcBuilders;
import static org.assertj.core.api.Assertions.assertThat;

@ExtendWith(MockitoExtension.class)
public class ArticleControllerTests {
    @InjectMocks
    private ArticleController articleController;
    private MockMvc mockMvc;

    @BeforeEach
    public void init() {
        mockMvc = MockMvcBuilders.standaloneSetup(articleController).build();
    }

    @Test
    public void mockMvcIsNotNull() {
        assertThat(articleController).isNotNull();
        assertThat(mockMvc).isNotNull();
    }
}
이제 특정 URL에 Query Parameter가 포함되어 있을 때 응답으로 JSON을 반환하는데, 그 JSON 안에 게시글 데이터가 있으며, 그 제목이 Query Parameter를 포함하고 있는 시나리오를 테스트해 보자.
import org.junit.jupiter.api.BeforeEach;
import org.junit.jupiter.api.Test;
import org.junit.jupiter.api.extension.ExtendWith;
import org.mockito.InjectMocks;
import org.mockito.junit.jupiter.MockitoExtension;
import org.springframework.http.MediaType;
import org.springframework.test.web.servlet.MockMvc;
import org.springframework.test.web.servlet.ResultActions;
import org.springframework.test.web.servlet.setup.MockMvcBuilders;
import static org.assertj.core.api.Assertions.assertThat;
import static org.hamcrest.core.StringContains.containsString;
import static org.springframework.test.web.servlet.request.MockMvcRequestBuilders.get;
import static org.springframework.test.web.servlet.result.MockMvcResultMatchers.*;

@ExtendWith(MockitoExtension.class)
public class ArticleControllerTests {
    @InjectMocks
    private ArticleController articleController;
    private MockMvc mockMvc;

    @BeforeEach
    public void init() {
        mockMvc = MockMvcBuilders.standaloneSetup(articleController).build();
    }

    @Test
    public void mockMvcIsNotNull() {
        assertThat(articleController).isNotNull();
        assertThat(mockMvc).isNotNull();
    }

    **@Test
    public void queryArticle() throws Exception {
        // given
        String url = "/articles?title=test";

        // when
        ResultActions resultActions = mockMvc.perform(get(url));

        // then
        resultActions.andExpectAll(
                status().is2xxSuccessful(),
                content().contentType(MediaType.APPLICATION_JSON),
                jsonPath("$[0].title", containsString("test"))
        );
    }**
}
이후 빨간 줄을 해결하기 위해 매핑을 만들어 준다.
@RestController
@RequestMapping("articles")
public class ArticleController {
    private final ArticleService articleService;

    public ArticleController(ArticleService articleService) {
        this.articleService = articleService;
    }

    @GetMapping
    public List<ArticleDto> readArticles(
            @RequestParam("title") String title
            ) {
        return articleService.findByTitle(title);
    }
}
이후 진짜 서비스를 테스트 용도로 흉내만 내서 작동할 service도 mocking해 준다.
@ExtendWith(MockitoExtension.class)
public class ArticleControllerTests {
    @InjectMocks
    private ArticleController articleController;
    **@Mock
    private ArticleService articleService;**
    private MockMvc mockMvc;

    @BeforeEach
    public void init() {
        mockMvc = MockMvcBuilders.standaloneSetup(articleController).build();
    }

    @Test
    public void mockMvcIsNotNull() {
        assertThat(articleController).isNotNull();
        assertThat(mockMvc).isNotNull();
    }

    @Test
    public void queryArticle() throws Exception {
        // given
        String url = "/articles?title=test";
        **ArticleDto articleDto = new ArticleDto();
        articleDto.setTitle("contains test");
        when(articleService.findByTitle("test"))
                .thenReturn(Collections.singletonList(articleDto));**

        // when
        ResultActions resultActions = mockMvc.perform(get(url));

        // then
        resultActions.andExpectAll(
                status().is2xxSuccessful(),
                content().contentType(MediaType.APPLICATION_JSON),
                jsonPath("$[0].title", containsString("test"))
        );
    }
}