얼마전에 방탈출을 하러 서울에 간적이 있는데 너무 신기했었다.
기존의 방탈출과는 다르게 방탈출 전용 앱이 있어, 앱을 설치한 후 방에 입장하여 앱을 통해 설명을 안내받고, 힌트를 얻을 수 있으며 답을 입력하는 방식으로 진행되는 형식이었다.
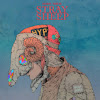
그 중에서 가장 인상깊었던 것은 바로 힌트를 제공받는 방법이었는데 다음 화면과 같았다.
복권을 긁어 꽝, 당첨의 유무를 알 수 있는 느낌의 화면이었는데 긁어서 숨어있던 힌트를 얻을 수 있었다.
이를 어떻게 구현할 수 있을까, 구글링을 해보던 중, '긁는다'라는 표현의 힌트를 얻어 Scratch, Lottery Scratch, ScratchView 등으로 검색을 해보았으며 그 중에서 가장 최근까지 커밋이 이루어지고 있는 안드로이드 오픈소스를 발견할 수 있었다.
https://github.com/AnupKumarPanwar/ScratchView
사용방법은 깃허브 링크에 잘 설명되어있으므로 사용하는데 어려움은 없었다.
링크에 설명에 나와있듯이, 앱수준의 build.gragle에 의존성을 추가하는 작업 뿐만 아닌 setting.gradle에 코드를 추가하는 작업이 있음에 유의하도록 하자.
dependencyResolutionManagement {
    repositoriesMode.set(RepositoriesMode.FAIL_ON_PROJECT_REPOS)
    repositories {
        ...
        maven { url "https://jitpack.io" }
        ...
    }
}
sync를 해주고 xml 또는 컴포즈로 이미지를 보여줄 화면에 이미지를 우선 배치한 뒤에 그 위에(코드로 따지면 하단에) 긁어낼 수 있는 뷰를 추가해주면 쉽게 작업을 끝낼 수 있다.
MainActivity.kt
class MainActivity : AppCompatActivity() {

    lateinit var binding: ActivityMainBinding

    override fun onCreate(savedInstanceState: Bundle?) {
        super.onCreate(savedInstanceState)
        binding = ActivityMainBinding.inflate(layoutInflater)
        setContentView(binding.root)

        Glide
            //Internet use-permission need
            .with(this)
            .load(IMAGE_URL)
            .into(binding.iv)
    }
}
Constants.kt (원하는 이미지의 URL 이나 drawable resource를 고르면 된다.)
object Constants {
    const val IMAGE_URL = "https://user-images.githubusercontent.com/51016231/189530632-bf05c1f0-d979-493c-98f2-d5165d8a4ef4.png"
}
activity_main.xml
<?xml version="1.0" encoding="utf-8"?>
<androidx.constraintlayout.widget.ConstraintLayout xmlns:android="http://schemas.android.com/apk/res/android"
    xmlns:app="http://schemas.android.com/apk/res-auto"
    xmlns:tools="http://schemas.android.com/tools"
    android:layout_width="match_parent"
    android:layout_height="match_parent"
    tools:context=".MainActivity">

    <ImageView
        android:id="@+id/iv"
        android:layout_width="300dp"
        android:layout_height="300dp"
        app:layout_constraintBottom_toBottomOf="parent"
        app:layout_constraintEnd_toEndOf="parent"
        app:layout_constraintStart_toStartOf="parent"
        app:layout_constraintTop_toTopOf="parent" />

    <com.anupkumarpanwar.scratchview.ScratchView
        android:layout_width="300dp"
        android:layout_height="300dp"
        app:layout_constraintBottom_toBottomOf="parent"
        app:layout_constraintEnd_toEndOf="parent"
        app:layout_constraintStart_toStartOf="parent"
        app:layout_constraintTop_toTopOf="parent"
        app:tile_mode="REPEAT" />


</androidx.constraintlayout.widget.ConstraintLayout>
tile_mode는 CLAMP, REPEAT, MIRROR 등이 있으며 기본적으로 제공되는 위에 깔리는 화면의 디자인 패턴을 의미한다. REPEAT이 그나마 깔끔해 사용해보았고 이미지를 직접 골라서 얹을 수도 있다.
에뮬레이터로 앱을 실행하여 매직패드를 통해 동작해보았는데 그럴듯 하다!