얼마전에 멀티모듈 구조를 가지는 java 프로젝트를 시작하게 되었는데, 환경구축 과정에서 겪었던 내용들에 대해서 정리해보려고 합니다.
모듈 생성
모듈 생성 자체는 매우 간단합니다. intellij 기준으로 다음과 같이 생성할 수 있습니다.
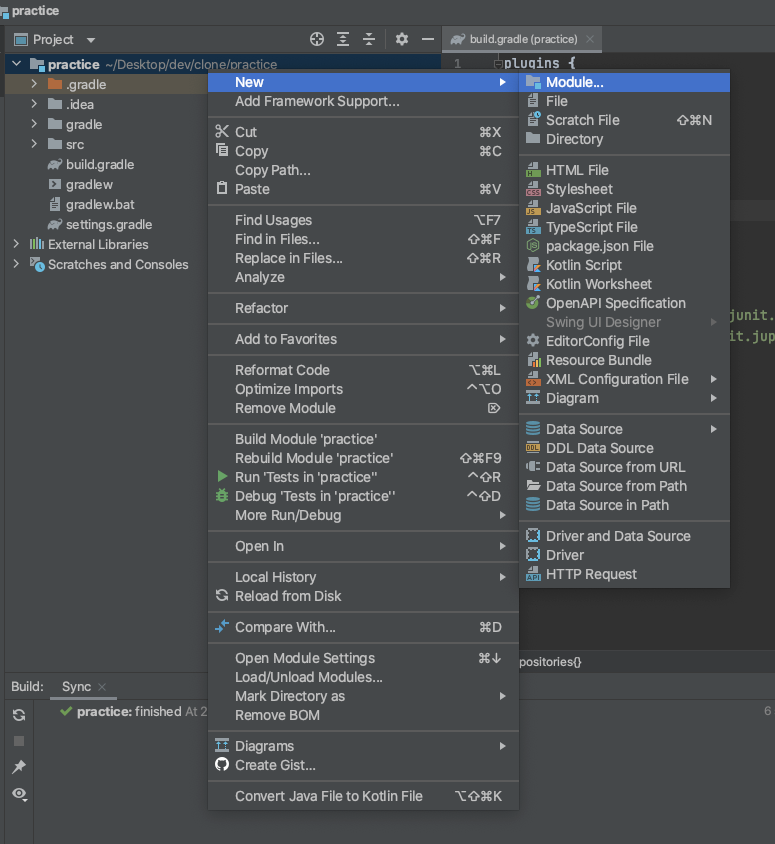
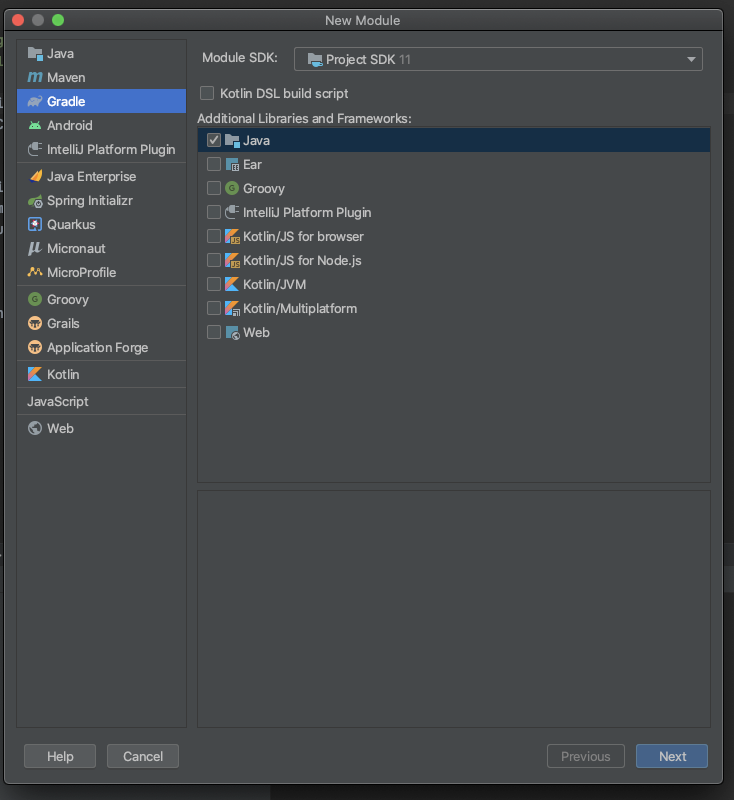
gradle을 사용할 것이므로 gradle을 선택
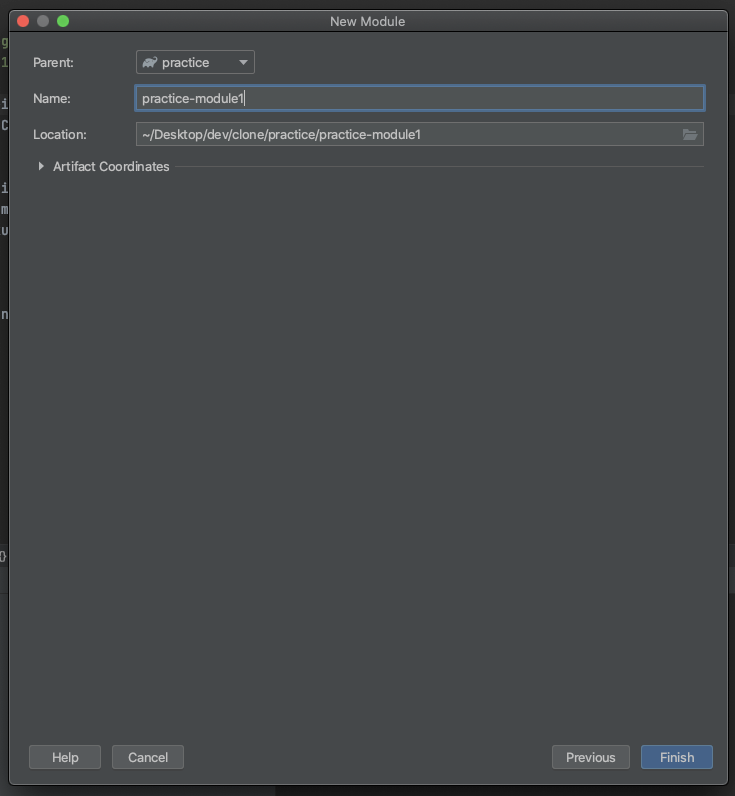
생성할 모듈의 이름 기입
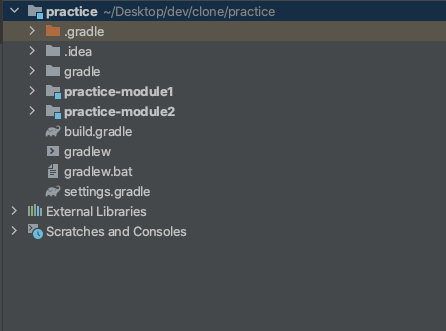
모듈 생성 완료!

settings.gradle 설정
모듈을 생성했으니 이제 각 모듈마다 설정파일을 작성하여 각 모듈의 환경들과 dependency를 관리해야 합니다.
우선, 연습을 위해 모듈을 하나 더 생성했습니다.
먼저 root의 settings.gradle에 아래 내용을 작성해야 합니다.
아래 내용은 practice 모듈이 하위 모듈들을 관리하겠다는 의미를 가집니다.
rootProject.name = 'practice'
include 'practice-module1'
include 'practice-module2'
build.gradle 설정
Root build.gradle
먼저 root에 있는 build.gradle을 작성하겠습니다.
plugins 블록 입니다.
plugins {
    id 'java'
    id 'org.springframework.boot' version '2.1.0.RELEASE'
}
(plugin이란 미리 구성해놓은 task들의 그룹이며 특정 빌드과정에 필요한 기본정보들을 포함하고 있습니다. 자세한 내용은 해당 문서를 참고해주세요.)
이제 root의 build.gradle 내에서 해당 플러그인들을 사용할 수 있게 되었습니다.
다음으로 subprojects 블록을 작성하겠습니다.
subpojects 블록은 root의 하위에 있는 모든 모듈에 적용될 내용들을 작성하는 블록 입니다.
(root는 포함되지 않습니다.)
각 모듈마다 build.gradle에 새로이 내용을 작성할 수도 있지만 모든 모듈에서 같은 설정을 사용하고 싶은 경우가 있기 때문에 이럴 때에는 subprojects에서 해당 내용을 정의합니다.
plugins {
    id 'java'
    id 'org.springframework.boot' version '2.1.0.RELEASE'
}

subprojects {
    group = 'com.example.practice'
    version = '0.0.1-SNAPSHOT'

    apply plugin: 'java'
    apply plugin: 'org.springframework.boot'
    apply plugin: 'io.spring.dependency-management'

    sourceCompatibility = 1.8
    targetCompatibility = 1.8

    repositories {
        mavenCentral()
    }

    dependencies {
        implementation 'com.fasterxml.jackson.core:jackson-databind:2.9.7'

        testImplementation 'org.junit.jupiter:junit-jupiter-api'
        testRuntimeOnly 'org.junit.jupiter:junit-jupiter-engine'
    }

    test {
        useJUnitPlatform()
    }
}
참고로, subprojects 블록에서는 plugins 블록을 사용할 수 없습니다.
따라서 apply plugin을 사용하여 plugin을 적용시켰습니다.
이 때, core plugin 외의 community plugin의 버전은 앞서 plugins 블록에 선언한 버전을 따라갑니다.
io.spring.dependency-management 플러그인은 버전정보도 없이 어떻게 적용되는건지 궁금할 수 있습니다.
그에 대한 답은 다음과 같습니다.
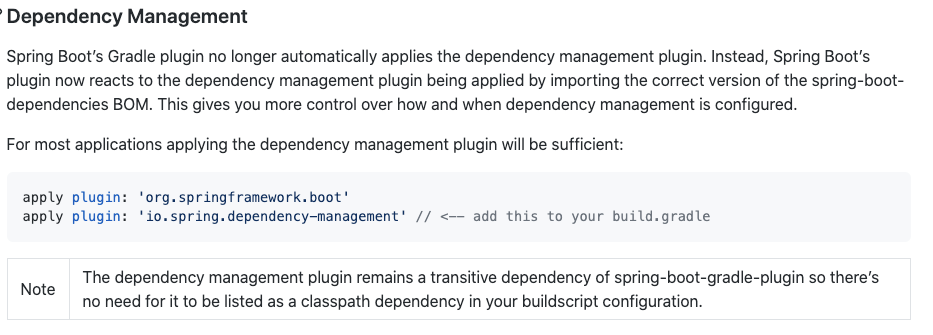
발번역일 수도 있지만 요약하자면, io.spring.dependency-management 는 spring-boot-gradle-plugin 의 transitive dependency 이다. 하지만 automatically 하게 적용하지는 않으니 apply plugin 을 명시해 줘야 한다. 정도로 해석 가능할 것 같습니다.
다시 돌아와서..
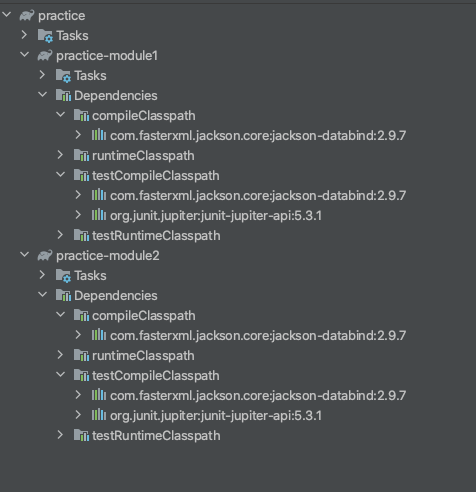
subproejcts 블록 작성 완료 후 빌드를 진행하니 모든 하위 모듈에 dependency가 잘 적용되었습니다.
이제 각 모듈의 build.gradle을 작성하겠습니다.
practice-module1 build.gradle
subprojects 에서 공통으로 정의한 부분 외의 practice-module1 에서만 적용할 내용들을 해당 파일에 작성하면 됩니다.
def resilience4jVersion = '1.4.0';

dependencies {
    compile "io.github.resilience4j:resilience4j-spring-boot2:${resilience4jVersion}"
    compile "io.github.resilience4j:resilience4j-reactor:${resilience4jVersion}"
    compile "io.github.resilience4j:resilience4j-all:${resilience4jVersion}"
}

bootJar {
    enabled = false
}

jar {
    enabled = true
}
여기서 중요한건 bootJar, jar 설정인데요.
스프링 부트 기반의 멀티 모듈 프로젝트를 구축할 때 Build를 실행하면 자동으로 bootJar 태스크를 실행합니다. (스프링 부트 플러그인에 이런 설정이 포함되어 있습니다.)
bootJar는 스프링 부트 application을 standalone 으로 실행시키기 위한 것들이 포함되기 때문에 main 메서드 없이 라이브러리의 역할 하는 모듈 이라면 해당 설정을 비활성화 해야 합니다.
그리고 명시적으로 jar task를 실행시키겠다고 작성을 해줘야 오류가 발생하지 않습니다.
practice-module1은 main 메서드가 없이 라이브러리의 역할만 할 것이므로 관련 설정을 넣어 주었습니다.
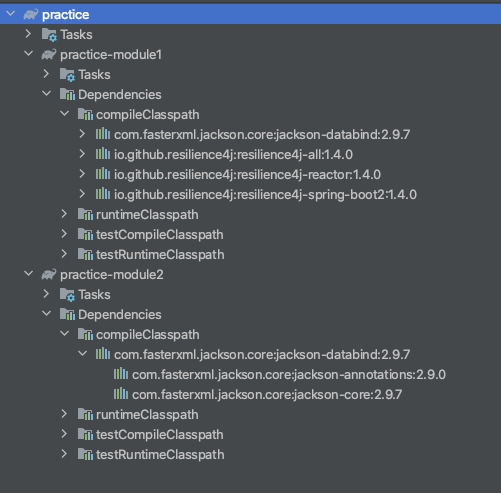
여기까지 build를 해보겠습니다.
practice-module1 에 dependency가 잘 적용된 모습입니다.
practice-module2 build.gradle
practice-module2 의 build.gradle을 작성하였습니다.
dependencies {
    implementation project(':practice-module1')
    implementation 'org.springframework.boot:spring-boot-starter-webflux'
}

bootJar {
    enabled = false
}

jar {
    enabled = true
}
implementation project(':practice-module1') 을 제외하면 비슷합니다.
implementation project(':practice-module1') 은 practice-module1 모듈을 의존하겠다는 의미입니다.
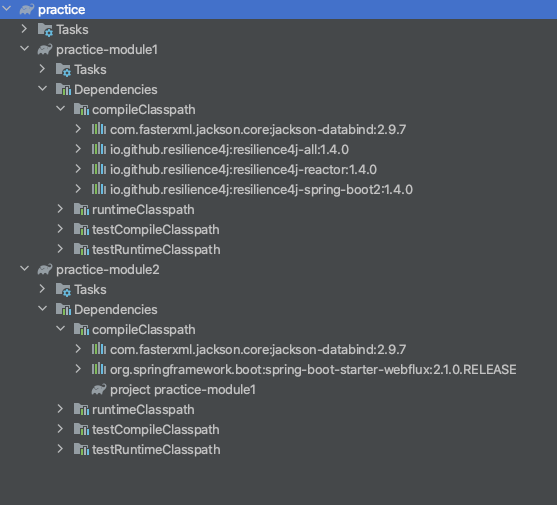
빌드를 해보면 dependency가 잘 적용되었습니다.
여기서 주의할 점이 있습니다.
만약 project-module1 의 build.gradle이 다음과 같이 implementation으로 되어 있다고 가정해보겠습니다.
def resilience4jVersion = '1.4.0';
dependencies {
implementation "io.github.resilience4j:resilience4j-spring-boot2:${resilience4jVersion}"
implementation "io.github.resilience4j:resilience4j-reactor:${resilience4jVersion}"
implementation "io.github.resilience4j:resilience4j-all:${resilience4jVersion}"
}
bootJar {
enabled = false
}
jar {
enabled = true
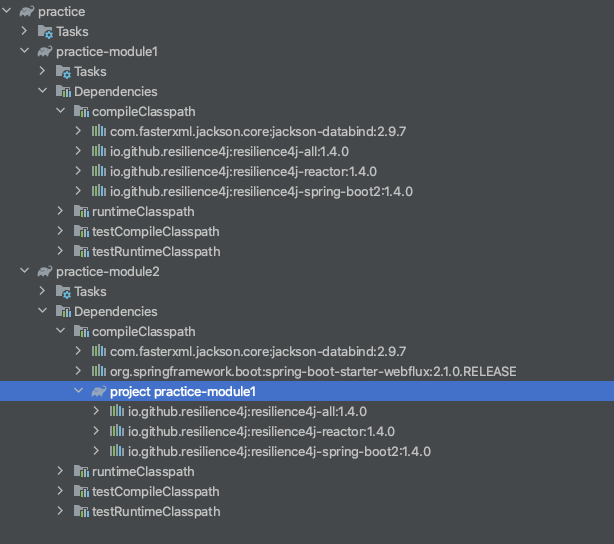
}이 상태로 빌드를 해보면
차이점이 보이시나요? practice-module2 밑에 있는 practice-module1의 하위 디펜던시들이 적용되지 않습니다. 즉, 하위 의존에 대한 접근이 제한되는 것을 뜻합니다.
만약, 하위 모듈에 대한 접근을 폐쇄하여 보호하고 싶다면 implementation을 사용하면 됩니다!
compile과 implementation의 더 자세한 차이점은 해당 문서를 참고해주세요.
여기까지 멀티모듈 프로젝트의 gradle 설정을 완료하였습니다.
끝!
