이 프로젝트는 이것저것 적용해서 테스트하기 위한 프로젝트입니다. 이번에는 투표 기능 구현에 들어가기 전에 기본적인 게시물 CRUD를 구현했습니다.
식사 메뉴 투표 커뮤니티 프로젝트를 진행하면서, 투표 기능을 구현하기 전에 먼저 기본적인 게시물 관리 기능부터 차근차근 구현하기로 했습니다. 한 번에 다 구현하는 게 아니라 조금씩 살을 붙이면서 견고한 기반을 다지는 것이 빠르게 구현이 가능할 것 같다고 생각했습니다.
데이터베이스 스키마 설계
- 1:N 관계: 한 사용자가 여러 게시물 작성 가능
- onDelete: Cascade: 사용자 삭제 시 게시물도 함께 삭제
- @updatedAt: 게시물 수정 시 자동으로 시간 업데이트
- @db.Text: 긴 내용을 위한 TEXT 타입 사용
// backend/prisma/schema.prisma

model User {
  id                     String    @id @default(uuid())
  email                  String    @unique
  password               String
  nickname               String?
  socialId               String?   @unique
  refreshToken           String?   @unique
  refreshTokenExpiresAt  DateTime?
  createdAt              DateTime  @default(now())

  posts                  Post[]    // 추가된 관계

  @@map("users")
}

model Post {
  id          String   @id @default(uuid())
  title       String
  content     String   @db.Text
  authorId    String
  author      User     @relation(fields: [authorId], references: [id], onDelete: Cascade)
  createdAt   DateTime @default(now())
  updatedAt   DateTime @updatedAt
  deletedAt   DateTime?

  @@map("posts")
}
TypeScript 타입 정의
API 통신과 타입 안전성을 위해 필요한 인터페이스들을 정의했습니다.
- DTO 패턴: 입력과 출력을 명확히 분리
- 선택적 속성: UpdatePostDto는 부분 업데이트 지원
- 페이지네이션: 대용량 데이터 처리를 위한 구조
사실 DTO 패턴은 Nest.js에서 사용했었는데, Express에서도 살짝 사용해볼까해서 구현했습니다.
// backend/src/types/post.types.ts

export interface CreatePostDto {
  title: string;
  content: string;
}

export interface UpdatePostDto {
  title?: string;
  content?: string;
}

export interface PostResponse {
  id: string;
  title: string;
  content: string;
  authorId: string;
  author: {
    id: string;
    nickname: string | null;
    email: string;
  };
  createdAt: Date;
  updatedAt: Date;
  deletedAt: Date | null;
}

export interface PostListResponse {
  posts: PostResponse[];
  total: number;
  page: number;
  limit: number;
}
서비스 계층 구현
비즈니스 로직을 담당하는 PostService를 구현했습니다.
1. 권한 체크: 작성자만 자신의 게시물 수정/삭제 가능
2. 검색 기능: 제목과 내용에서 OR 조건으로 검색
3. 페이지네이션: skip/take를 활용한 효율적인 데이터 조회
4. 성능 최적화: Promise.all로 병렬 처리
5. 데이터 선택: 민감한 정보 제외하고 필요한 데이터만 조회
// backend/src/services/post.service.ts

export class PostService {
  // 게시물 생성
  async createPost(authorId: string, data: CreatePostDto): Promise<PostResponse> {
    const { title, content } = data;

    const post = await prisma.post.create({
      data: {
        title,
        content,
        authorId,
      },
      include: {
        author: {
          select: {
            id: true,
            nickname: true,
            email: true,
          },
        },
      },
    });

    return post;
  }

  // 게시물 목록 조회 (페이지네이션 포함)
  async getPosts(query: GetPostsQuery): Promise<PostListResponse> {
    const { page = 1, limit = 10, search } = query;
    const skip = (page - 1) * limit;

    // 삭제되지 않았고, search에 해당하는 게시물만 조회
    const where = {
      deletedAt: null,
      ...(search && {
        OR: [{ title: { contains: search } }, { content: { contains: search } }],
      }),
    };

    const [posts, total] = await Promise.all([
      prisma.post.findMany({
        where,
        include: {
          author: {
            select: {
              id: true,
              nickname: true,
              email: true,
            },
          },
        },
        orderBy: {
          createdAt: 'desc',
        },
        skip,
        take: limit,
      }),
      prisma.post.count({ where }),
    ]);

    return {
      posts,
      total,
      page,
      limit,
    };
  }

  // 게시물 단일 조회
  async getPostById(id: string): Promise<PostResponse> {
    const post = await prisma.post.findUnique({
      where: {
        id,
        deletedAt: null,
      },
      include: {
        author: {
          select: {
            id: true,
            nickname: true,
            email: true,
          },
        },
      },
    });

    if (!post) {
      throw new Error('게시물을 찾을 수 없습니다.');
    }

    return post;
  }

  // 게시물 수정
  async updatePost(id: string, authorId: string, data: UpdatePostDto): Promise<PostResponse> {
    // 게시물 존재 확인 및 작성자 검증 (삭제되지 않은 게시물만)
    const existingPost = await prisma.post.findFirst({
      where: {
        id,
        deletedAt: null,
      },
    });

    if (!existingPost) {
      throw new Error('게시물을 찾을 수 없습니다.');
    }

    if (existingPost.authorId !== authorId) {
      throw new Error('게시물을 수정할 권한이 없습니다.');
    }

    const updatedPost = await prisma.post.update({
      where: { id },
      data,
      include: {
        author: {
          select: {
            id: true,
            nickname: true,
            email: true,
          },
        },
      },
    });

    return updatedPost;
  }

  // 게시물 삭제
  async deletePost(id: string, authorId: string): Promise<void> {
    // 게시물 존재 확인 및 작성자 검증 (삭제되지 않은 게시물만)
    const existingPost = await prisma.post.findFirst({
      where: {
        id,
        deletedAt: null,
      },
    });

    if (!existingPost) {
      throw new Error('게시물을 찾을 수 없습니다.');
    }

    if (existingPost.authorId !== authorId) {
      throw new Error('게시물을 삭제할 권한이 없습니다.');
    }

    // Soft Delete
    await prisma.post.update({
      where: { id },
      data: {
        deletedAt: new Date(),
      },
    });
  }
}
컨트롤러 계층 구현
HTTP 요청을 처리하는 PostController를 구현했습니다.
1. 입력값 검증: 클라이언트 데이터의 유효성 검사
2. 에러 처리: 적절한 HTTP 상태 코드와 메시지 반환
3. 타입 안전성: TypeScript를 활용한 컴파일 타임 검증
4. 일관된 응답: ApiResponse 인터페이스 활용
5. 보안: JWT 토큰을 통한 사용자 인증
// backend/src/controllers/post.controller.ts

export class PostController {
  constructor(private postService: PostService) {}

  // 게시물 생성
  createPost = async (req: AuthenticatedRequest, res: Response, next: NextFunction): Promise<void> => {
    try {
      const { title, content }: CreatePostDto = req.body;
      const authorId = req.user.id;

      // 입력값 검증
      if (!title || !content) {
        const errorResponse: ErrorResponseDTO = {
          success: false,
          message: '제목과 내용을 입력해주세요.',
        };
        res.status(400).json(errorResponse);
        return;
      }

      if (title.length > 200) {
        const errorResponse: ErrorResponseDTO = {
          success: false,
          message: '제목은 200자를 초과할 수 없습니다.',
        };
        res.status(400).json(errorResponse);
        return;
      }

      const post = await this.postService.createPost(authorId, { title, content });

      const successResponse: ApiResponse = {
        success: true,
        message: '게시물이 생성되었습니다.',
        data: { post },
      };

      res.status(201).json(successResponse);
    } catch (error) {
      if (error instanceof Error) {
        const errorResponse: ErrorResponseDTO = {
          success: false,
          message: error.message,
        };
        res.status(400).json(errorResponse);
        return;
      }
      next(error);
    }
  };

  // 게시물 목록 조회
  getPosts = async (req: Request, res: Response, next: NextFunction): Promise<void> => {
    try {
      const { page, limit, search }: GetPostsQuery = req.query;

      const pageNum = page ? parseInt(String(page), 10) : 1;
      const limitNum = limit ? parseInt(String(limit), 10) : 10;

      // 페이지네이션 검증
      if (pageNum < 1) {
        const errorResponse: ErrorResponseDTO = {
          success: false,
          message: '페이지 번호는 1 이상이어야 합니다.',
        };
        res.status(400).json(errorResponse);
        return;
      }

      if (limitNum < 1 || limitNum > 100) {
        const errorResponse: ErrorResponseDTO = {
          success: false,
          message: 'limit은 1 이상 100 이하여야 합니다.',
        };
        res.status(400).json(errorResponse);
        return;
      }

      const result = await this.postService.getPosts({
        page: pageNum,
        limit: limitNum,
        search: typeof search === 'string' ? search : undefined,
      });

      const successResponse: ApiResponse = {
        success: true,
        data: result,
      };

      res.json(successResponse);
    } catch (error) {
      // 에러 처리 로직...
    }
  };
}
아키텍처 고민과 선택
Repository 패턴을 사용하지 않은 이유
처음에는 Controller → Service → Repository 3계층 구조를 고려했지만, 다음과 같은 이유로 Controller → Service 구조를 선택했습니다.
- Prisma가 이미 Repository 역할: 타입 안전성과 쿼리 빌더 제공
- 프로젝트 규모: 현재는 단순한 CRUD 작업이 주를 이룸
- 개발 속도: 불필요한 보일러플레이트 코드 제거
- 유지보수성: 코드 복잡도 감소
언제 Repository 패턴이 필요할까?
- 복잡한 Raw SQL 쿼리가 많을 때
- 여러 데이터베이스 지원 필요
- 캐싱 로직 구현
- 매우 복잡한 비즈니스 로직
실행 결과
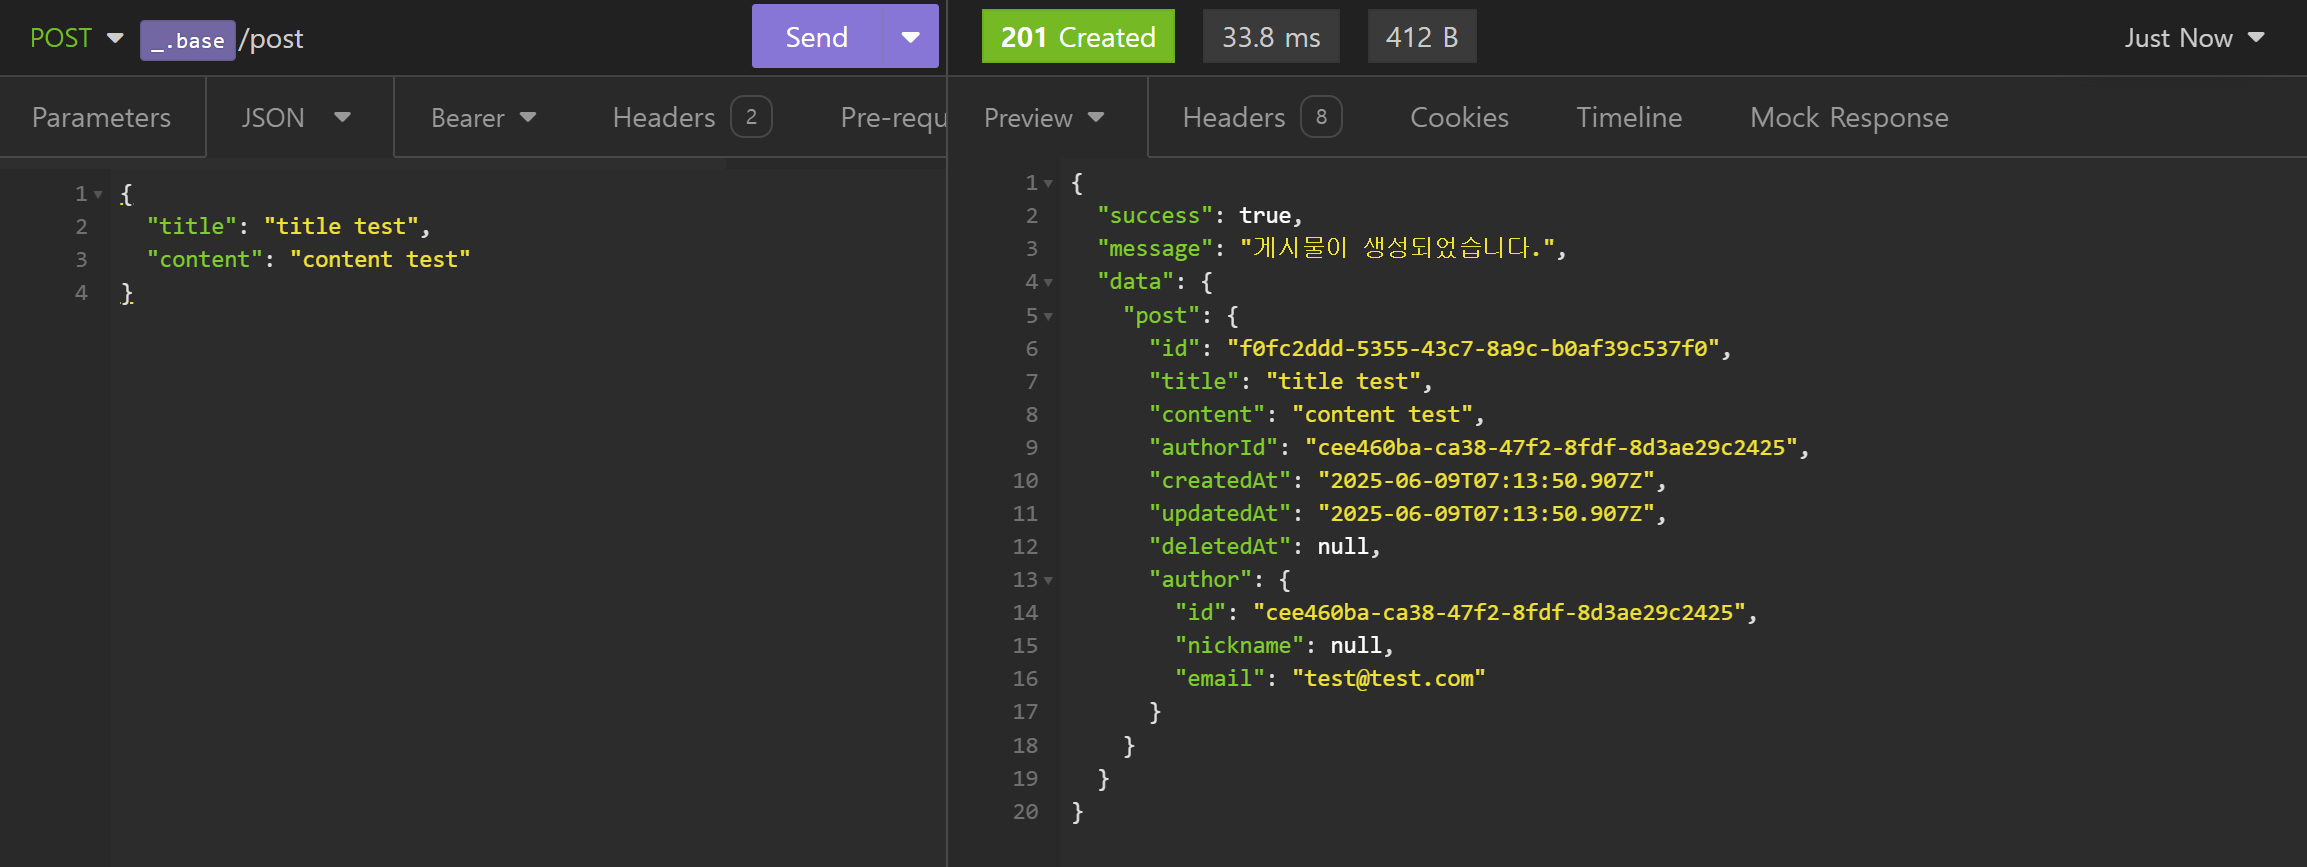
- 게시물 생성 (Create)
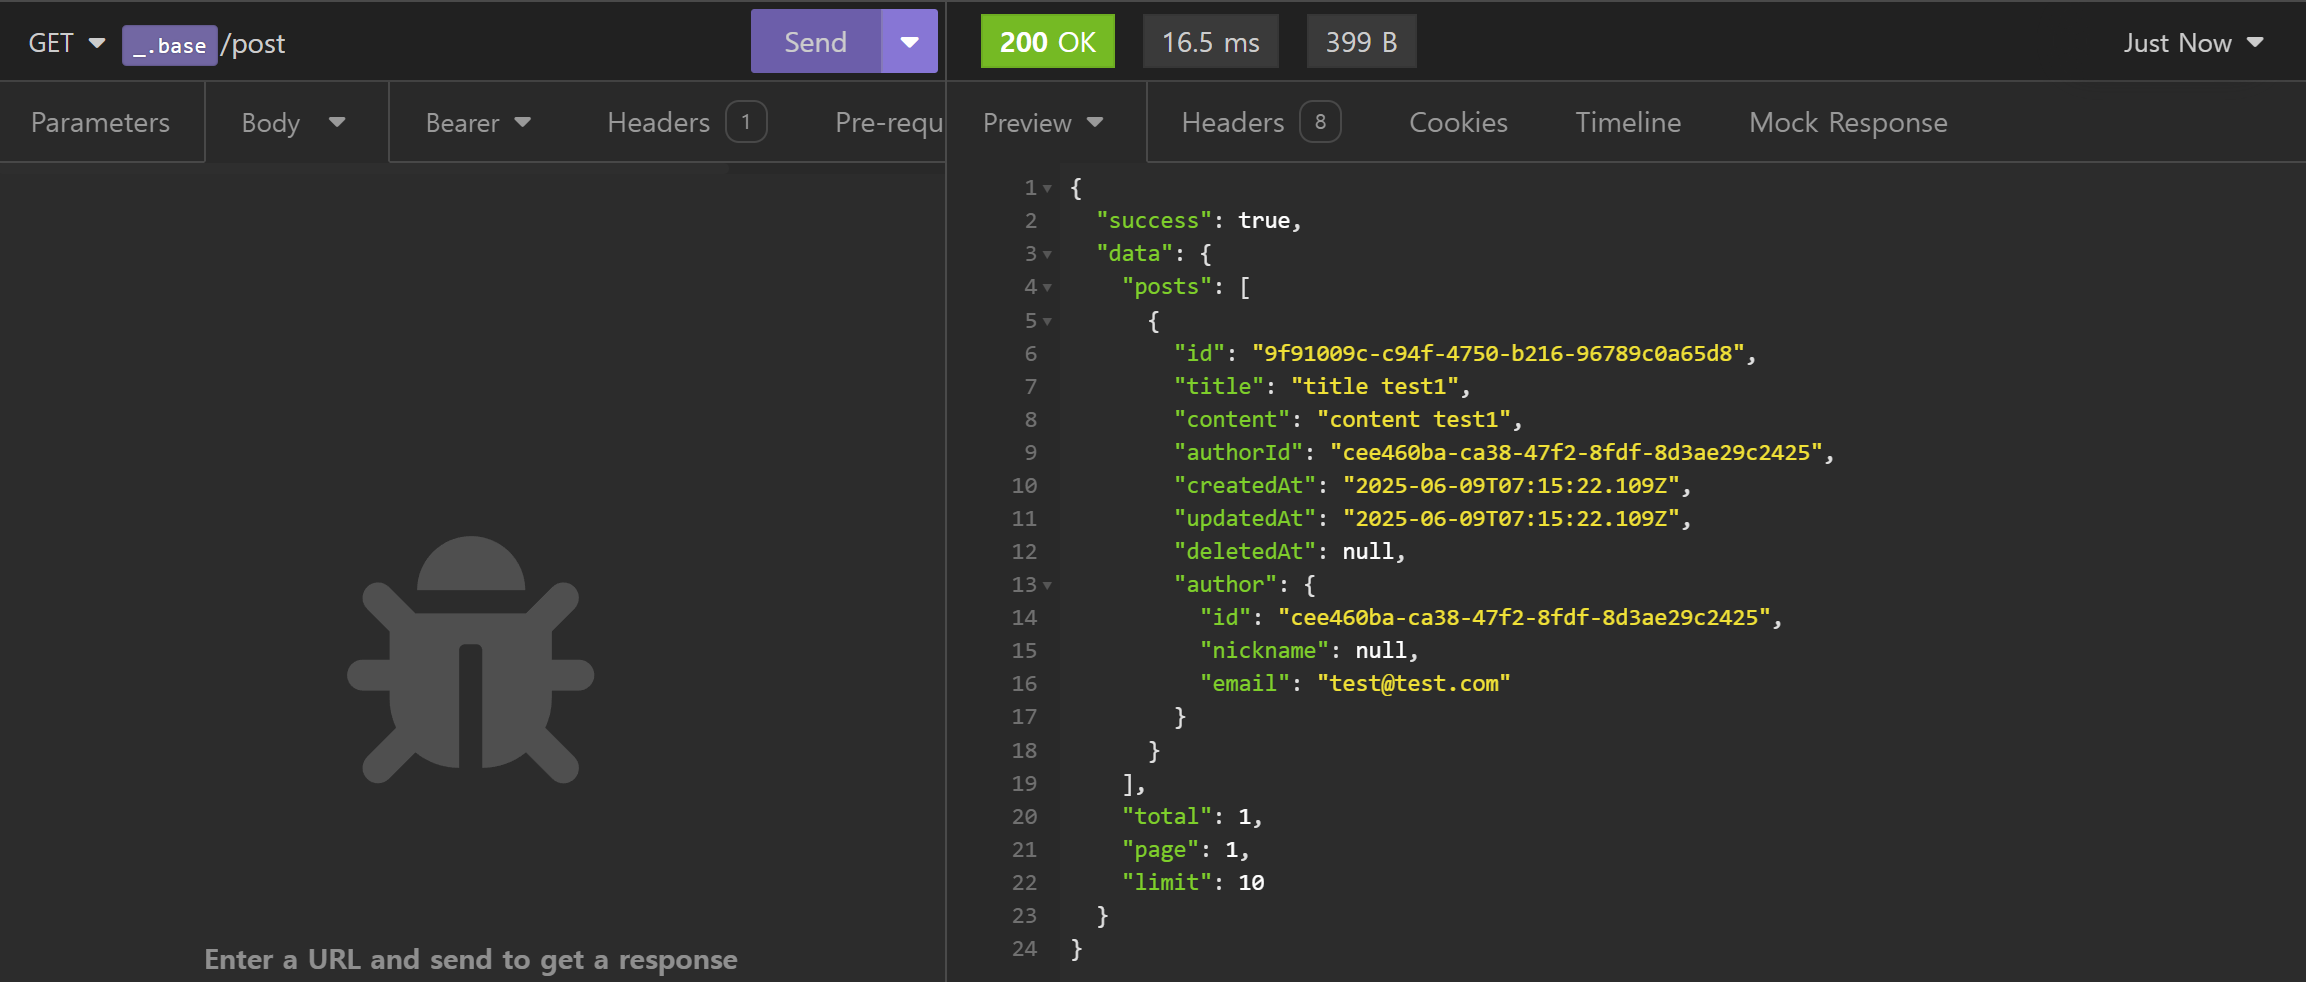
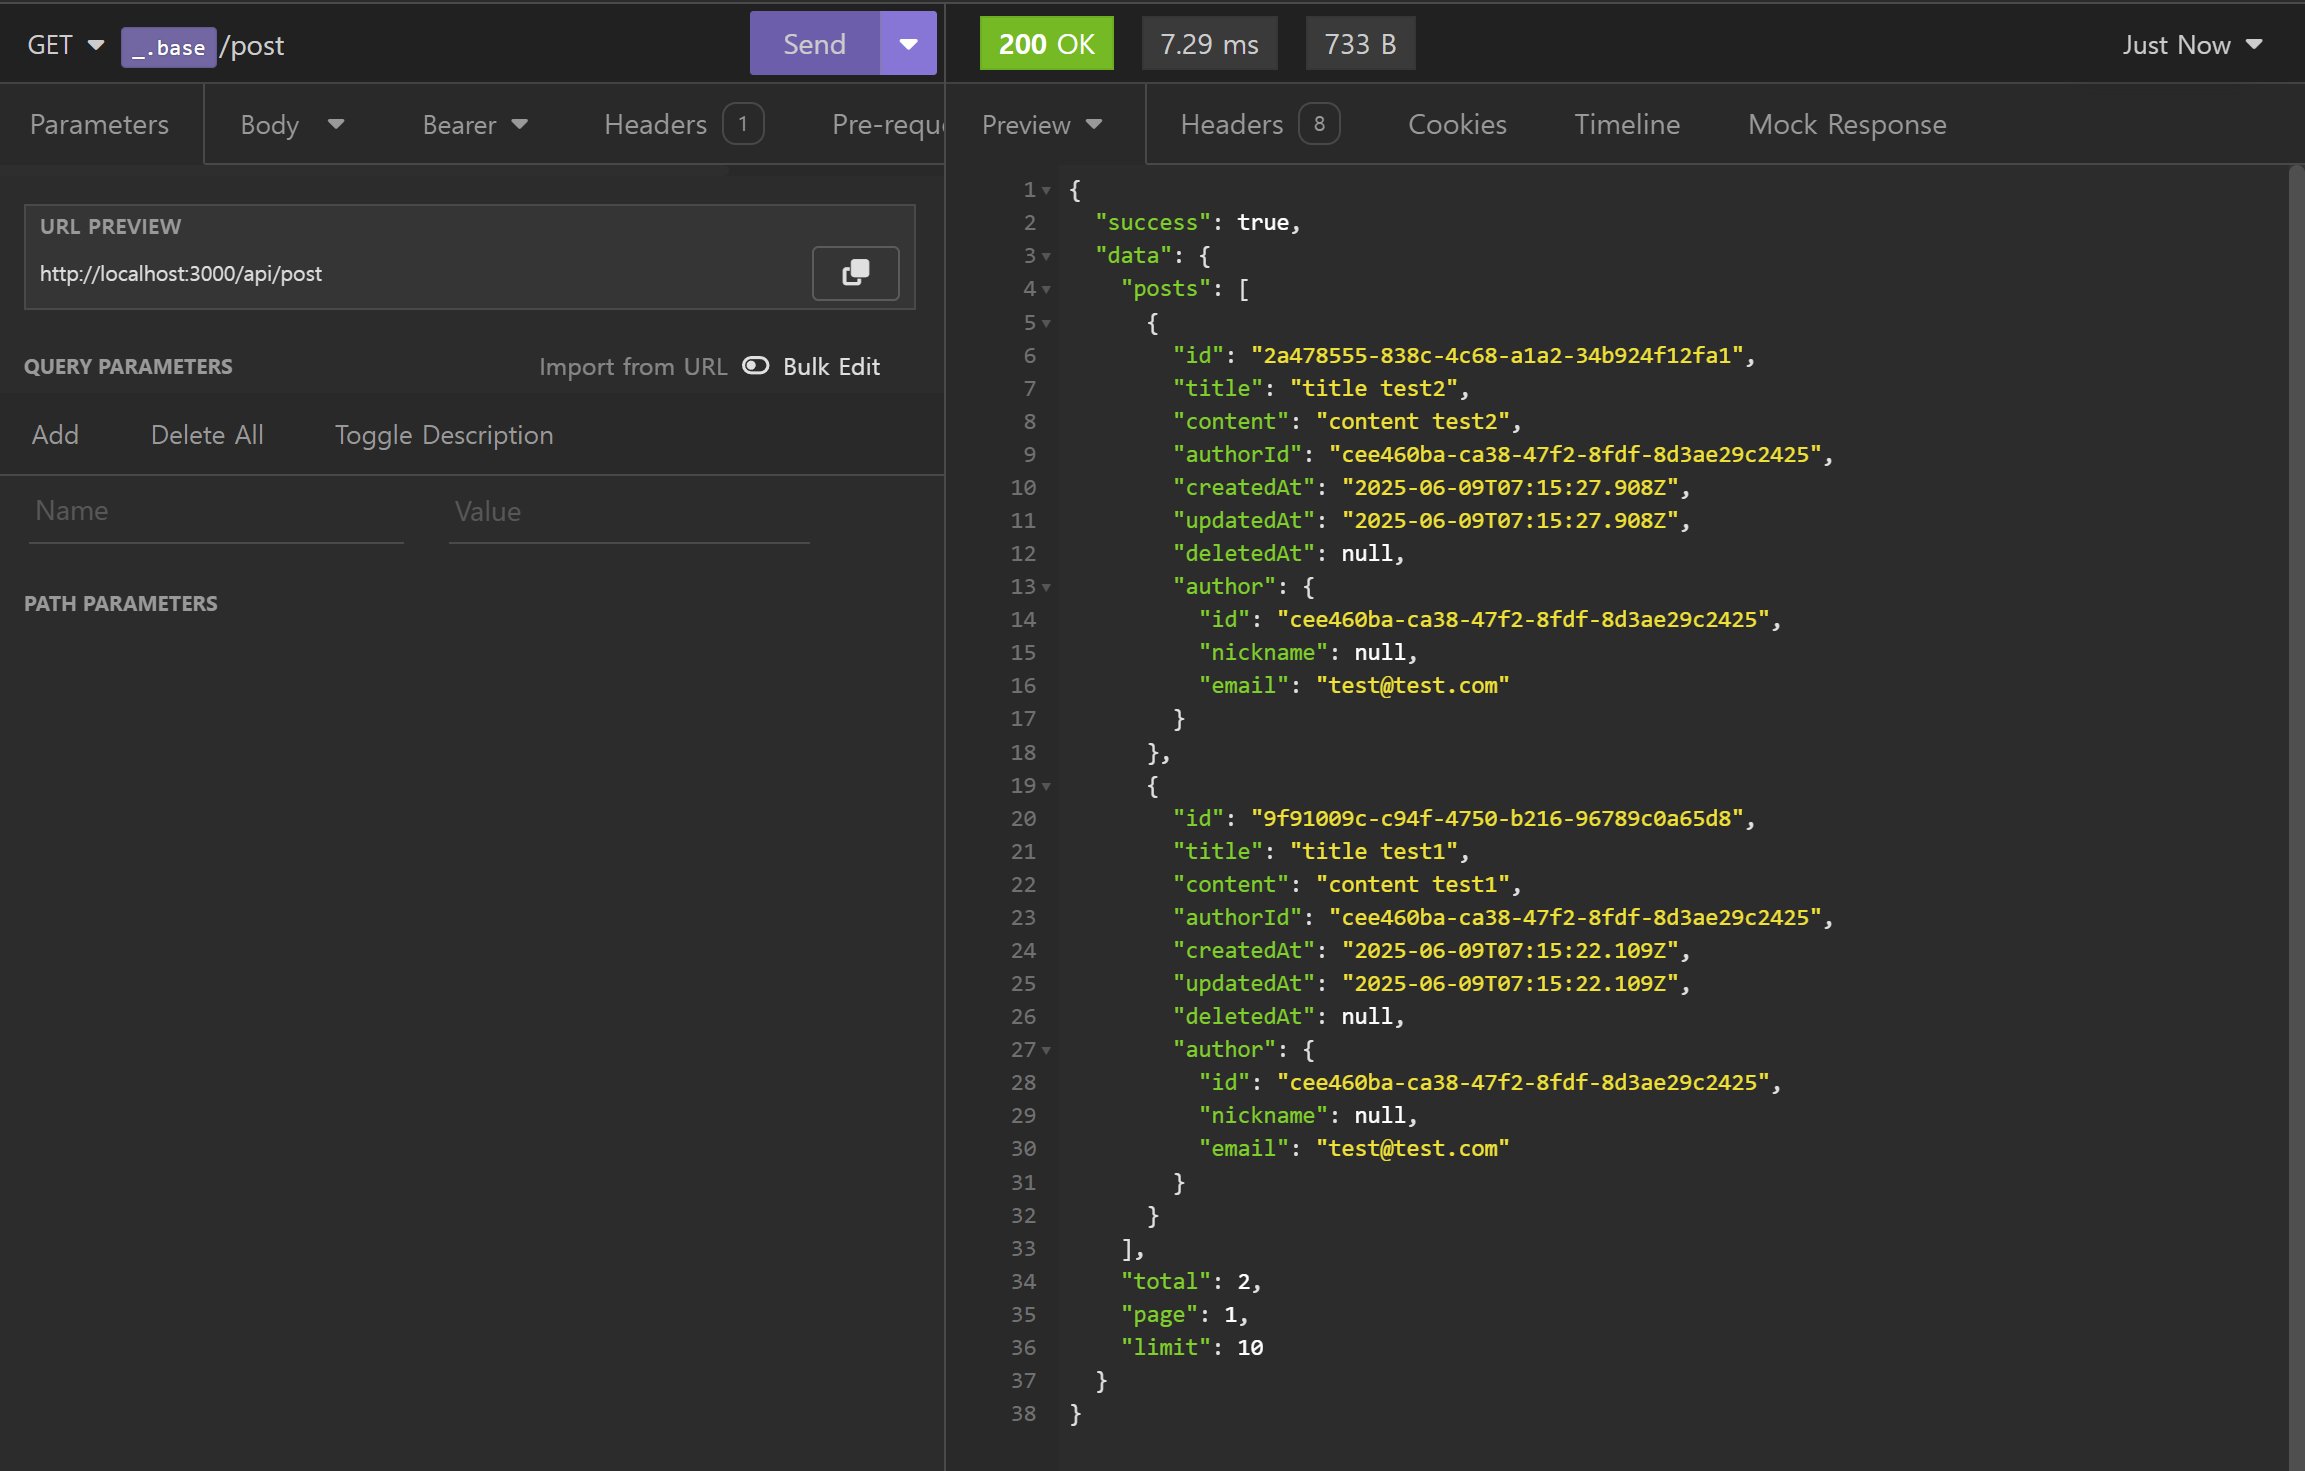
- 게시물 목록 조회 (Read)
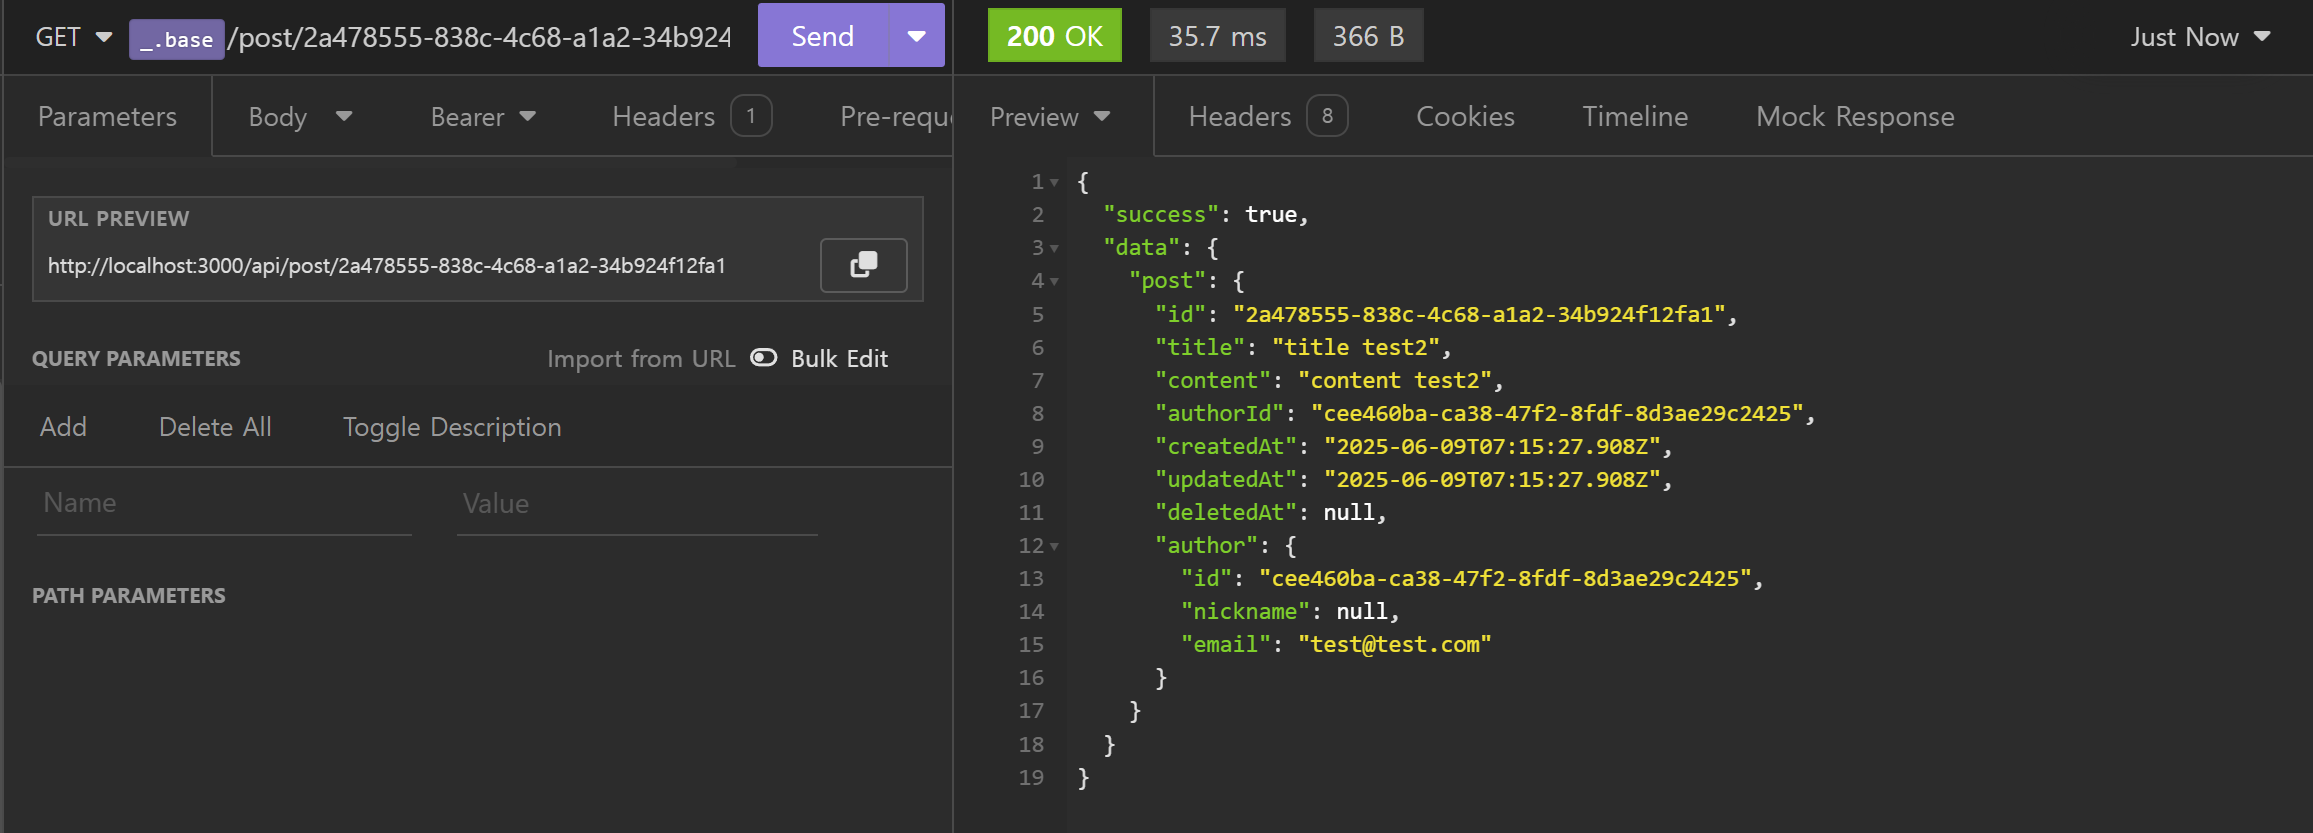
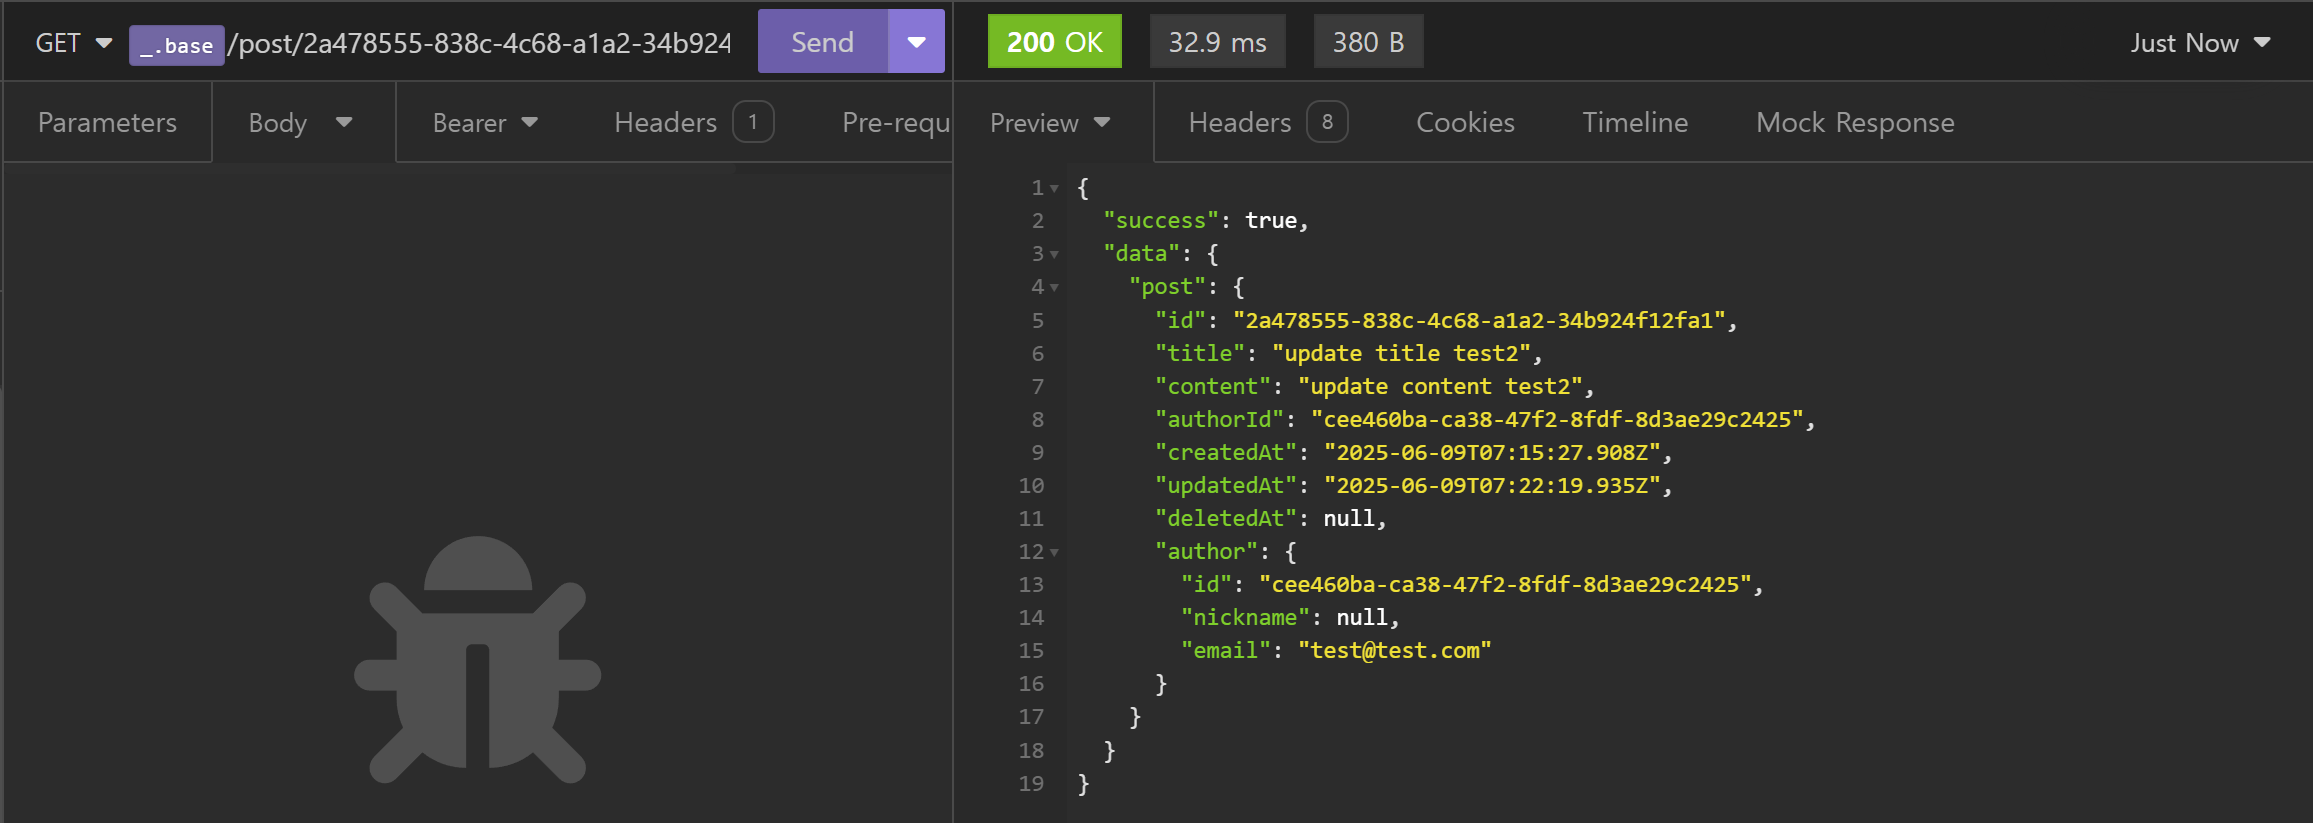
- 게시물 상세 조회 (Read)
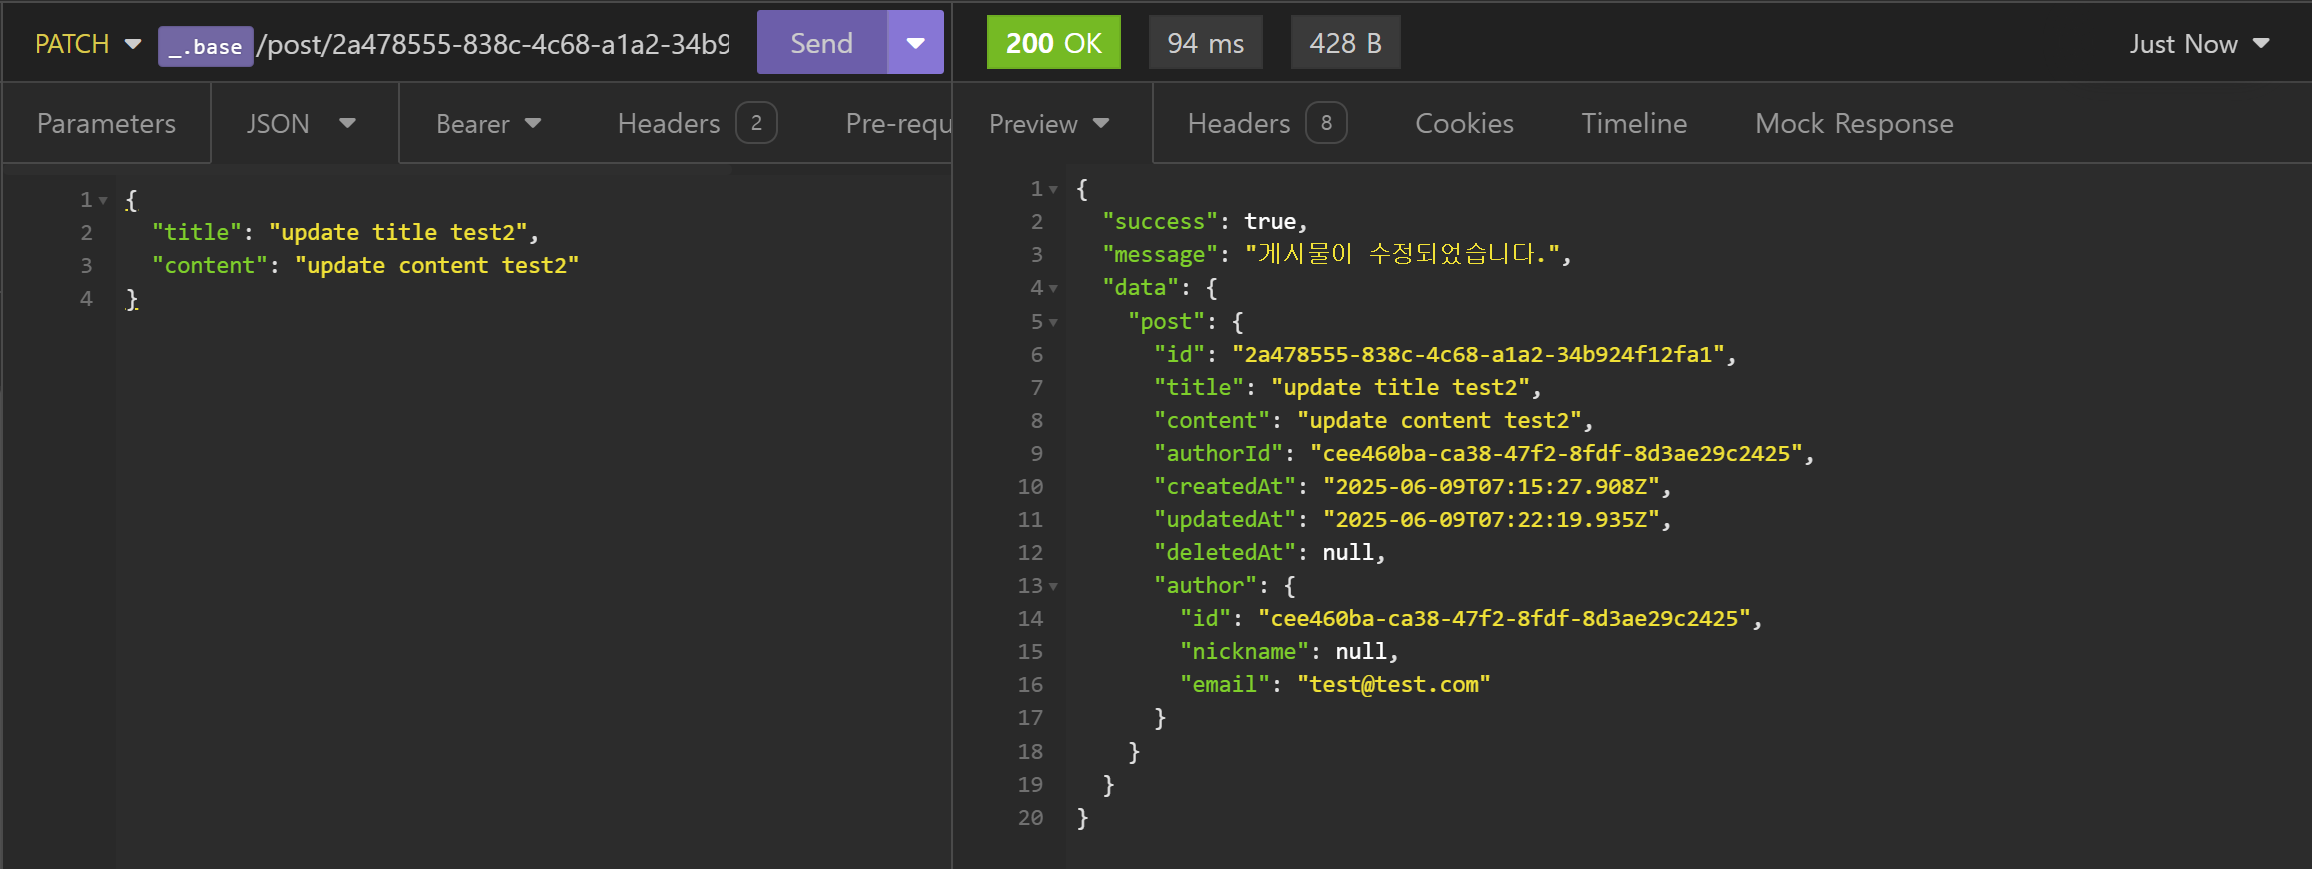
- 게시물 수정 (Update)
- 게시물 삭제 (Delete)