1. Spring MVC
Model, View, Controller의 약자
1) Model : 서비스 데이터 그 자체
2) View : 사용자가 확인하는 데이터의 표현
3) Controller : 사용자의 입출력 다루는 부분
- 사용자는 view를 통해서 화면을 보고 controller라는 부분에 하고자하는 명령을 내리게 되면 이 controller은 모델을 변화시키고, 모델을 갱신, 이후 변화된 데이터가 다시 view에 반영된다.
django mtv & spring mvc 패턴 비교
- 1) MTV : 모델, 템플릿, 뷰
- 모델 : MVC 모델에 대응, DB에 저장되는 데이터
- 템플릿 : MVC 뷰에 대응, 유저에게 보여지는 화면, 장고는 뷰에서 로직을 처리한 후 html파일을 context와 함께 렌더링, 이 때의 HTML 파일을 템플릿이라 함
- 뷰 : MVC의 컨트롤러에 대응, 요청에 따라 적절한 로직 수행해 결과를 템플릿으로 렌더링
(+) URLConf : url 패턴을 정의해서 해당 url고ㅓ
- 2) MVC : 모델, 뷰, 컨트롤러
- 모델 : 데이터를 가지고 있으며, 데이터 처리 로직을 가짐
- 뷰 : 화면의 요청에 대한 결과물을 보여주는 역할, 유저와 어플리케이션 간 인터페이스
- 컨트롤러 : 모델과 뷰 이어주는 역할
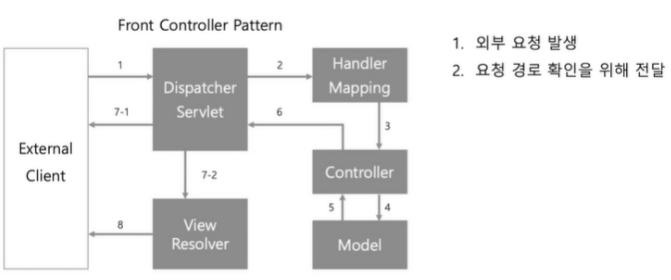
- 외부 요청 발생
- 요청 경로 확인을 위해 전달
- Controller로 전달
- 모델 조작
- 갱신된 데이터 전달
- 응답 전달
- 응답을 Client로 전송
1) 데이터 전송
2) 데이터를 포함한 view 제작 - 사용자에게 뷰 제공
2. Controller, RequestMapping
1. Controller, RequestMapping실습
- 스프링 이니셜라이저로 이동
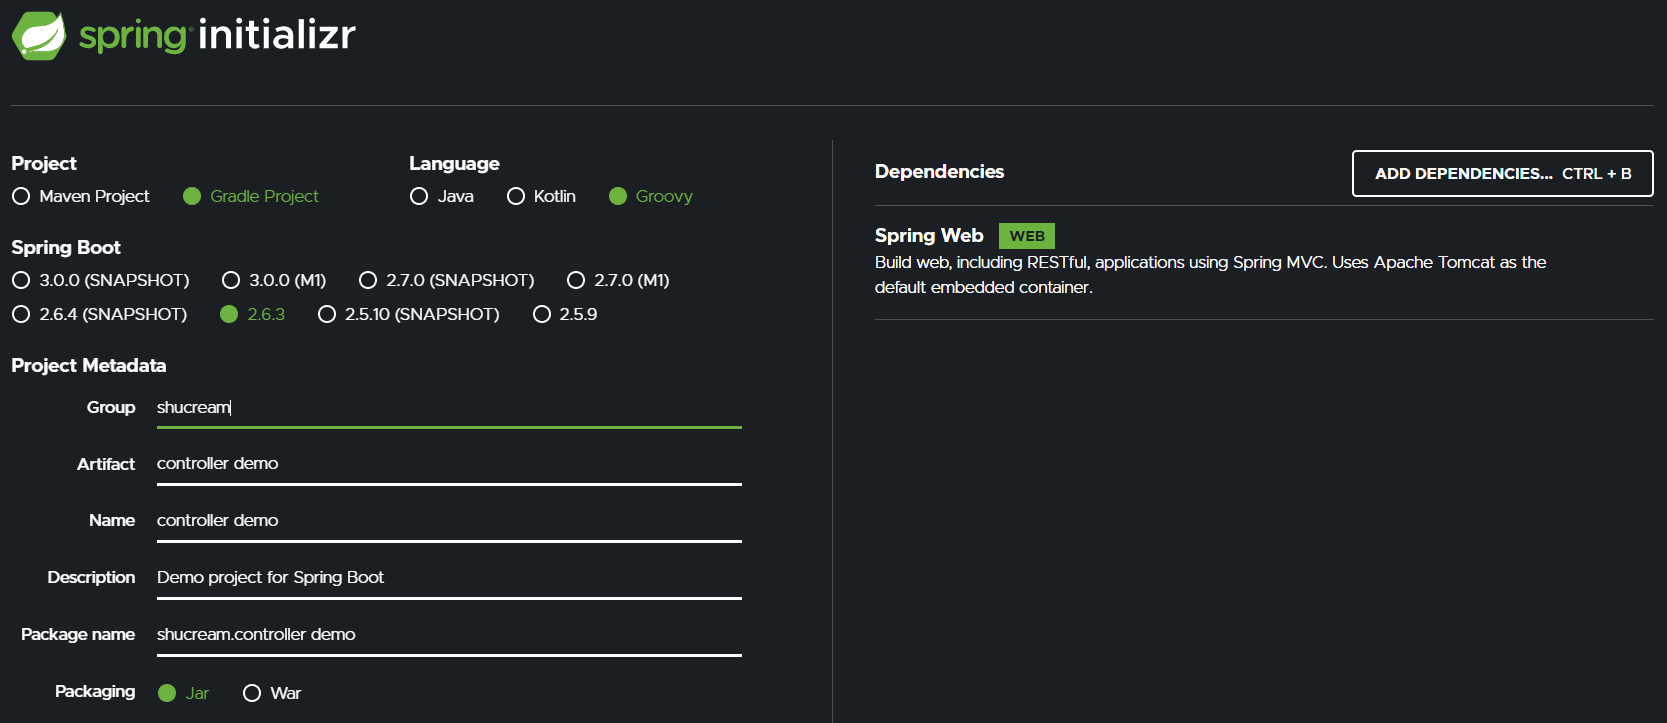
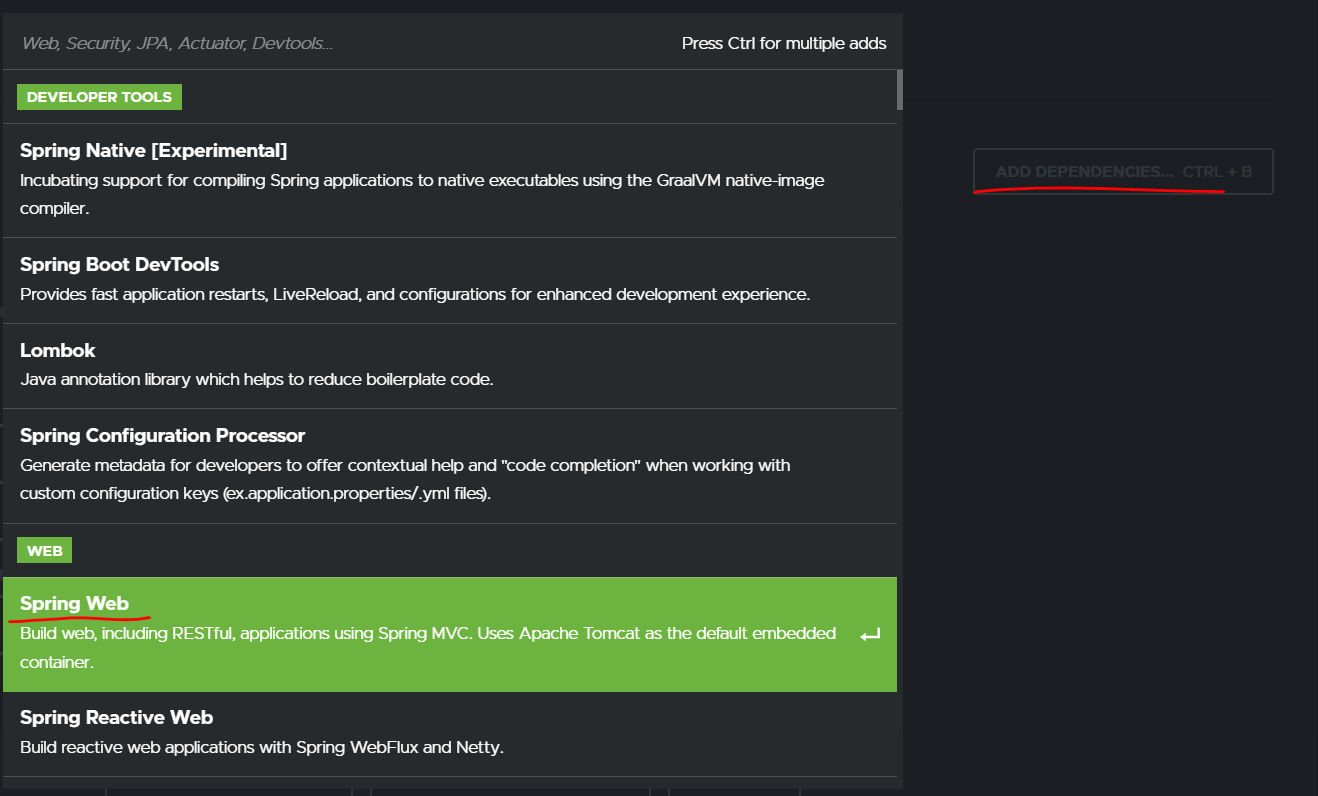
- 프로젝트 생성 & main-java-폴더명(이니셜라이저에서 했던 거) -controller 용 파일 하나 생성
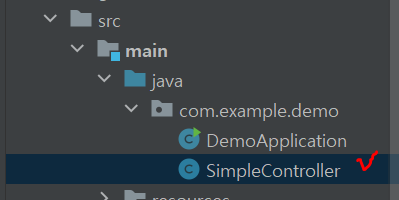
- import ~ Controller & Annotation 달아주기
- controller 코드
package com.example.demo;

import org.slf4j.Logger;
import org.slf4j.LoggerFactory;
import org.springframework.stereotype.Controller;
import org.springframework.web.bind.annotation.RequestMapping;
import org.springframework.web.bind.annotation.RequestMethod;

@Controller
public class SimpleController {
    private static final Logger logger
            = LoggerFactory.getLogger(SimpleController.class);

    @RequestMapping(
            value = "hello", //얘는 요청의 url로서의 pass를 담당
            method = RequestMethod.GET
    )
    public String hello(){
        return "hello.html";
    }
}
- vsc에서 html 만들기(intelliJ에서 열었던 폴더랑 똑같은 폴더를 열게 되면 html이 똑같이 생성됨)
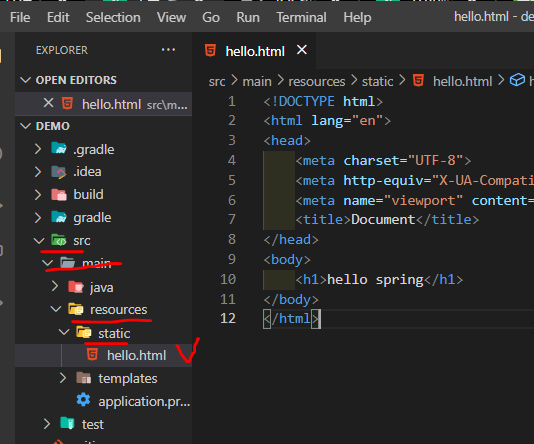
=> intelliJ에서도 생성
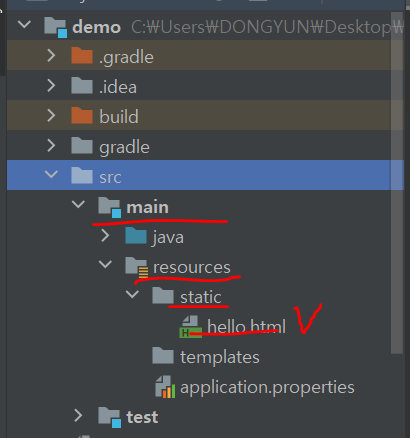
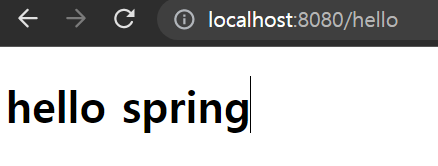
=> 이제 run 하면 결과


포트 8080으로 이동해보자
(+) 만약 url에 pass 해주는 value를 hungry로 바꾸면
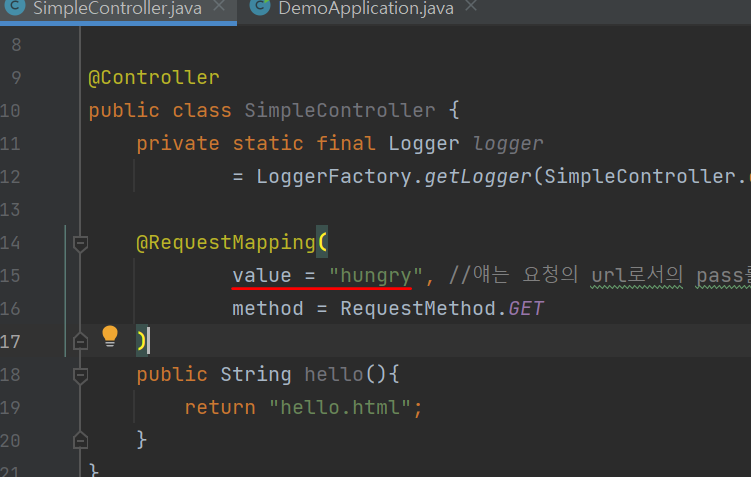
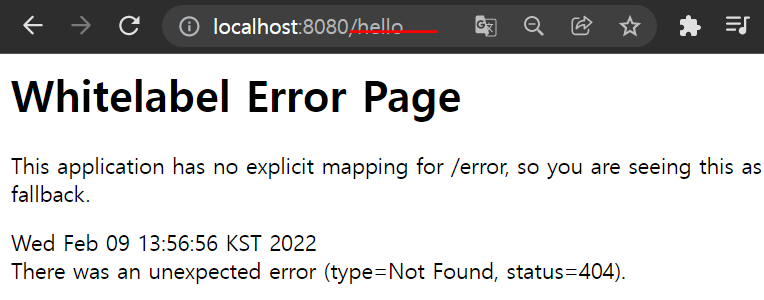
=> url을 hungry로 바꿔줘야 한다

controller, requestmapping 두개를 조합
=> 기본적으로 요청을 받는 창구로서의 역할을 수행하게 되는 것
-> requestmapping 말고도 getmapping이 있는데, requestmapping과의 차이점은 request가 get으로 고정된다는 점!
-> 간단한 getMapping 관련 코드
1  @GetMapping(
2          value = "/hello/{id}"
3   )
4   public String helloPath(@PathVariable("id") String id){
5       logger.info("Path variable is" + id);
6       return "/hello.html";
7   }
코드 풀이
2) 만약 url에hello/{id}값으로 상대경로가 찍혀서 get 되면 helloPath 함수 발동
4) getMapping에 있는 uri에서 "id"라는 아이를 id라는 값으로 받아오라
5) logger.info를 통해서 함수가 발동되면 우리의 로그에Path variable is {uri에 찍혔던 id값}을 찍어라
6) hello.html 페이지를 나타나게 하라

이런 식으로 사이트 url 에 id 값을 더하면

내가 지정한 Path variable is {uri에 찍혔던 id값} 방식으로 로그가남게 된다
- 그리고 보여줄 페이지는 여전히 hello.html로 설정돼있으니깐 url이 달라도 같은 페이지가 보여지는 것
2. 추가 응용 코드
    @RequestMapping(
            value = "hello"
    )
    public String hello(@RequestParam(name="id", required = false, defaultValue = "")String id){
        logger.info("Path:Hello");
        logger.info("Query Param id : " + id);
        return "hello.html";
}-
만약 hello 라는 url이 발동했을 때
-
request parameter 중에서
id="값"으로 구성된 아이가 존재한다면 로그에Query Param id : {값}으로 찍어라 -
하지만 required=false이므로 필수는 아니다
-
실행 화면
http://localhost:8080/hello?id=Custard

=> 위처럼 id의 값으로 Custard를 건넸다면 내 로그에
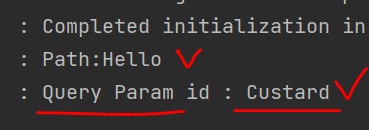
-
그 아이디의 값이 내가 원하는 형식으로 잘 찍힌다
3. json 파일 활용 코드
- main에
SimplePayload파일 제작
package com.example.demo;

public class SimplePayload {
    private String name;
    private int age;
    private String Occupation;

    public SimplePayload(String name, int age, String occupation) {
        this.name = name;
        this.age = age;
        Occupation = occupation;
    }

    public String getName() {
        return name;
    }

    public int getAge() {
        return age;
    }

    public String getOccupation() {
        return Occupation;
    }

    public void setName(String name) {
        this.name = name;
    }

    public void setAge(int age) {
        this.age = age;
    }

    public void setOccupation(String occupation) {
        Occupation = occupation;
    }

    @Override
    public String toString() {
        return "SimplePayload{" +
                "name='" + name + '\'' +
                ", age=" + age +
                ", Occupation='" + Occupation + '\'' +
                '}';
    }
}
-
위와 같은 추가 파일 작성 (생성자, toString 아이는 모두 generate 기능을 이용해 너무 간편히 만듦)
-
SimpleController
    @GetMapping(
            "/get-profile"
    )
    public @ResponseBody SimplePayload getProfile(){
        return new SimplePayload("custard", 23,"Developer");
}- 위와 같은 코드 작성하면 (데이터를 http의 body에 넣고 운반하겠다는 말)

- 지정된 url에 데이터가 잘 전달된다
Response Body를 붙이지 않았다면
    @GetMapping(
            "/get-profile"
    )
    public SimplePayload getProfile(){
        return new SimplePayload("custard", 23,"Developer");
}- 이런 형태였다면 getProfile() 함수는 getMapping 을 탐색
- getMapping의 path value를 확인 & return 할 html과 같은 뷰를 탐색하게 됨
Response Body를 붙이게 되면
- 얘가 뷰를 탐색하지 않음
- 대신 getProfile() 자체로 "나는 데이터다" 라고 인식하게 되는 것
(+) [Spring PathVariable Annotation 설명](https://www.baeldung.com/spring-pathvariable)
@PathVariableannotation can be used to handle template variables in the request URI mapping
=> uri 안에 있는 변수를 가져올 때 사용하는 어노테이션
@GetMapping("/api/employees/{id}")
@ResponseBody
public String getEmployeesById(@PathVariable String id) {
    return "ID: " + id;
}
(+) Spring RequestParam Annotation 설명
- @RequestParam : 넘어오는 requestParam(쿼리) (쿼리스트링(Query String)) 중에서 지정한 키값을 데리고 오는 역할을 수행
- 다만 해당하는 parameter이 없을 수도 있는 경우가 존재하게 된다면 에러를 방지하기 위해서
required=False를 덧붙여서 필수적으로 요구하지 않게하기
Path variable is {uri에 찍혔던 id값}형식
쿼리스트링
[쿼리스트링 설명]https://ysoh.tistory.com/entry/Query-String)
http://hostname[:port]/folder/file?변수1=값1&변수2=값2&변수3=값3
=> "?" 뒤의 굵은 이탤릭체로 표현된 부분이 쿼리스트링 이다. URL 주소와 쿼리스트링은 "?"로 구분되며 변수와 값의 쌍(변수=값)으로 구성된다. 만약 여러 쌍의 변수와 값을 전달할 경우 각각의 쌍을 "&"로 구분
(ex)http://localhost:8080/JSPLecture/queryStr.jsp?no=200058001&name=Hong
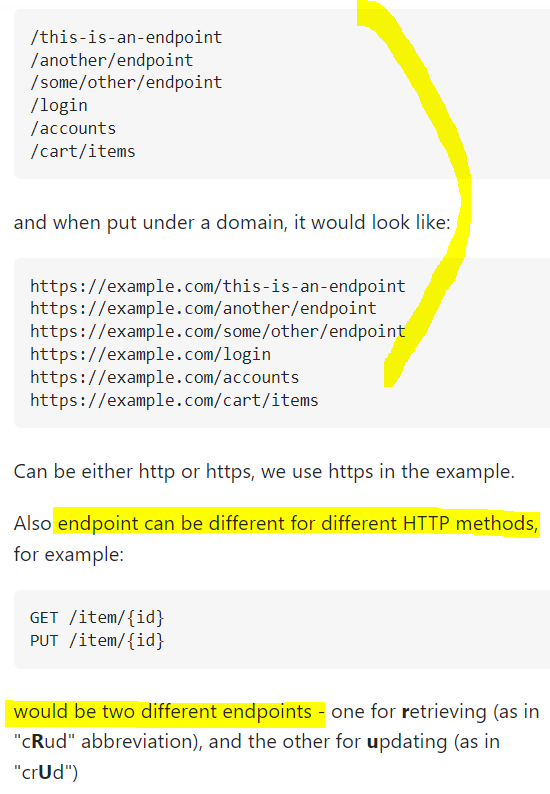
(+) endpoint
- 같은 URL들에 대해서도 다른 요청을 하게끔 구별하게 해주는 항목
**(+)JAVA toString 메소드 재정의
- toString :
=> 객체 생성하고 (ex)Human me = new Human();
=> 생성한 인스턴스를System.out.println(me)를 통해 찍으면 toString에서 재정의한대로 출력되는 것임
=> 따로 오버라이드 하지 않으면 클래스 이름 + @ + hash코드 더한 결과로만 나온다
에러 해결
1) invalid source release: 11
Execution failed for task ':compileTestGroovy'.
invalid source release: 11
스택오버플로우 링크
=> that error occurs precisely when you are using a source / target level that is not supported by the JVM you are running gradle with.
=> gradle의 jvm설정이 11 이하 버젼인데
bulid.gradle에 sourceCompatibility의 설정이 11로 되어 있어서 발생 한다.
나의 jvm 설정
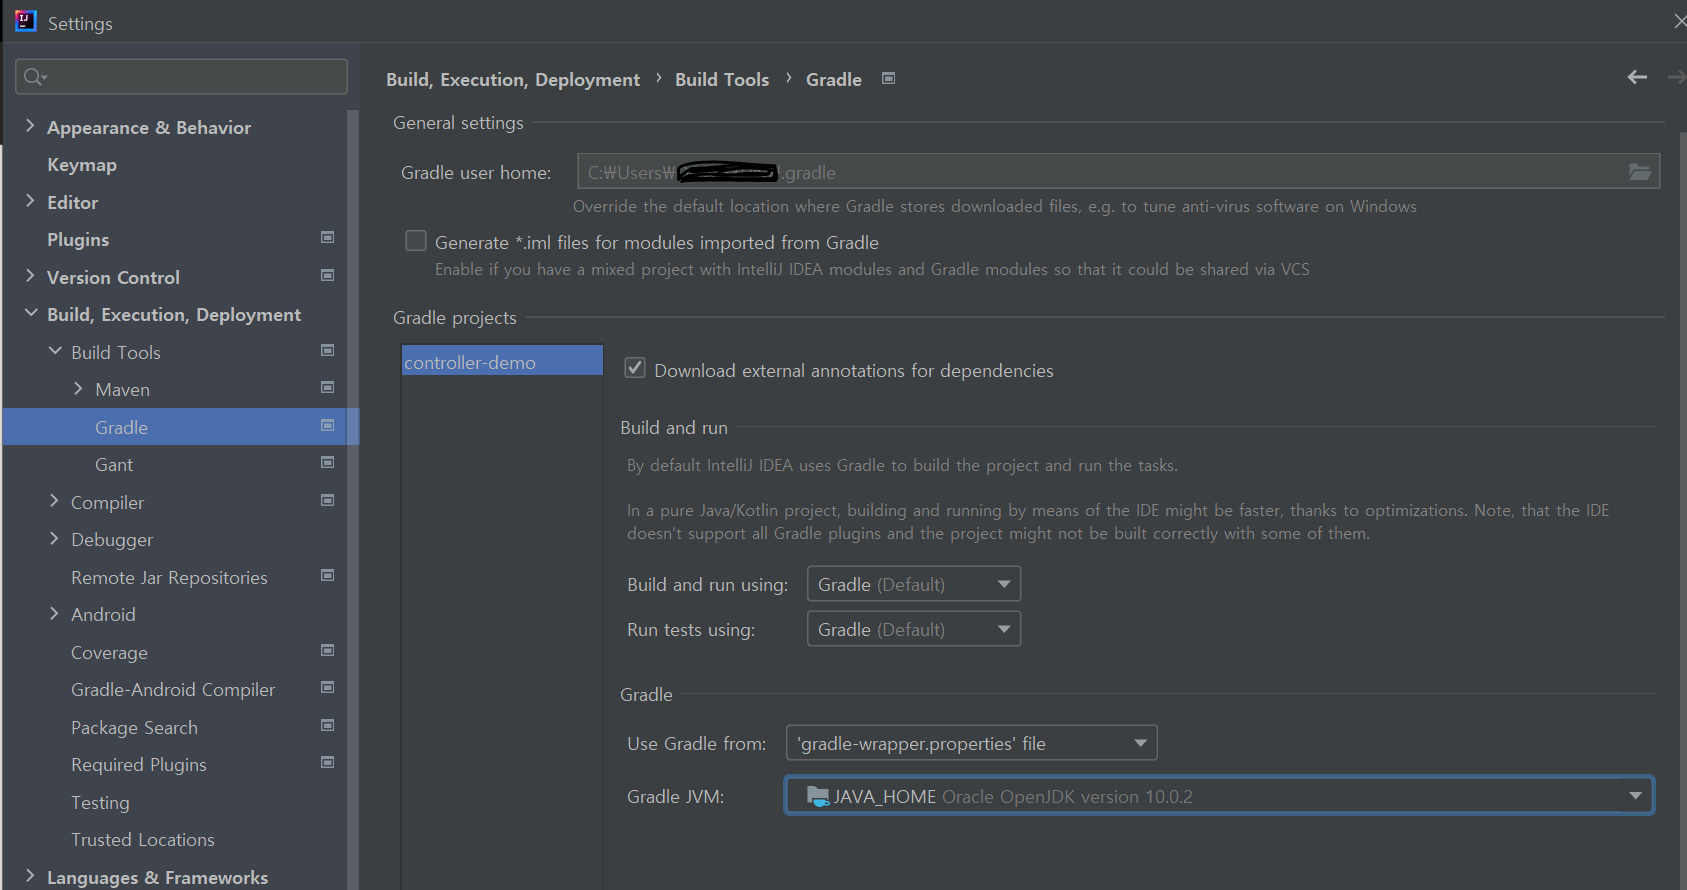
11이하로 되어 있었다 -> 따라서 이 아이를 11로 고쳐주고 저장함
해결책 참고 블로그 : https://manystory.tistory.com/87
- 그리고 파일 만들 때 main 안에다가 만들어야 함..
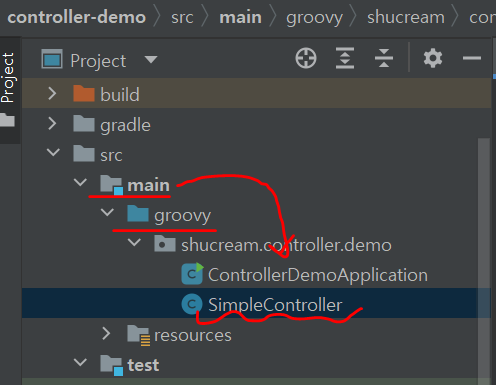
2) Logger 선언 시에
class ch.qos.logback.classic.Logger cannot be cast to class java.util.logging.Logger (ch.qos.logback.classic.Logger is in unnamed module of loader 'app'; java.util.logging.Logger is in module java.logging of loader 'bootstrap')
	at shucream.controller.demo.SimpleController.<clinit>(SimpleController.java:13)
이런 에러가 뜬다면 잘못된 Logger을 선택한 것
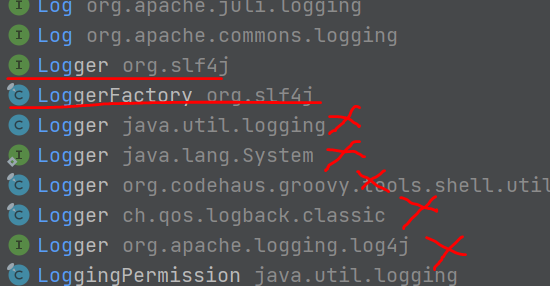
빨간 밑줄 친 로거를 선택하셔야 합니다앙
3) payload 전달 시에
    @GetMapping(
            "/get-profile"
    )
    public SimplePayload getProfile(){
        return new SimplePayload("custard", 23,"Developer");
}- 원래 데이터는 HTTP 응답의 BODY에 작성이 되게 돼있음
- 따라서 annotation을 getProfile에 붙여주깅
    @GetMapping(
            "/get-profile"
    )
    public @ResponseBody SimplePayload getProfile(){
        return new SimplePayload("custard", 23,"Developer");
    }
