리덕스를 사용하면
- 리액트 앱에서 리덕스를 사용하면 상태 업데이트 관련 로직을 모듈로 따로 분리하여 컴포넌트 파일과 별개로 관리할 수 있으므로 코드의 유지, 보수에 도움이 된다.
- 여러 컴포넌트에서 동일한 상태를 공유해야 할 때도 유용하다.
- 실제 업데이트가 필요한 컴포넌트만 리렌더링되도록 쉽게 최적화할 수 있다.
앞서 바닐라 자바스크립트 환경에서 리덕스를 사용할 때는 store.dispatch, store.subscribe 함수를 사용했다. 리액트 앱에서 리덕스를 사용할 때는 store 내장 함수를 직접 사용하기 보다는 react-redux 라이브러리에서 제공하는 connect, Provider 함수를 사용하여 관련 작업을 처리한다.
프로젝트 준비
$ yarn create react-app react-redux-tutorial
$ cd react-redux-tutorial

// 리덕스, react-redux 라이브러리 설치
$ yarn add redux react-redux

$ yarn start
UI 준비
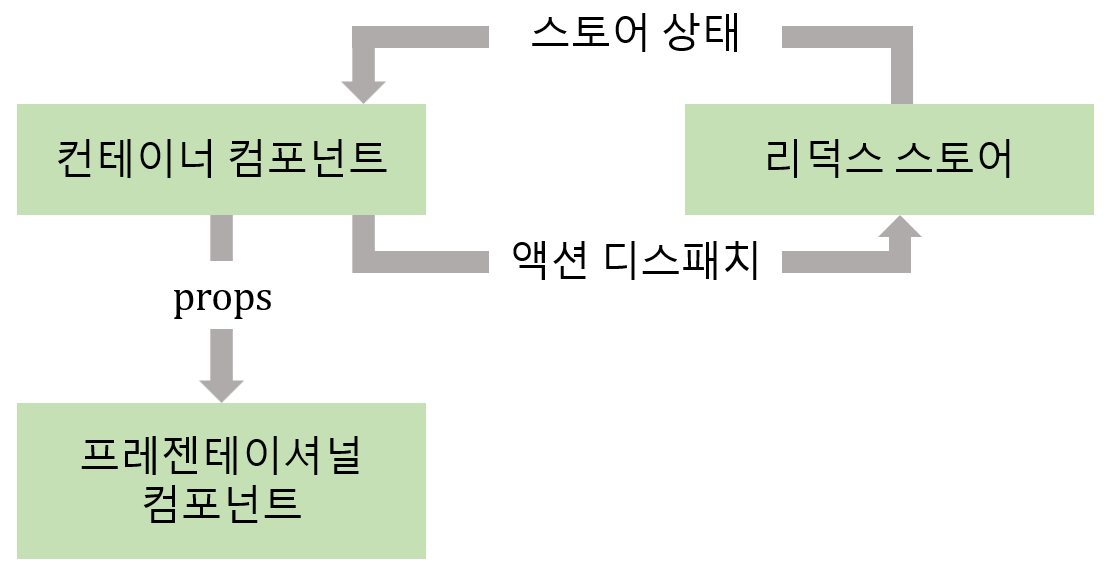
리덕스를 사용할 때 가장 많이 사용하는 패턴은 프레젠테이션 컴포넌트와 컨테이너 컴포넌트를 분리하는 것이다.
- 프레젠테이셔널 컴포넌트
상태 관리가 이루어지지 않고 그저 props를 받아와 화면에 UI를 보여주기만 하는 컴포넌트- 컨테이너 컴포넌트
리덕스와 연동되어 있는 컴포넌트
리덕스로부터 상태를 받아오기도 하고, 리덕스 스토어에 액션을 디스패치하기도 한다.
코드
카운터 컴포넌트
🏷️components/counter.js
import React from "react";

const Counter = ({ number, onIncrease, onDecrease }) => {
    return(
        <div>
            <h1>{number}</h1>
            <div>
                <button onClick={onIncrease}>+1</button>
                <button onClick={onDecrease}>-1</button>
            </div>
        </div>
    )
}

export default Counter
할 일 목록 컴포넌트
🏷️components/todos.js
import React from "react";

const TodoItem = ({ todo, onToggle, onRemove }) =>{
    return(
        <div>
            <input type="checkbox" />
            <span>예제 텍스트</span>
            <button>삭제</button>
        </div>
    )
}

const Todos = ({
    input,
    todos,
    onChangeInput,
    onInsert,
    onToggle,
    onRemove
}) => {
    const onSubmit = e => (
        e.preventDefault()
    )

    return(
        <div>
            <form onSubmit={onSubmit}>
                <input />
                <button type="submit">등록</button>
            </form>
            <div>
                <TodoItem/>
                <TodoItem/>
                <TodoItem/>
            </div>
        </div>
    )
}

export default Todos🏷️App.js
import Counter from './components/counter';
import Todos from './components/todos';

const App = () => {
  return(
    <div>
      <Counter number={0}/>
      <hr />
      <Todos/>
    </div>
  )
}

export default App;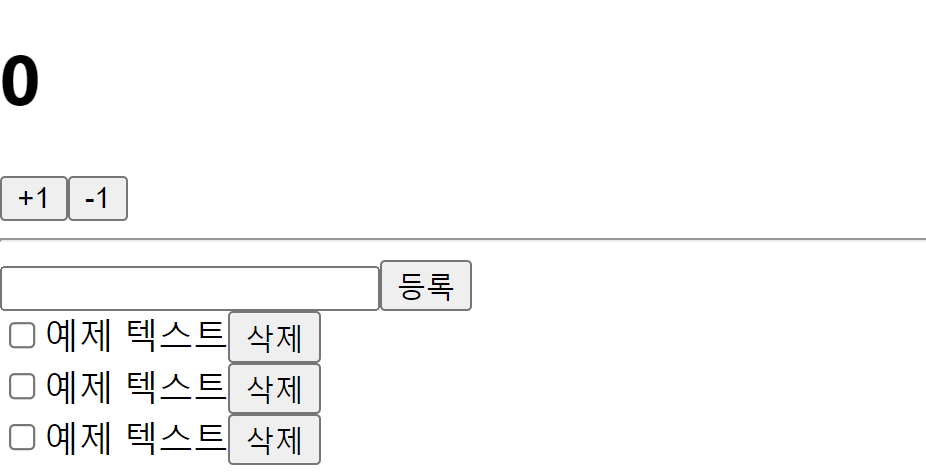
리덕스 관련 코드 작성
리덕스를 사용할 때는 액션 타입, 액션 생성 함수, 리듀서 코드를 작성해야 한다. 이 코드들은 각각 다른 파일에 작성할 수도 있고, 기능별로 묶어서 하나의 파일에 작성할 수도 있다.
-
일반적 구조
actions, constants, reducers 3개의 디렉토리를 만들고 그 안에 기능별로 파일을 하나씩 만든다. 새로운 액션을 만들 때마다 세 종류의 파일을 모두 수정해야하기 때문에 불편하다. -
Ducks 패턴
액션 타입, 액션 생성 함수, 리듀서를 기능별로 하나의 파일에 몰아서 다 작성한다.
여기서는 Ducks 패턴을 사용하여 코드를 작성할 것이다.
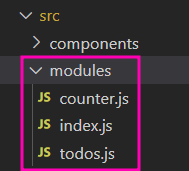
counter 모듈
// modules/counter.js

// 액션 타입 정의
const INCREASE = 'counter/INCREASE'
const DECREASE = 'counter/DECREASE'

// 액션 생성 함수
export const increase = () => ({ type: INCREASE })
export const decrease = () => ({ type: DECREASE })

// 초기상태
const initialState = {
    number: 0
}

// 리듀서
const counter = (state = initialState, action) => {
    switch(action.type) {
        case INCREASE :
            return {
                number: state.number + 1
            }
        case DECREASE :
            return {
                number: state.number - 1
            }
       default :
            return state
    }
}

export default counter
todos 모듈
// modules/todos.js

// 액션 타입 정의
const CHANGE_INPUT  = 'todos/'
const INSERT = 'todos/INSERT'
const TOGGLE = 'todos/TOGGLE'
const REMOVE = 'todos/REMOVE'

// 액션 생성 함수
export const changeInput = input => ({
    type: CHANGE_INPUT,
    input
})

let id = 3

export const insert = text => ({
    type: INSERT,
    todo: {
        id: id++,
        text,
        done: false
    }
})

export const toggle = id => ({
    type: TOGGLE,
    id
})

export const remove = id => ({
    type: REMOVE,
    id
})

// 초기 상태
const initialState = {
    input: '',
    todos: [
        {
            id: 1,
            text: '리덕스 기초 배우기',
            done: true
        },
        {
            id: 2,
            text: '리덕스 사용하기',
            done: false
        }
    ]
}

// 리듀서
const todos = (state = initialState, action) => {
    switch(action.type) {
        case CHANGE_INPUT :
            return {
                ...state,
                input: action.input
            }
        case INSERT :
            return {
                ...state,
                todos: [
                    ...state.todos,
                    action.todo
                ]
            }
        case TOGGLE :
            return {
                ...state,
                todos: state.todos.map(todo =>
                    todo.id === action.id ? {...todo, done: !todo.done} : todo )
            }
        case REMOVE :
            return {
                ...state,
                todos: state.todos.filter(todo =>
                    todo.id !== action.id)
            }
        default :
            return state
    }
}

export default todos
root 리듀서
createStore 함수를 사용해 스토어를 만들 때는 리듀서를 하나만 사용해야 한다. 그렇기 때문에 기존에 만든 리듀서를 하나로 합쳐줘야 하는데, 이 작업은 리덕스에서 제공하는 combineReducers 함수를 사용하면 쉽게 처리할 수 있다.
// modules/index.js

import counter from "./counter";
import todos from "./todos";
import { combineReducers } from "redux";

const rootReducer = combineReducers({
    counter,
    todos
})

export default rootReducer
리액트 앱에 리덕스 적용
스토어, Provider 컴포넌트 생성
-
스토어를 만들고 리액트 앱에 리덕스를 적용하는 작업은
src/index.js에서 이루어진다. -
리액트 컴포넌트에서 store를 사용할 수 있도록 App 컴포넌트를
react-redux에서 제공하는Provider컴포넌트로 감싸준다. store를 props로 전달해주면 된다.
// src/index.js

import React from 'react';
import ReactDOM from 'react-dom/client';
import './index.css';
import App from './App';

import rootReducer from './modules';
import { legacy_createStore } from 'redux';

import { Provider } from 'react-redux';


const store = legacy_createStore(rootReducer)

const root = ReactDOM.createRoot(document.getElementById('root'));

root.render(
  <Provider store={store}>
    <App />
  </Provider>
);
Redux DevTools 설치 및 적용
Redux DevTools
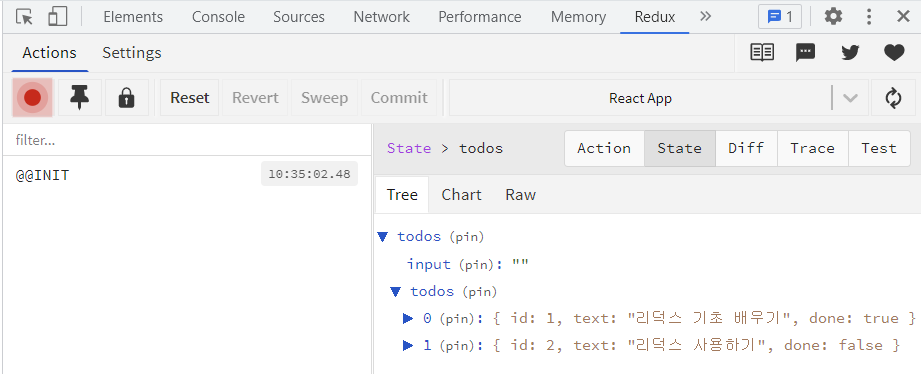
리덕스 개발자 도구를 사용하면 현재 스토어의 상태를 개발자 도구에서 조회할 수 있고 지금까지 어떤 액션들이 디스패치 되었는지, 그리고 액션에 따라 상태가 어떻게 변화했는지 확인할 수 있다. 또한 액션을 직접 디스패치 할 수도 있다.
설치 방법
- 크롬 웹 스토어에서
Redux DevTools을 설치한다. - 프로젝트에
redux-devtools-extension을 설치한다.$ yarn add redux-devtools-extension - index.js를 다음과 같이 수정하면 적용이 끝난다.
// src/index.js

import React from 'react';
import ReactDOM from 'react-dom/client';
import App from './App';

import rootReducer from './modules';
import { legacy_createStore } from 'redux';
import { Provider } from 'react-redux';

import { composeWithDevTools } from 'redux-devtools-extension';


const store = legacy_createStore(rootReducer, composeWithDevTools())

const root = ReactDOM.createRoot(document.getElementById('root'));

root.render(
  <Provider store={store}>
    <App />
  </Provider>
);
브라우저에서 개발자 도구를 실행한 후 Redux 탭을 열어보자.
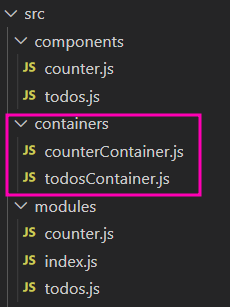
컨테이너 컴포넌트 만들기
컨테이너 컴포넌트는 리덕스 스토어와 연동된 컴포넌트이다.
컴포넌트를 리덕스와 연동하려면 react-redux에서 제공하는 connect 함수를 사용해야 한다.
connect(mapStateToProps, mapDispatchToProps)(연동할 컴포넌트)
↓
const makeContainer = connect(mapStateToProps, mapDispatchToProps)
makeContainer(연동할 컴포넌트)
mapStateToProps
리덕스 스토어 안의 상태를 컴포넌트의 props로 넘겨주기 위해 설정하는 함수mapDispatchToProps
액션 생성 함수를 컴포넌트의 props로 넘겨주기 위해 사용하는 함수
connect 함수를 호출하면 또 다른 함수를 반환하는데, 반환된 함수에 컴포넌트를 파라미터로 넣어주면 리덕스와 연동된 컴포넌트가 만들어진다.
counterContainer
🏷️ containers/counterContainer.js
connect를 사용하면 mapStateToProps와 mapDispatchToProps에서 반환하는 객체 내부 값들이 CounterContainer 컴포넌트의 props로 전달된다. 이들은 store의 state, dispatch를 파라미터로 받아온다.
App 컴포넌트를 Provider 컴포넌트로 감싸주고 store를 props로 전달해주었기 때문에 리액트 컴포넌트에서 store를 사용할 수 있는 것이다.
import React from "react";
import Counter from "../components/counter";
import { connect } from "react-redux";
import { increase, decrease } from "../modules/counter"; // 액션 생성 함수

const CounterContainer = ({ number, increase, decrease }) => {
    return <Counter number={number} onIncrease={increase} onDecrease={decrease}/>
}

// state는 현재 스토어가 지니고 있는 상태
const mapStateToProps = state => ({
    number: state.counter.number
})

const mapDispatchToProps = dispatch => ({
    increase: () => {
        dispatch(increase())
    },
    decrease: () => {
        dispatch(decrease())
    }
})

export default connect(mapStateToProps,mapDispatchToProps)(CounterContainer)
🏷️ App.js
Counter 컴포넌트를 CounterContainer 컴포넌트로 교체한다.
import Todos from './components/todos';
import CounterContainer from './containers/counterContainer';

const App = () => {
  return(
    <div>
      <CounterContainer/>
      <hr />
      <Todos/>
    </div>
  )
}

export default App;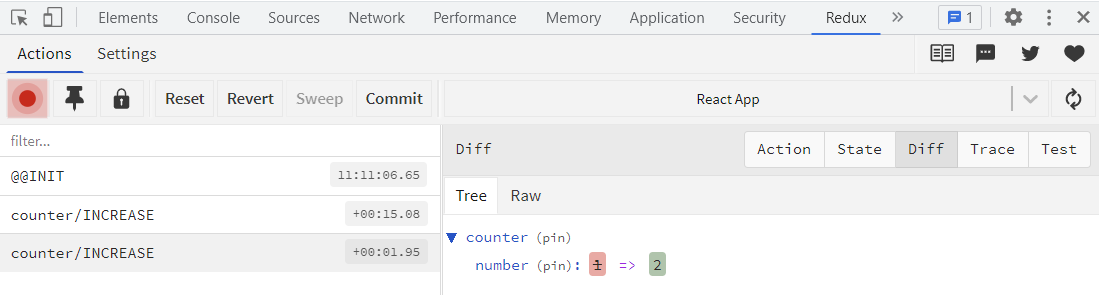
🧐 소스 최적화
컴포넌트에서 액션을 디스패치 하기 위해 각 액션 생성 함수를 호출하고 dispatch로 감싸는 작업이 번거로울 수 있다. 이럴땐 리덕스에서 제공하는bindActionCreators함수를 사용하면 간단하다.( const mapDispatchToProps = dispatch => bindActionCreators( { increase, decrease, }, dispatch, )
mapDispatchToProps에 해당하는 파라미터를 함수 형태가 아닌 액션 생성 함수로 이루어진 객체 형태로 넣어주면 더욱 간단하다.export default connect( mapStateToProps, { increase, decrease } )(CounterContainer)
todosContainer
🏷️ containers/todosContainer.js
import React from "react";
import { connect } from "react-redux";
import Todos from "../components/todos";
import { changeInput, insert, toggle, remove } from "../modules/todos"; // 액션 생성 함수

const TodosContainer = ({
    input,
    todos,
    changeInput,
    insert,
    toggle,
    remove}) => {
    return <Todos input={input} todos={todos} onChangeInput={changeInput}
            onInsert={insert} onToggle={toggle} onRemove={remove}/>
}

const mapStateToProps = state => ({
    input: state.todos.input,
    todos: state.todos.todos
})

export default connect(mapStateToProps,
    {changeInput,
        insert,
        toggle,
        remove
    }
)(TodosContainer)
🏷️ components/todos.js
import React from "react";

const TodoItem = ({ todo, onToggle, onRemove }) =>{
    return(
        <div>
            <input type="checkbox" onClick={()=>{onToggle(todo.id)}} checked={todo.done} readOnly={true}/>
            <span style={{ textDecoration: todo.done ? "line-through" : "none"}}>{todo.text}</span>
            <button onClick={() => onRemove(todo.id)}>삭제</button>
        </div>
    )
}

const Todos = ({
    input,
    todos,
    onChangeInput,
    onInsert,
    onToggle,
    onRemove
}) => {
    const onSubmit = e => {
        e.preventDefault()
        onInsert(input)
        onChangeInput('')
    }

    const onChange = e => onChangeInput(e.target.value)

    return(
        <div>
            <form onSubmit={onSubmit}>
                <input value={input} onChange={onChange} />
                <button type="submit">등록</button>
            </form>
            <div>
                {todos.map(todo => (
                    <TodoItem key={todo.id} todo={todo} onToggle={onToggle} onRemove={onRemove}/>
                ))}
            </div>
        </div>
    )
}

export default Todos
🏷️ App.js
import CounterContainer from './containers/counterContainer';
import TodosContainer from './containers/todosContainer';

const App = () => {
  return(
    <div>
      <CounterContainer/>
      <hr />
      <TodosContainer/>
    </div>
  )
}

export default App;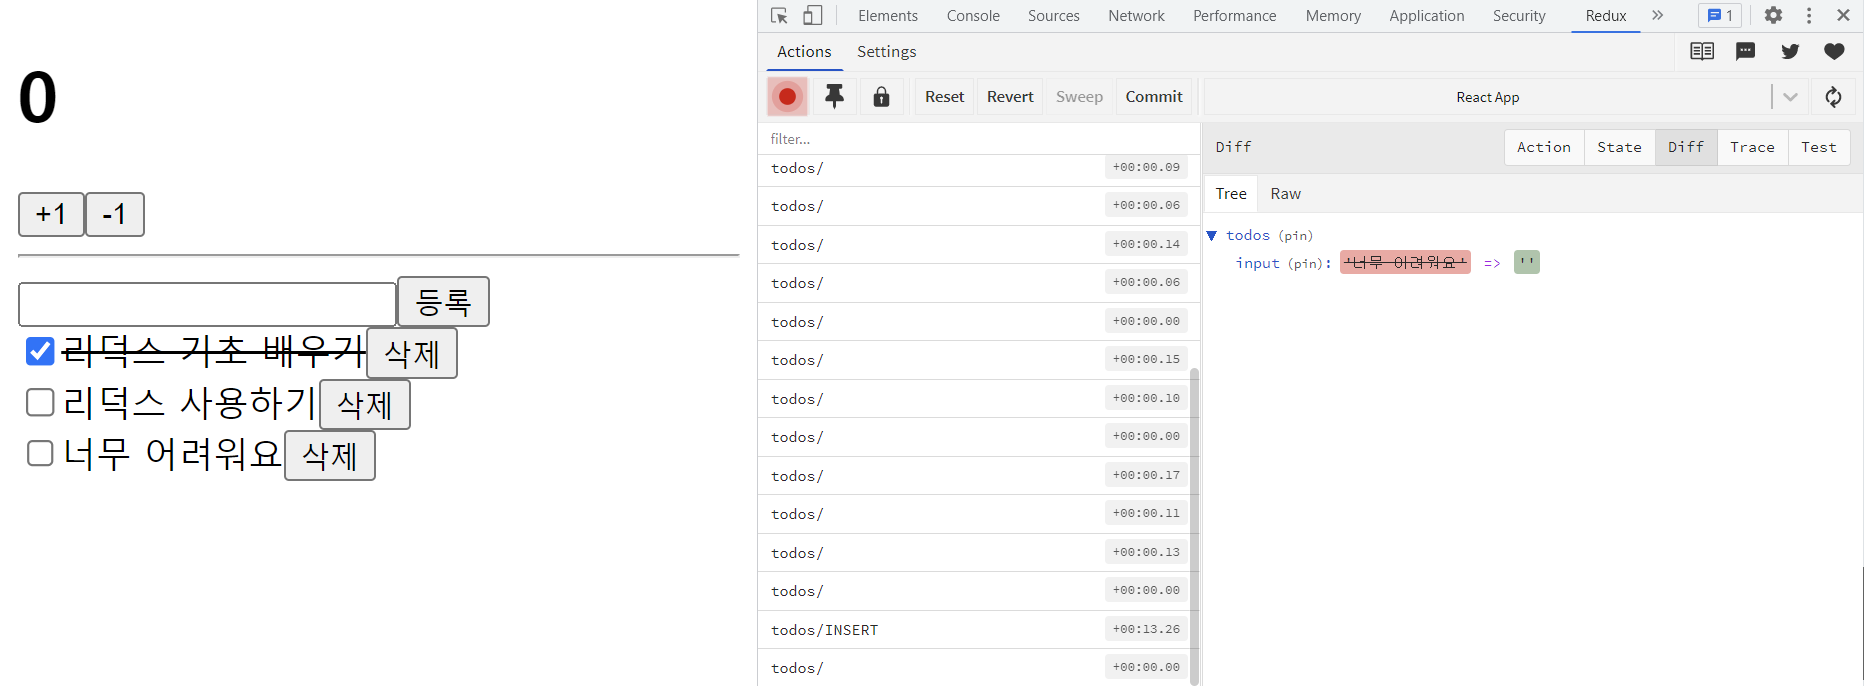
🧐 useSelector, useDispatch
TodosContainer 컴포넌트를 connect 함수 대신useSelector,useDispatch훅 형태로 전환해 보자.
import React, { useCallback } from "react";
import Todos from "../components/todos";
import { changeInput, insert, toggle, remove } from "../modules/todos"; // 액션 생성 함수
import { useSelector, useDispatch } from "react-redux";

const TodosContainer = () => {
    const {input, todos} = useSelector(({todos}) => ({
        input: todos.input,
        todos: todos.todos
    }))

    const dispatch = useDispatch()

    const onChangeInput = useCallback(input => dispatch(changeInput(input)),[dispatch])
    const onInsert = useCallback(text => dispatch(insert(text)),[dispatch])
    const onToggle = useCallback(id => dispatch(toggle(id)),[dispatch])
    const onRemove = useCallback(id => dispatch(remove(id)),[dispatch])


    return <Todos input={input} todos={todos} onChangeInput={onChangeInput}
            onInsert={ onInsert} onToggle={onToggle} onRemove={onRemove}/>
}


export default TodosContainer
connect 와 Hooks 차이점
컨테이너 컴포넌트를 만들 때는connect함수를 사용해도 되고,Hooks를 사용해도 된다.
차이점은 다음과 같다.
connect함수를 사용하여 컴포넌트를 만들면 부모 컴포넌트가 리렌더링될 경우, props 값이 안바뀌었으면 리렌더링을 자동으로 방지한다. (최적화)useSeletor를 사용하여 리덕스 상태를 조회했을 때는 최적화 작업이 자동으로 이루어지지 않아서React.memo를 컴포넌트에 추가해야 한다.export default React.memo(TodosContainer)