
Ansible
플레이북
이전 블로그에서는 플레이북의 필터까지 다루었다.
이번에는 필터 이후에 팩트(fact) 변수 부터 다룰 예정이다.
팩트(fact) 변수
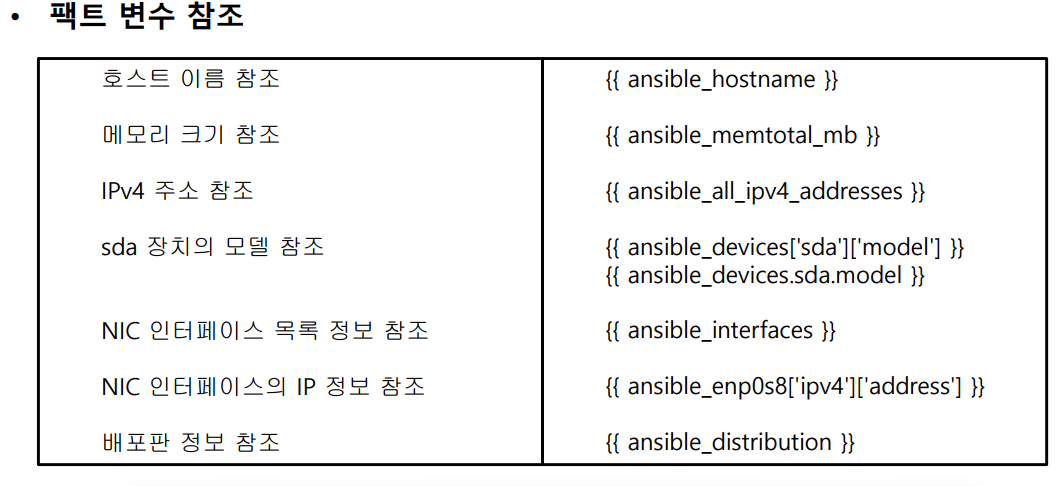
- 운영 체제 관련 정보, IP 주소, NIC 정보, 디스크 장치, 배포판, 환경 변수, CPU 정보, 메모리 정보, 마운트 정보 등 관리 노드의 정보를 가진 변수
- ansible_로 시작하는 변수로 접근할 수 있음
- 별도로 설정하지 않는 한, 기본적으로 플레이 실행 시 첫 번째 작업으로 해당 호스트의 정보를 팩트 변수로 자동으로 수집하고 메모리에 저장

더 편하게 정보를 검색할 수 있다ansible ansi-node2 -m setup | less
- name: fact test
  hosts: ansi-node1
  gather_facts: 0 # gathering facts 종료
  tasks:
  - name: print facts1 # 종료 상태에서 팩트 변수 출력
    debug:
      msg: "{{ ansible_facts }}"
  - name: gathering facts # gathering facts 시작
    setup:
  - name: print facts2
    debug:
msg: "{{ ansible_facts }}" # 시작 상태에서 팩트 변수 출력 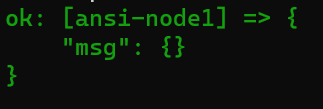
-> gathering facts 종료상태에서 팩트변수를 출력하면 아무것도 나타나지 않는 것을 확인
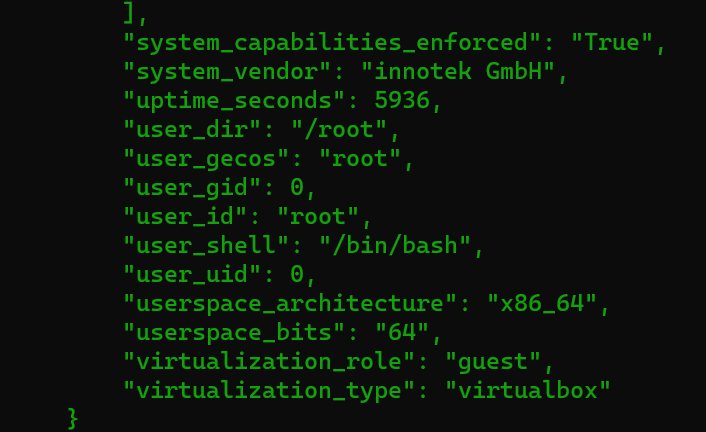
-> gathering facts를 setup모듈로 킨 상태에서 다시 팩트변수를 출력하면 방대한 양의 정보가 나타나는 것을 확인
- name: print facts2
    debug:
      msg: "ansible_hostname = {{ ansible_hostname }}"
      # 호스트이름을 참조해서 hostname 출력
  - debug:
      msg: "ansible_facts.hostname = {{ ansible_facts.hostname }}"
# 팩트변수 전체에서 hostname을 출력 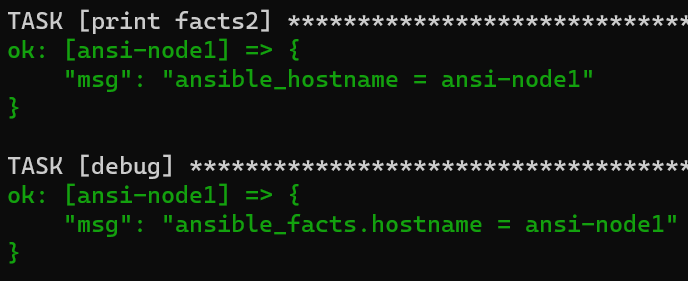
-> 팩트변수에서 hostname을 출력하는 것과 호스트네임을 참조해서 출력하는 것은 결과가 같다
<팩트 수집 비활성화>
- gather_facts: no
<작업 중에 변수 수정>
- set_fact 모듈을 사용해 플레이북의 작업을 실행하는 중에 새 변수를 정의하거나 기존 변수의 값을 재정의 할 수 있음
- name: set facts test
  hosts: ansi-node1
  vars:
    var1: "{{ ansible_hostname }}" # var1에 hostname정보 정의
  tasks:
  - name: print hostname
    debug:
      msg: "{{ var1 }}"
  - name: set_facts # var1에 distribution에 정보 재정의
    set_fact:
      var1: "{{ ansible_distribution }}"
  - name: print distribution
    debug:
      msg: "{{ var1 }}"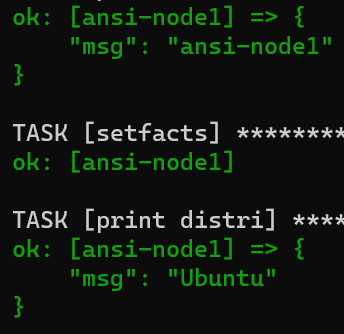
-> 처음에는 hostname이 출력되었다가 set_fact모듈로 작업중에 var1의 정보를 재정의함으로써 두번째에는 dirtribution에 대한 정보가 출력되는 것을 볼 수 있다
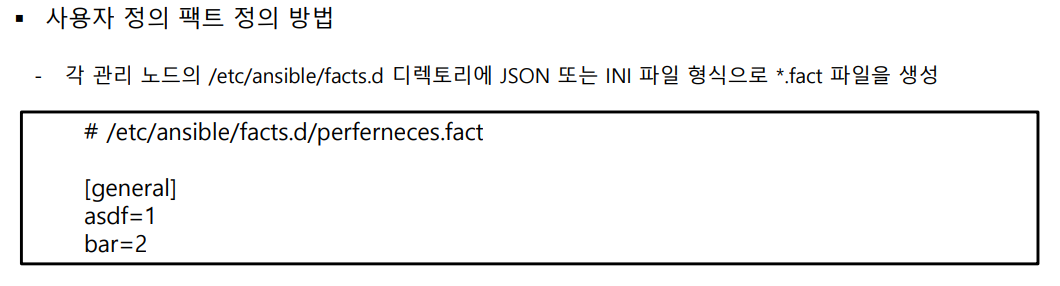
<사용자 정의 팩트 변수>
-
사용자 정의 팩트는 각 호스트별 사용자가 직접 정적 팩트 변수를 선언 가능
-
정의된 사용자 정의 팩트는 ansible_local 변수로 참조 가능
-
ssh ansi-node1 # 관리 대상 노드 접속
sudo mkdir -p /etc/ansible/facts.d/ # facts.d 디렉터리 생성
ls -R /etc/ansible # 디렉터리 있는지 확인
sudo vi /etc/ansible/facts.d/test.fact  # test.fact 변수 생성 및 아래와 같이 작성 후 저장

[test_section1]
username=Lee
groupname=groom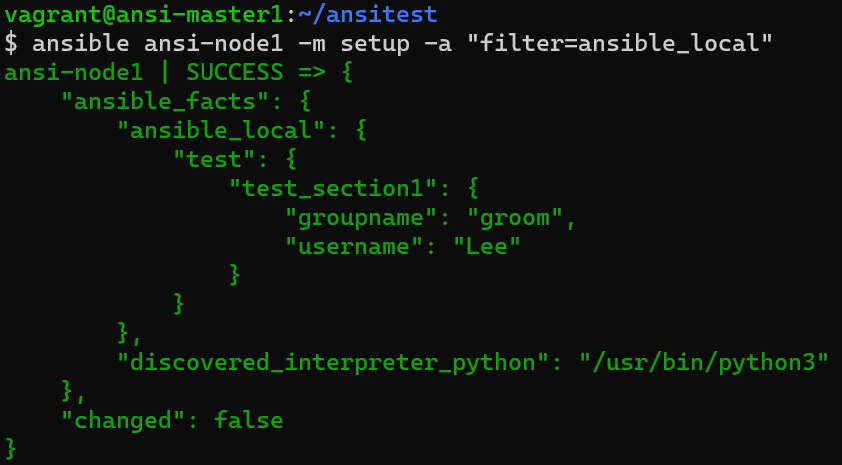
-> 사용자가 정의한 fact변수의 정보를 볼 수 있다
ssh ansi-node1
sudo vi /etc/ansible/facts.d/my.fact # 새로운 팩트 파일 생성 및 아래와 같이 정보 작성 후 저장

[my_section1]
telnumber=000-0000-0000

[my_section2]
telnumber=111-1111-1111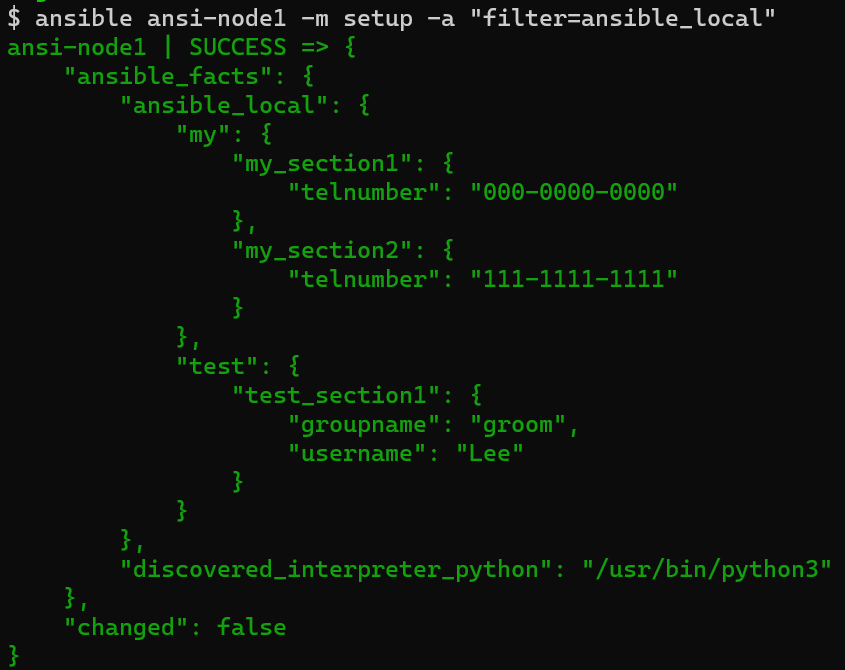
-> 새로운 사용자 정의 fact변수의 정보도 추가되어 출력되는 것을 볼 수 있다.
-> fact변수의 이름이 달라도 하나의 ansible_local에 잡힌다
💡 fact변수의 확장자는 항상 .fact여야 한다
# 플레이북을 통해 이전에 만든 사용자 정의 fact변수 정보를 추출
- name: loacl fact test
  hosts: ansi-node1
  tasks:
  - debug:
      msg: "{{ ansible_local }}"
  - debug:
      msg: "{{ ansible_local.test.test_section1.username }}"
  - debug:
      msg: "{{ ansible_local.test.test_section1.groupname }}"
  - debug:
      msg: "{{ ansible_local.my.my_section1.telnumber }}"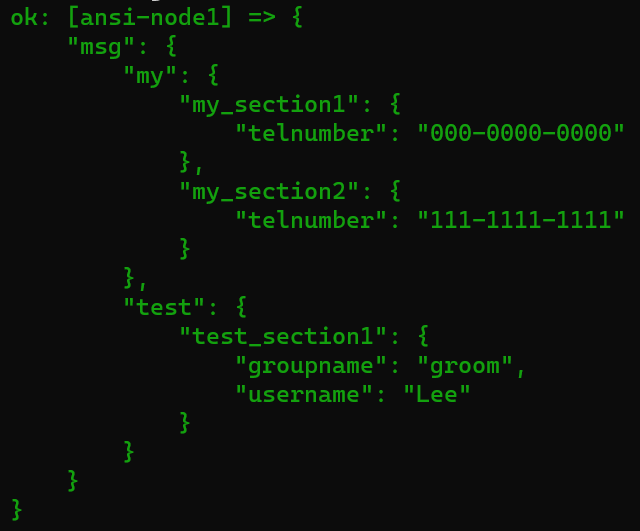
-> ansible_local만 출력한 결과 모든 팩트변수의 정보가 출력된다
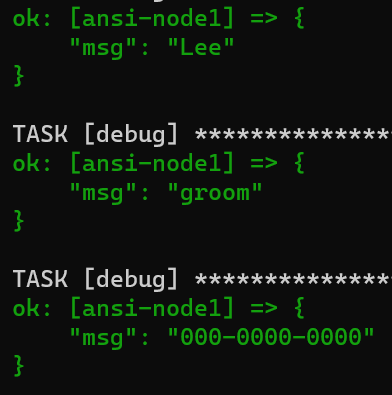
-> ansible_loacl에서 원하는 정보만 추출해서 출력할 수 있다
- name: local fact test
  hosts: ansi-node3
  tasks:
  - name: create dir
    file:
      state: directory
      dest: "/etc/ansible/facts.d/"
      recurse: yes
  - name: create facts file
    file:
      state: touch
      dest: "/etc/ansible/facts.d/test.fact"
  - name: edit facts file
    copy:
      content: "[test1_section]\nusername=park\ngroupname=nobreak"
      dest: "/etc/ansible/facts.d/test.fact"
  - name: update gathering facts # 다시한번 setup모듈로 facts의 정보를 수집해야한다
    setup:
  - name: print loacl fact
    debug:
      msg: "{{ansible_local}}"
  - name: print username
    debug:
      msg: "{{ansible_local.test.test1_section.username}}"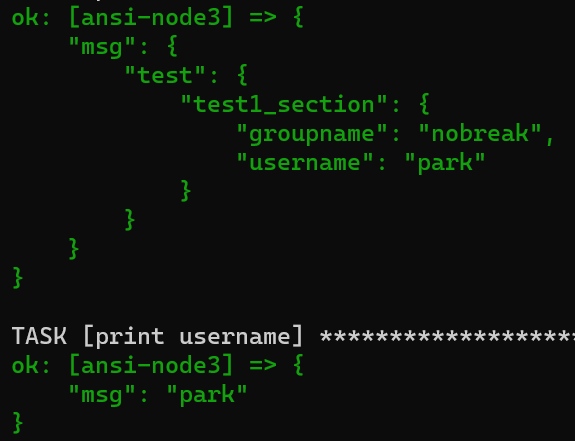
-> 각 노드에 직접 들어가서 fact변수를 만들기는 비효율적이다. 따라서 master노드에서 플레이북을 통해 대상 노드에 facts.d 디렉터리와 fact변수를 만들어 정보를 입력하고 위의 사진처럼 원하는 정보를 출력할 수 있다.
-> 마스터에서 플레이북으로 원하는 노드의 facts.d 디렉터리에 .fact파일을 생성후 원하는 정보(ex. 패키지 정보..)를 입력하고 실행시키면 해당 노드들이 .fact파일을 가지게 된다.
다시 master에서 플레이북을 통해 ansible_local을 이용하여 원하는 정보를 해당 노드의 .fact파일에서 뽑아와 작업(ex. 패키지 설치..)을 하면 된다
1 . fact파일 응용 예시
- name: local_fact file
  hosts: ansi-master1
  gather_facts: no
  tasks:
  - copy:
      content: "[localfacts]\npkgname=samba\nsrvc=smbd\nstate=present\n"
      dest: /home/vagrant/ansitest/local.fact

- name: local_fact make
  hosts: BB
  tasks:
  - file:
      state: directory
      path: /etc/ansible/facts.d/
      recurse: yes
  - copy:
      src: /home/vagrant/ansitest/local.fact
      dest: /etc/ansible/facts.d/local.fact
  - setup:

  - apt:
      name: "{{ ansible_local.local.localfacts.pkgname }}"
      state: "{{ ansible_local.local.localfacts.state }}"

  - service:
      name: "{{ ansible_local.local.localfacts.srvc }}"
      state: started
      enabled: yes
-> BB 에 /etc/ansible/facts.d 디렉토리를 만들어 local.fact 파일을 저장한 후에 local fact 변수를 이용해서 samba 패키지를 설치하고 시작
2 . fact파일 응용 예시
- name: local_facts_conf
  hosts: ansi-node2,ansi-node3
  tasks:
  - name: make directory
    file:
      path: /etc/ansible/facts.d/
      state: directory

  - name: make test1.fact
    file:
      path: /etc/ansible/facts.d/test1.fact
      state: touch

  - name: Write test1.fact
    lineinfile:
      path: /etc/ansible/facts.d/test1.fact
      line: "[custom]\nhostname={{ ansible_hostname }}\naddress={{ ansible_enp0s8.ipv4.address }}"

  - name: Create test2.fact
    copy:
      content: "[user]\nid={{ ansible_hostname }}_admin\npw=1"
      dest: /etc/ansible/facts.d/test2.fact

  - name: Gathering Facts
    setup:


  - name: local_fact print
    debug:
      msg: "{{ ansible_local }}"

  - name: local_fact hostname print
    debug:
      msg: "{{ ansible_local.test1.custom.hostname }}"
-> fact파일에 hostname과 ipaddress 작성할 때 일일이 정보를 입력하는 것이 아니라 해당 노드가 가지고 있는 정보를 모아놓은 ansible_facts를 이용해 정보를 작성한다
<특수 변수>
- 특수 변수는 미리 예약되어 있으며 사용자가 직접 설정할 수 없음
- Ansible은 특수 변수의 값을 현재 상태를 반영하도록 재정의
작업 제어
반복문, 조건문, 핸들러 등을 이용해 다양하게 작업 순서를 제어해 효과적으로 실행할 수 있음
반복문
- 반복적인 작업을 효율적으로 하기 위해 사용
- loop 구문을 사용해서 각 모듈(작업)에 대한 반복 작업 수행 가능
- 변수 값을 변경하면서 모듈을 실행 ( item 이라는 이름의 변수 사용 )
- 조건식과는 다르게 block 단위의 반복작업은 불가
- 조건식과 함께 사용하는 방식은 가능
- loop 구문에서 변수 선언 시에 리스트 형태 구성도 가능
- 중첩 기능도 제공
1 . 단순 반복문 예시
- name: loop test
  hosts: ansi-node2
  gather_facts: 0
  tasks:
  - name: create user
    user:
      name: "{{ item }}"
    loop: # 반복문은 모듈과 같은 위치에서 실행
    - testuser01
    - testuser02
2 . 반복문에 변수 참조 예시
- name: loop test
  hosts: ansi-node3
  vars:
    username:
    - testuser01
    - testuser02
  gather_facts: 0
  tasks:
  - name: create user
    user:
      name: "{{ item }}"
    loop: "{{ username }}"
3 . 반복문 응용 예시
- name: loop test
  hosts: ansi-node1
  gather_facts: 0
  tasks:
  - command: ls -al /home/vagrant
    register: result

  - debug:
      msg: "{{ item }}"
    loop: "{{ result.stdout_lines }}"
4 . 사전 목록 반복
- name: loop test
  hosts: ansi-node1
  vars:
    info:
    - name: Lee
      age: 47
    - name: kim
      age: 30
    - name: park
      age: 50
  tasks:
  - debug:
      msg: " name = {{ item.name }} age = {{ item.age }} "
    loop: "{{ info }}"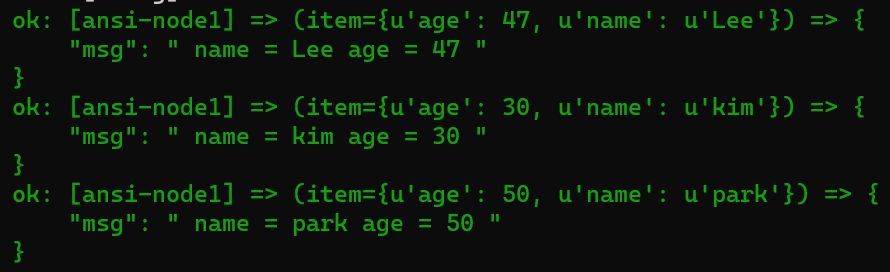
-> 리스트의 값이 하나씩 들어와서 값의 키/벨류 값이 각각 출력된다
5 . 중첩 리스트 반복: 여러 개의 리스트를 결합(데카르트 곱) 가능
- name: loop test
  hosts: ansi-node1
  gather_facts: 0
  vars:
    list1:
    - 1
    - 2
    list2:
    - a
    - b
    - c
  tasks:
  - debug:
      msg: "number = {{ item[0] }} alpha = {{ item[1] }}"
    loop: "{{ list1 | product(list2) | list }}"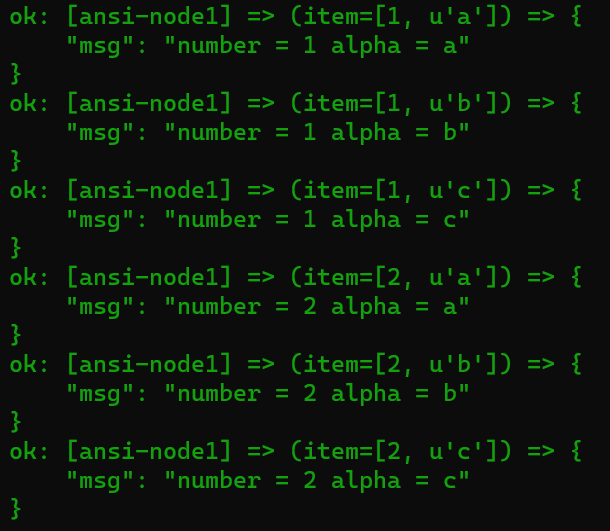
-> 1에 a,b,c 2에 a,b,c처럼 데카르트 곱으로 출력되는 것을 볼 수 있다
6 . 인벤토리 반복: 인벤토리 호스트 목록을 반복문을 통해 가져올 수 있음
- name: loop test
  hosts: ansi-node1
  gather_facts: 0
  tasks:
  - debug:
      msg: "{{ item }}"
    loop: "{{ groups['ABC'] }}"

  - debug:
      msg: "{{ item }}"
    loop: "{{ query('inventory_hostnames','all') }}"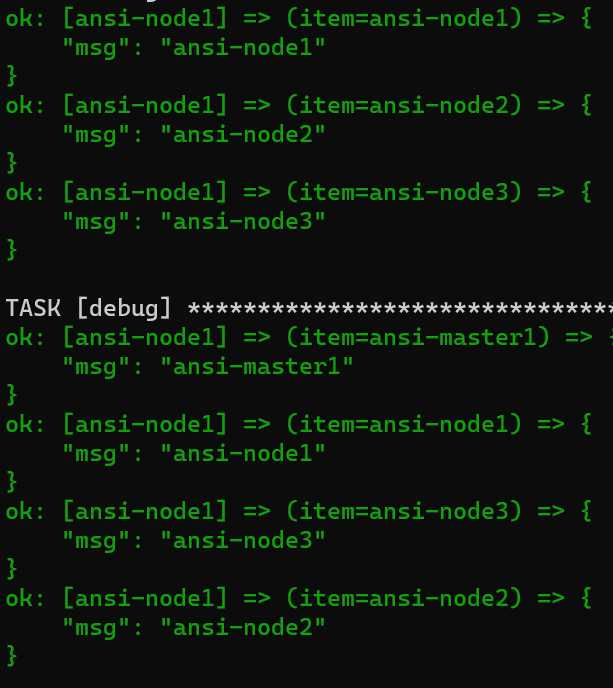
-> 호스트 목록의 특정 호스트나 그룹을 반복문을 통해 가져올 수 있다.
7 . 등록변수를 이용한 반복
- name: loop test
  hosts: ansi-node1
  gather_facts: 0
  tasks:
  - shell: "echo This is my item : {{ item }}"
    loop:
    - one
    - two
    register: result
  - debug:
      msg: "{{result}}" # 첫번째 결과
  - debug:
      var: result # 두번째 결과
-> 첫번째 결과와 두번째 결과는 같다
-> 등록변수를 이용해 결과를 캡처할 수 있다
- name: loop test
  hosts: ansi-node1
  gather_facts: 0
  tasks:
  - shell: "echo This is my item : {{ item }}"
    loop:
    - one
    - two
    register: result
  - debug:
      msg: "{{ item.stdout }}"
    loop:
      "{{ result.results }}"
-> reuslt 등록변수의 결과중에 results항목을 뽑아 반복문을 통해 stdout을 출력
8 . 반복문을 이용한 유저 생성
- name: use loop to create user
  hosts: ansi-node1
  vars:
    user_info:
    - name: user01
      pw: "1234" # 문자열입력
    - name: user02
      pw: "4567"
    - name: user03
      pw: "8901"
  tasks:
  - name: create user
    user:
      name: "{{ item['name'] }}"
      password: "{{ item['pw'] | password_hash('sha256','123456') }}"
      # 패스워드 입력은 문자열로 들어와야한다
    loop: "{{ user_info }}"
-> /etc/passwd 확인으로 유저가 생성된 것을 확인
-> 여러 유저를 반복문으로 쉽게 생성
📗 패스워드를 암호화하는 해쉬는 password_hash이고 파라미터로 알고리즘과 sort값이 들어간다
📗 그냥 해쉬는 hash이고 파라미터로 알고리즘만 들어간다
📌 sort값: 패스워드를 그냥 알고리즘만 이용해서 암호화하면 시간만 있다면 암호를 깨기 쉽다 (ex.사전공격...). 따라서 '특정 문자열'을 섞어서 같이 암호화하면 암호문은 훨씬 복잡해질것이다. 이 '특정 문자열'이 sort값이다.