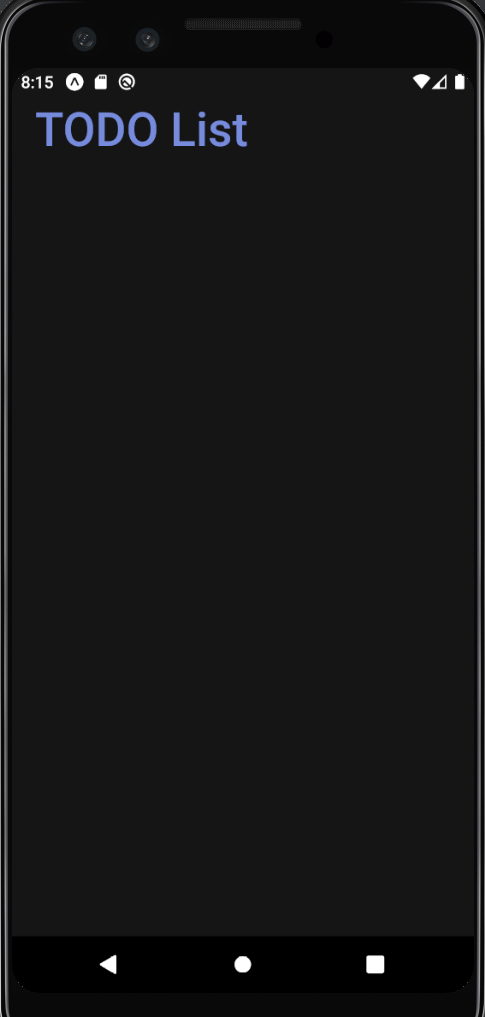
타이틀
// theme.js

export const theme = {
    background: '#101010',
    itemBackground: '#313131',
    main: '#778bdd',
    text: '#cfcfcf',
    done: '#616161',
};
import React from 'react'
import styled, { ThemeProvider } from 'styled-components/native';
import { theme } from './theme';
const Container = styled.View`
flex: 1;
background-color: ${({theme}) => theme.background};
align-items: center;
justify-content: flex-start;
`
const Title = styled.Text`
font-size: 40px;
font-weight: 600;
color: ${({theme}) => theme.main};
align-self: flex-start;
margin: 0px 20px;
`
export default function App () {
return (
<ThemeProvider theme={theme}>
<Container>
<Title>TODO List</Title>
</Container>
</ThemeProvider>
)
}

SafeAreaView 컴포넌트
iOS에서 노치 디자인 때문에 Title 컴포넌트가 가려지는 것을 방지하기 위해 자동으로 padding값이 적용되어 있다
노치란? 스크린 일부에 센서 등을 넣어서 화면이 파인 것 처럼 보이는 것
const Container = styled.SafeAreaView`
    flex: 1;
    background-color: ${({theme}) => theme.background};
    align-items: center;
    justify-content: flex-start;
`
StatusBar 컴포넌트
안드로이드에서 Title 컴포넌트가 상태 바에 가려지는 것을 방지하기 위해 상태 바를 변경할 수 있다
<StatusBar
    barStyle="light-content"
    backgroundColor={theme.background}
/>
StatusBar 컴포넌트의 backgroundColor 속성은 안드로이드에만 적용 가능!!
Input 컴포넌트
// Input.js
import React from 'react'
import { styled } from 'styled-components/native';

const StyledInput = styled.TextInput`
    width: 100%;
    height: 60px;
    margin: 3px 0;
    padding: 15px 20px;
    border-radius: 10px;
    background-color: ${({theme}) => theme.itemBackground};
    font-size: 25px;
    color: ${({theme}) => theme.text};
`

const Input = () => {
    return <StyledInput />
}

export default Input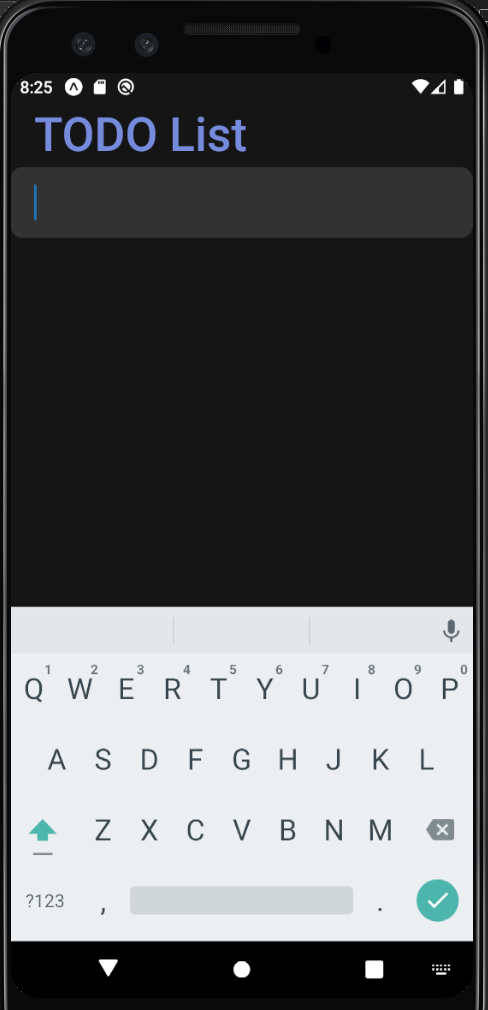
Dimensions
현재 화면의 크기를 알 수 있다
처음 받아온 값으로 크기가 고정되기 때문에 기기를 회전하면 화면 크기와 일치하지 않을 수 있어서 이벤트 리스너를 사용한다
(useWindowDimensions도 가능함 화면 크기가 바뀔 때 크기를 자동으로 업데이트 해줌)
import React from 'react'
import { styled } from 'styled-components/native';
import { Dimensions } from 'react-native';

const StyledInput = styled.TextInput`
    width: ${({width}) => width-40}px;
    height: 60px;
    margin: 3px 0;
    padding: 15px 20px;
    border-radius: 10px;
    background-color: ${({theme}) => theme.itemBackground};
    font-size: 25px;
    color: ${({theme}) => theme.text};
`

const Input = () => {
    const width = Dimensions.get('window').width;
    return <StyledInput width={width} />
}

export default Input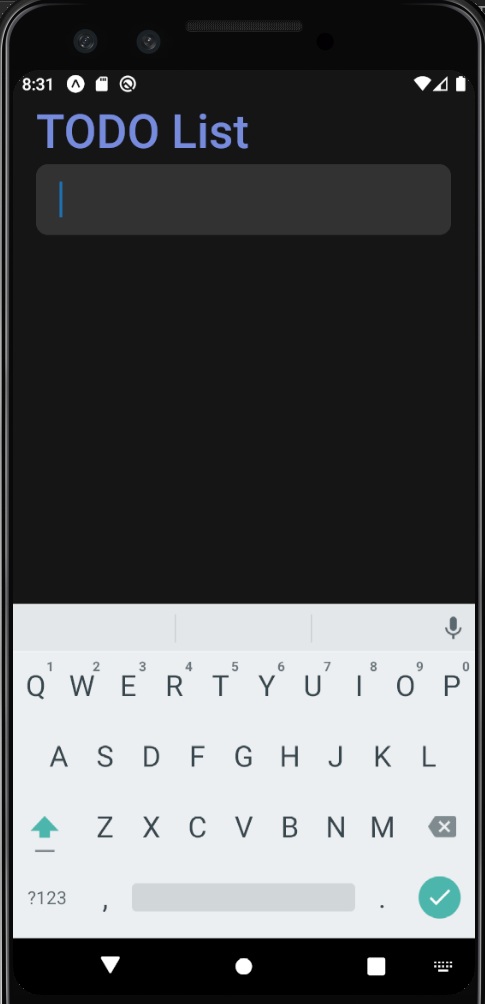
Input 컴포넌트
// props로 전달

<Input placeholder="+ Add a Task" />
import React from 'react'
import { styled } from 'styled-components/native';
import { Dimensions } from 'react-native';
const StyledInput = styled.TextInput.attrs(({theme}) => ({
placeholderTextColor: theme.main,
}))`
width: ${({width}) => width-40}px;
height: 60px;
margin: 3px 0;
padding: 15px 20px;
border-radius: 10px;
background-color: ${({theme}) => theme.itemBackground};
font-size: 25px;
color: ${({theme}) => theme.text};
`
const Input = ({placeholder}) => {
const width = Dimensions.get('window').width;
return <StyledInput width={width} placeholder={placeholder} maxLength={50}/>
}
export default Input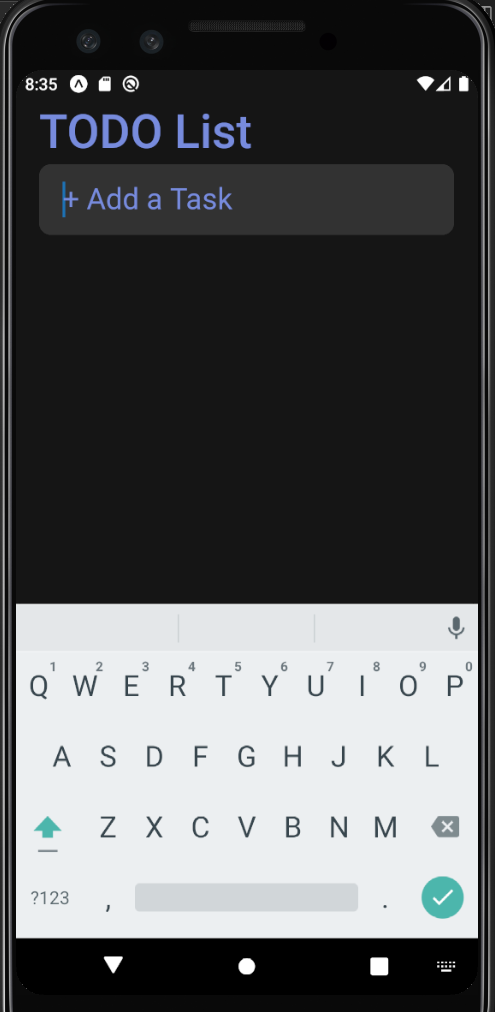
TextInput
- 첫 글자가 대문자
- 오타 자동으로 수정
// 속성 커스텀 가능

<StyledInput
    width={width}
    placeholder={placeholder}
    maxLength={50}
    autoCapitalize="none" // 자동으로 대문자로 전환
    autoCorrect={false} // 자동 수정 기능
    returnKeyType="done" // 키보드 완료 버튼 설정
/>
iOS에만 존재
- returnKeyType none
- keyboardAppearance
<StyledInput
    keyboardAppearance="dark" // 키보드 색상을 어둡게
/>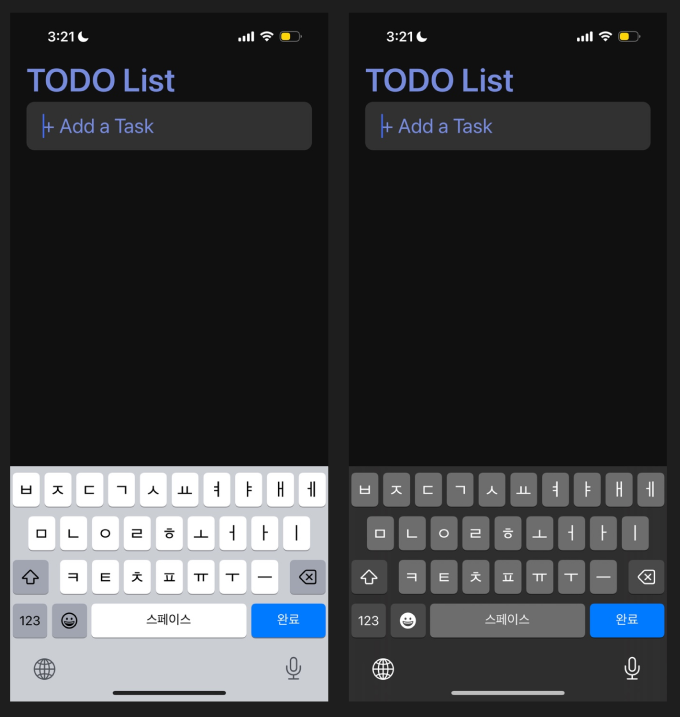
안드로이드에만 존재
- returnKeyType join (가입)
이벤트
Input 컴포넌트에 이벤트 추가
export default function App () {
    const [newTask, setNewTask] = useState('');

    const _addTask = () => {
        alert(`Add: ${newTask}`);
        setNewTask('');
    }

    const _handleTextChange = text => {
        setNewTask(text);
    }

    return (
        <ThemeProvider theme={theme}>
            <Container>
                <StatusBar
                    barStyle="light-content"
                    backgroundColor={theme.background}
                />
                <Title>TODO List</Title>
                <Input
                    placeholder="+ Add a Task"
                    value={newTask}
                    onChangeText={_handleTextChange} // 사용자가 입력한 텍스트가 변경되면 함수 호출
                    onSubmitEditing={_addTask} // Enter 입력시 함수 호출
                />
            </Container>
        </ThemeProvider>
    )
}
// Input.js
import React from 'react'
import { styled } from 'styled-components/native';
import { Dimensions } from 'react-native';
import { PropTypes } from 'prop-types';
const StyledInput = styled.TextInput.attrs(({theme}) => ({
placeholderTextColor: theme.main,
}))`
width: ${({width}) => width-40}px;
height: 60px;
margin: 3px 0;
padding: 15px 20px;
border-radius: 10px;
background-color: ${({theme}) => theme.itemBackground};
font-size: 25px;
color: ${({theme}) => theme.text};
`
const Input = ({placeholder, value, onChangeText, onSubmitEditing}) => {
const width = Dimensions.get('window').width;
return (
<StyledInput
width={width}
placeholder={placeholder}
maxLength={50}
autoCapitalize="none"
autoCorrect={false}
returnKeyType="done"
keyboardAppearance="dark"
value={value}
onChangeText={onChangeText}
onSubmitEditing={onSubmitEditing}
/>
)
}
Input.propTypes = { // props로 전달할 값의 타입
placeholder: PropTypes.string,
value: PropTypes.string.isRequired, // 필수
onChangeText: PropTypes.func.isRequired, // 필수
onSubmitEditing: PropTypes.func.isRequired, // 필수
}
export default Input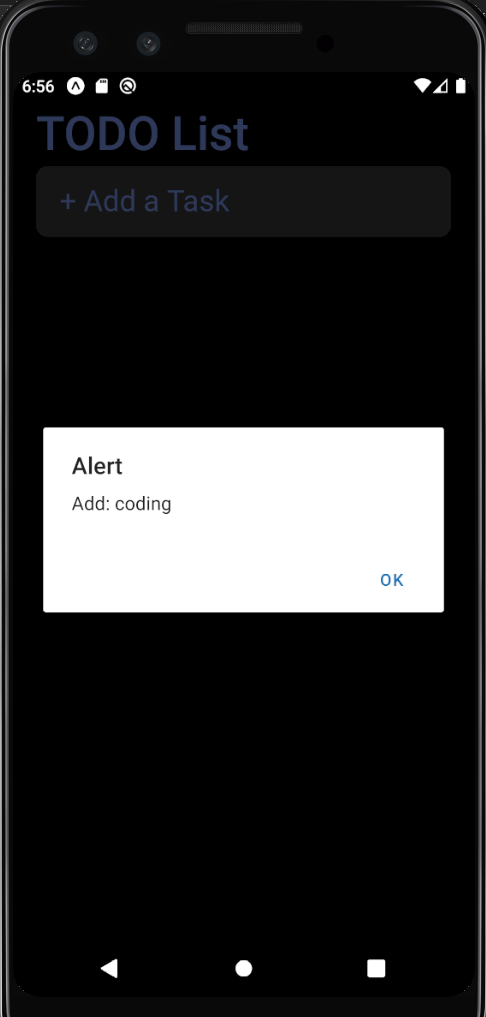
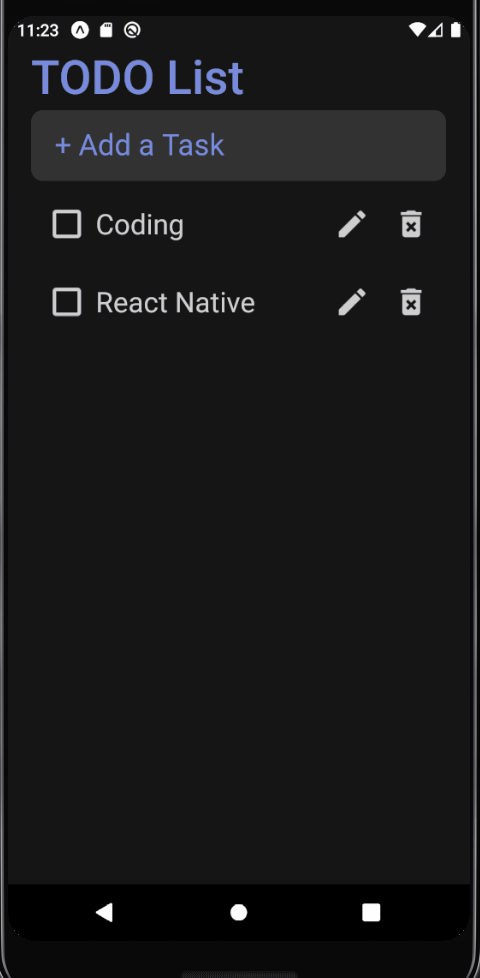
할 일 목록 만들기
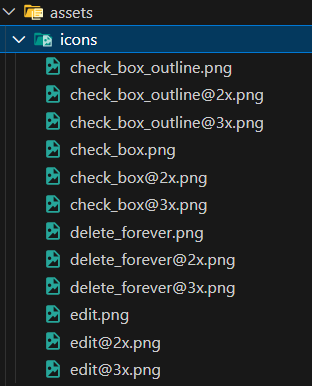
이미지
파일명을 동일한 이름으로 사용하면서 뒤에 @2x, @3x를 붙이면 화면 사이즈에 알맞는 크기의 이미지를 자동으로 불러와서 사용한다
Task 컴포넌트
// Task.js
import React from 'react'
import styled from 'styled-components/native'
import PropTypes from 'prop-types'
import IconButton from './IconButton'
import { images } from '../images'

const Container = styled.View`
    flex-direction: row;
    align-items: center;
    background-color: ${({theme}) => theme.itemBackGround};
    border-radius: 10px;
    padding: 5px;
    margin: 3px 0px;
`

const Contents = styled.Text`
    flex: 1;
    font-size: 24px;
    color: ${({theme}) => theme.text};
`

const Task = ({text}) => {
    return (
        <Container>
            <IconButton type={images.uncompleted}/>
            <Contents>{text}</Contents>
            <IconButton type={images.update} />
            <IconButton type={images.delete} />
        </Container>
    )
}

Task.propTypes = {
    text: PropTypes.string.isRequired,
}

export default Task
import React, { useState } from 'react'
import styled, { ThemeProvider } from 'styled-components/native';
import { theme } from './theme';
import { Dimensions, StatusBar } from 'react-native';
import Input from './components/Input';
import Task from './components/Task';
const Container = styled.SafeAreaView`
flex: 1;
background-color: ${({theme}) => theme.background};
align-items: center;
justify-content: flex-start;
`
const Title = styled.Text`
font-size: 40px;
font-weight: 600;
color: ${({theme}) => theme.main};
align-self: flex-start;
margin: 0px 20px;
`
const List = styled.ScrollView`
flex: 1;
width: ${({width}) => width-40}px;
`
export default function App () {
const width = Dimensions.get('window').width;
const [newTask, setNewTask] = useState('');
const _addTask = () => {
alert(`Add: ${newTask}`);
setNewTask('');
}
const _handleTextChange = text => {
setNewTask(text);
}
return (
<ThemeProvider theme={theme}>
<Container>
<StatusBar
barStyle="light-content"
backgroundColor={theme.background}
/>
<Title>TODO List</Title>
<Input
placeholder="+ Add a Task"
value={newTask}
onChangeText={_handleTextChange}
onSubmitEditing={_addTask}
/>
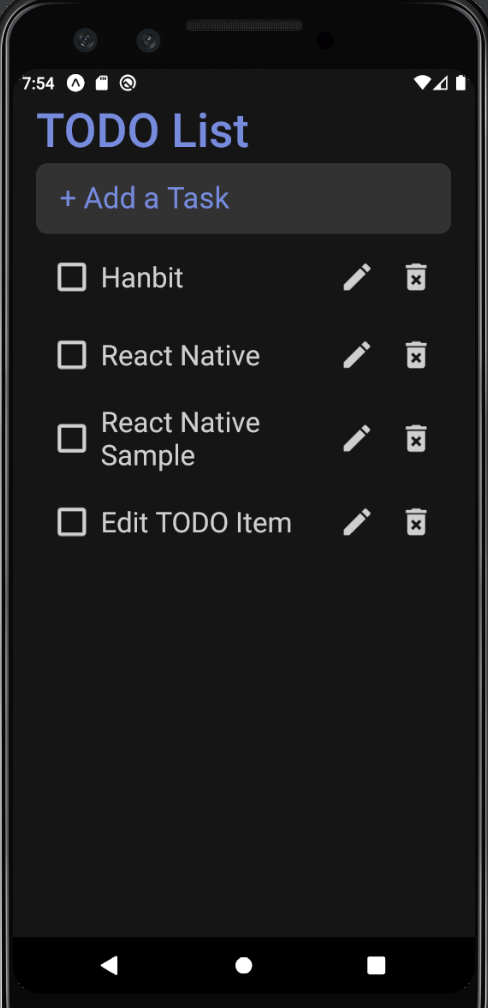
<List width={width}>
<Task text="Hanbit" />
<Task text="React Native" />
<Task text="React Native Sample" />
<Task text="Edit TODO Item" />
</List>
</Container>
</ThemeProvider>
)
}
기능 구현하기
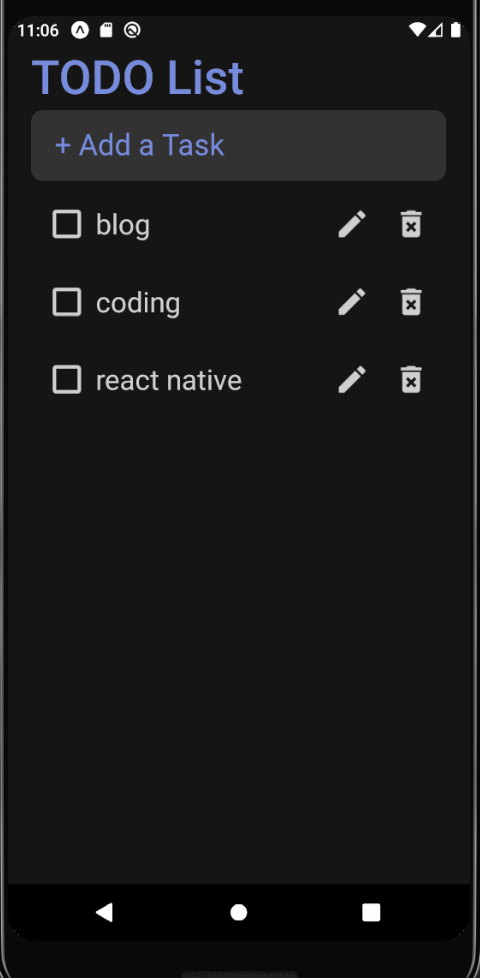
할 일 항목을 배열로 변경
const [tasks, setTasks] = useState({
    '1': {id: '1', text: 'Hanbit', completed: false},
    '2': {id: '2', text: 'React Native', completed: true},
    '3': {id: '3', text: 'React Native Sample', completed: false},
    '4': {id: '4', text: 'Edit TODO Item', completed: false},
})

<List width={width}>
    {Object.values(tasks)
        .reverse() // 최신 항목을 가장 앞에 나타나게 하려고 역순으로 설정
        .map(item => (
            <Task key={item.id} text={item.text} />
        ))
    }
</List>
추가 기능
- id는 할 일 항목이 추가되는 시간의 타임스탬프
- 새로 입력되는 항목의 완료 여부는 false
const _addTask = () => {
    const ID = Date.now().toString();
    const newTaskObject = {
        [ID]:{id: ID, text: newTask, completed: false},
    };
    setNewTask(''); // Input 컴포넌트 초기화
    setTasks({...tasks, ...newTaskObject}); // 기존의 목록을 유지하고 새로운 항목을 추가
}
삭제 기능
불변성 유지를 위해서 원본 객체를 수정하지 않고 새로운 객체를 생성해서 변경사항을 적용한다
const _deleteTask = id => {
  	// 빈 객체에 tasks를 복사
    const currentTasks = Object.assign({}, tasks);
    delete currentTasks[id];
    setTasks(currentTasks);
}<IconButton type={images.delete} id={item.id} onPressOut={deleteTask}/>import React from 'react';
import { TouchableOpacity } from 'react-native';
import styled from 'styled-components/native';
import PropTypes from 'prop-types';
import { images } from '../images';
const Icon = styled.Image`
tint-color: ${({theme}) => theme.text};
width: 30px;
height: 30px;
margin: 10px;
`
const IconButton = ({type, onPressOut, id}) => {
const _onPressOut = () => {
onPressOut(id);
}
return (
<TouchableOpacity onPressOut={_onPressOut}>
<Icon source={type} />
</TouchableOpacity>
)
}
IconButton.defaultProps = {
onPressOut: () => {},
}
Icon.propTypes = {
type: PropTypes.oneOf(Object.values(images)).isRequired,
onPressOut: PropTypes.func,
id: PropTypes.string,
}
export default IconButton 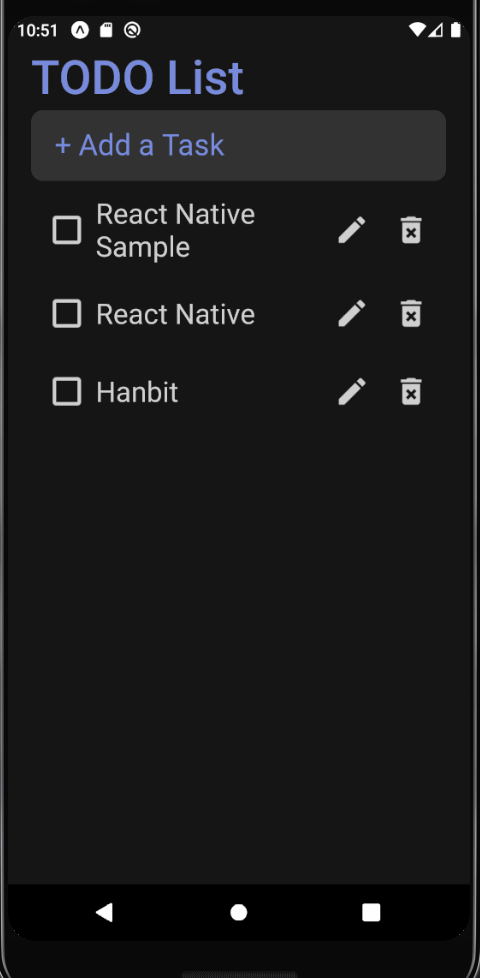
완료 기능
const _toggleTask = id => {
    const currentTasks = Object.assign({}, tasks);
   // false는 true로, true는 false로 변경
    currentTasks[id]['completed'] = !currentTasks[id]['completed'];
    setTasks(currentTasks);
}

<List width={width}>
    {Object.values(tasks)
        .reverse()
        .map(item => (
            <Task key={item.id} item={item} deleteTask={_deleteTask} toggleTask={_toggleTask}/>
        ))
    }
</List>
import React from 'react'
import styled from 'styled-components/native'
import PropTypes from 'prop-types'
import IconButton from './IconButton'
import { images } from '../images'
const Container = styled.View`
flex-direction: row;
align-items: center;
background-color: ${({theme}) => theme.itemBackGround};
border-radius: 10px;
padding: 5px;
margin: 3px 0px;
`
const Contents = styled.Text`
flex: 1;
font-size: 24px;
color: ${({theme, completed}) => (completed ? theme.done : theme.text)};
text-decoration-line: ${({completed}) =>
completed ? 'line-through' : 'none'};
`
const Task = ({item, deleteTask, toggleTask}) => {
return (
<Container>
<IconButton
type={item.completed ? images.completed : images.uncompleted}
id={item.id}
onPressOut={toggleTask}
completed={item.complted}
/>
<Contents completed={item.completed}>{item.text}</Contents>
// 완료된 경우애는 수정 버튼 렌더링 x
{item.completed || <IconButton type={images.update} />}
<IconButton
type={images.delete}
id={item.id}
onPressOut={deleteTask}
/>
</Container>
)
}
Task.propTypes = {
text: PropTypes.string.isRequired,
deleteTask: PropTypes.func.isRequired,
toggleTask: PropTypes.func.isRequired,
}
export default Task
수정 기능
const _updateTask = item => {
    const currentTasks = Object.assign({}, tasks);
  	// id에 해당하는 항목을 item으로 덮어씌운다
    currentTasks[item.id] = item;
    setTasks(currentTasks);
}
const Task = ({item, deleteTask, toggleTask, updateTask}) => {
const [isEditing, setIsEditing] = useState(false);
const [text, setText] = useState(item.text);
const _handleUpdateButtonPress = () => {
setIsEditing(true);
}
const _onSubmitEditing = () => {
if (isEditing) {
const editedTask = Object.assign({}, item, {text});
setIsEditing(false);
updateTask(editedTask);
}
}
return isEditing ? (
<Input
value={text}
onChangeText={text => setText(text)}
onSubmitEditing={_onSubmitEditing}
/>
):(
<Container>
<IconButton
type={item.completed ? images.completed : images.uncompleted}
id={item.id}
onPressOut={toggleTask}
completed={item.complted}
/>
<Contents completed={item.completed}>{item.text}</Contents>
{item.completed || (
<IconButton
type={images.update}
onPressOut={_handleUpdateButtonPress}
/>
)}
<IconButton
type={images.delete}
id={item.id}
onPressOut={deleteTask}
/>
</Container>
)
}
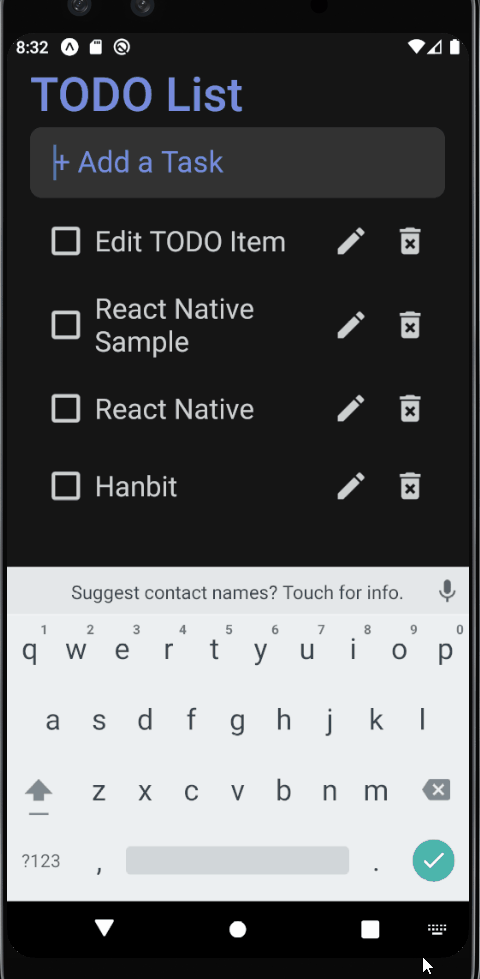
입력 취소하기
입력하는 중에 다른 영역을 클릭하면 입력 중인 내용이 사라지고 취소되도록 한다
// 새로운 할 일을 작성할 때

const _onBlur = () => {
    setNewTask('');
}
// 할 일을 수정 중일 때
const _onBlur = () => {
if (isEditing) {
setIsEditing(false);
setText(item.text);
}
}
부가 기능
데이터 저장하기
AsyncStorage를 이용해서 로컬에 데이터를 저장하고 불러올 수 있다
// 설치

npm install @react-native-async-storage/async-storage
import AsyncStorage from '@react-native-async-storage/async-storage';
const _saveTasks = async tasks => {
try {
// AsyncStorage는 문자열만 저장 가능
await AsyncStorage.setItem('tasks', JSON.stringify(tasks));
setTasks(tasks);
} catch(e) {
console.error(e);
}
}
const _addTask = () => {
const ID = Date.now().toString();
const newTaskObject = {
[ID]:{id: ID, text: newTask, completed: false},
};
setNewTask('');
_saveTasks({...tasks, ...newTaskObject}); // 데이터 저장
}
const _deleteTask = id => {
const currentTasks = Object.assign({}, tasks);
delete currentTasks[id];
_saveTasks(currentTasks); // 데이터 저장
}
const _toggleTask = id => {
const currentTasks = Object.assign({}, tasks);
currentTasks[id]['completed'] = !currentTasks[id]['completed'];
_saveTasks(currentTasks); // 데이터 저장
}
const _updateTask = item => {
const currentTasks = Object.assign({}, tasks);
currentTasks[item.id] = item;
_saveTasks(currentTasks); // 데이터 저장
}데이터 불러오기
startAsync: AppLoading 컴포넌트가 동작하는 동안 실행될 함수onFinish: startAsync가 완료되면 실행할 함수onError: startAsync에서 오류가 발생하면 실행할 함수
import AppLoading from 'expo-app-loading';

const _loadTasks = async () => {
    const loadedTasks = await AsyncStorage.getItem('tasks');
    setTasks(JSON.parse(loadedTasks || '{}'));
}

return isReady? (
    <ThemeProvider theme={theme}>
  	...
    </ThemeProvider>
) : (
    <AppLoading
        startAsync={_loadTasks} // 데이터 불러오는 동안 로딩
        onFinish={() => setIsReady(true)} // 데이터 다 불러오면 화면 렌더링
        onError={console.error}
    />
)
로딩 화면과 아이콘
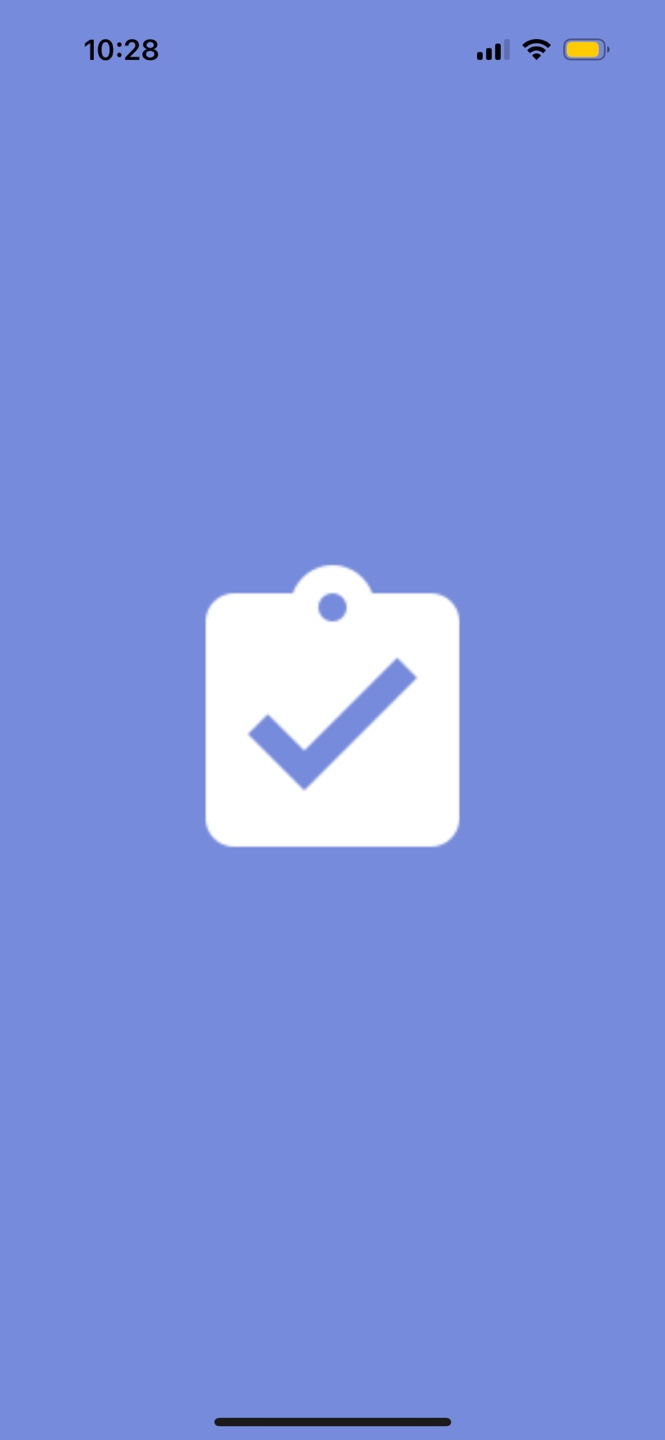
app.json을 보면 아이콘과 로딩 화면에 사용되는 이미지를 확인할 수 있다
splash.png: 로딩 화면 아이콘icon.png: 애플리케이션 아이콘
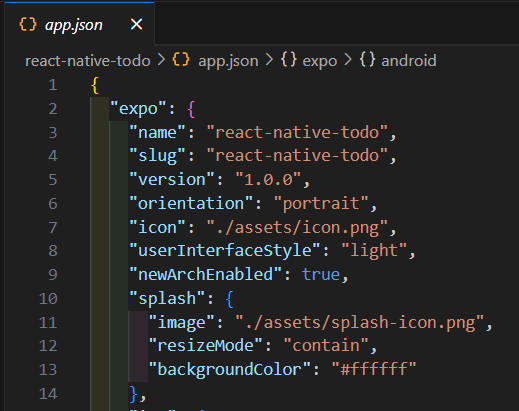
 원하는 사진을 가져와서 파일명을 해당하는 아이콘에 맞게 변경해주면 된다
깃허브
https://github.com/nakyeongg/react-native-todo
참고
처음 배우는 리액트 네이티브