메인 화면
- 로그인, 회원가입: 인증 상태가 해제되면 렌더링되어야 함
- 그 외: 인증 후 렌더링되어야 함
내비게이션
MainStack 내비게이션
// src/screens/ChannelCreatin.js

import React from 'react'
import styled from 'styled-components/native'
import { Button, Text } from 'react-native'
const Container = styled.View`
    flex: 1;
    background-color: ${({theme}) => theme.background};
`

const ChannelCreation = ({navigatin}) => {
    return (
        <Container>
            <Text style={{fontSize: 24}}>Channel Creation</Text>
            <Button title="Channel" onPress={() => navigation.navigate('Channel')}/>
        </Container>
    )
}

export default ChannelCreation
// src/screens/Channel.js
import React from 'react'
import { Text } from 'react-native'
import styled from 'styled-components/native'
const Container = styled.View`
flex: 1;
background-color: ${({theme}) => theme.background};
`
const Channel = () => {
return (
<Container>
<Text style={{fontSize: 24}}>Chaeenl</Text>
</Container>
)
}
export default Channel// src/navigations/MainStack.js
import React from 'react'
import { ThemeContext } from 'styled-components'
import { createStackNavigator } from '@react-navigation/stack'
import { Channel, ChannelCreation } from '../screens'
const Stack = createStackNavigator();
const MainStack = () => {
const theme = useContext(ThemeContext);
return (
<Stack.Navigator
screenOption={{
headerTitleAlign: 'center',
headerTintColor: theme.headerTintColor,
cardStyle: {backgroundColor: theme.background},
headerBackTitleVisible: false,
}}
>
<Stack.Screen name='Channel Creation' component={ChannelCreation}/>
<Stack.Screen name='Channel' component={Channel}/>
</Stack.Navigator>
)
}
export default MainStack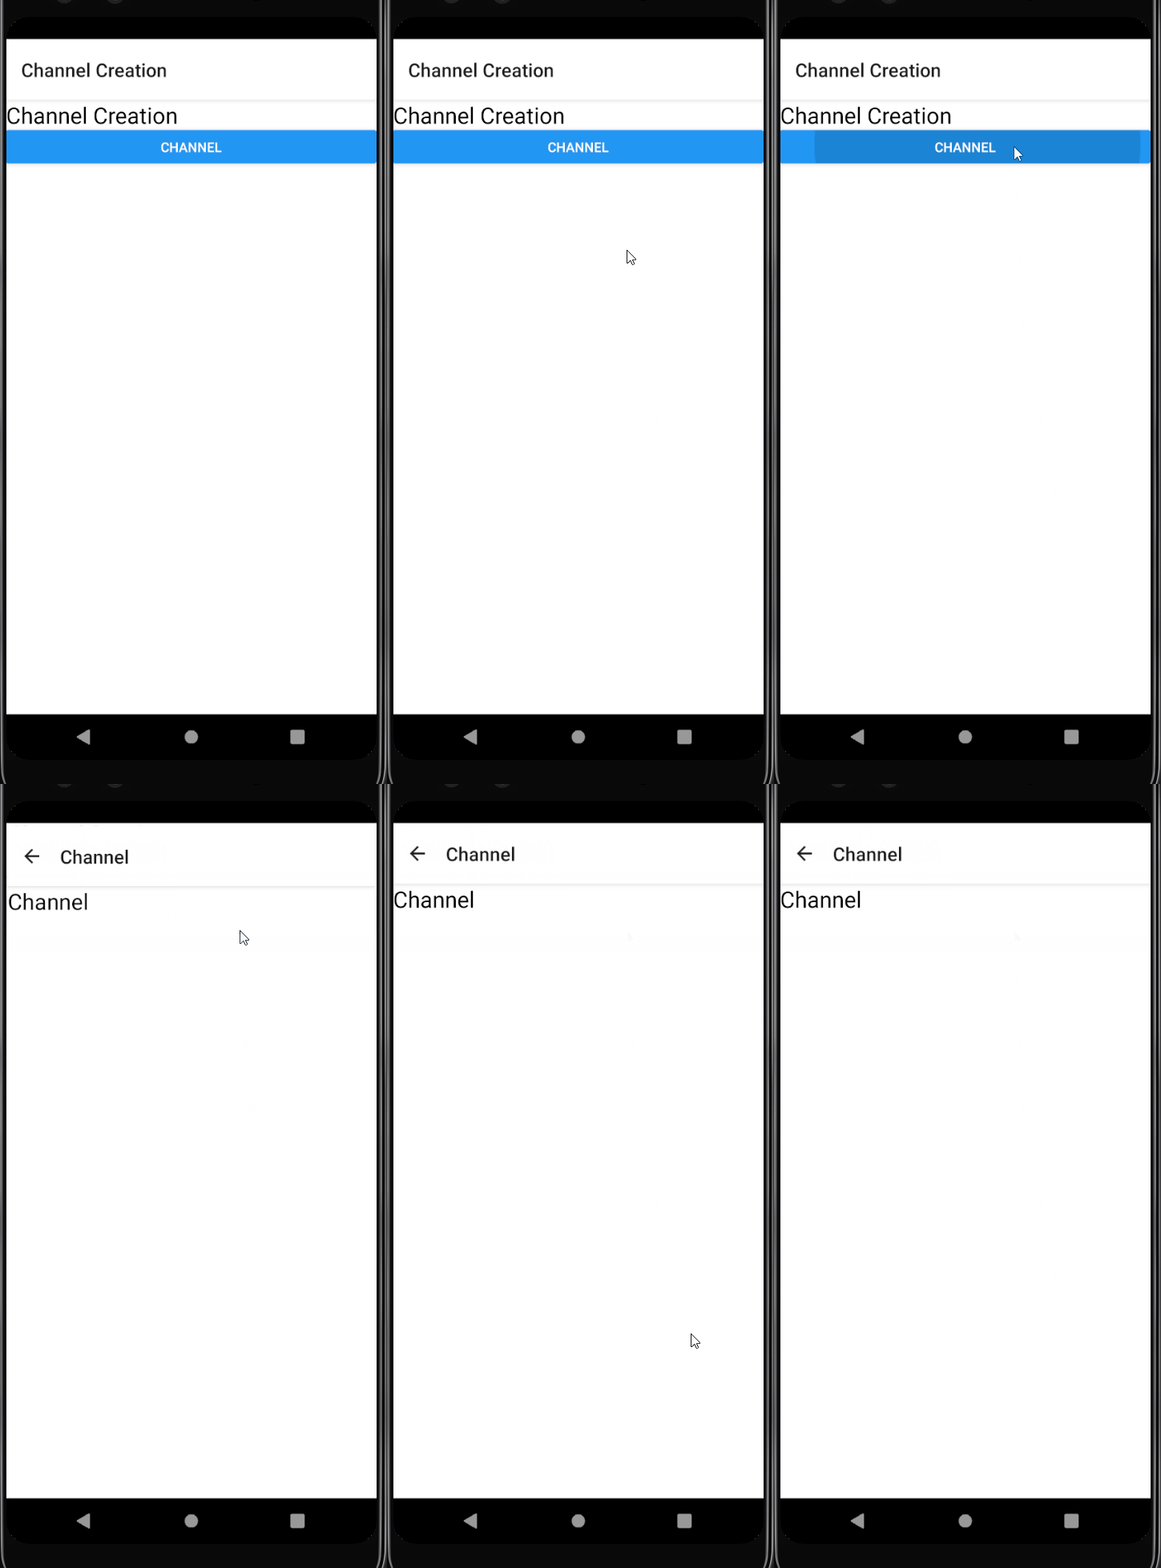
MainTab 내비게이션
// src/navigations/MainTab.js

import React from 'react'
import { ChannelList, Profile } from '../screens'
import { createBottomTabNavigator } from '@react-navigation/bottom-tabs'

const Tab = createBottomTabNavigator();

const MainTab = () => {
    return (
        <Tab.Navigator  screenOptions={{ headerShown: false }}>
            <Tab.Screen name='Channel List' component={ChannelList}/>
            <Tab.Screen name='Profile' component={Profile}/>
        </Tab.Navigator>
    )
}

export default MainTab
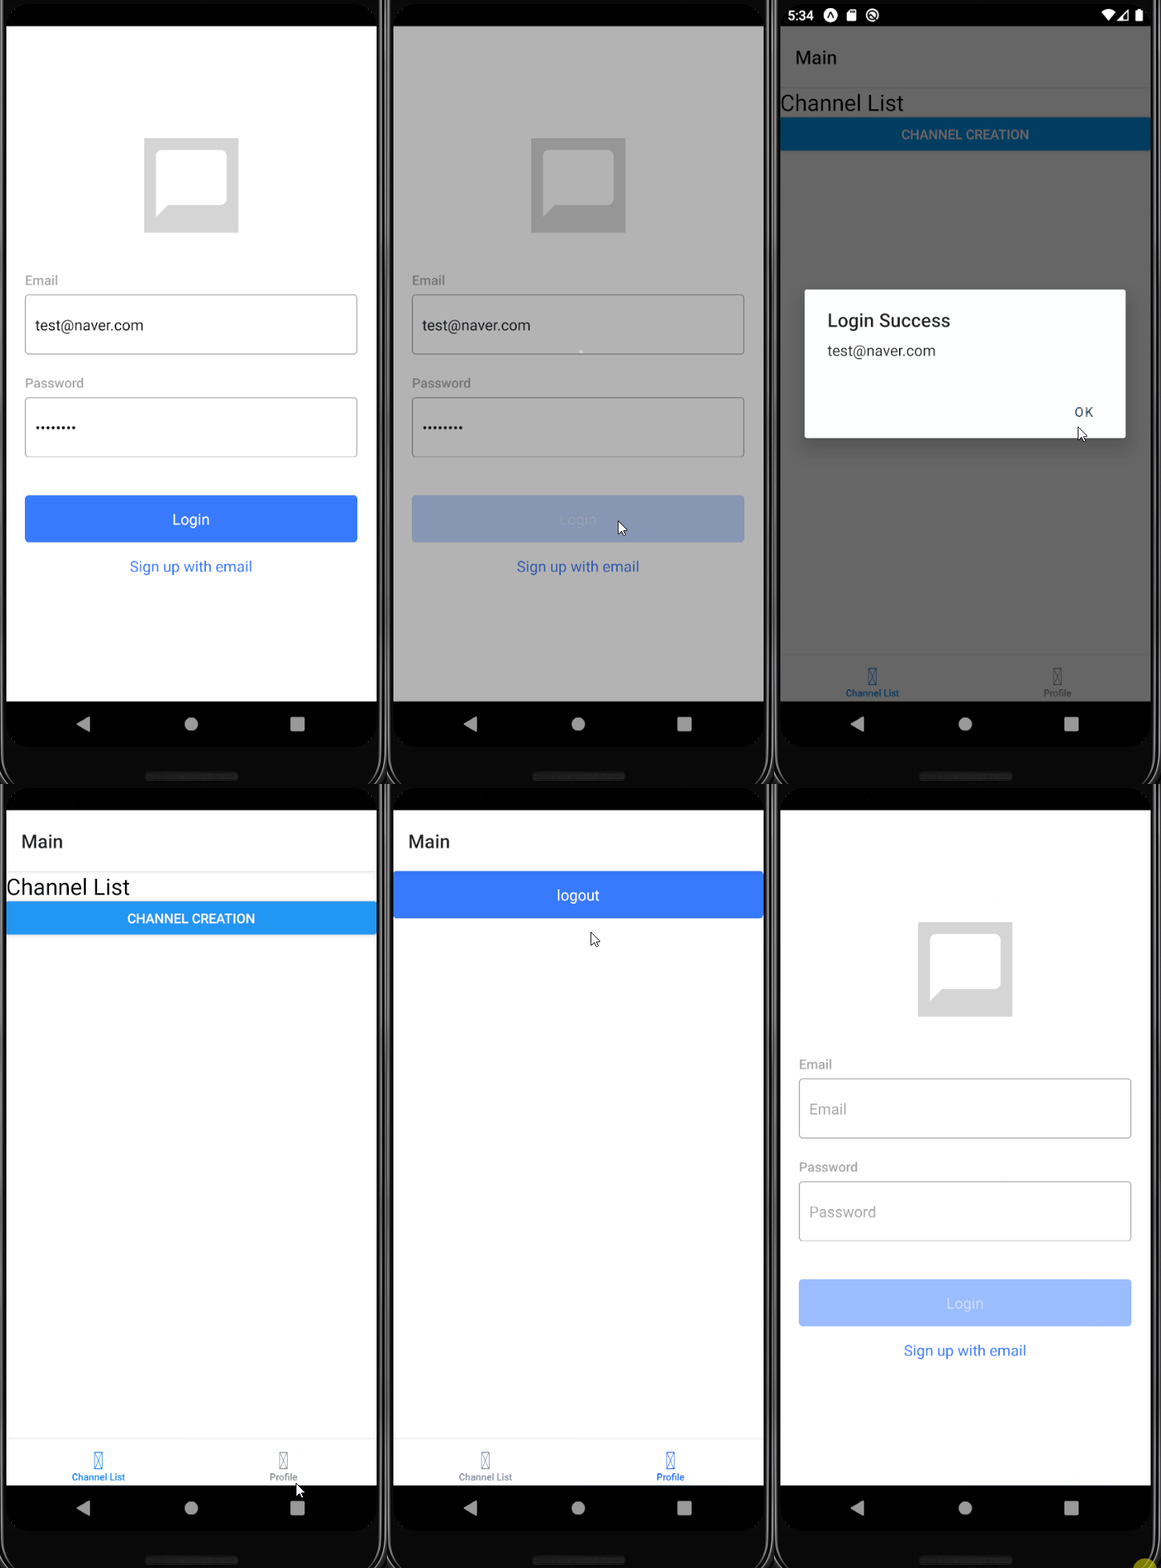
인증과 화면 전환
- AuthStack 내비게이션: 애플리케이션 시작될 때, 로그아웃해서 인증 사라질 때
- MainStack 내비게이션: 로그인 or 회원가입으로 인증 성공했을 때
여러 곳에서 상태 변경할 때는 Context API 사용!
// src/contexts/User.js

import React, { useState, createContext } from "react";

const UserContext = createContext({
    user: {email: null, uid: null},
    dispatch: () => {},
})

const UserProvider = ({children}) => {
    const [user, setUser] = useState({});
    const dispatch = ({email, uid}) => {
        setUser({email, uid});
    }
    const value = {user, dispatch};
    return <UserContext.Provider value={value}>{children}</UserContext.Provider>
}

export { UserContext, UserProvider };{user?.uid && user?.email ? <MainStack/> : <AuthStack/>}user에 id와 email 값의 유무에 따라 인증 유무를 판단해서 렌더링할 컴포넌트를 다르게 설정한다
인증에 성공한 후 뒤로 가기 버튼 누르면 로그인 화면으로 돌아가지 x
로그아웃
export const logout = async () => {
    return await Auth.signOut();
}
프로필 화면
탭 버튼 변경
<Tab.Screen
    name='Channel List'
    component={ChannelList}
    options={{
        tabBarIcon: ({focused}) =>
            TabBarIcon({
                focused,
                name: focused ? 'chat-bubble' : 'chat-bubble-outline',
            }),
    }}
/>
헤더 변경
index: 현재 렌더링되는 화면의 인덱스 (Screen 컴포넌트 순서를 기준으로 0부터 지정됨)
useEffect(() => {
    const titles = route.state?.routeNames || ['Channels'];
    const index = route.state?.index || 0;
    navigation.setOptions({headerTitle: titles[index]})
}, [route])
route값이 변경될 때마다 index값을 확인하고 지정된 name으로 렌더링되게 한다
그리고 route의 state는 첫 렌더링 때는 전달되지 않기 때문에 state 없는 경우에는 첫 화면의 이름이 렌더링되도록 한다
채널 생성 화면
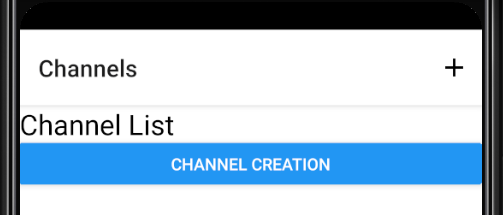
채널 생성 버튼
navigation.setOptions({
    headerTitle: titles[index],
    headerRight: () =>
        index === 0 && (
            <MaterialIcons
                name='add'
                size={26}
                style={{margin: 10}}
                onPress={() => navigation.navigate('Channel Creation')}
            />
        )
})
채널 생성
import React, { useContext, useEffect, useRef, useState } from 'react'
import styled from 'styled-components/native'
import { Input, Button } from '../components'
import { KeyboardAwareScrollView } from 'react-native-keyboard-aware-scroll-view'

const Container = styled.View`
    flex: 1;
    justify-content: center;
    align-items: center;
    background-color: ${({theme}) => theme.background};
    padding: 0 20px;
`
const ErrorText = styled.Text`
    align-items: flex-start;
    width: 100%;
    height: 20px;
    margin-bottom: 10px;
    line-height: 20px;
    color: ${({theme}) => theme.errorText};
`

const ChannelCreation = ({ navigation }) => {
    const [title, setTitle] = useState('');
    const [description, setDescription] = useState('');
    const descriptionRef = useRef();
    const [errorMessage, setErrorMessage] = useState('');
    const [disabled, setDisabled] = useState(true);

    useEffect(() => {
        setDisabled(!(title && description));
    }, [title, description])

    const _handletitleChange = title => {
        setTitle(title);
        setErrorMessage(title.trim() ? '' : 'Please verify your email.');
    }
    const _handleCreateButtonPress = () => {};

    return (
        <KeyboardAwareScrollView
            contentContainerStyle={{flex: 1}}
            extraScrollHeight={20}
        >
            <Container>
                <Input
                    label="Title"
                    value={title}
                    onChangeText={_handletitleChange}
                    onSubmitEditing={() => {
                        setTitle(title.trim())
                        descriptionRef.current.focus();
                    }}
                    onBlur={() => setTitle(title.trim())}
                    placeholder="Title"
                    returnKeyType="next"
                    maxLength={20}
                />
                <Input
                    ref={descriptionRef}
                    label="Description"
                    value={description}
                    onChangeText={text => setDescription(text)}
                    onSubmitEditing={() => {
                        setDescription(description.trim())
                        _handleCreateButtonPress
                    }}
                    onBlur={() => setDescription(description.trim())}
                    placeholder="Description"
                    returnKeyType="done"
                    maxLength={40}
                />
                <ErrorText>{errorMessage}</ErrorText>
                <Button
                    title="Create"
                    onPress={_handleCreateButtonPress}
                    disabled={disabled}
                />
            </Container>
        </KeyboardAwareScrollView>
    )
}

export default ChannelCreation
import { getFirestore, doc, collection } from 'firebase/firestore';
const DB = getFirestore(app);
export const createChannel = async ({title, description}) => {
const newChannelRef = doc(collection(DB, 'channels'));
const id = newChannelRef.id;
const newChannel = {
id,
title,
description,
createAt: Date.now(),
};
await doc(collection(DB, 'channels'));
return id;
}
채널 목록 화면
FlatList 컴포넌트
ScrollView 컴포넌트와는 달리 화면에 적절한 양의 데이터만 렌더링하고 스크롤의 이동에 맞춰 필요한 부분을 추가적으로 렌더링한다
import React, { useContext } from 'react'
import { Button } from 'react-native'
import styled from 'styled-components/native'
import { FlatList } from 'react-native'
import { MaterialIcons } from '@expo/vector-icons';
import { ThemeContext } from 'styled-components';

const Container = styled.View`
    flex: 1;
    background-color: ${({theme}) => theme.background};
`

const ItemContainer = styled.TouchableOpacity`
    flex-direction: row;
    align-items: center;
    border-bottom-width: 1px;
    border-color: ${({theme}) => theme.listBorder};
    padding: 15px 20px;
`

const ItemTextContainer = styled.View`
    flex: 1;
    flex-direction: column;
`

const ItemTitle = styled.Text`
    font-size: 20px;
    font-weight: 600;
`

const ItemDescription = styled.Text`
    font-size: 16px;
    margin-top: 5px;
    color: ${({theme}) => theme.listDescription};
`

const ItemTime = styled.Text`
    font-size: 12px;
    color: ${({theme}) => theme.listTime};
`

const channels = [];
for (let idx=0; idx<1000; idx++) {
    channels.push({
        id: idx,
        title: `title ${idx}`,
        description: `description ${idx}`,
        createAt: idx,
    })
}

const Item = ({item: {id, title, description, createdAt}, onPress}) => {
    const theme = useContext(ThemeContext);
 	console.log(`Item: ${id}`);

    return (
        <ItemContainer onPress={() => onPress({id, title})}>
            <ItemTextContainer>
                <ItemTitle>{title}</ItemTitle>
                <ItemDescription>{description}</ItemDescription>
            </ItemTextContainer>
            <ItemTime>{createdAt}</ItemTime>
            <MaterialIcons
                name='keyboard-arrow-right'
                size={24}
                color={theme.listIcon}
            />
        </ItemContainer>
    )
}

const ChannelList = ({ navigation }) => {
    const _handleItemPress = params => {
        navigation.navigate('Channel', params);
    }

    return (
        <Container>
            <FlatList
                keyExtractor={item => item['id'].toString()}
                data={channels}
                renderItem={({item}) => (
                    <Item item={item} onPress={_handleItemPress} />
                )}
            />
            <Button
                title='Channel Creation'
                onPress={() => navigation.navigate('Channel Creation')}
            />
        </Container>
    )
}

export default ChannelList
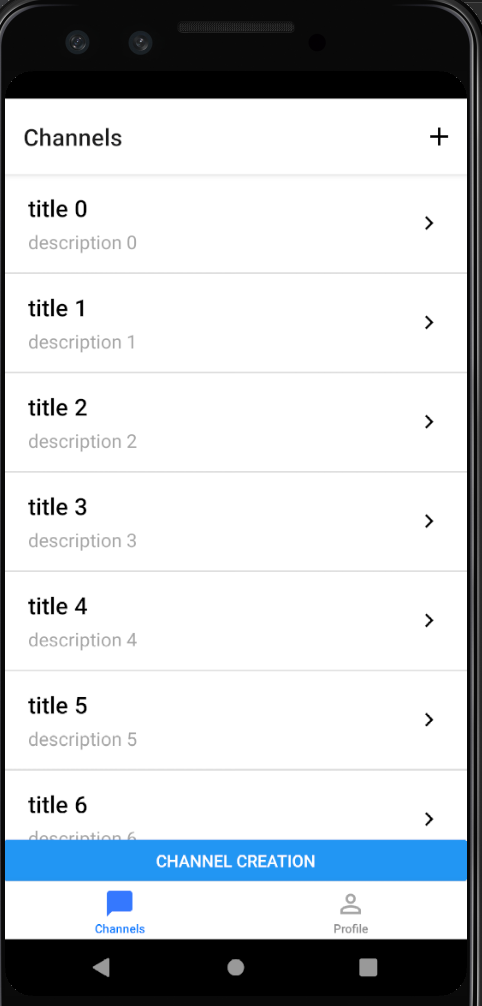
windowSize
터미널에서 로그를 확인해보면 FlatList 컴포넌트 특징 때문에 데이터가 일부만 렌더링된 것을 알 수 있다
렌더링되는 데이터 수는 sindowSize 속성에 의해 결정되기 때문에 화면 크기마다 렌더링 항목 수 달라진다
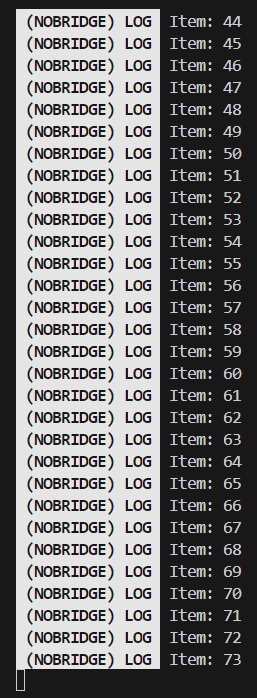
렌더링 수는 아래의 식을 만족한다
현재 화면 + 이전 데이터 + 이후 데이터windowSize가 값을 작게 설정하면?
- 데이터 양 감소
- 메모리 소비 감소
- 빠른 스크롤 -> 빈 공간 생길 가능성 o
단점 = 데이터가 여러번 렌더링된다
React.memo 사용하면 불필요한 반복 작업을 줄일 수 있다
const Item = React.memo(
    ({item: {id, title, description, createdAt}, onPress}) => {
        const theme = useContext(ThemeContext);
        console.log(`Item: ${id}`);

        return (
            <ItemContainer onPress={() => onPress({id, title})}>
                <ItemTextContainer>
                    <ItemTitle>{title}</ItemTitle>
                    <ItemDescription>{description}</ItemDescription>
                </ItemTextContainer>
                <ItemTime>{createdAt}</ItemTime>
                <MaterialIcons
                    name='keyboard-arrow-right'
                    size={24}
                    color={theme.listIcon}
                />
            </ItemContainer>
        )
    }
)
채널 데이터 수신
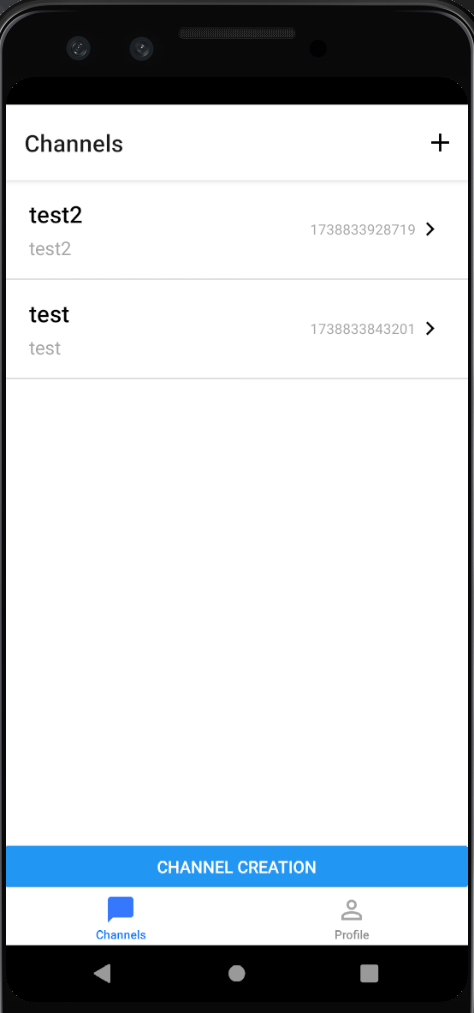
파이어베이스의 데이터베이스로부터 데이터를 받아 채널 목록을 렌더링한다
import { DB } from '../utils/firebase'
import { getFirestore, onSnapshot, collection, query, orderBy } from 'firebase/firestore';

const [channels, setChannels] = useState([]);

useEffect(() => {
    const channelsRef = collection(db, 'channels');
    const q = query(channelsRef, orderBy('createdAt', 'desc'));

    const unsubscribe = onSnapshot(q, (snapshot) => {
        const list = [];
        snapshot.forEach((doc) => {
            list.push(doc.data());
        });
        setChannels(list);
    });

    return () => unsubscribe();
}, []);

const _handleItemPress = params => {
    navigation.navigate('Channel', params);
}
moment 라이브러리
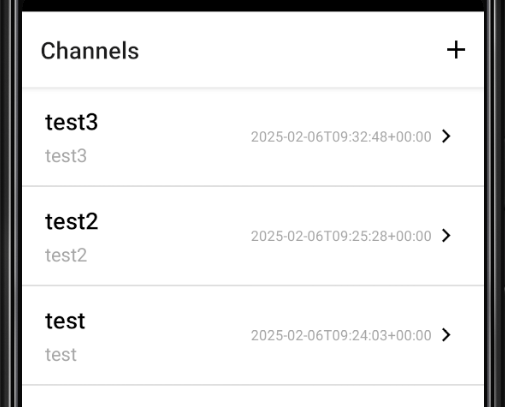
시간과 날짜에 관련된 함수를 쉽게 사용할 수 있는 라이브러리이다
이를 통해 타임스탬프를 익숙한 시간 형태로 변경해본다
npm install momentconst getDataOrTime = ts => {
const now = moment().startOf('day');
const target = moment(ts).startOf('day');
return moment(ts).format(now.diff(target, 'days' > 0 ? 'MM/DD' : 'HH:mm'));
}
채널 화면
메시지 데이터
메시지 데이터를 실시간으로 받기 위해선 onSnapshot 함수를 통해 수신 대기 상태로 수정해야 한다
메시지 전송
export const createMessage = async ({ channelId, text }) => {
    const messageRef = doc(collection(DB, 'channels', channelId, 'messages')); // 메시지 컬렉션 추가
    await setDoc(messageRef, {
        text,
        createdAt: Date.now(),
    });
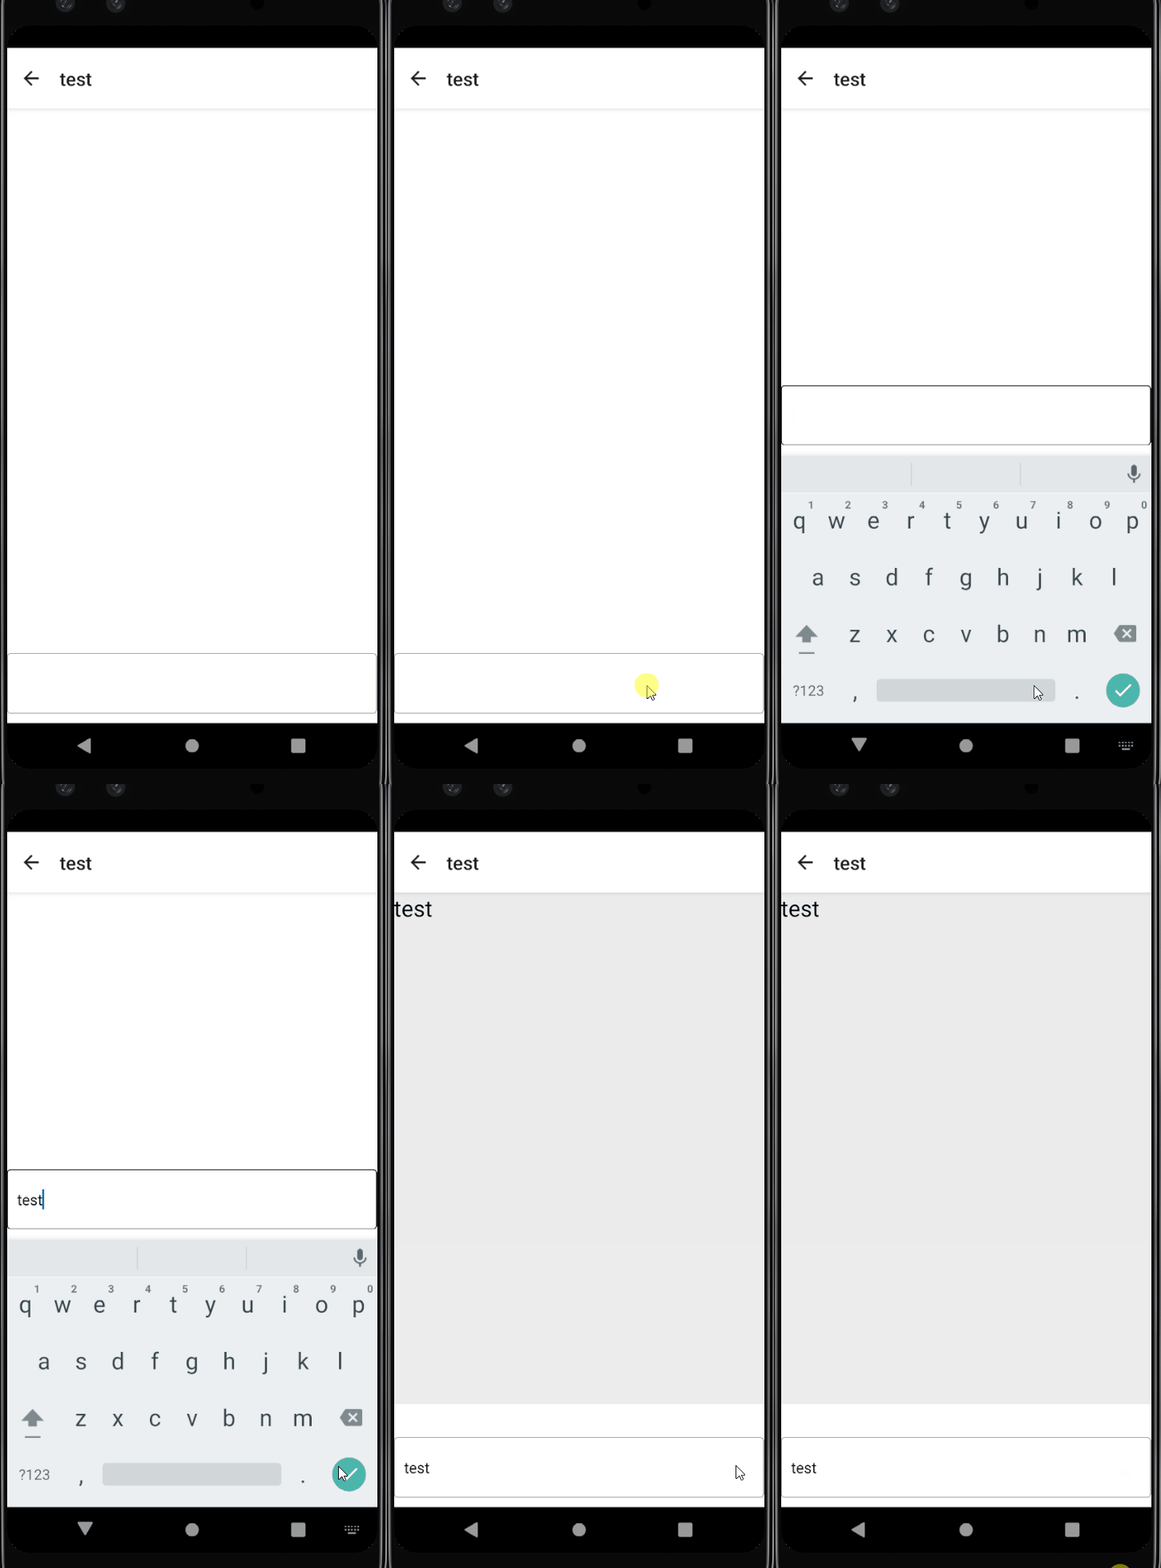
}<Input
value={text}
onChangeText={text => setText(text)}
onSubmitEditing={() => createMessage({channelId: params.id, text})}
/>
GiftedChat 컴포넌트
채팅 애플리케이션은 최신 데이터가 아래에 있다 따라서 스크롤 방향을 위로 가도록 해야한다
- FlatList 컴포넌트의 inverted 속성
<FlatList
    keyExtractor={item => item['id']}
    data={message}
    renderItem={({item}) => (
        <Text style={{fontSize: 24}}>{item.text}</Text>
    )}
    inverted={true}
/>- GiftedChat 컴포넌트
npm install react-native-gifted-chat// src/screens/Channel.js
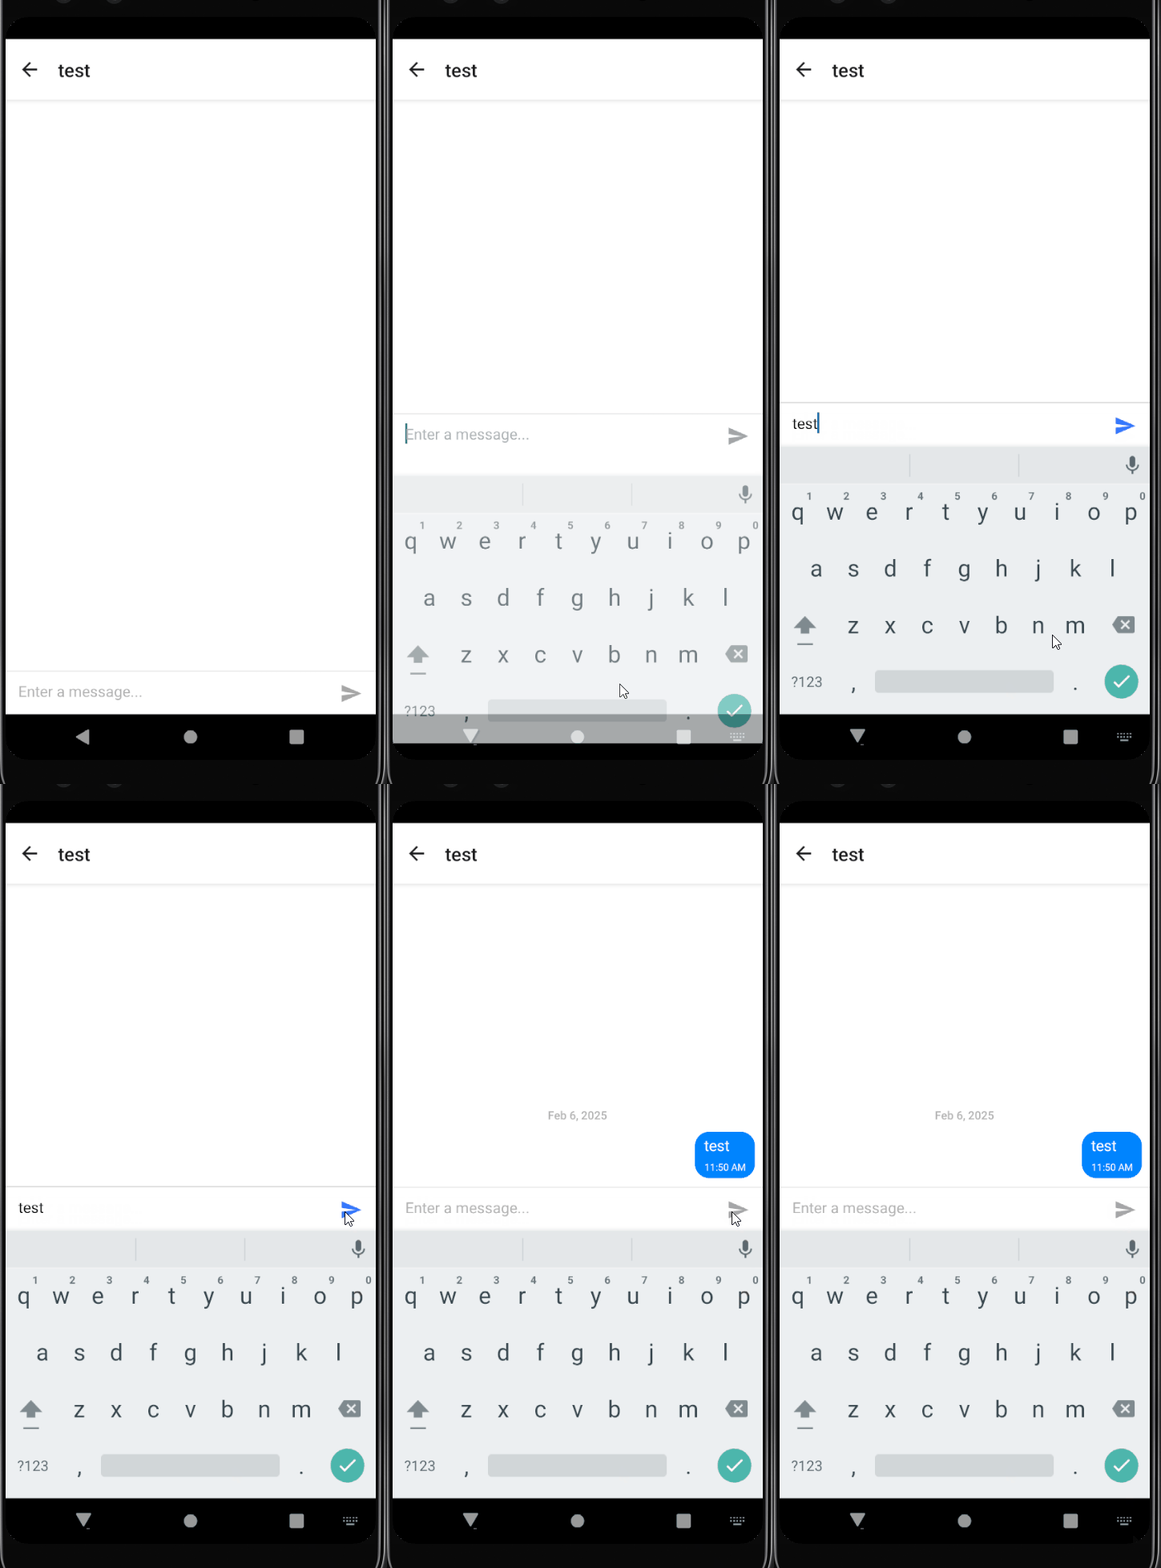
<GiftedChat
listViewProps={{
style: {backgroundColor: theme.background},
}}
placeholder="Enter a message..."
messages={messages}
user={{ _id: uid, name, avatar: photoUrl }}
onSend={_handleMessageSend}
alwaysShowSend={true}
textInputProps={{
autoCapitalize: 'none',
autoCorrect: false,
textContentType: 'none',
underlineColorAndroid: 'transparent',
}}
multiline={false}
renderUsernameOnMessage={true}
scrollToBottom={true}
renderSend={props => <SendButton {...props} />}
/>메시지 생성
export const createMessage = async ({ channelId, message }) => {
    const messageRef = doc(collection(DB, 'channels', channelId, 'messages'));
    await setDoc(messageRef, {
        ...message,
        createdAt: Date.now(),
    });
}
참고
처음 배우는 리액트 네이티브