들어가며
나는 테스트코드를 통해서 API 문서화를 진행해왔다. 그런데 문득 생각이 들었다. REST Docs는 어쩌면 백엔드 개발자한테만 좋은거 아닐까? Swagger를 쓰는게 프론트엔드 입장에서는 실제로 테스트도 해볼 수 있고, UI도 예쁘니 더 좋은거 아닐까? 라는 생각을 해봤다.
OpenApi Specification(OAS) 기반 API 문서화
Swagger 팀이 SmartBear Software에 합류하면서 Swagger Spec.이 OpenApi Spec.으로 명칭이 바뀌었고 오늘날에는 RESTful API 스펙에 대한 사실상의 표준으로서 활용되고 있다고 합니다. Swagger-UI는 이 OAS를 해석하여 API 스펙을 시각화해줍니다. 또한 Postman, Paw 같은 API Client들도 OAS를 지원하고 있어 OAS의 활용도가 다양한 것을 알 수 있습니다.
구현
1. Swagger UI static 파일 추가
1.1 Swagger UI 정적 파일 설치
Swagger UI의 의존성이 필요하지 않기 때문에 Swagger UI의 정적파일을 설치해야 한다.
Swagger UI Installation 에서 zip 파일을 받은 후 /dist 폴더 내부의 필요한 파일들만 복사해주면 된다.

우선적으로 모든 파일을 복사하여 저장 하면 된다. 파일들을 원하는 위치에 저장해주면 되는데 나의 경우 resources/static 하위에 저장하였다.
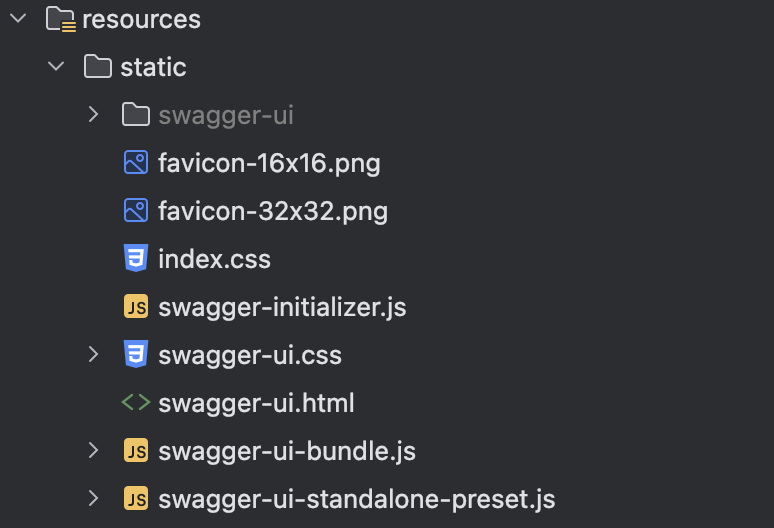
그리고 /dist 폴더에 있던 index.html을 swagger-ui.html로 이름을 변경해주고 조금의 코드를 변경해야 한다.
<!-- HTML for static distribution bundle build -->
<!DOCTYPE html>
<html lang="en">
<head>
  <meta charset="UTF-8">
  <title>Swagger UI</title>
  <link rel="stylesheet" type="text/css" href="/static/swagger-ui.css" />
  <link rel="stylesheet" type="text/css" href="/static/index.css" />
  <link rel="icon" type="image/png" href="/static/favicon-32x32.png" sizes="32x32" />
  <link rel="icon" type="image/png" href="/static/favicon-16x16.png" sizes="16x16" />
</head>

<body>
<div id="swagger-ui"></div>
<script src="/static/swagger-ui-bundle.js" charset="UTF-8"> </script>
<script src="/static/swagger-ui-standalone-preset.js" charset="UTF-8"> </script>
<script src="/static/swagger-initializer.js" charset="UTF-8"> </script>
</body>
</html>
// swagger-initializer.js
window.onload = function() {
//<editor-fold desc="Changeable Configuration Block">
// the following lines will be replaced by docker/configurator, when it runs in a docker-container
window.ui = SwaggerUIBundle({
url: "/static/swagger-ui/openapi3.yaml", // 생성할 yaml 파일의 위치를 넣으면 됨
dom_id: '#swagger-ui',
deepLinking: true,
presets: [
SwaggerUIBundle.presets.apis,
SwaggerUIStandalonePreset
],
plugins: [
SwaggerUIBundle.plugins.DownloadUrl
],
layout: "StandaloneLayout"
});
//</editor-fold>
};이와 같이 코드를 변경해두면 기본적인 Swagger 정적 파일 세팅은 끝이났다.
1.2 Static Routing 설정
그리고 static Routing을 해주어야 한다. 정적 파일 경로에 맞게 WebMvcConfigurer의 addResourceHandlers() 메서드를 작성한다.
@Configuration
public class StaticRoutingConfig implements WebMvcConfigurer {

    @Override
    public void addResourceHandlers(ResourceHandlerRegistry registry) {
        registry.addResourceHandler("/static/**")
            .addResourceLocations("classpath:/static/");
        registry.addResourceHandler("swagger-ui.html")
            .addResourceLocations("classpath:/static/swagger-ui/");
    }

}
2. OAS 생성을 위한 restdocs-api-spec
Spring REST Docs의 extension을 포함하는 restdocs-api-spec과 MockMvc wrapper를 제공하는 restdocs-api-spec-mockmvc를 이용해서 OAS 파일을 생성할 수 있다.
오픈 소스로 제공 되고 있기 때문에 gradle에 의존성을 추가해주면 된다.
restdocs-api-spec 깃허브
README의 gradle 설정법이 자세히 나와있으니 그대로 추가해주면 된다.
plugins {
    id 'com.epages.restdocs-api-spec' version '0.18.2'
}
dependencies {
    testImplementation 'com.epages:restdocs-api-spec-mockmvc:0.18.2'
}
openapi3 {
    server = 'https://localhost:8080'
    title = 'My API'
    description = 'My API description'
    version = '0.1.0'
    format = 'yaml'
}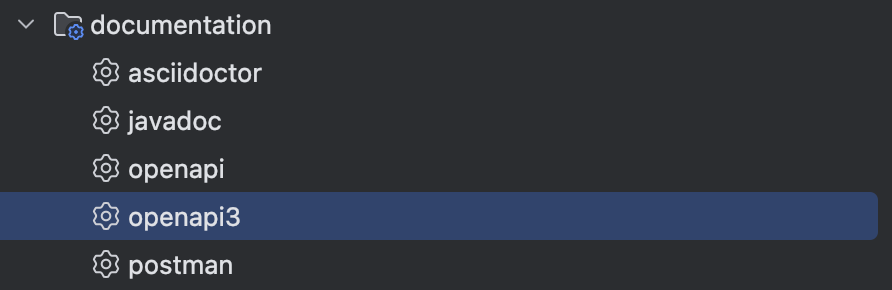
의존성을 추가하면 gradle의 documentation에 openapi, openapi3, postman이 추가 된 것을 알 수 있다.
이 때 openapi3를 실행 시켜보면 openapi3.yaml이 생성된다.

3. OAS 파일 Swagger로 옮기기
build 내에 존재하는 파일을 static 폴더로 옮기기 위해서 gradle에 작업을 추가해야 한다.
tasks.register('copyOasToSwagger', Copy) {
    delete 'src/main/resources/static/swagger-ui/openapi3.yaml' // 기존 OAS 파일 삭제
    from "$buildDir/api-spec/openapi3.yaml" // 복제할 OAS 파일 지정
    into 'src/main/resources/static/swagger-ui/.' // 타겟 디렉터리로 파일 복제
    dependsOn 'openapi3' // openapi3 Task가 먼저 실행되도록 설정
}

bootJar {
    dependsOn copyOasToSwagger
}
gradle에 위 코드를 추가해주면 build시에 swagger를 생성 할 수 있도록 변경 할 수 있다.
4. MockMvcRestDocumentationWrapper 사용하기
아래의 코드는 기존의 REST Docs를 사용할 때 사용하던 코드이다.
    @DisplayName("신규 상품을 등록하는 API")
    @Test
    void createProduct() throws Exception {
        ProductCreateRequest request = ProductCreateRequest.builder()
            .name("스타벅스 원두")
            .category("원두")
            .price(50000L)
            .description("에티오피아산")
            .build();

        given(productService.createProduct(any(ProductCreateServiceRequest.class)))
            .willReturn(ProductResponse.builder()
                .id(1L)
                .name("스타벅스 원두")
                .category("원두")
                .price(50000L)
                .description("에티오피아산")
                .build());

        mockMvc.perform(
                post("/api/v1/products")
                    .content(objectMapper.writeValueAsString(request))
                    .contentType(MediaType.APPLICATION_JSON)
            )
            .andDo(print())
            .andExpect(status().isOk())
            .andDo(document("product-create",
                preprocessRequest(prettyPrint()),
                preprocessResponse(prettyPrint()),
                requestFields(
                    fieldWithPath("name").type(JsonFieldType.STRING)
                        .description("상품 이름")
                        .attributes(field("constraints", "최대 20자")),
                    fieldWithPath("category").type(JsonFieldType.STRING)
                        .description("상품 카테고리")
                        .attributes(field("constraints", "최대 50자")),
                    fieldWithPath("price").type(JsonFieldType.NUMBER)
                        .description("상품 가격"),
                    fieldWithPath("description").type(JsonFieldType.STRING)
                        .description("상품 상세 설명")
                        .attributes(field("constraints", "최대 500자"))
                ),
                responseFields(
                    fieldWithPath("code").type(JsonFieldType.NUMBER)
                        .description("코드"),
                    fieldWithPath("status").type(JsonFieldType.STRING)
                        .description("상태"),
                    fieldWithPath("message").type(JsonFieldType.STRING)
                        .description("메시지"),
                    fieldWithPath("data").type(JsonFieldType.OBJECT)
                        .description("응답 데이터"),
                    fieldWithPath("data.id").type(JsonFieldType.NUMBER)
                        .description("상품 ID"),
                    fieldWithPath("data.name").type(JsonFieldType.STRING)
                        .description("상품 이름"),
                    fieldWithPath("data.category").type(JsonFieldType.STRING)
                        .description("상품 카테고리"),
                    fieldWithPath("data.price").type(JsonFieldType.NUMBER)
                        .description("상품 가격"),
                    fieldWithPath("data.description").type(JsonFieldType.STRING)
                        .description("상품 상세 설명")
                )
            ));
    }
이 때 딱 한나만 바꿔주면 된다. document 하는곳 앞에 MockMvcRestDocumentationWrapper를 붙여주면 된다.
    @DisplayName("신규 상품을 등록하는 API")
    @Test
    void createProduct() throws Exception {
        ProductCreateRequest request = ProductCreateRequest.builder()
            .name("스타벅스 원두")
            .category("원두")
            .price(50000L)
            .description("에티오피아산")
            .build();

        given(productService.createProduct(any(ProductCreateServiceRequest.class)))
            .willReturn(ProductResponse.builder()
                .id(1L)
                .name("스타벅스 원두")
                .category("원두")
                .price(50000L)
                .description("에티오피아산")
                .build());

        mockMvc.perform(
                post("/api/v1/products")
                    .content(objectMapper.writeValueAsString(request))
                    .contentType(MediaType.APPLICATION_JSON)
            )
            .andDo(print())
            .andExpect(status().isOk())
            .andDo(MockMvcRestDocumentationWrapper.document("product-create",
                preprocessRequest(prettyPrint()),
                preprocessResponse(prettyPrint()),
                requestFields(
                    fieldWithPath("name").type(JsonFieldType.STRING)
                        .description("상품 이름")
                        .attributes(field("constraints", "최대 20자")),
                    fieldWithPath("category").type(JsonFieldType.STRING)
                        .description("상품 카테고리")
                        .attributes(field("constraints", "최대 50자")),
                    fieldWithPath("price").type(JsonFieldType.NUMBER)
                        .description("상품 가격"),
                    fieldWithPath("description").type(JsonFieldType.STRING)
                        .description("상품 상세 설명")
                        .attributes(field("constraints", "최대 500자"))
                ),
                responseFields(
                    fieldWithPath("code").type(JsonFieldType.NUMBER)
                        .description("코드"),
                    fieldWithPath("status").type(JsonFieldType.STRING)
                        .description("상태"),
                    fieldWithPath("message").type(JsonFieldType.STRING)
                        .description("메시지"),
                    fieldWithPath("data").type(JsonFieldType.OBJECT)
                        .description("응답 데이터"),
                    fieldWithPath("data.id").type(JsonFieldType.NUMBER)
                        .description("상품 ID"),
                    fieldWithPath("data.name").type(JsonFieldType.STRING)
                        .description("상품 이름"),
                    fieldWithPath("data.category").type(JsonFieldType.STRING)
                        .description("상품 카테고리"),
                    fieldWithPath("data.price").type(JsonFieldType.NUMBER)
                        .description("상품 가격"),
                    fieldWithPath("data.description").type(JsonFieldType.STRING)
                        .description("상품 상세 설명")
                )
            ));
    }
문서화 결과
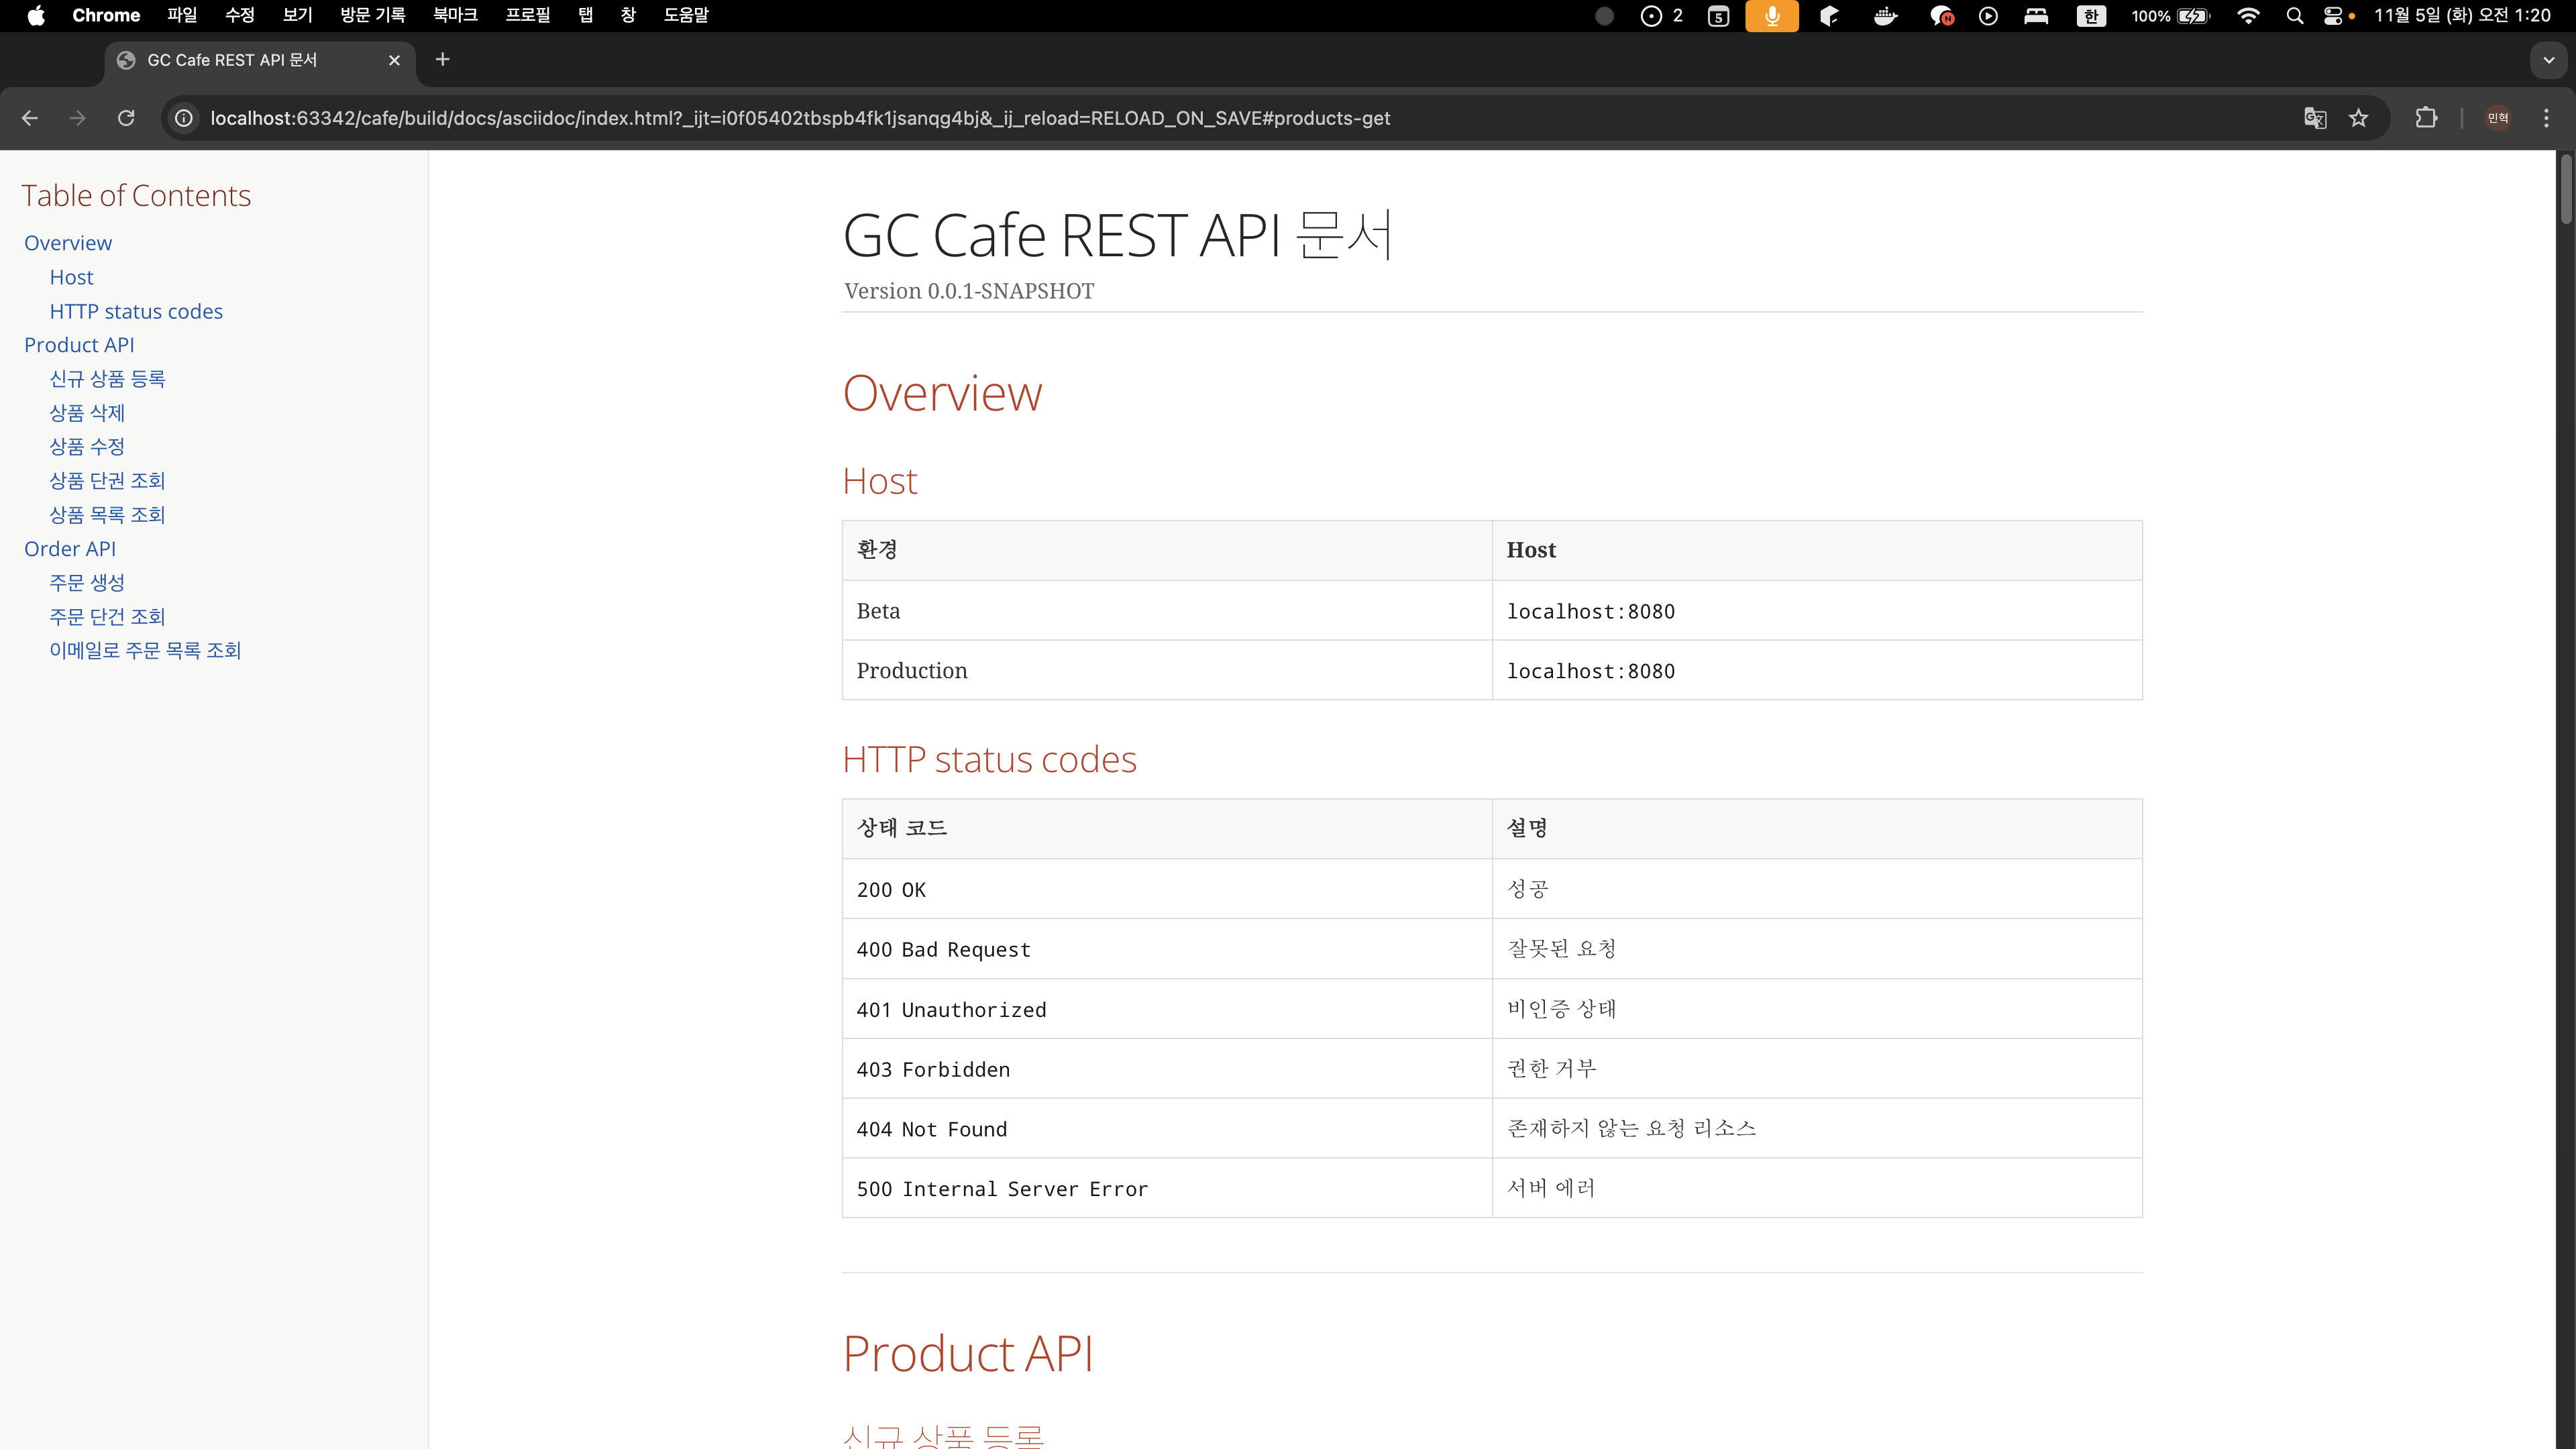
기존에 작성했던 문서화들이 모두 옮겨온 것을 확인 할 수 있었다.
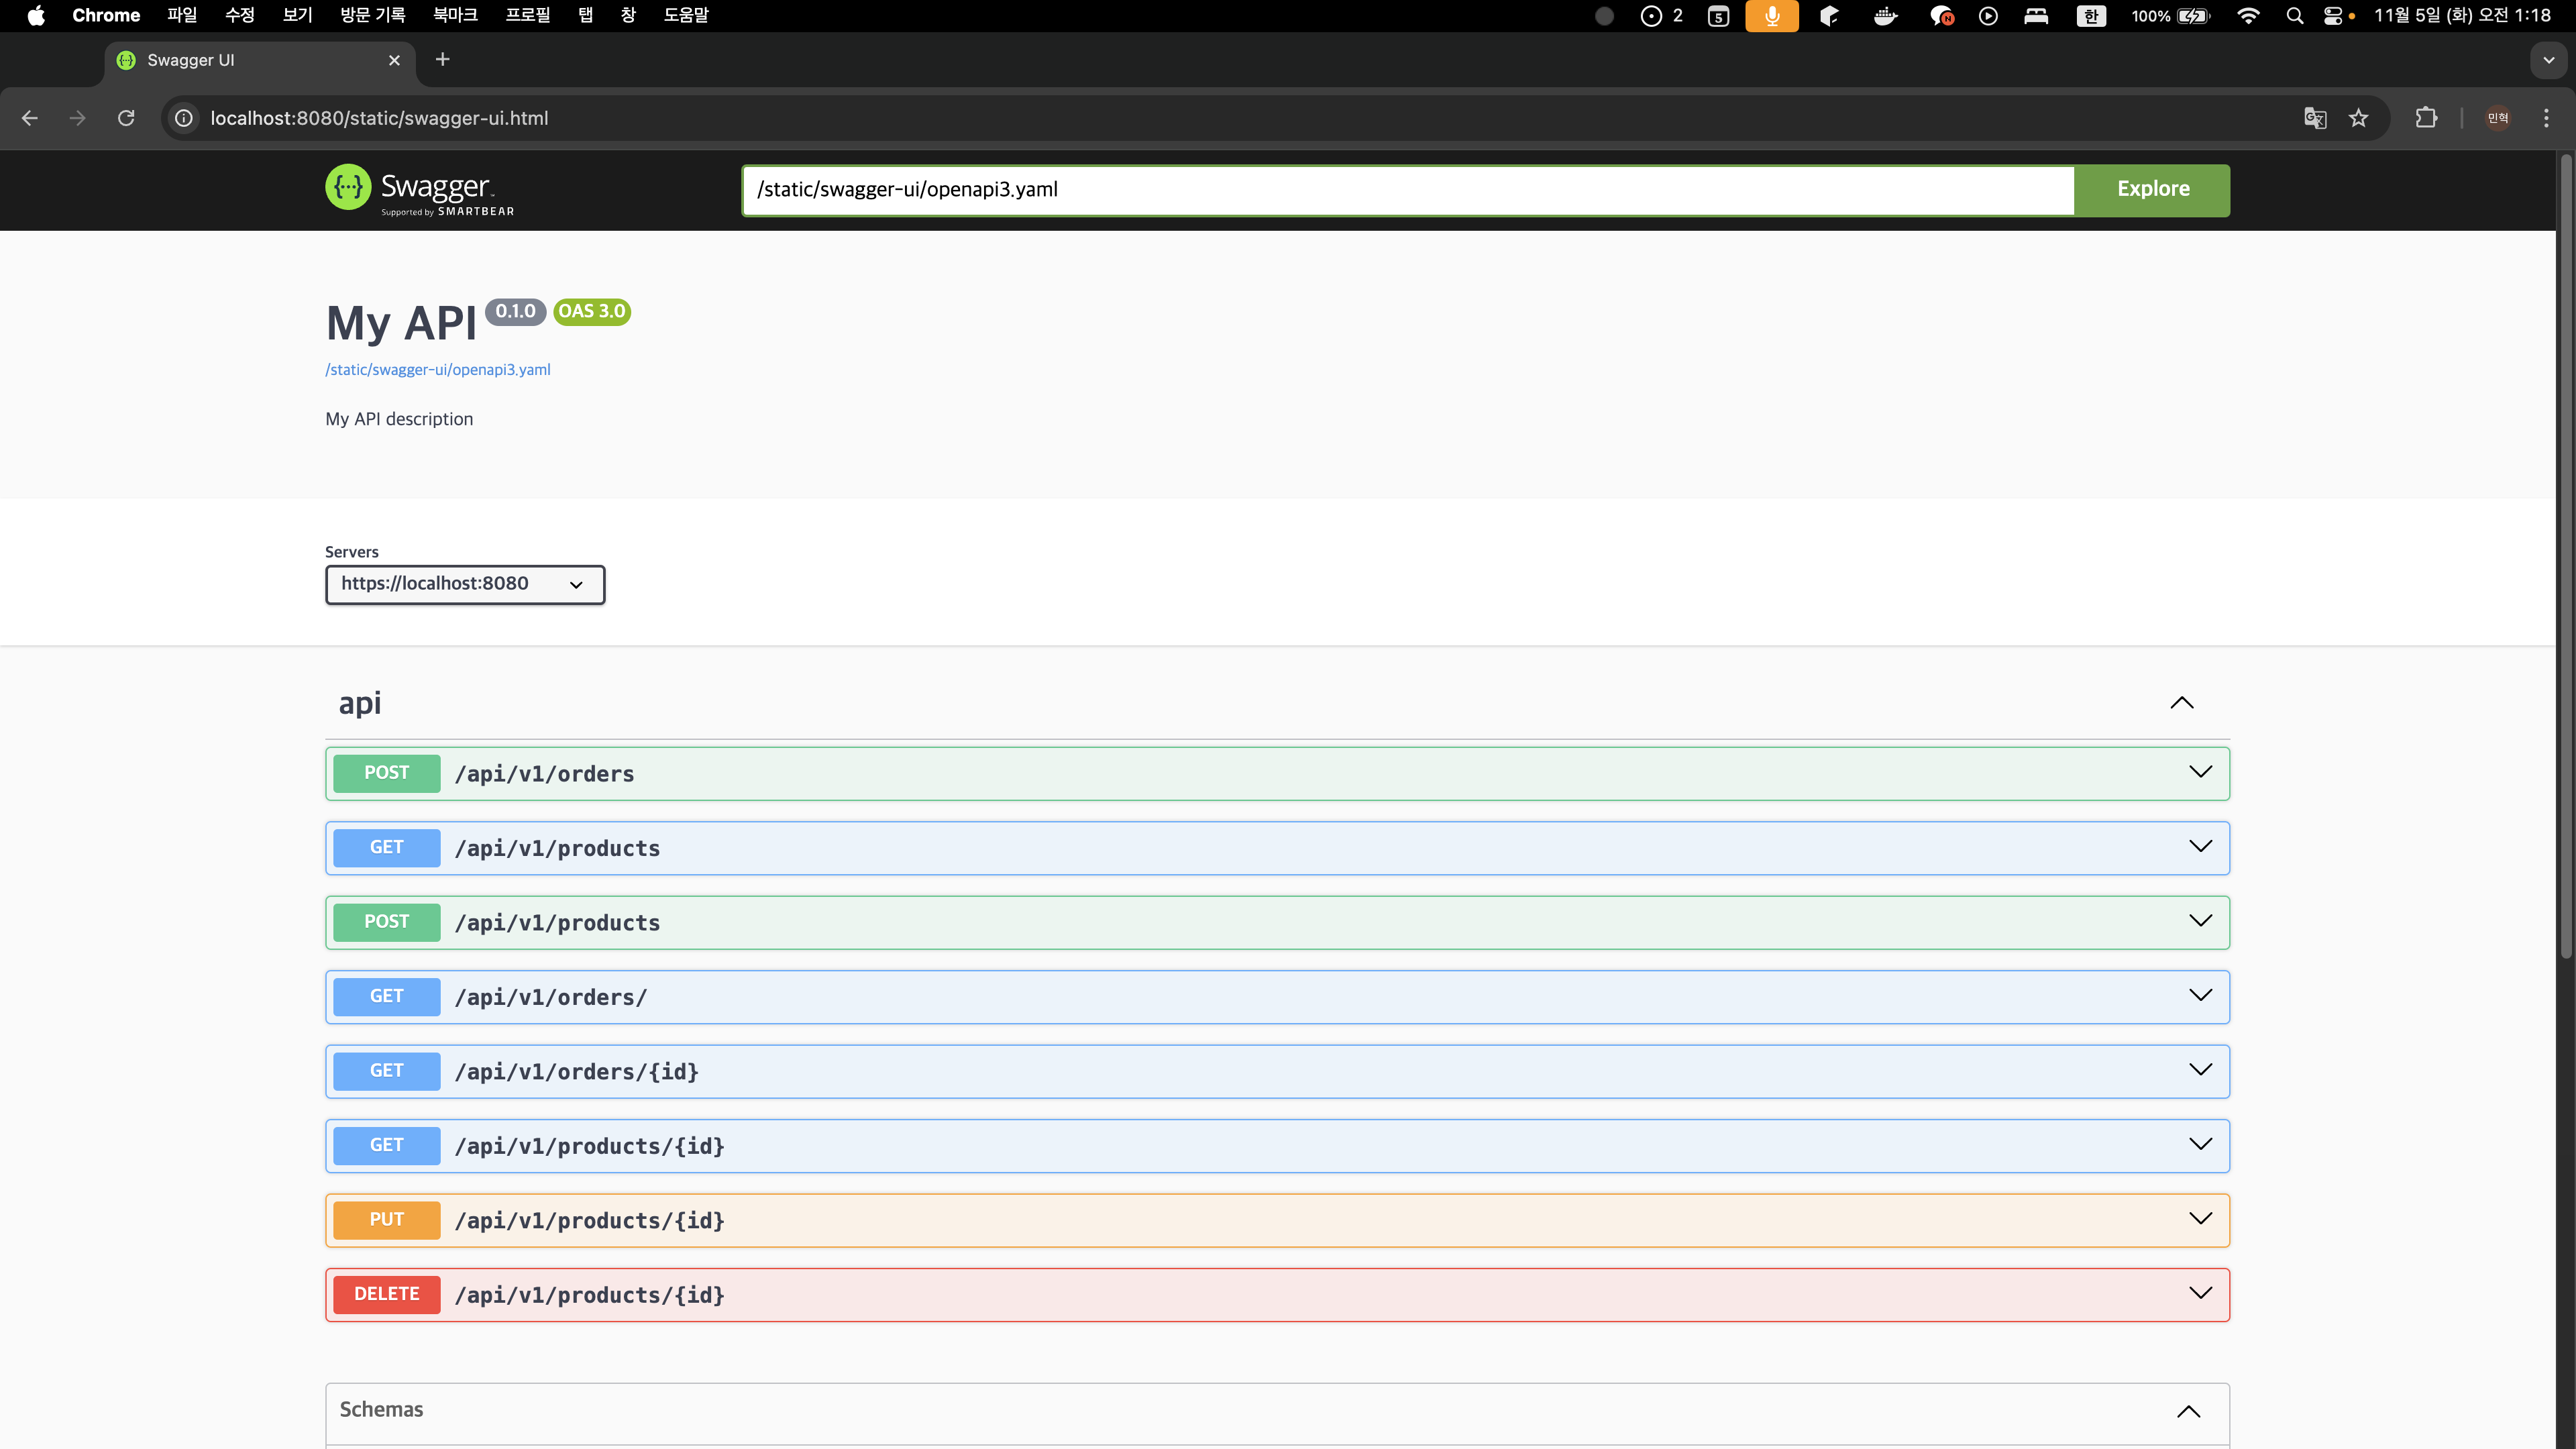
이제 테스트로 검증된 문서인 REST Docs와 Swagger API 도 만들 수 있게 되었다.
마치며
생각보다 설정하는게 어렵지 않았다. 그냥 단순히 Swagger를 이용하기 위해 REST Docs를 추가해주면 간단하게 Swagger도 사용 할 수 있게 되었다. 생각보다 어렵지 않으니까, 다음에 REST Docs를 사용하게 된다면 꼭 초반에 설정해서 Swagger까지 사용 할 수 있게 만들도록 해야겠다.
참고 자료
OpenAPI Specification을 이용한 더욱 효과적인 API 문서화
restdocs-api-spec
Swagger UI Released!
