parity ethereum 으로 private network ethereum을 구축해보려고 했지만 거래가 일어나지 않는 오류가 생겨서, 최신까지 update가 되는 openethereum으로 진행하기로 하였다.
1. docker 이미지 생성
1-1. docker만들기
$ docker run -it --name openethereum ubuntu:20.041-2. 프로그램 깔기
# apt-get update# apt-get install -y gcc g++ pkg-config file make cmake git clang libssl-dev curl 
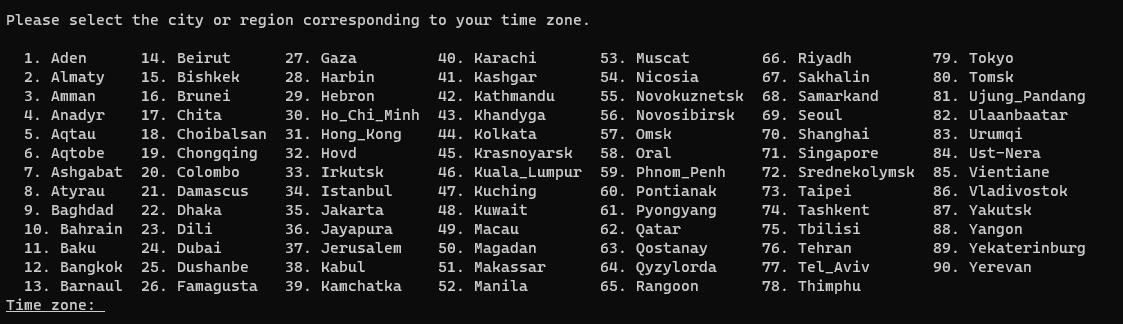
69번을 입력하여 Seoul을 선택한다.
# git clone https://github.com/openethereum/openethereum.git
rust를 설치한다.
# curl https://sh.rustup.rs -sSf | sh

# apt-get install cargo
yasm을 설치한다.
# apt-get install -y yasm
rustup의 버전을 낮추기 위해서 환경변수를 업데이트 해준다.
# source $HOME/.cargo/envrust의 버전을 낮춘다.
# rustup override set 1.51.0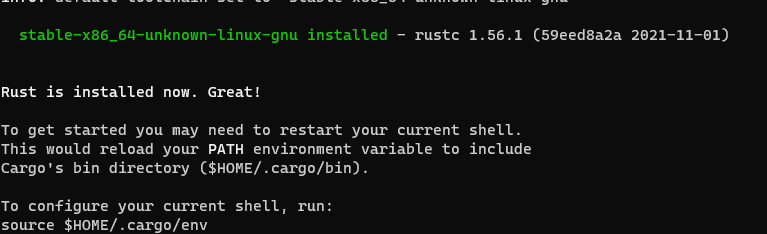
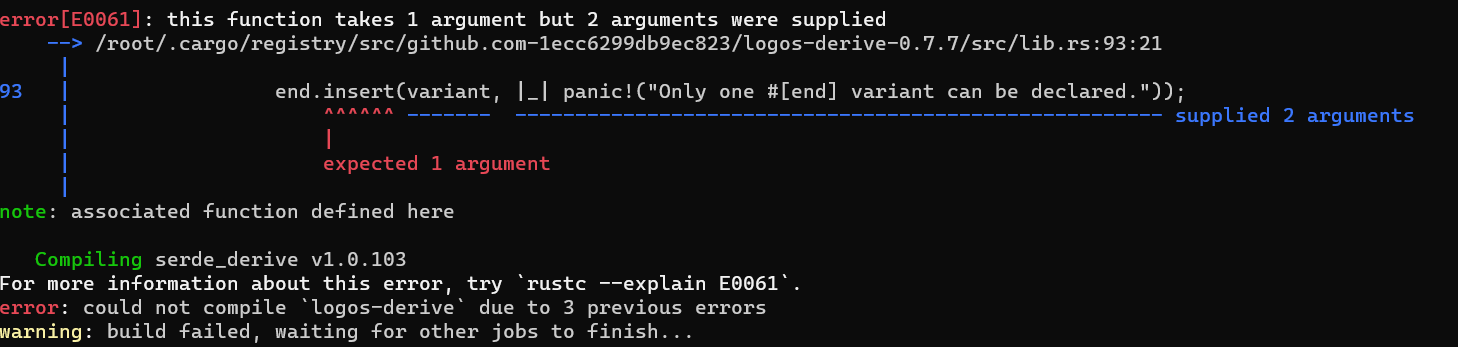
버전을 낮추지 않으면 다음과 같은 오류가 발생하게 된다.
1-3. openethereum 빌드하기
# cd openethereum# cargo build --release --features final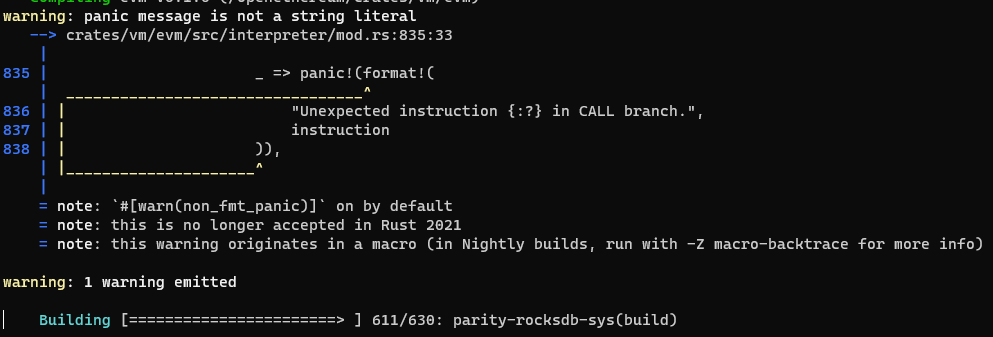
이렇게 경고 메세지가 뜨는데 빨간색으로 에러만 나지 않으면 된다. 그냥 작업을 진행하자.
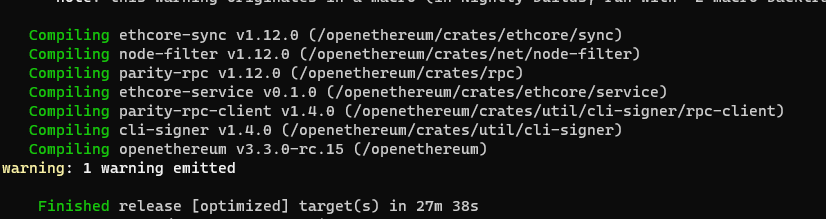
좀 오래걸린다. 나는 27분 걸렸다.
2. 이미지 올리기
# exit을 입력하여 도커를 빠져나온다.
다음과 같은 형식으로 컨테이너를 이미지로 저장시킬 수 있다.
$ docker commit [container] [image명]$ docker commit openethereum nara7875/openethereum:0그러면 좀 시간이 걸린다.

다음과 같이 입력한다. nara7875부분은 각자의 도커 아이디로 대체한다.
$ docker login위와 같이 입력하여 도커허브에 로그인을 한다.
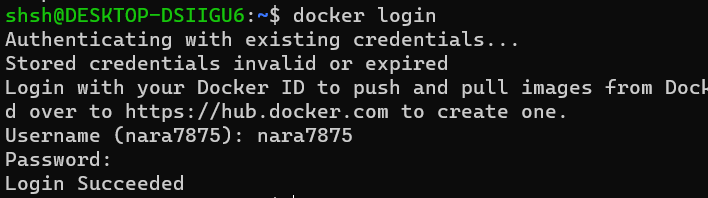
Username은 도커허브의 아이디를 입력하면 된다.
$ docker push nara7875/openethereum:0그럼 다음과 같은 화면이 나온다.

좀 시간이 걸린다.

3. 계정 만들기
아까 컨테이너에 다시 실행시키고 다시 들어간다.
$ docker start openethereum
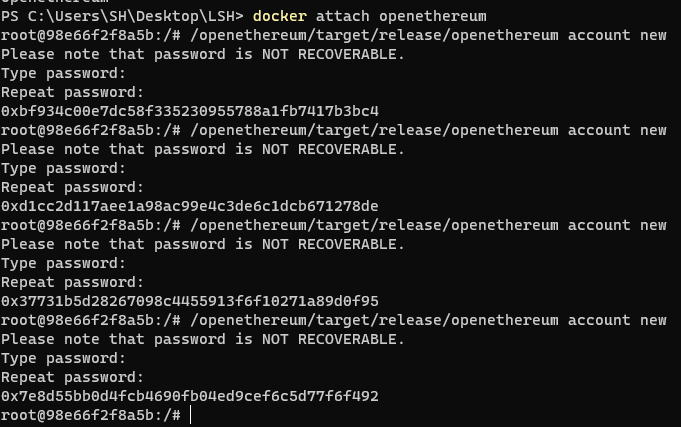
$ docker attach openethereum# /openethereum/target/release/openethereum account new다음과 같이 입력하면

비밀번호를 입력하면 된다. 이 계정들은 파일로 저장이 되어서 ~/.local/share/openethereum/keys/ethereum의 위치에 저장이 된다.
4번 반복한다.
# cd ~/.local/share/openethereum/keys/ethereum
# ls

다음과 같이 여러개의 파일이 생겼음을 알 수 있다.
파일의 내용을 확인하기 위해서 vim 편집기를 깐다.
# apt-get install vim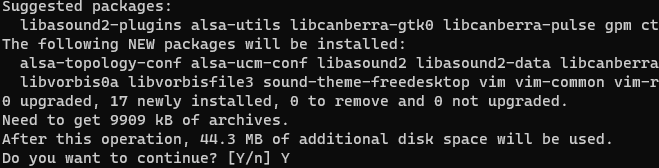
44.3MB의 내용을 차지한다는 것이다.

# vi UTC--2021-11-15T06-03-52Z--8a2eec67-4f02-c481-55d6-ab0bddff32c7

내용을 확인할 수 있다. 아직 도커를 끄지 말자.
4. docker-compose
우리는 docker-compose를 이용해서 여러 멀티 노드를 만들 것이다.
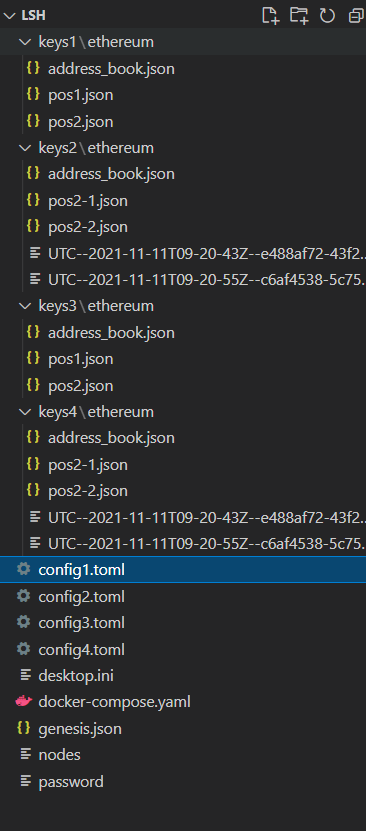
4-1. 폴더구조
이렇게 설정을 해준다.
4-2. keysN
1-3과 2-4 즉 짝수 홀수끼리 짝을 이뤄서 같은 내용으로 적는다.
keys1과 keys3의 내용을 동일하게 하고, keys2와 keys4의 내용을 동일하게 한다.
4-2-1. address_book.json
위와 같이 {}로 채워준다.
4-2-2. posN.json
내용을 아까 도커안의 ~/.local/share/openethereum/keys/ethereum의 첫번째 파일의 내용을 전부 복사해서 붙여넣는다.
1,3에는 첫번째 두번째 파일을 복사해서 넣고,
2,4번째에는 세번째 네번째 파일을 복사해서 넣는다.
4-3. docker-compose
version: "3"

services:
  pos1:
    image: "nara7875/openethereum:0"
    tty: true
    ports:
      - 8547:8547
      - 30305:30305
    environment:
      ENV: ETHERNODE1
      RPCPORT: 8547
      PORT: 30305
      RUST_BACKTRACE: 1
    volumes:
      - ./config1.toml:/openethereum/config.toml
      - ./genesis.json:/openethereum/genesis.json
      - ./password:/openethereum/password
      - ./nodes:/openethereum/nodes
      - ./keys1:/openethereum/keys
    container_name: pos1
    command: >
      sh -c "cd ~/
            /openethereum/target/release/openethereum --config /openethereum/config.toml"
    working_dir: /openethereum


  pos2:
    image: "nara7875/openethereum:0"
    tty: true
    ports:
      - 8548:8548
      - 30306:30306
    environment:
      ENV: ETHERNODE1
      RPCPORT: 8548
      PORT: 30306
      RUST_BACKTRACE: 1
    volumes:
      - ./config2.toml:/openethereum/config.toml
      - ./genesis.json:/openethereum/genesis.json
      - ./password:/openethereum/password
      - ./nodes:/openethereum/nodes
      - ./keys2:/openethereum/keys
    container_name: pos2
    command: >
      sh -c "cd ~/
            /openethereum/target/release/openethereum --config /openethereum/config.toml"
    working_dir: /openethereum

  pos3:
    image: "nara7875/openethereum:0"
    tty: true
    ports:
      - 8549:8549
      - 30307:30307
    environment:
      ENV: ETHERNODE1
      RPCPORT: 8549
      PORT: 30307
      RUST_BACKTRACE: 1
    volumes:
      - ./config3.toml:/openethereum/config.toml
      - ./genesis.json:/openethereum/genesis.json
      - ./password:/openethereum/password
      - ./nodes:/openethereum/nodes
      - ./keys3:/openethereum/keys
    container_name: pos3
    command: >
      sh -c "cd ~/
            /openethereum/target/release/openethereum --config /openethereum/config.toml"
    working_dir: /openethereum

  pos4:
    image: "nara7875/openethereum:0"
    tty: true
    ports:
      - 8550:8550
      - 30308:30308
    environment:
      ENV: ETHERNODE1
      RPCPORT: 8550
      PORT: 30308
      RUST_BACKTRACE: 1
    volumes:
      - ./config4.toml:/openethereum/config.toml
      - ./genesis.json:/openethereum/genesis.json
      - ./password:/openethereum/password
      - ./nodes:/openethereum/nodes
      - ./keys4:/openethereum/keys
    container_name: pos4
    command: >
      sh -c "cd ~/
            /openethereum/target/release/openethereum --config /openethereum/config.toml"
    working_dir: /openethereum

  poscli:
    image: "nara7875/openethereum:0"
    tty: true
    container_name: pos-cli
    working_dir: /openethereum
    command: /bin/bash

    links:
      - pos1:pos1
      - pos2:pos2
      - pos3:pos3
      - pos4:pos4

    depends_on:
        - pos1
        - pos2
        - pos3
        - pos4
4-4. genesis.json
아까 얻은 key 파일에 보면 address가 있을 것이다. 거기에 0x를 붙여서 여기에 list와 account에 적는다.
각각 1,3에 넣은 두개의 키 중 하나를 넣고, 2,4에 넣은 두 개의 키 중 하나를 넣어 총 2개를 넣어준다.
{
    "name": "ethereum",
    "engine": {
      "authorityRound": {
        "params": {
          "blockReward": "0x4563918244F40000",
          "stepDuration": "1",
          "validators": {
            "list": [
              "0x025637ef3a120351aa516b7755889b7061b823bc",
              "0x5c83a354066503aff93508d3e6789b280f164bfb",
              "0xa929b6824015e6d1f2687187cbf86c06e4bc1691",
              "0xa25febdb301594a08f6a860959a97b9aab919894"
            ]
          }
        }
      }
    },
    "params": {
      "gasLimitBoundDivisor": "0x400",
      "maximumExtraDataSize": "0x20",
      "minGasLimit": "0x1388",
      "networkID": "0x396",
      "eip155Transition": 0,
      "validateChainIdTransition": 0,
      "eip140Transition": 0,
      "eip211Transition": 0,
      "eip214Transition": 0,
      "eip658Transition": 0
    },
    "genesis": {
      "seal": {
        "authorityRound": {
          "step": "0x0",
          "signature": "0x0000000000000000000000000000000000000000000000000000000000000000000000000000000000000000000000000000000000000000000000000000000000"
        }
      },
      "difficulty": "0x10",
      "gasLimit": "0x2625A00"
    },
    "accounts": {
      "0x025637ef3a120351aa516b7755889b7061b823bc": {
        "balance": "10000000000000000000000000"
      },
      "0xa929b6824015e6d1f2687187cbf86c06e4bc1691": {
        "balance": "10000000000000000000000000"
      }
    }
  }
list에는 아까 만들어주었던 4개의 계정을 넣는다.
여기서 acconts의 내용은 미리 계정에 그만큼의 코인을 넣고 시작하겠다는 의미이다.
4-5.config n.toml
다음은 config1.toml의 내용이다.
이런 식으로 각각의 confign.toml의 network의 port와 rpc의 port를 docker-compose와 똑같이 설정을 해준다.
[parity]
chain = "/openethereum/genesis.json"
base_path = "/openethereum/"

[network]
port = 30305
reserved_peers=  "/openethereum/nodes"
allow_ips = "all"
# Override the bootnodes from selected chain file.
#bootnodes = ["enode://XXX@localhost:30300", "enode://XXXX@localhost:30301"]
# Enable or disable new peers discovery.
discovery = false

[rpc]
port = 8547
apis = ["web3", "eth", "net", "personal", "parity", "parity_set", "traces" ,"rpc", "parity_accounts","signer"]
interface = "all"
cors = ["all"]


[account]
password = ["/openethereum/password"]

[mining]
engine_signer = "0x5c83a354066503aff93508d3e6789b280f164bfb"
gas_floor_target = "40000000"

[misc]
logging = "own_tx=trace"
log_file = "/openethereum/log.log"
color = true
여기서 각각의 항목을 알아보자.
[parity]
chain = "/openethereum/genesis.json"
base_path = "/openethereum/"
....빌드중...
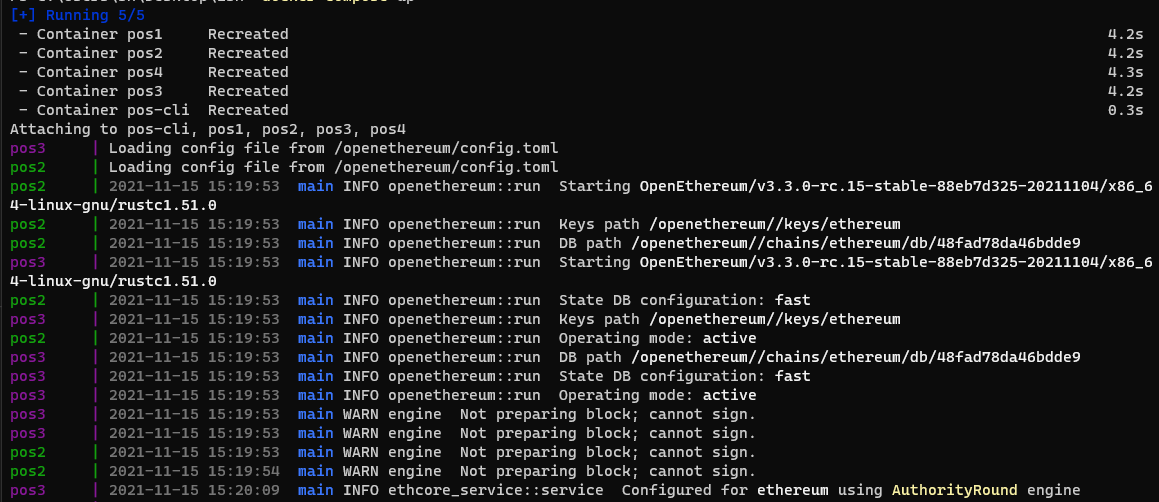
터미널에서 docker-compose.yaml폴더가 있는 디렉토리까지 이동하고 다음과 같은 명령어를 입력한다.
docker-compose up
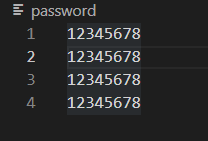
4-6 password
account new를 할 때 입력했던 패스워드를 차례로 입력한다.
5. 메타마스크
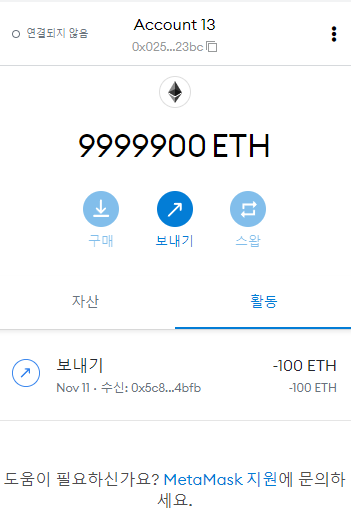
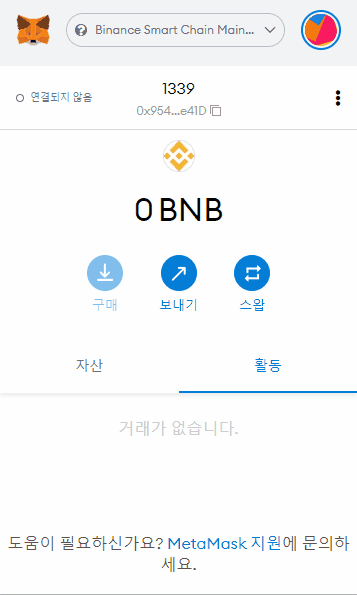
이제 진짜로 메타마스크에서 거래가 되는지 확인을 해보자.
먼저 이미 실험을 해봤다가 실패했다면 네트워크와 계정들을 지운다. 그래야 제대로 작동하는지 확인할 수 있다.
그리고 계정을 하나 만든다. 이왕이면 genesis.json에서 account에 설정해 주었던 계정으로 적는다. 그래야 돈이 든 계정을 확인할 수 있다.
5-1. 네트워크 추가하기
5-2. 터미널에서 작동하는 것
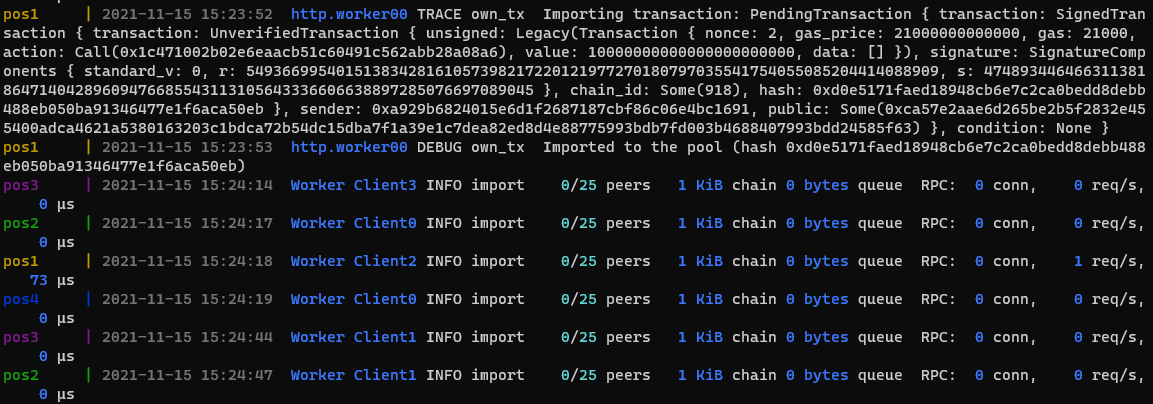
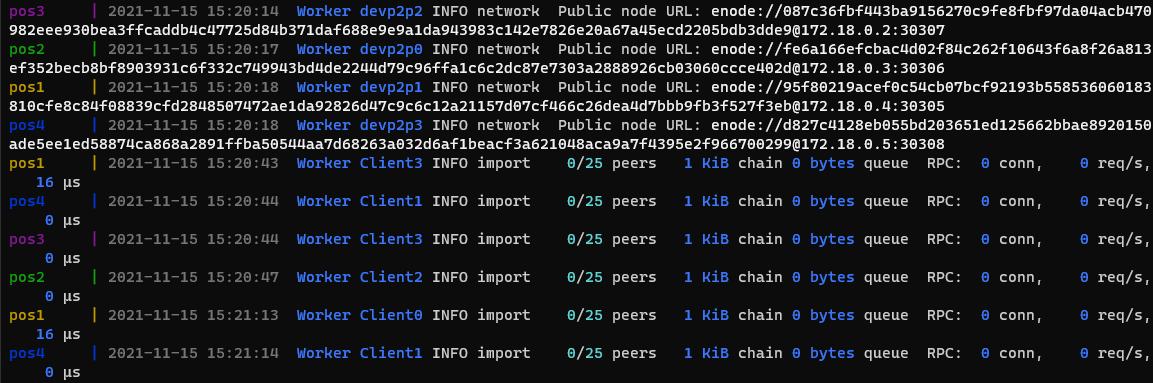
트랜잭션이 생성되고 거래가 되는 것을 알 수 있다.
5-3. 거래 성공