Discord Bot 만들기
- 지난 세션에서 GitHub Actions에 대해 다뤄보았다.
- 이를 바탕으로 Discord Bot을 만들어보자
⛺️ Marketplace
- github marketplace에서 discord bot 만들기와 관련된 github actions를 찾아보자
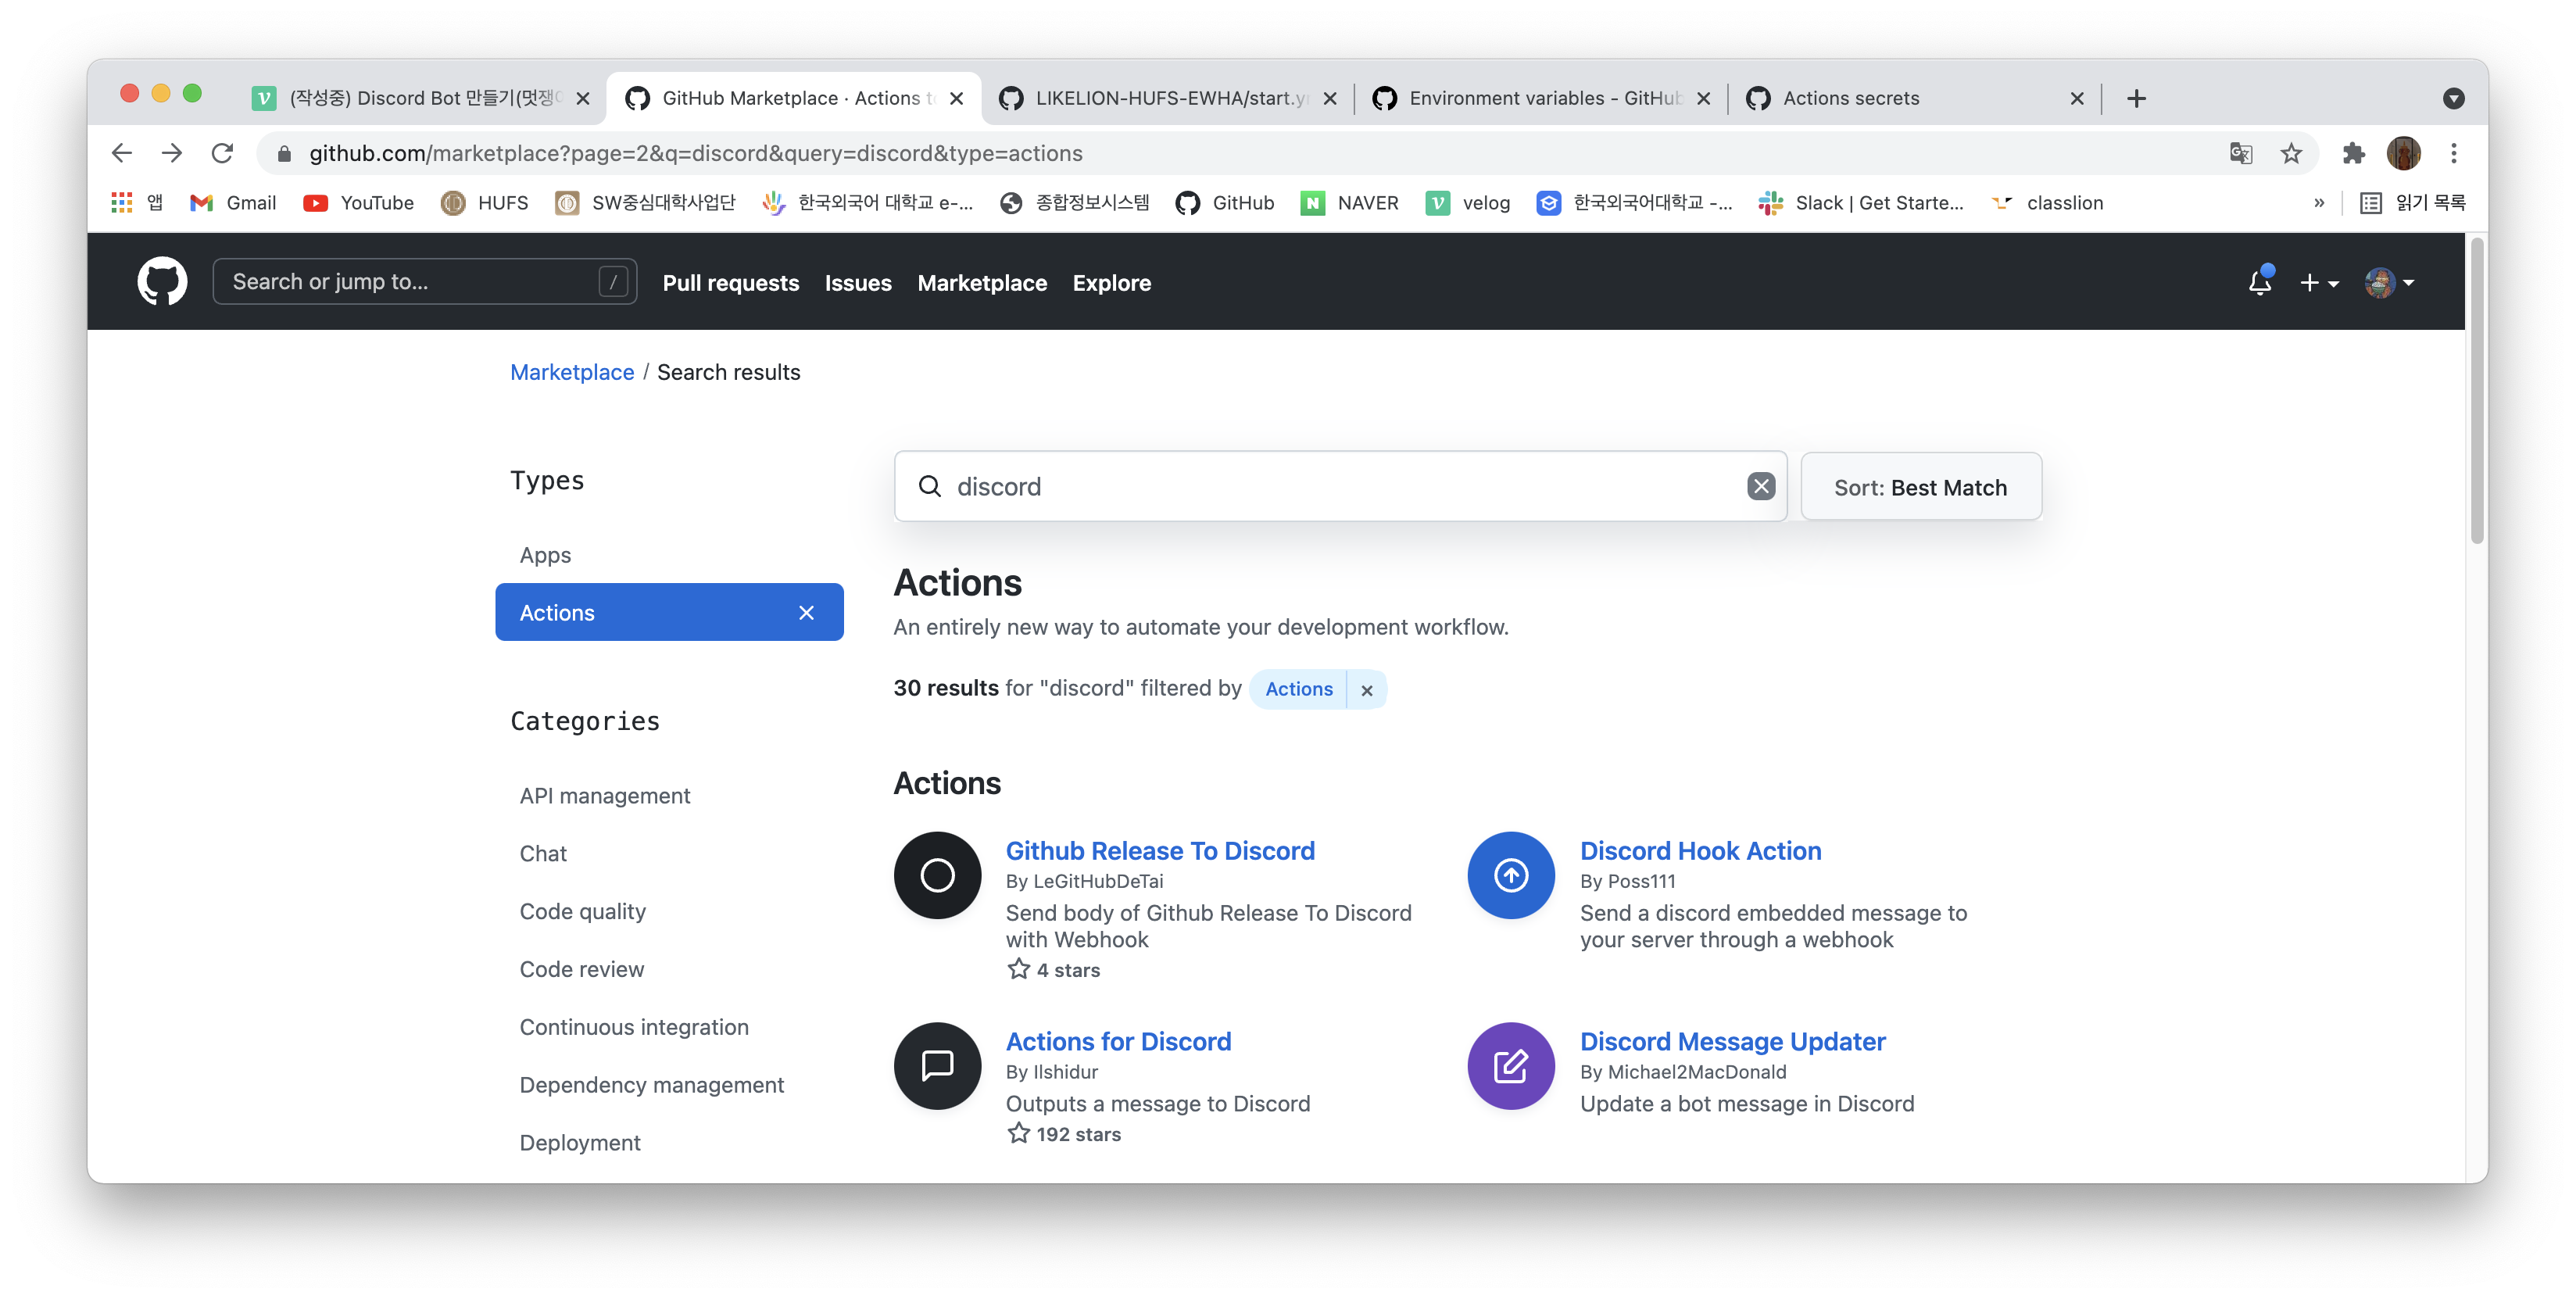
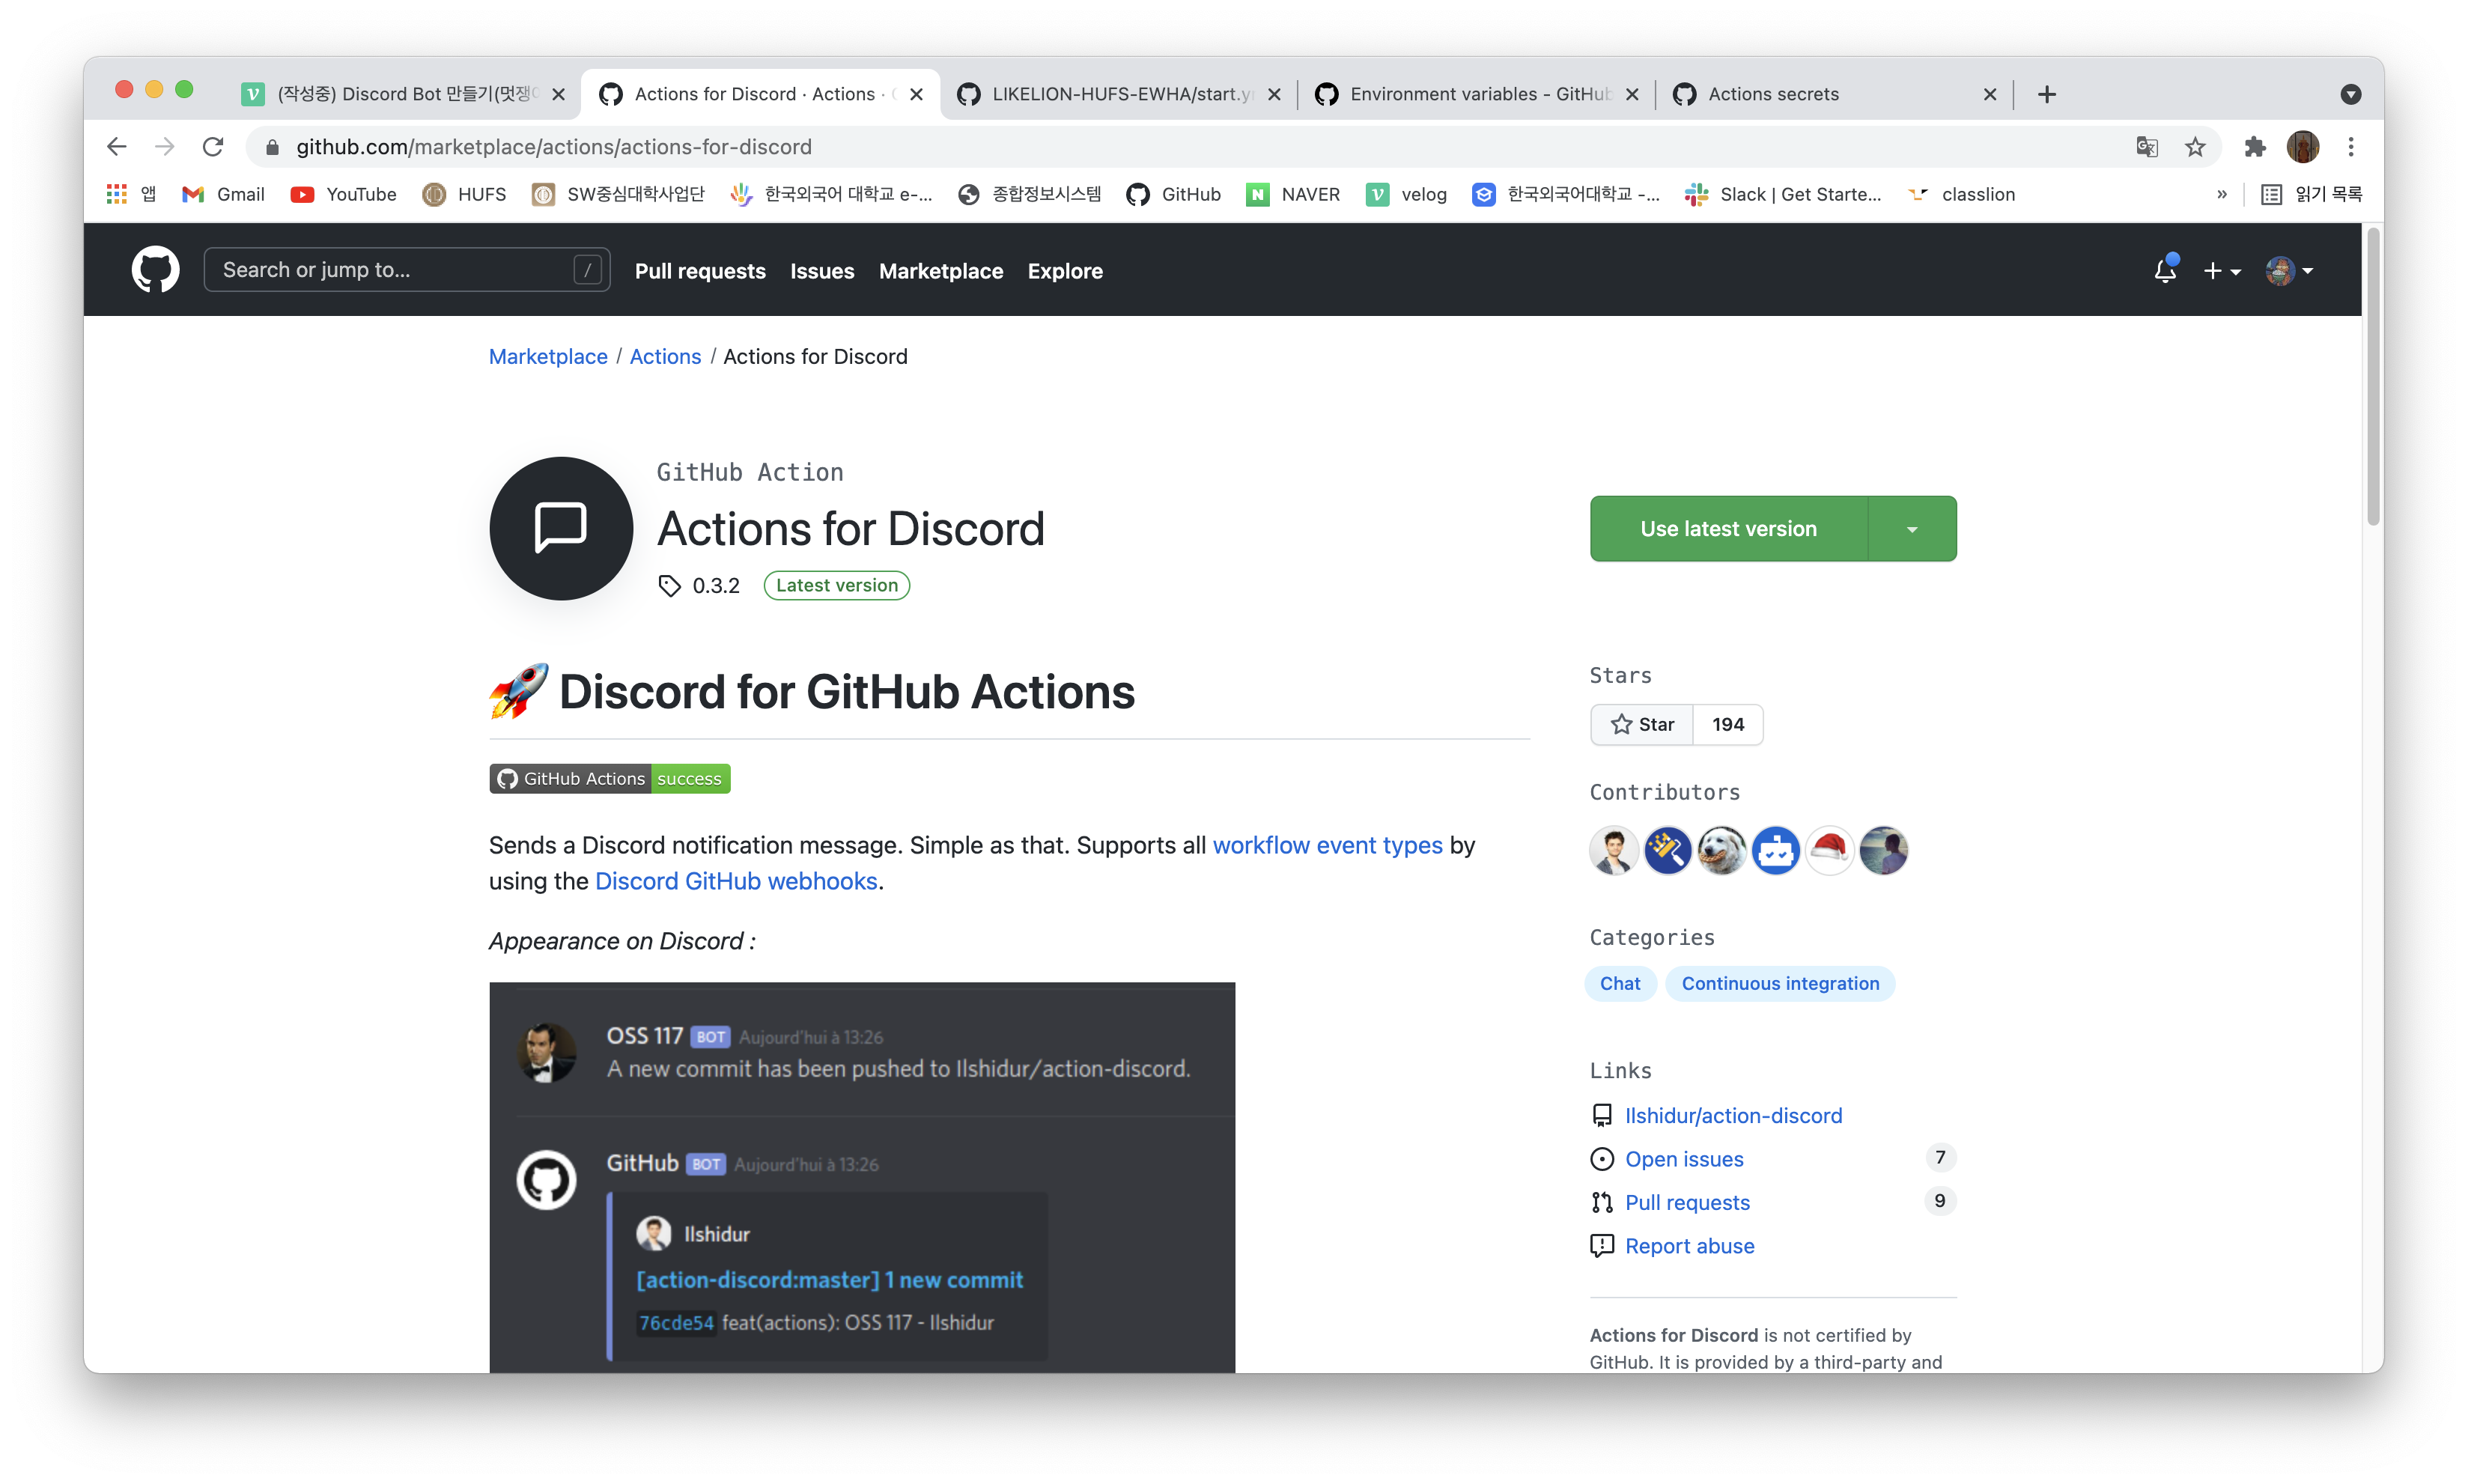
- 위의
Actions for Discord의 코드를 참고하여 yml(yaml)을 만든다.
# This is a basic workflow to help you get started with Actions

name: Discord 알리미

# Controls when the workflow will run
on:
  # Triggers the workflow on push or pull request events but only for the main branch
  push:
    branches: [ main ]
  # pull_request:
  #   branches: [ main ]

  # Allows you to run this workflow manually from the Actions tab
  # workflow_dispatch:

# A workflow run is made up of one or more jobs that can run sequentially or in parallel
jobs:
  # This workflow contains a single job called "build"
  build:
    # The type of runner that the job will run on
    runs-on: ubuntu-latest

    # Steps represent a sequence of tasks that will be executed as part of the job
    steps:
      # Checks-out your repository under $GITHUB_WORKSPACE, so your job can access it
      - uses: actions/checkout@v2 # 지우면 안됨, 서버에서 클론받아 액션을 돌리고 checkout을 하는 과정이 필수적임

      - name: 멋사 안녕
        run: echo "멋사 안녕"

      - name: Discord notification
        env:
          DISCORD_WEBHOOK: ${{ secrets.DISCORD_WEBHOOK }}
          DISCORD_USERNAME: GitHub Actions
          DISCORD_AVATAR: https://images.velog.io/images/nathan29849/post/344b519b-f338-45a9-8f24-75fe8f6253f5/image.png
        uses: Ilshidur/action-discord@master
        with:
          args: "DOUGH GitHub Actions!: {{GITHUB_EVENT_NAME}}"
          # args: 'The project {{ EVENT_PAYLOAD.repository.full_name }} has been deployed.'

      # # Runs a single command using the runners shell
      # - name: Run a one-line script
      #   run: echo Hello, world!

      # # Runs a set of commands using the runners shell
      # - name: Run a multi-line script
      #   run: |
      #     echo Add other actions to build,
      #     echo test, and deploy your project.
⛺️ WEBHOOK 설정하기
-
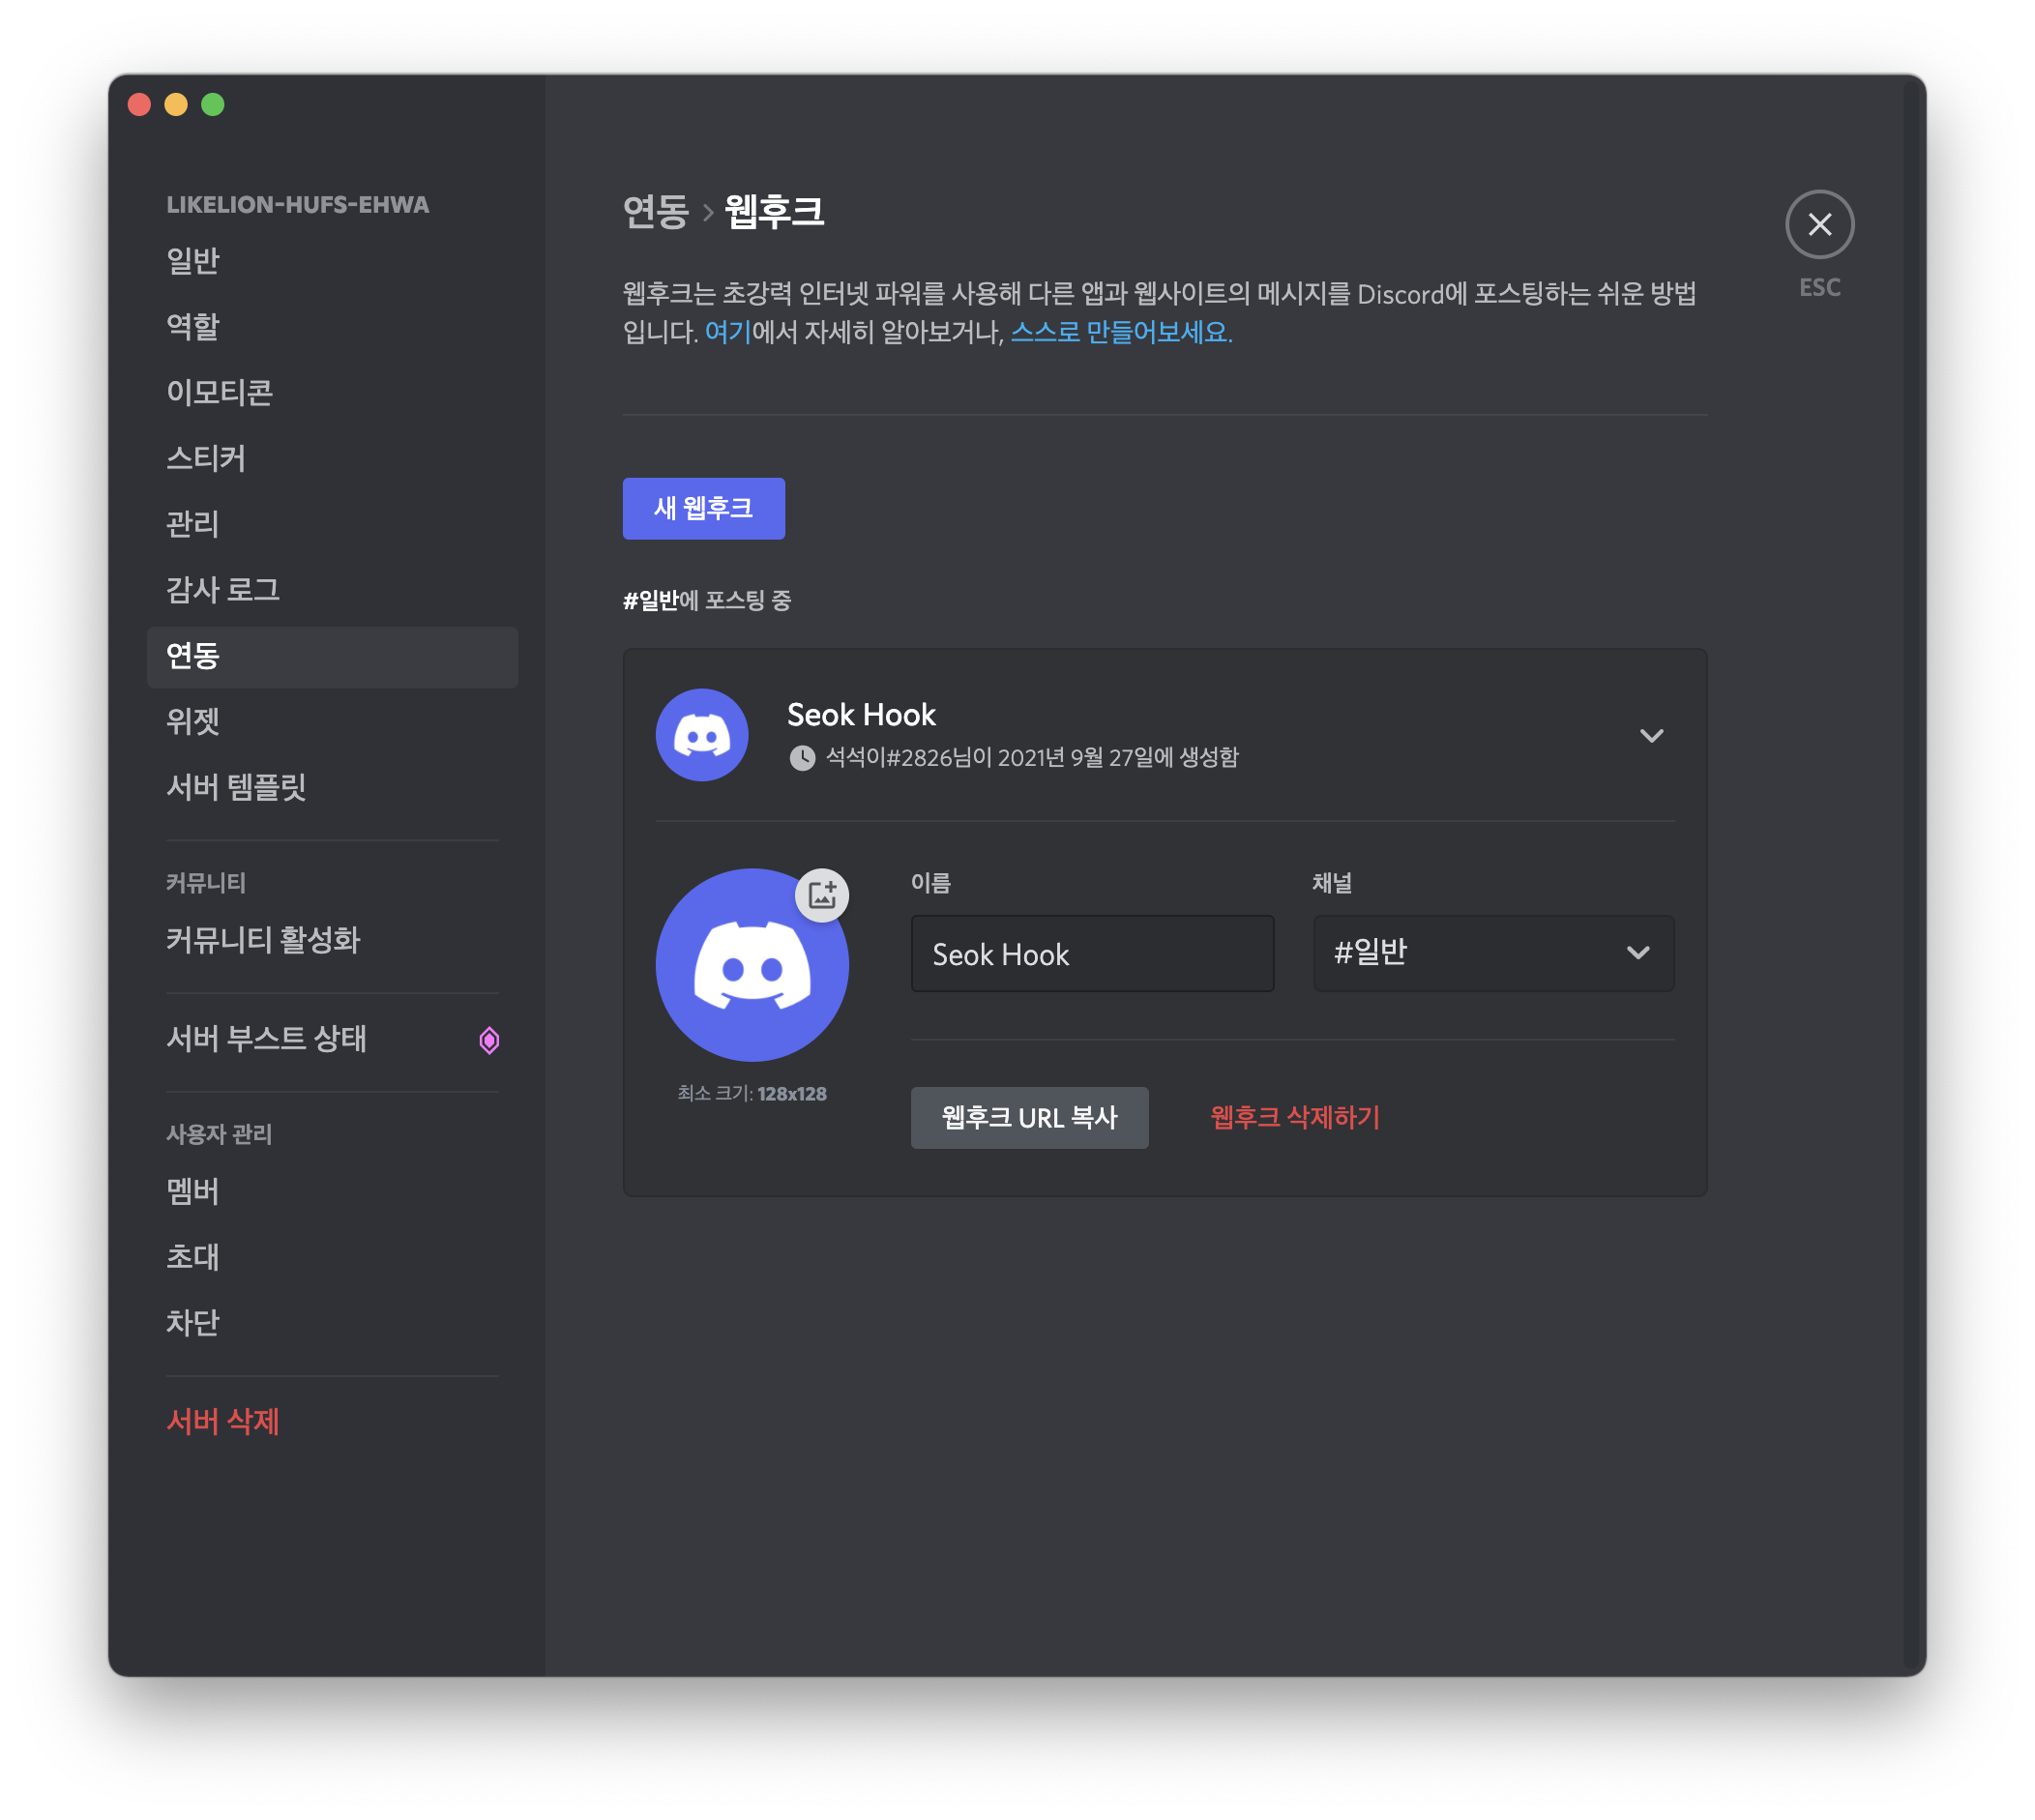
디스코드의 서버를 하나 개설한다.
-
서버 설정에 들어가서
연동->웹후크로 들어간다.

-
웹 후크를 만들어 웹 후크 URL을 복사한다.
-
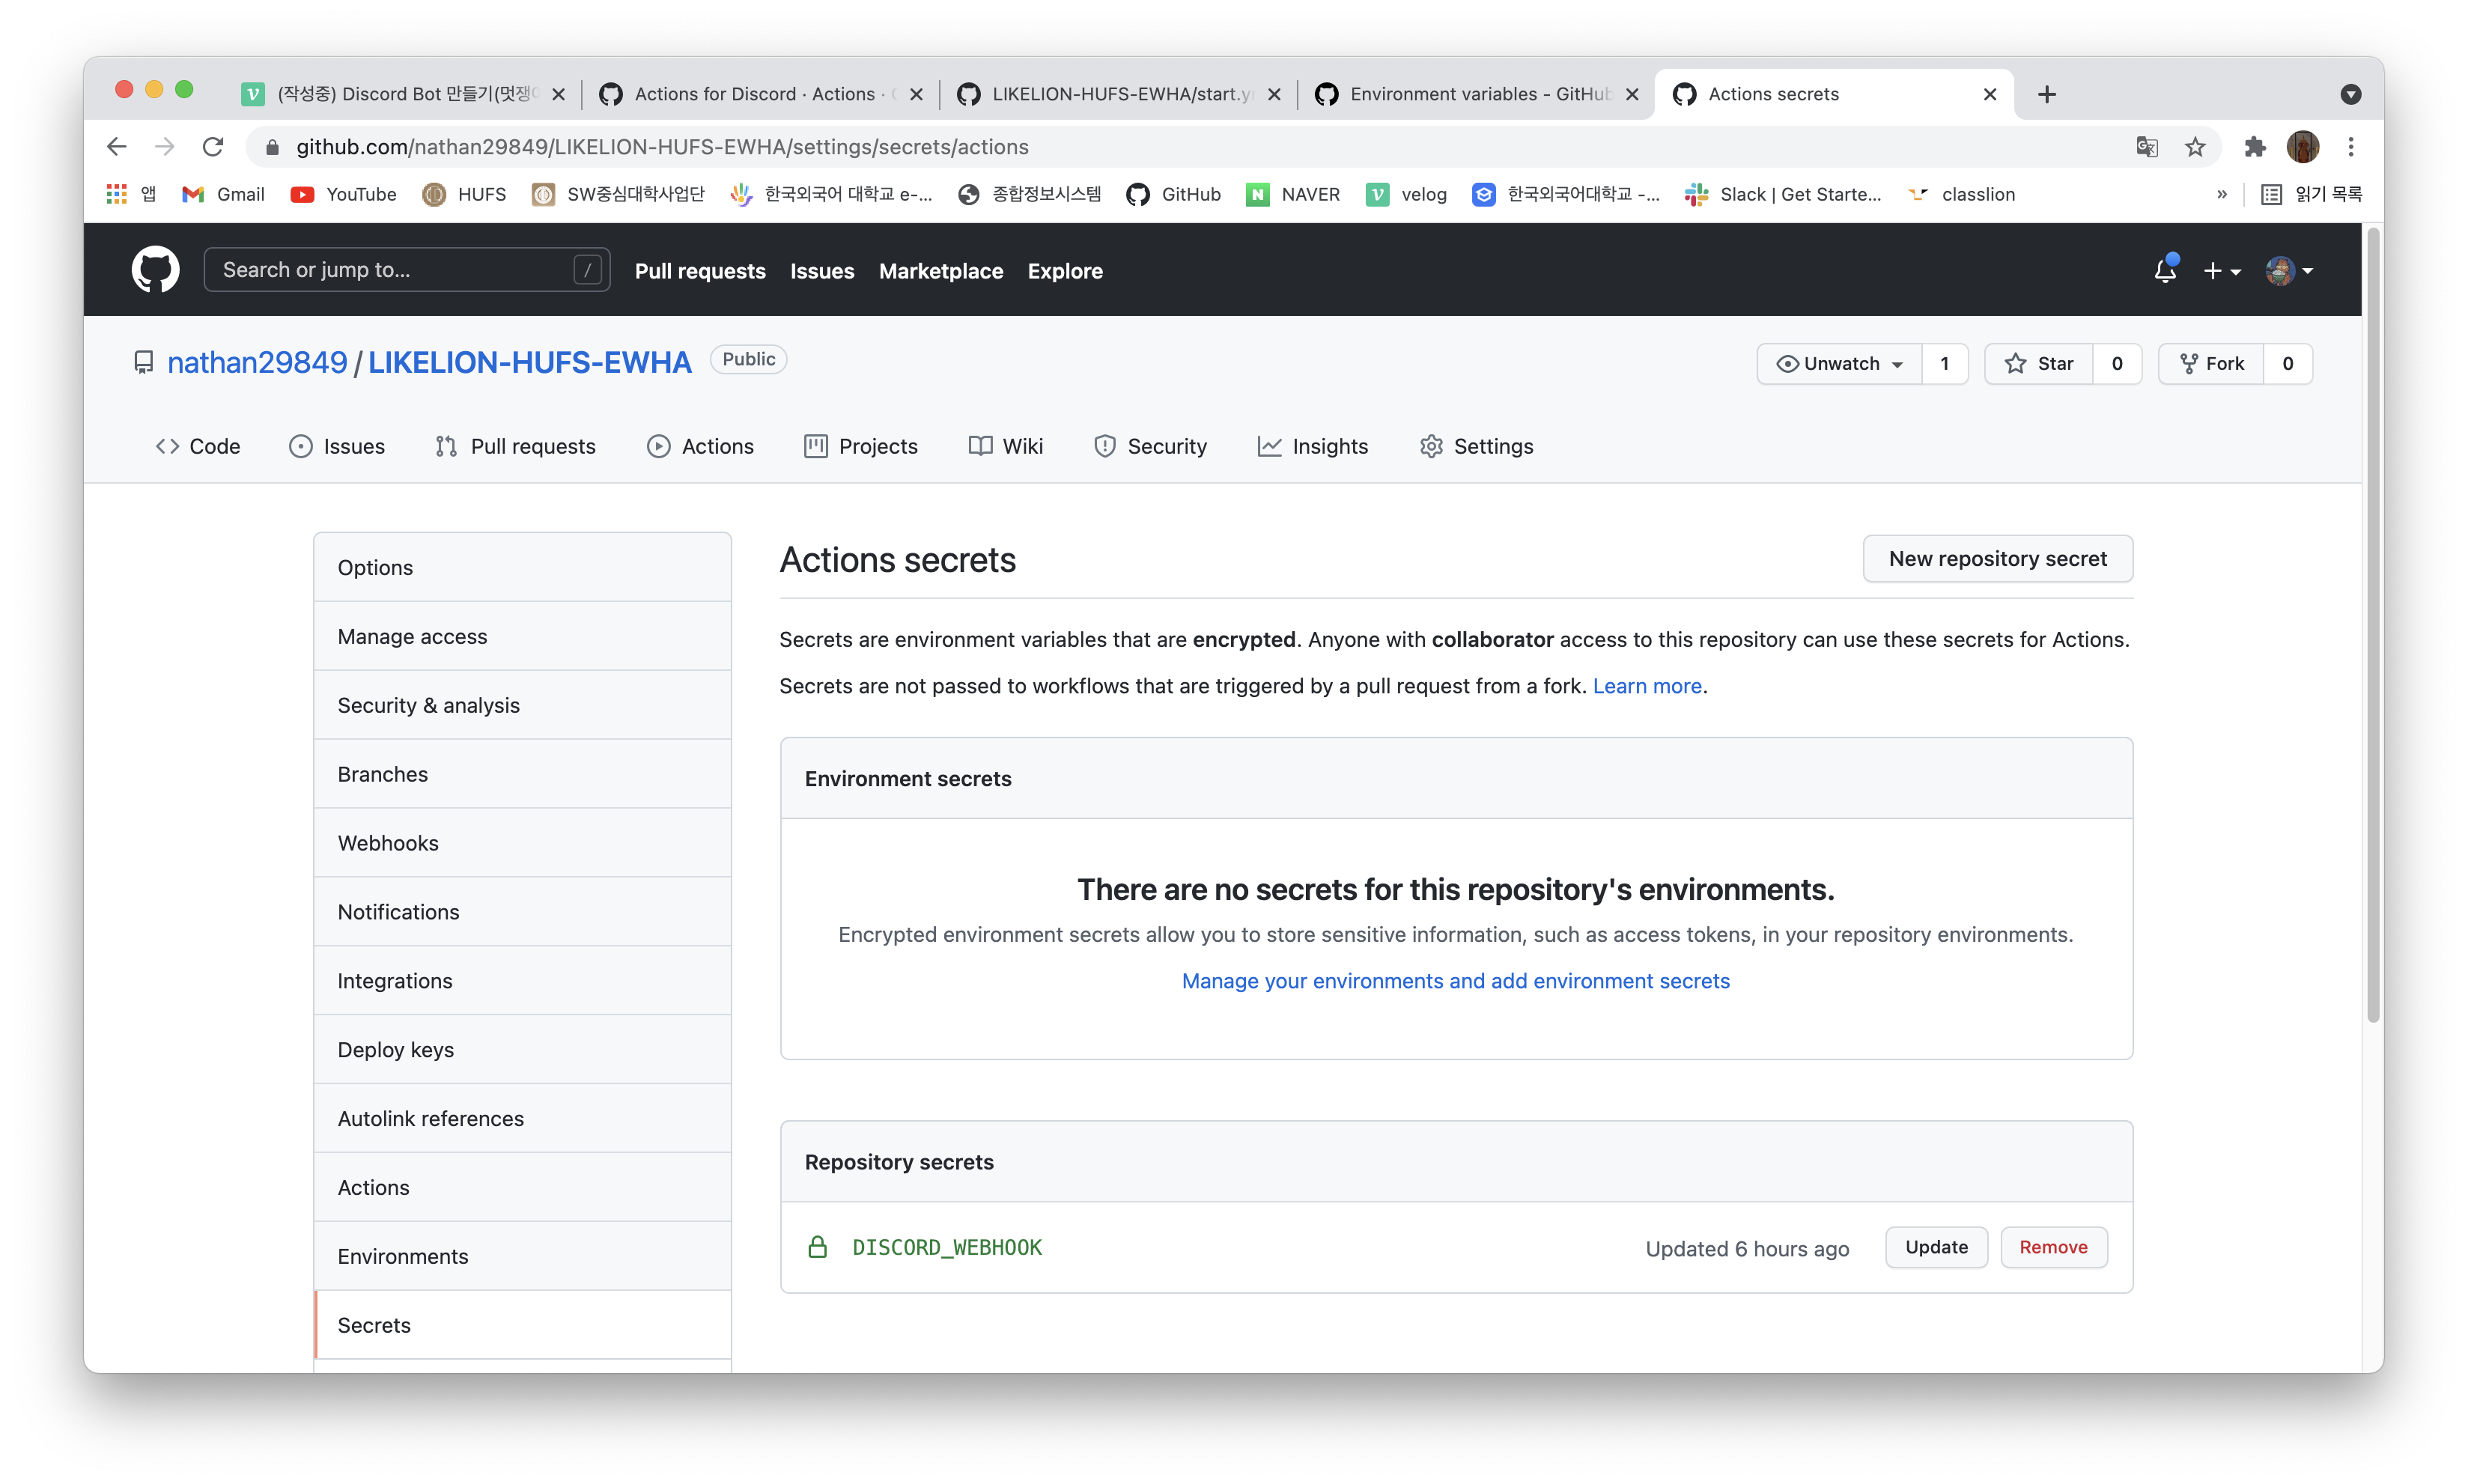
복사한 웹 후크 URL을 가지고 repository로 돌아간 뒤,
settings에서 왼쪽 목차 중Sectrets를 선택한다.
-
New repository secret을 선택한 뒤 Secret name을 설정하고value에 아까 복사한 웹 후크 URL을 넣어준다. (웹 후크 URL은 민감한 정보에 속하기 때문에 이런 방식으로 관리한다.)
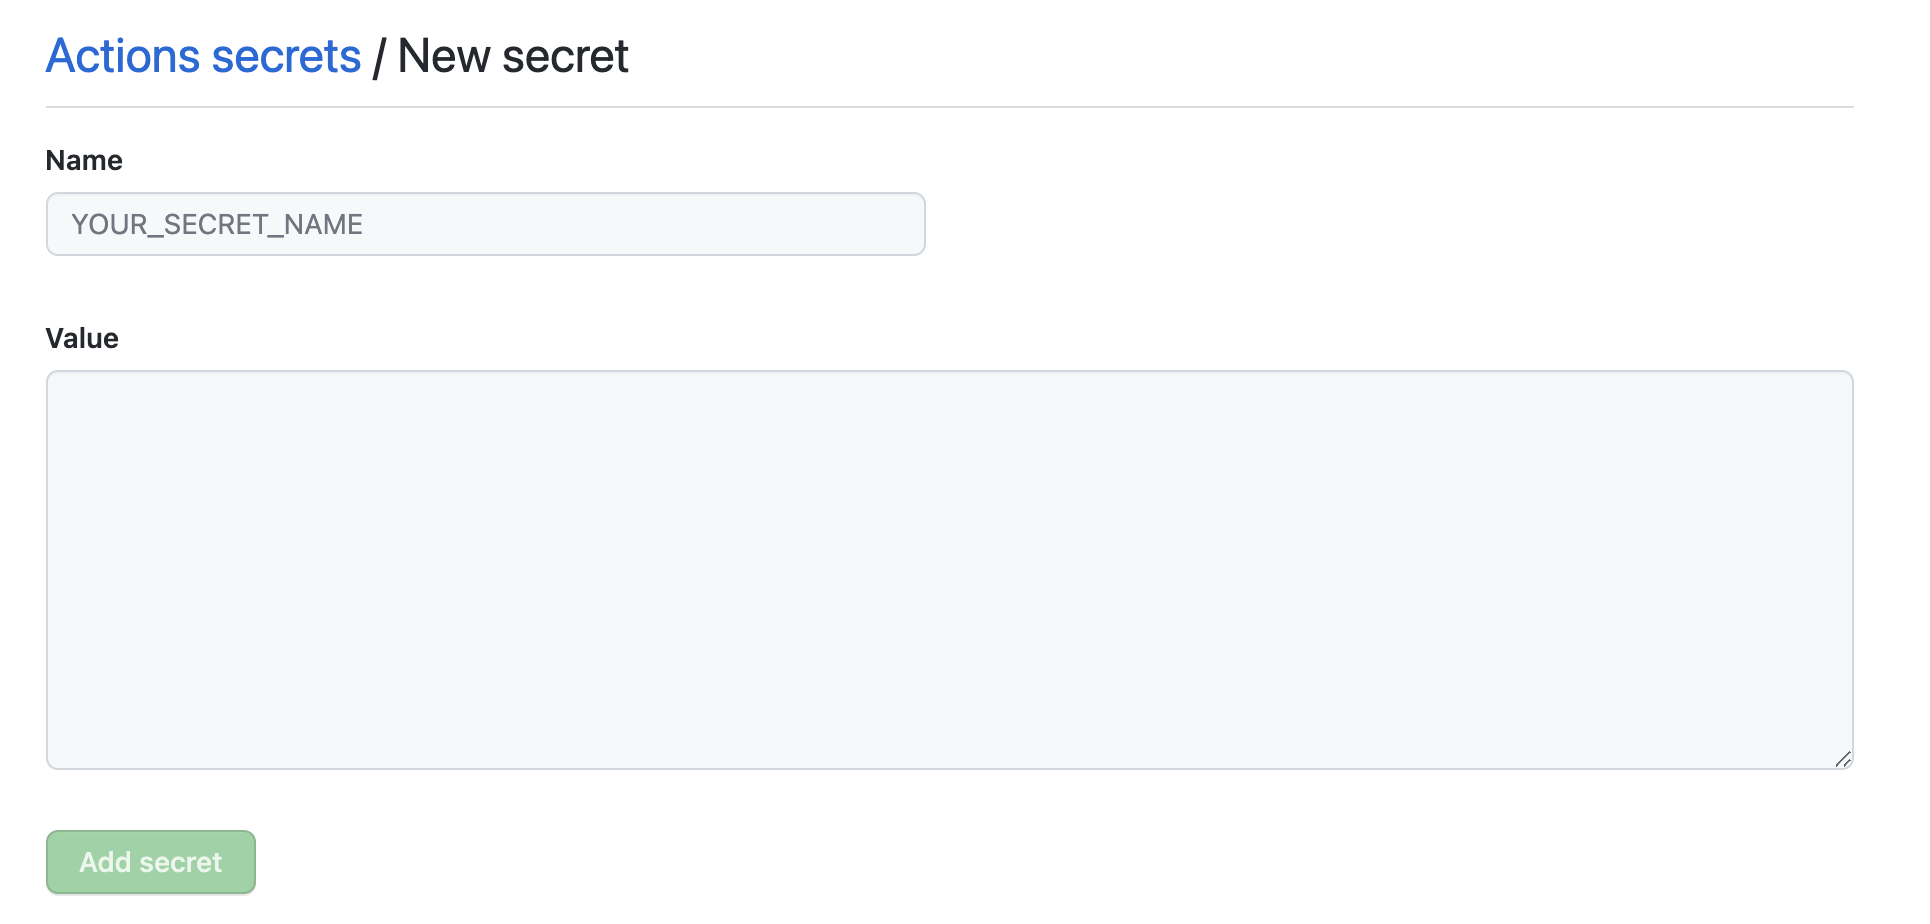
⛺️ Discord Bot 생성하기
-
구글 검색창에
discord for developers를 검색하여 아래 페이지로 이동한다.
discord for developers 바로가기 -
Application->New Application을 통해 새로운 Application을 만든다.
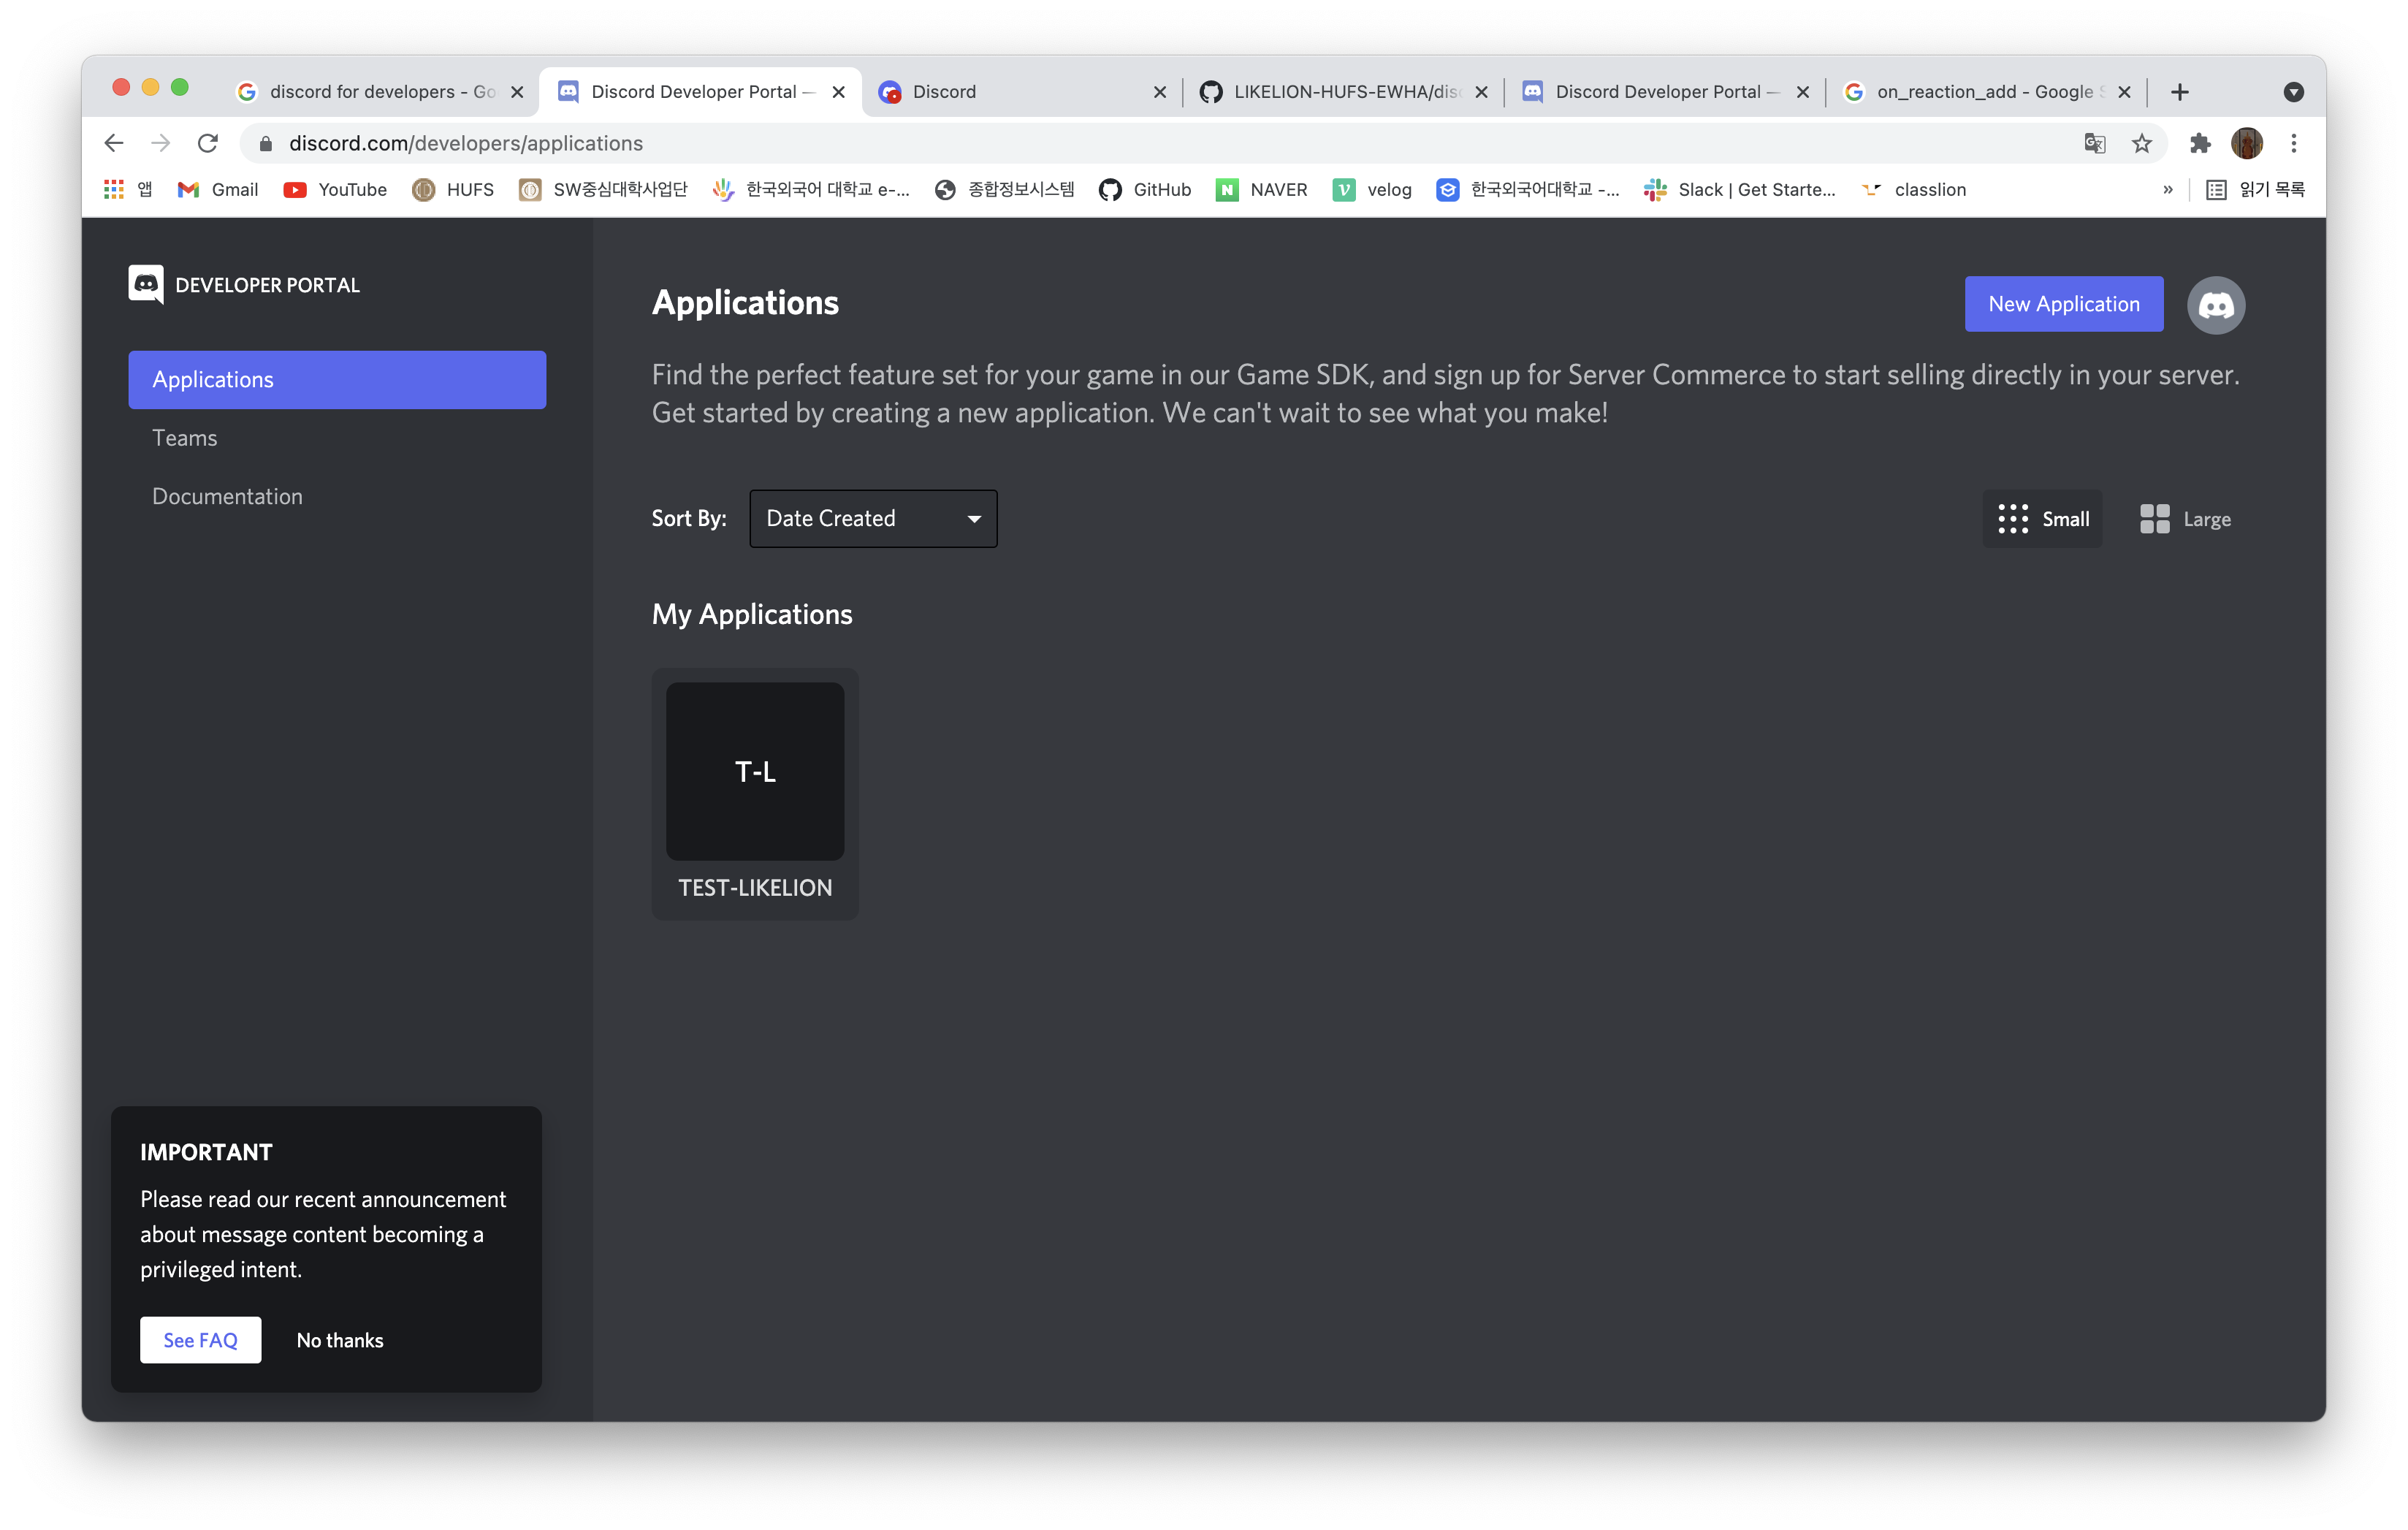
-
Bot에 들어가서 새로운 Bot을 만든다(흔한 이름이라면 이름을 바꿔야 봇이 생성됨에 유의하자)
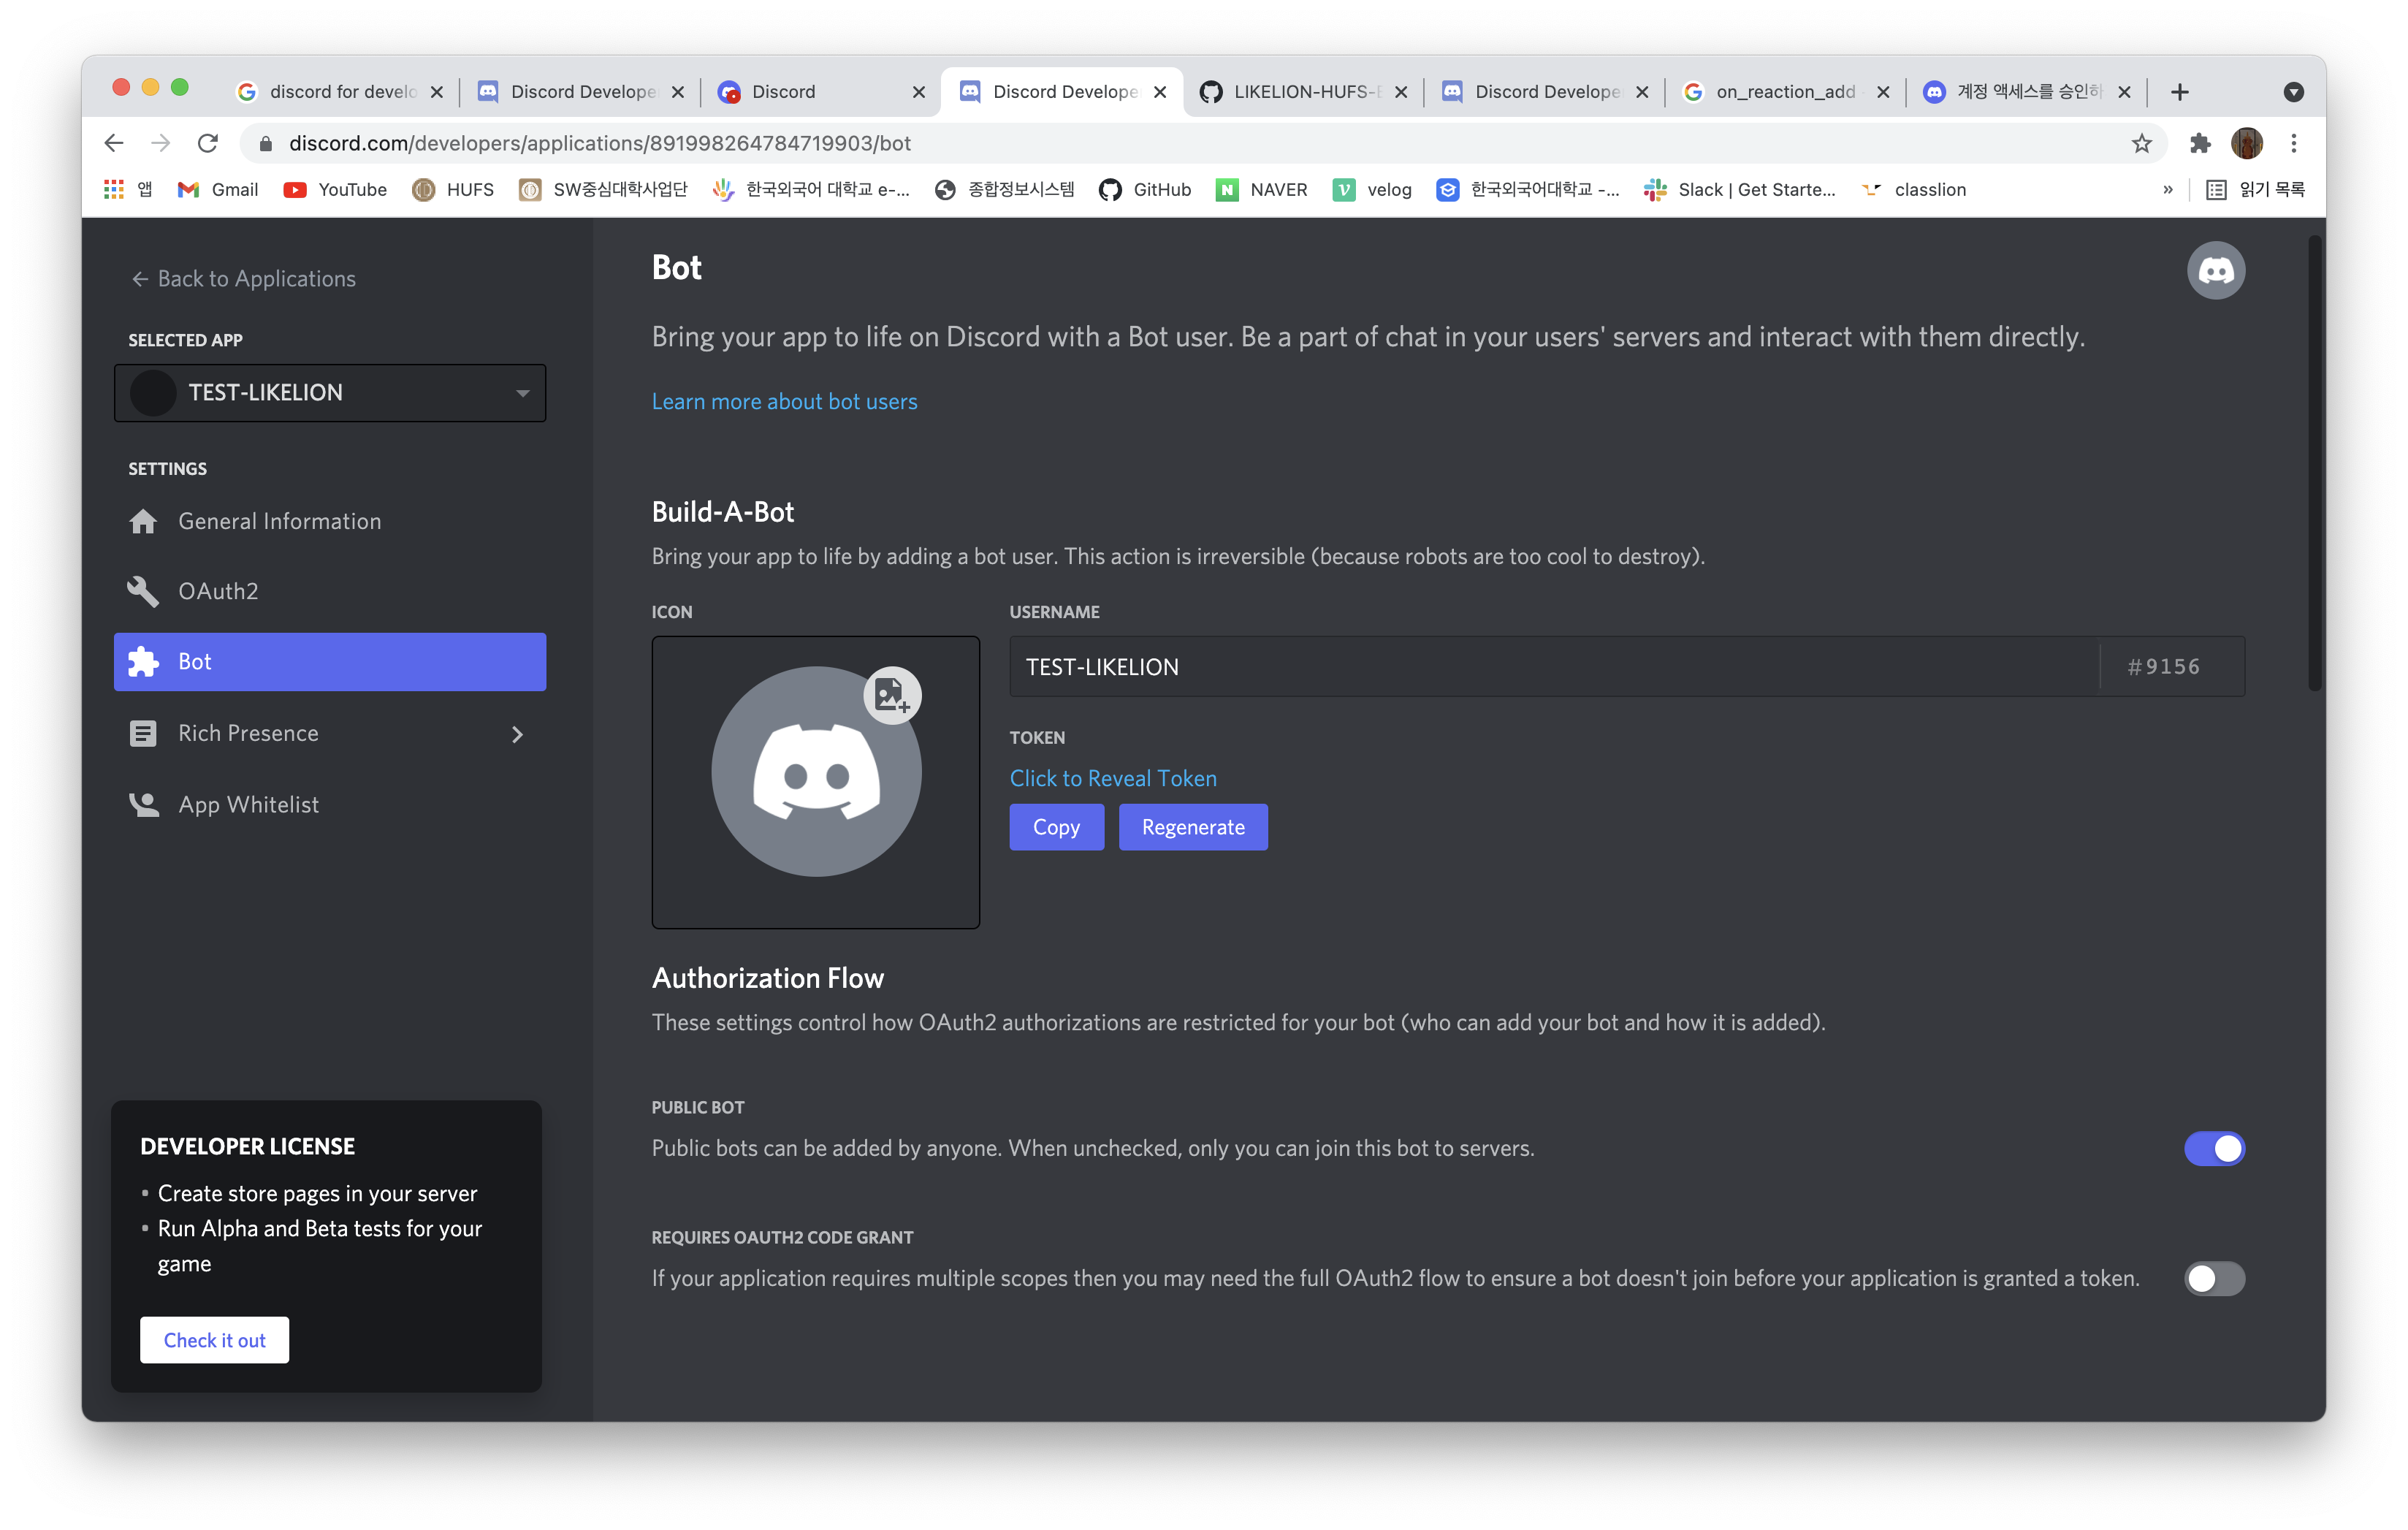
-
그리고
OAuth2로 들어가서bot체크박스에 체크를 하면 아래와 같이 코드를 copy할 수 있게 나온다.
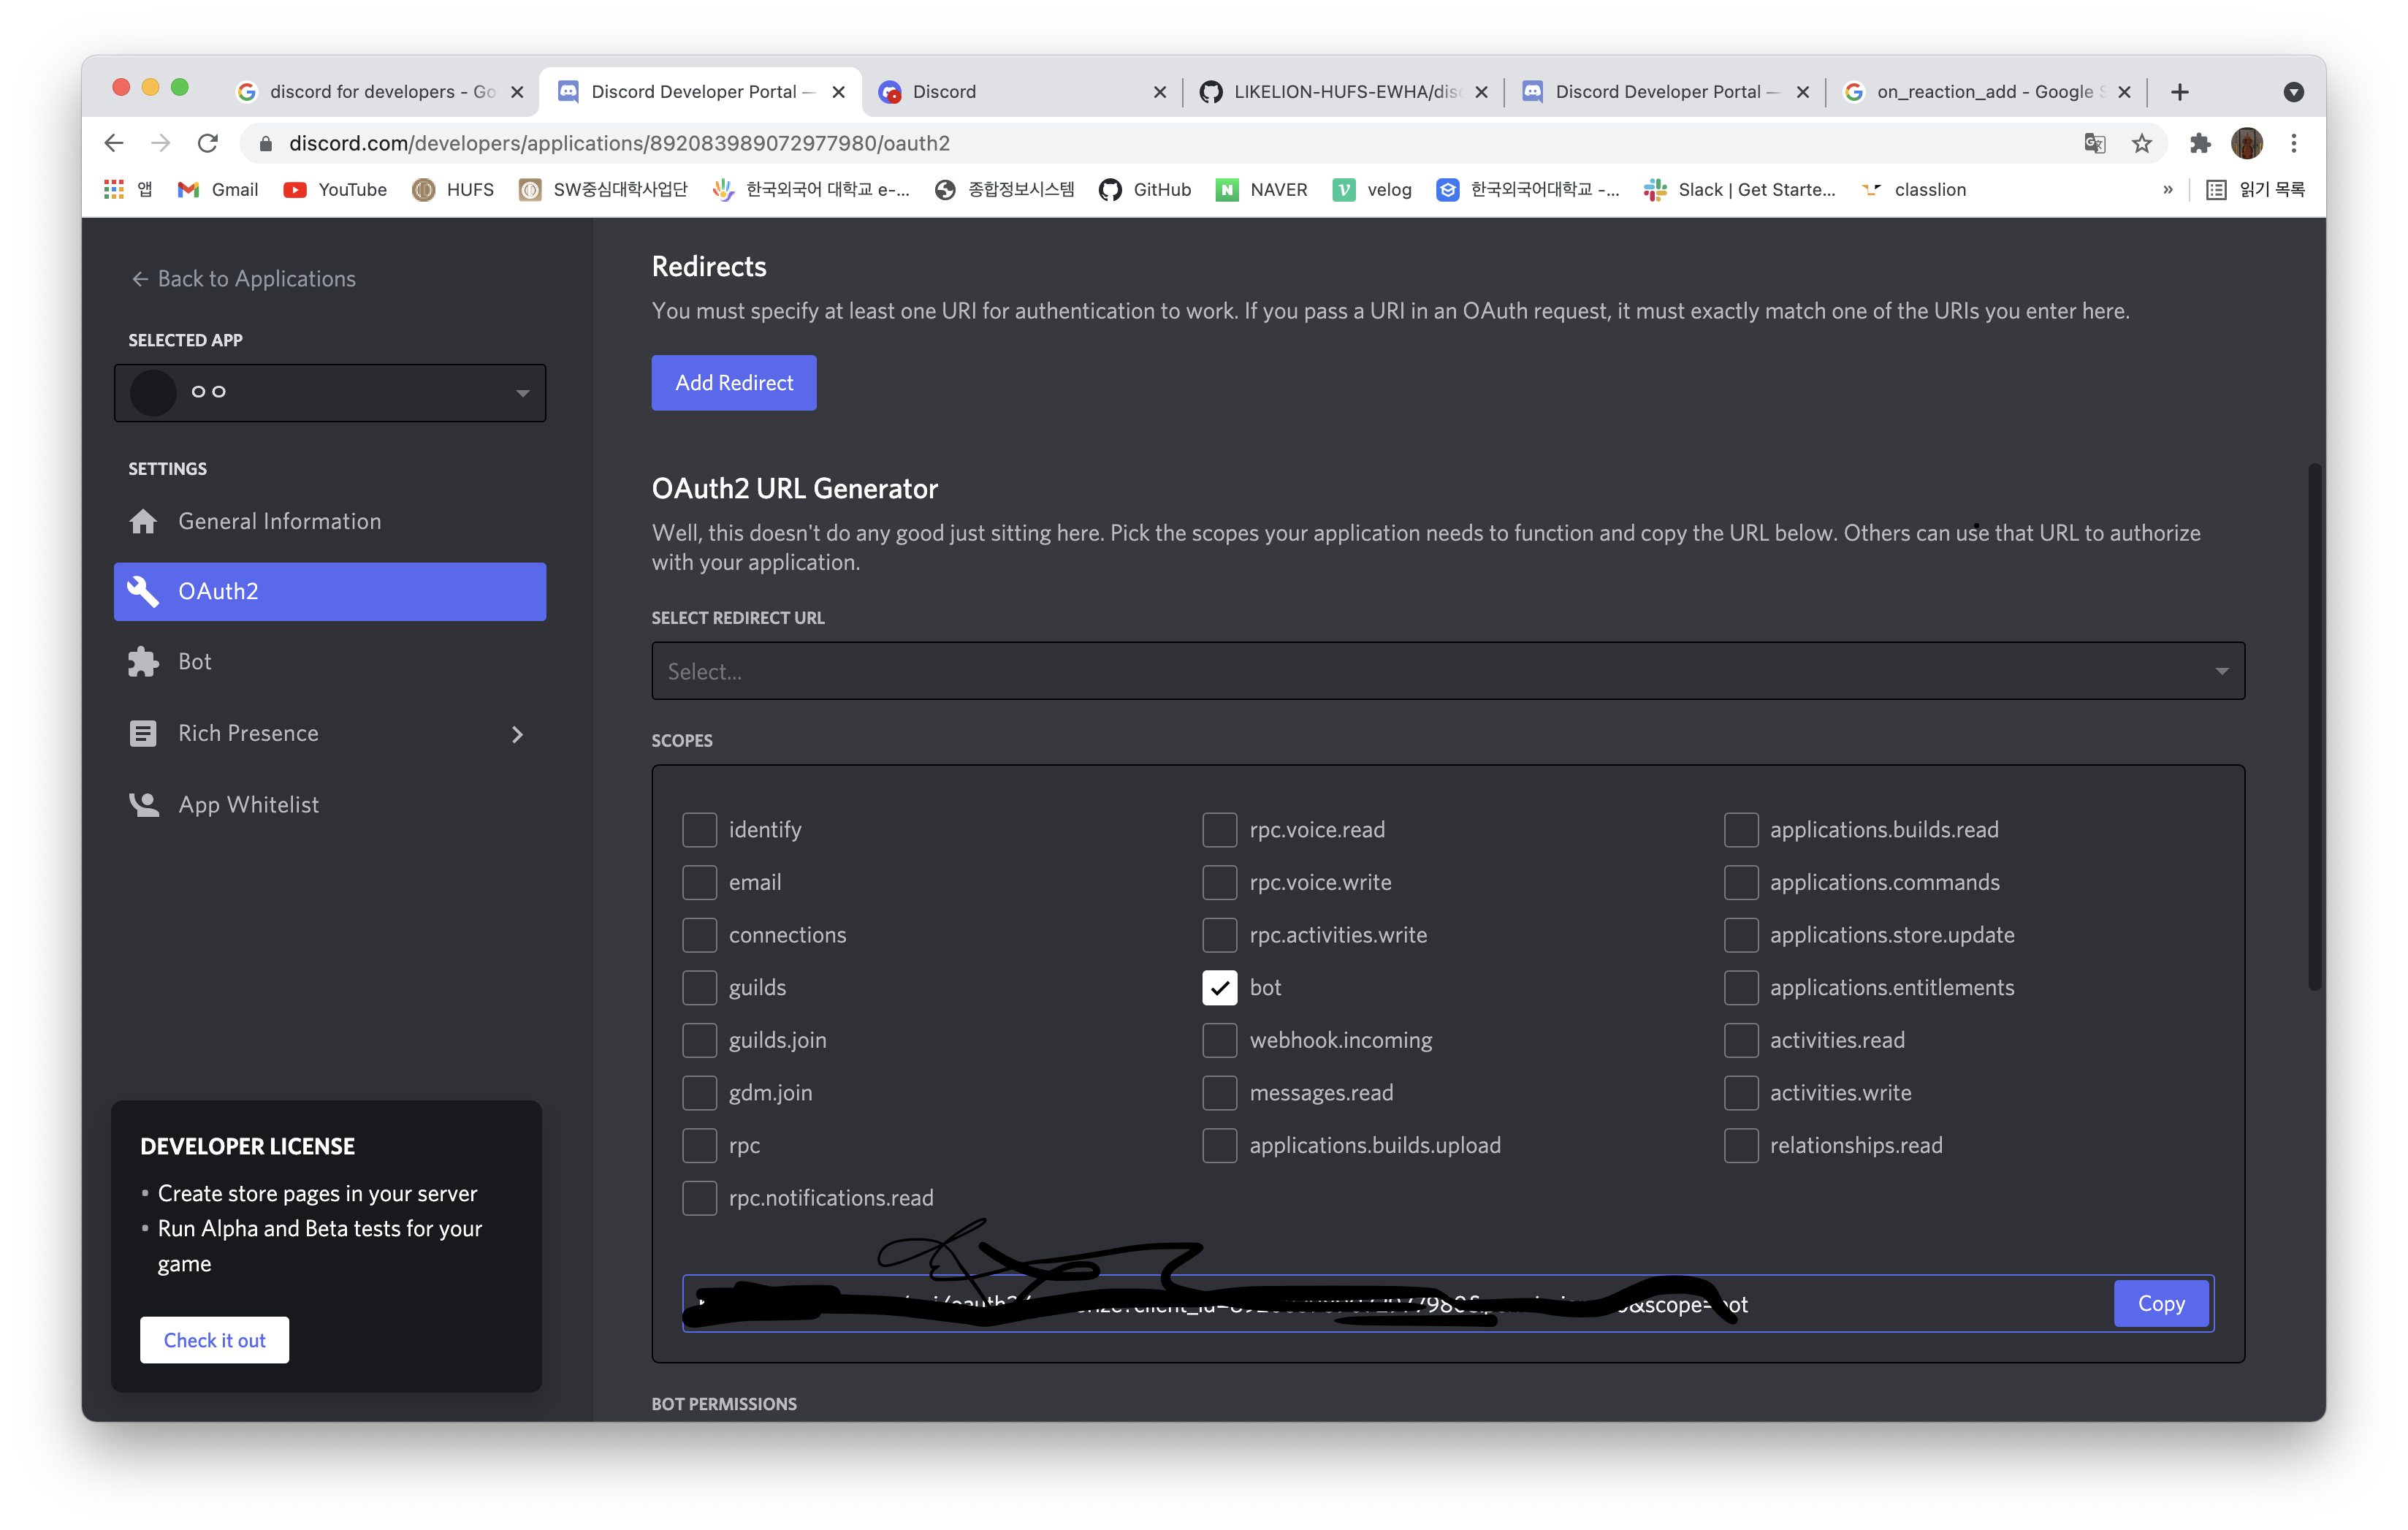
-
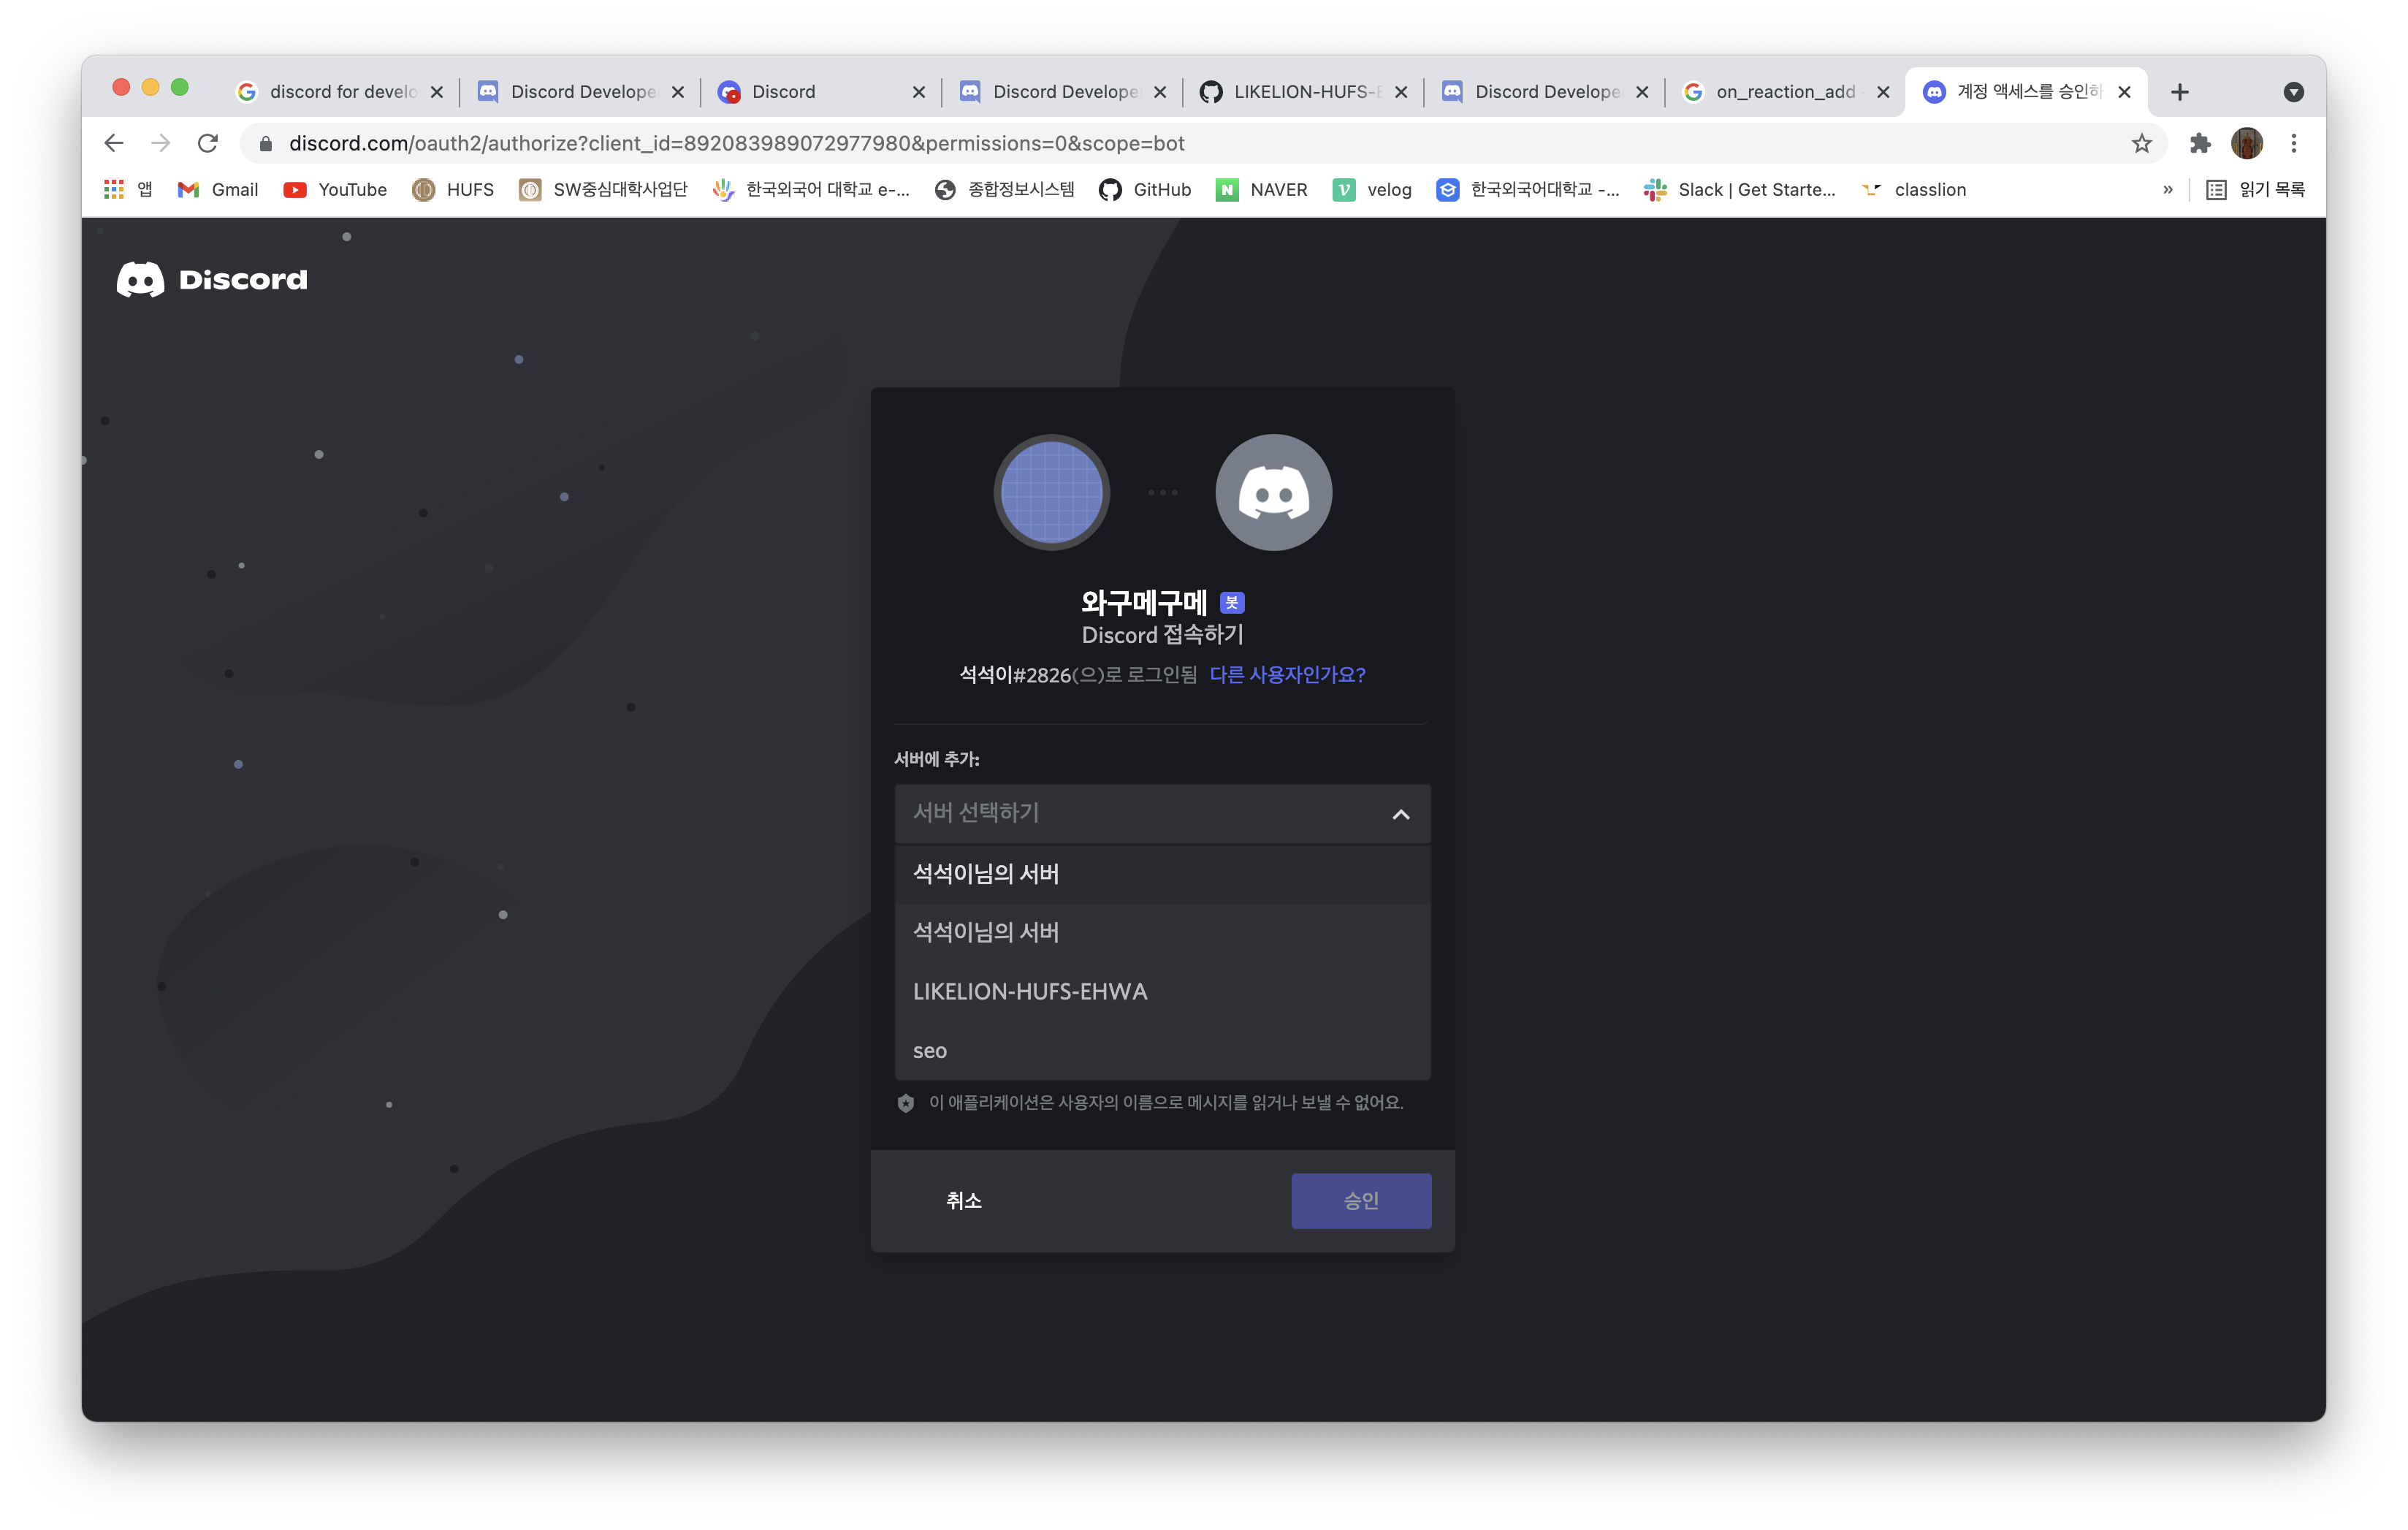
해당 주소를 copy하여 url로 접속하게 되면 다음과 같이 bot을 설정할 수 있는 창이 뜬다. (Bot을 넣으려는 서버를 선택하고 승인을 완료하자)
⛺️ python으로 discord bot 설정하기
-
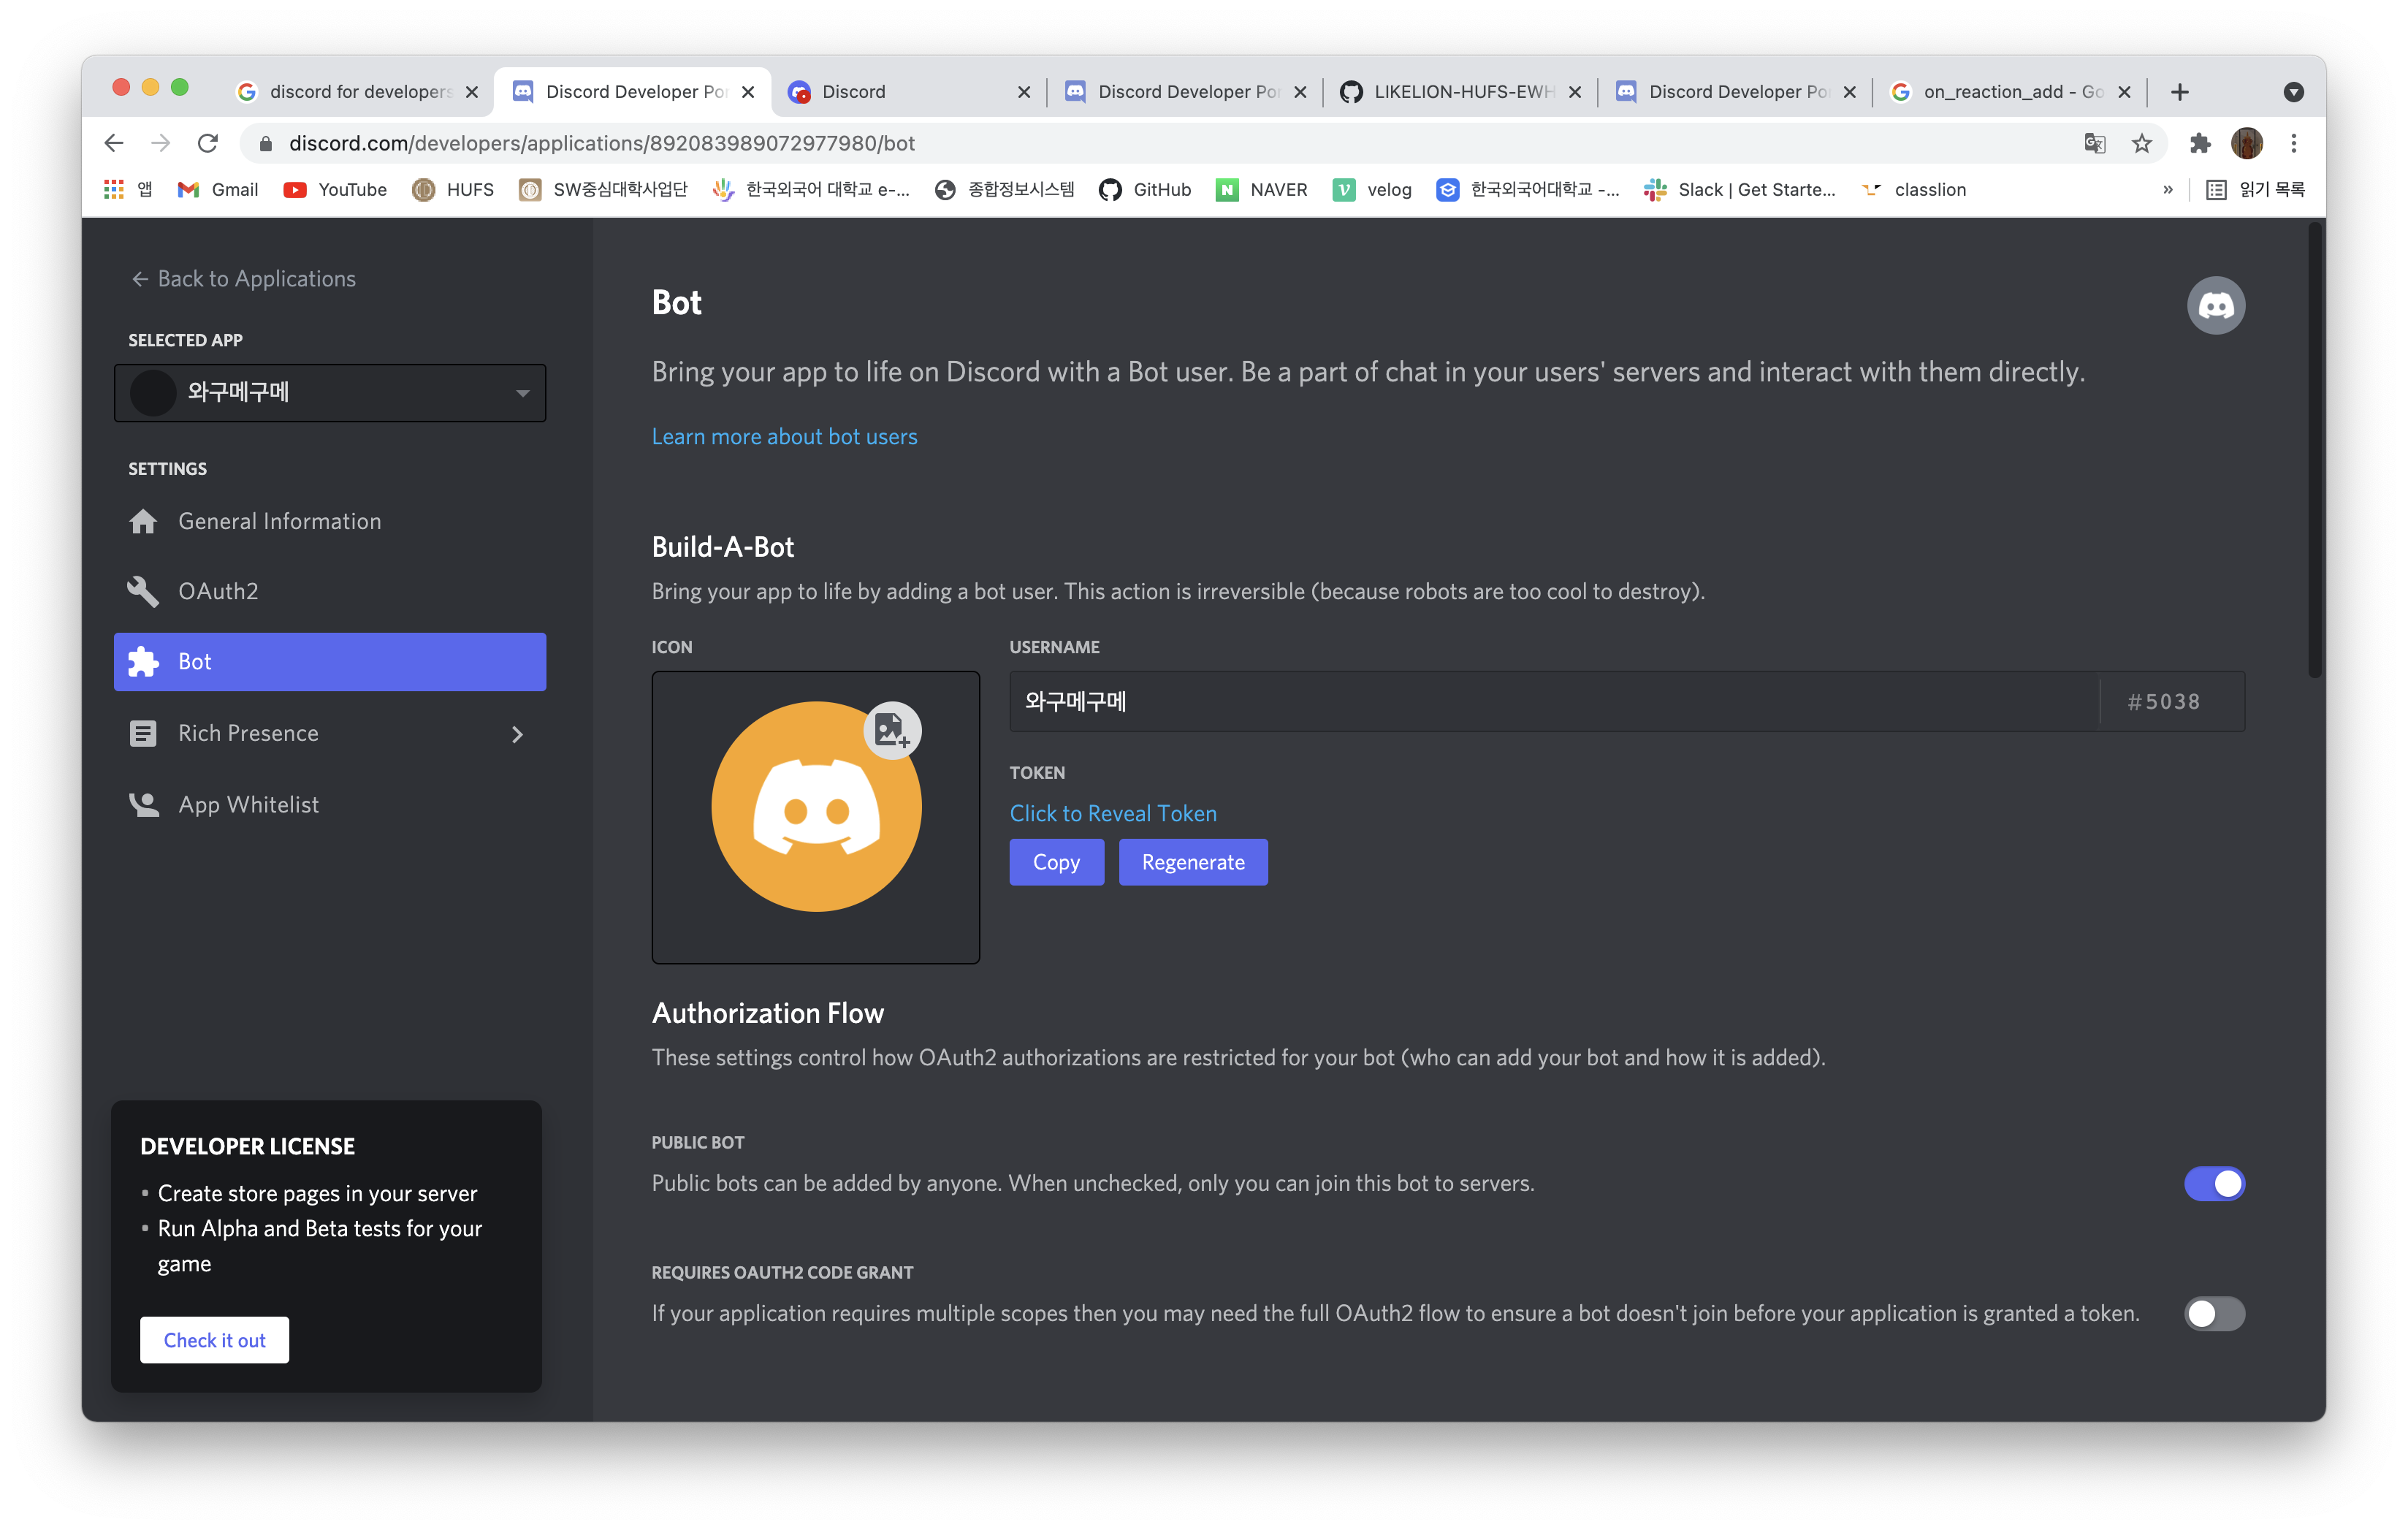
Discord Developer 사이트에서 Bot을 클릭해 들어가보면
Token이라는 것이 보인다.
-
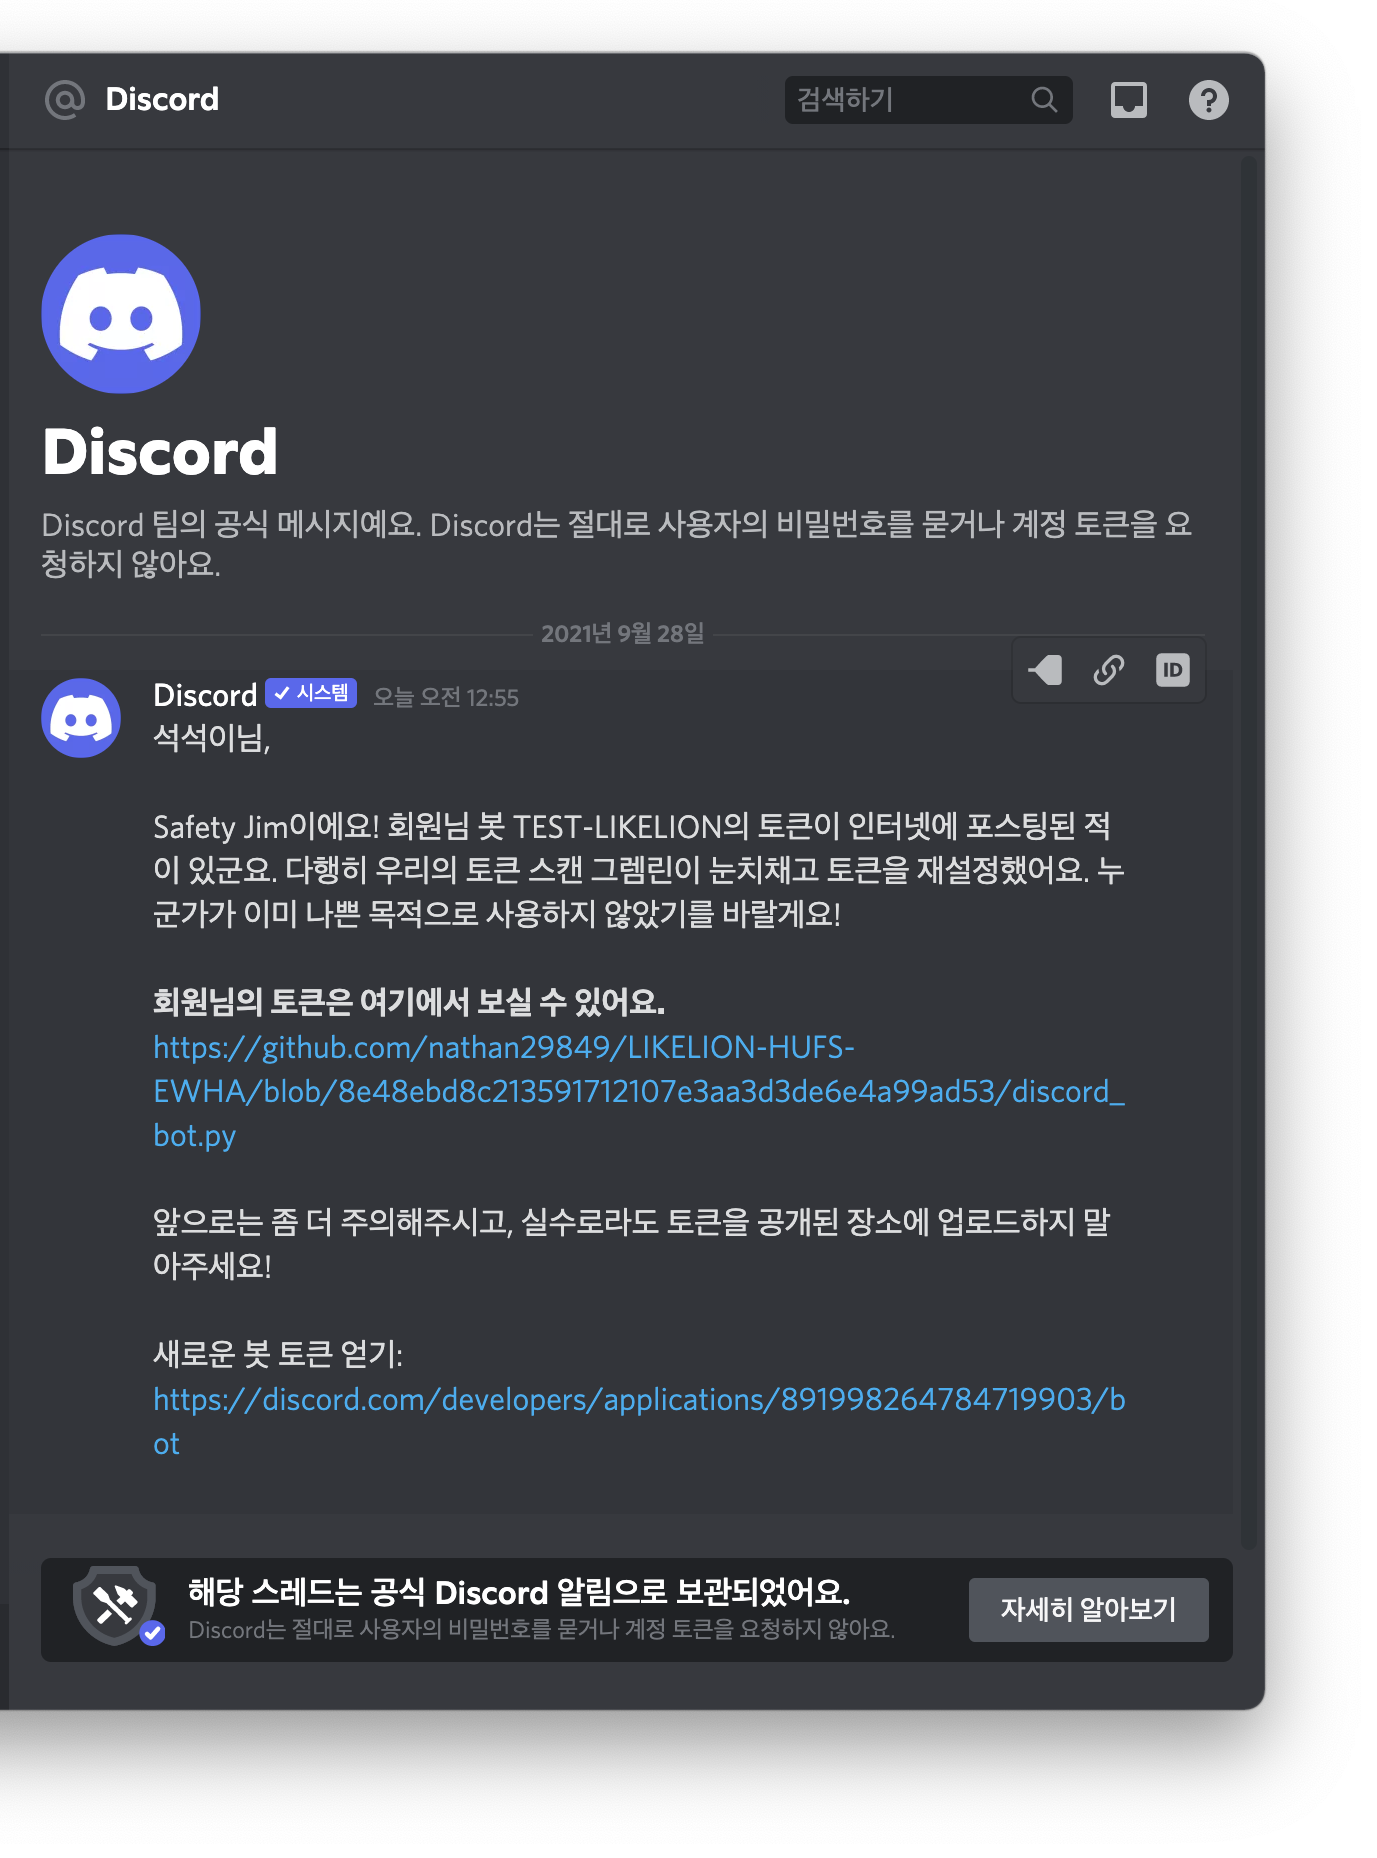
해당 토큰을 유출하게 되면 discord로 부터 아래와 같이 DM이 날아오고, 토큰이 재설정 되었다는 메시지가 오니 유출에 주의하자.
-
이 복사한 Token을 가지고 python file을 만들어 우리가 원하는 대로 Bot이 작동할 수 있도록 해줄 것이다.
-
아래와 같이 파이썬 파일을 작성해주면 된다. (토큰 정보에 복사한 Token을 넣어주면 된다.)
import discord
import random
from discord.ext import commands


bot = commands.Bot(command_prefix="!")

# command -> 시작 command !시작 랜덤 command!랜덤
# event -> on_massage, on_reactions_add

@bot.command()
async def 시작(ctx):
    await ctx.send("안녕! 안녕! 안녕!")

@bot.command()
async def 배고파(ctx):
    await ctx.send("친구한테 빌붙으세요")

@bot.command()
async def 랜덤(ctx):
    # 1~100까지 숫자 중 하나를 랜덤으로 뽑기
    number = random.randrange(1, 101)
    await ctx.send(f"뽑힌 숫자: {number}")

@bot.event
async def on_message(message):
    if message.author.bot == False:
        await message.channel.send("누군가가 메시지를 입력했습니다!")

@bot.event
async def on_reaction_add(reaction, user):
    await user.send("네가.. 이모티콘을 눌렀니..?")

bot.run("토큰정보")- 실행에 앞서 우선 터미널에서 install 받아야 할 목록이 있다.
pip3 install discord.py
pip3 install asyncio-
asyncio는 비동기 처리를 위해 필요하다.
참고 : 파이썬으로 비동기 처리하기 -
이렇게 아래 코드를 터미널에 입력하고나면 아래와 같이 잘 작동됨을 확인할 수 있다!
python3 discord_bot.py (파일의 이름)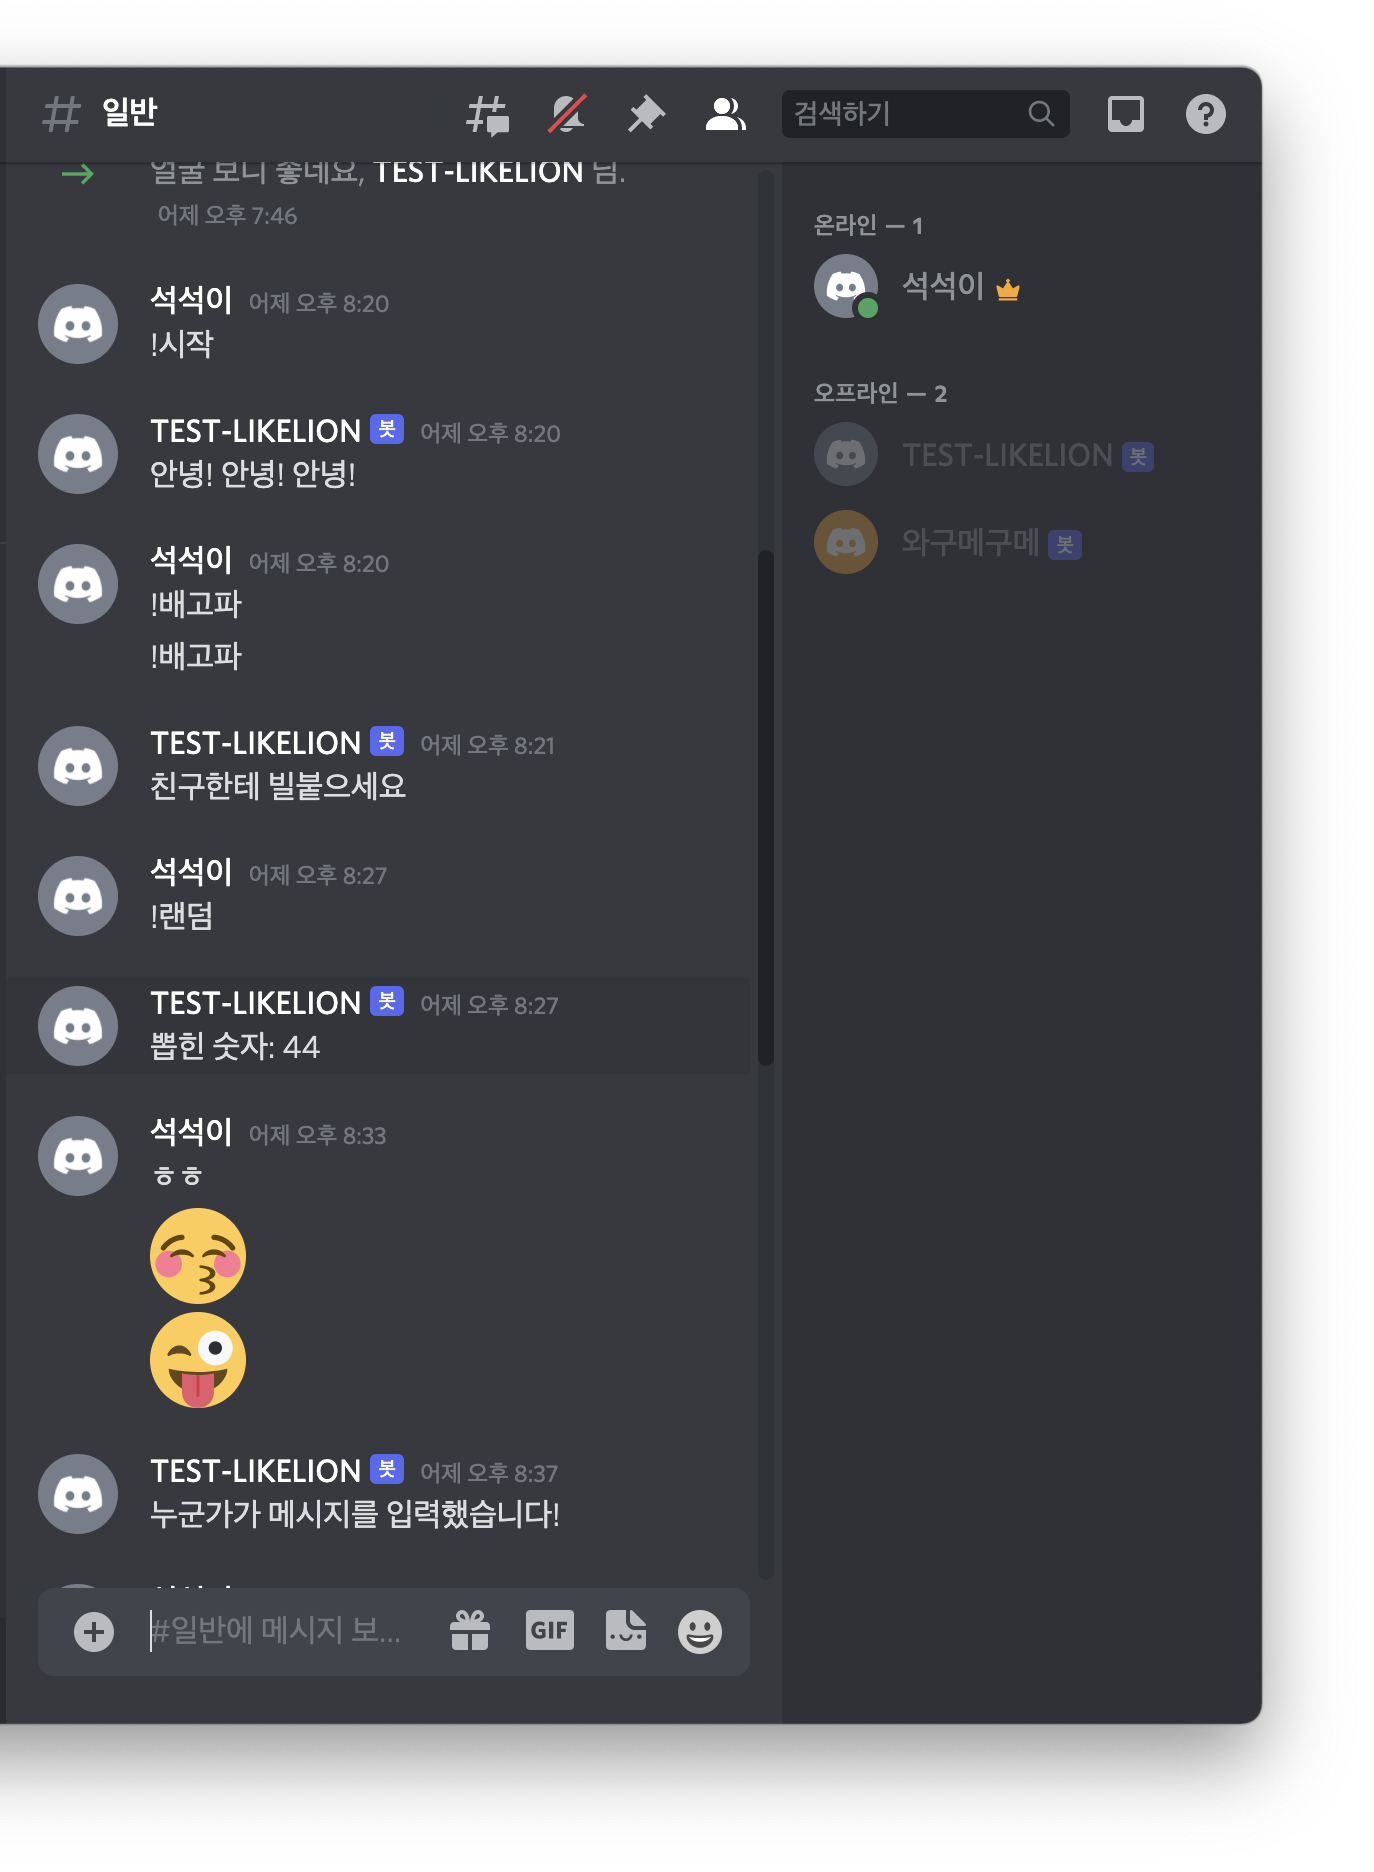
- 다만 위의 코드를 쳤을 때 터미널의 상태는 꺼지지 않고 계속 진행중이어야 한다.
(만약 파일이 조기 종료되었거나 봇의 작동이 확인되지 않는다면 이 페이지의 맨 아래 기술블로그를 참고하길 바란다.)
⛺️ API Reference
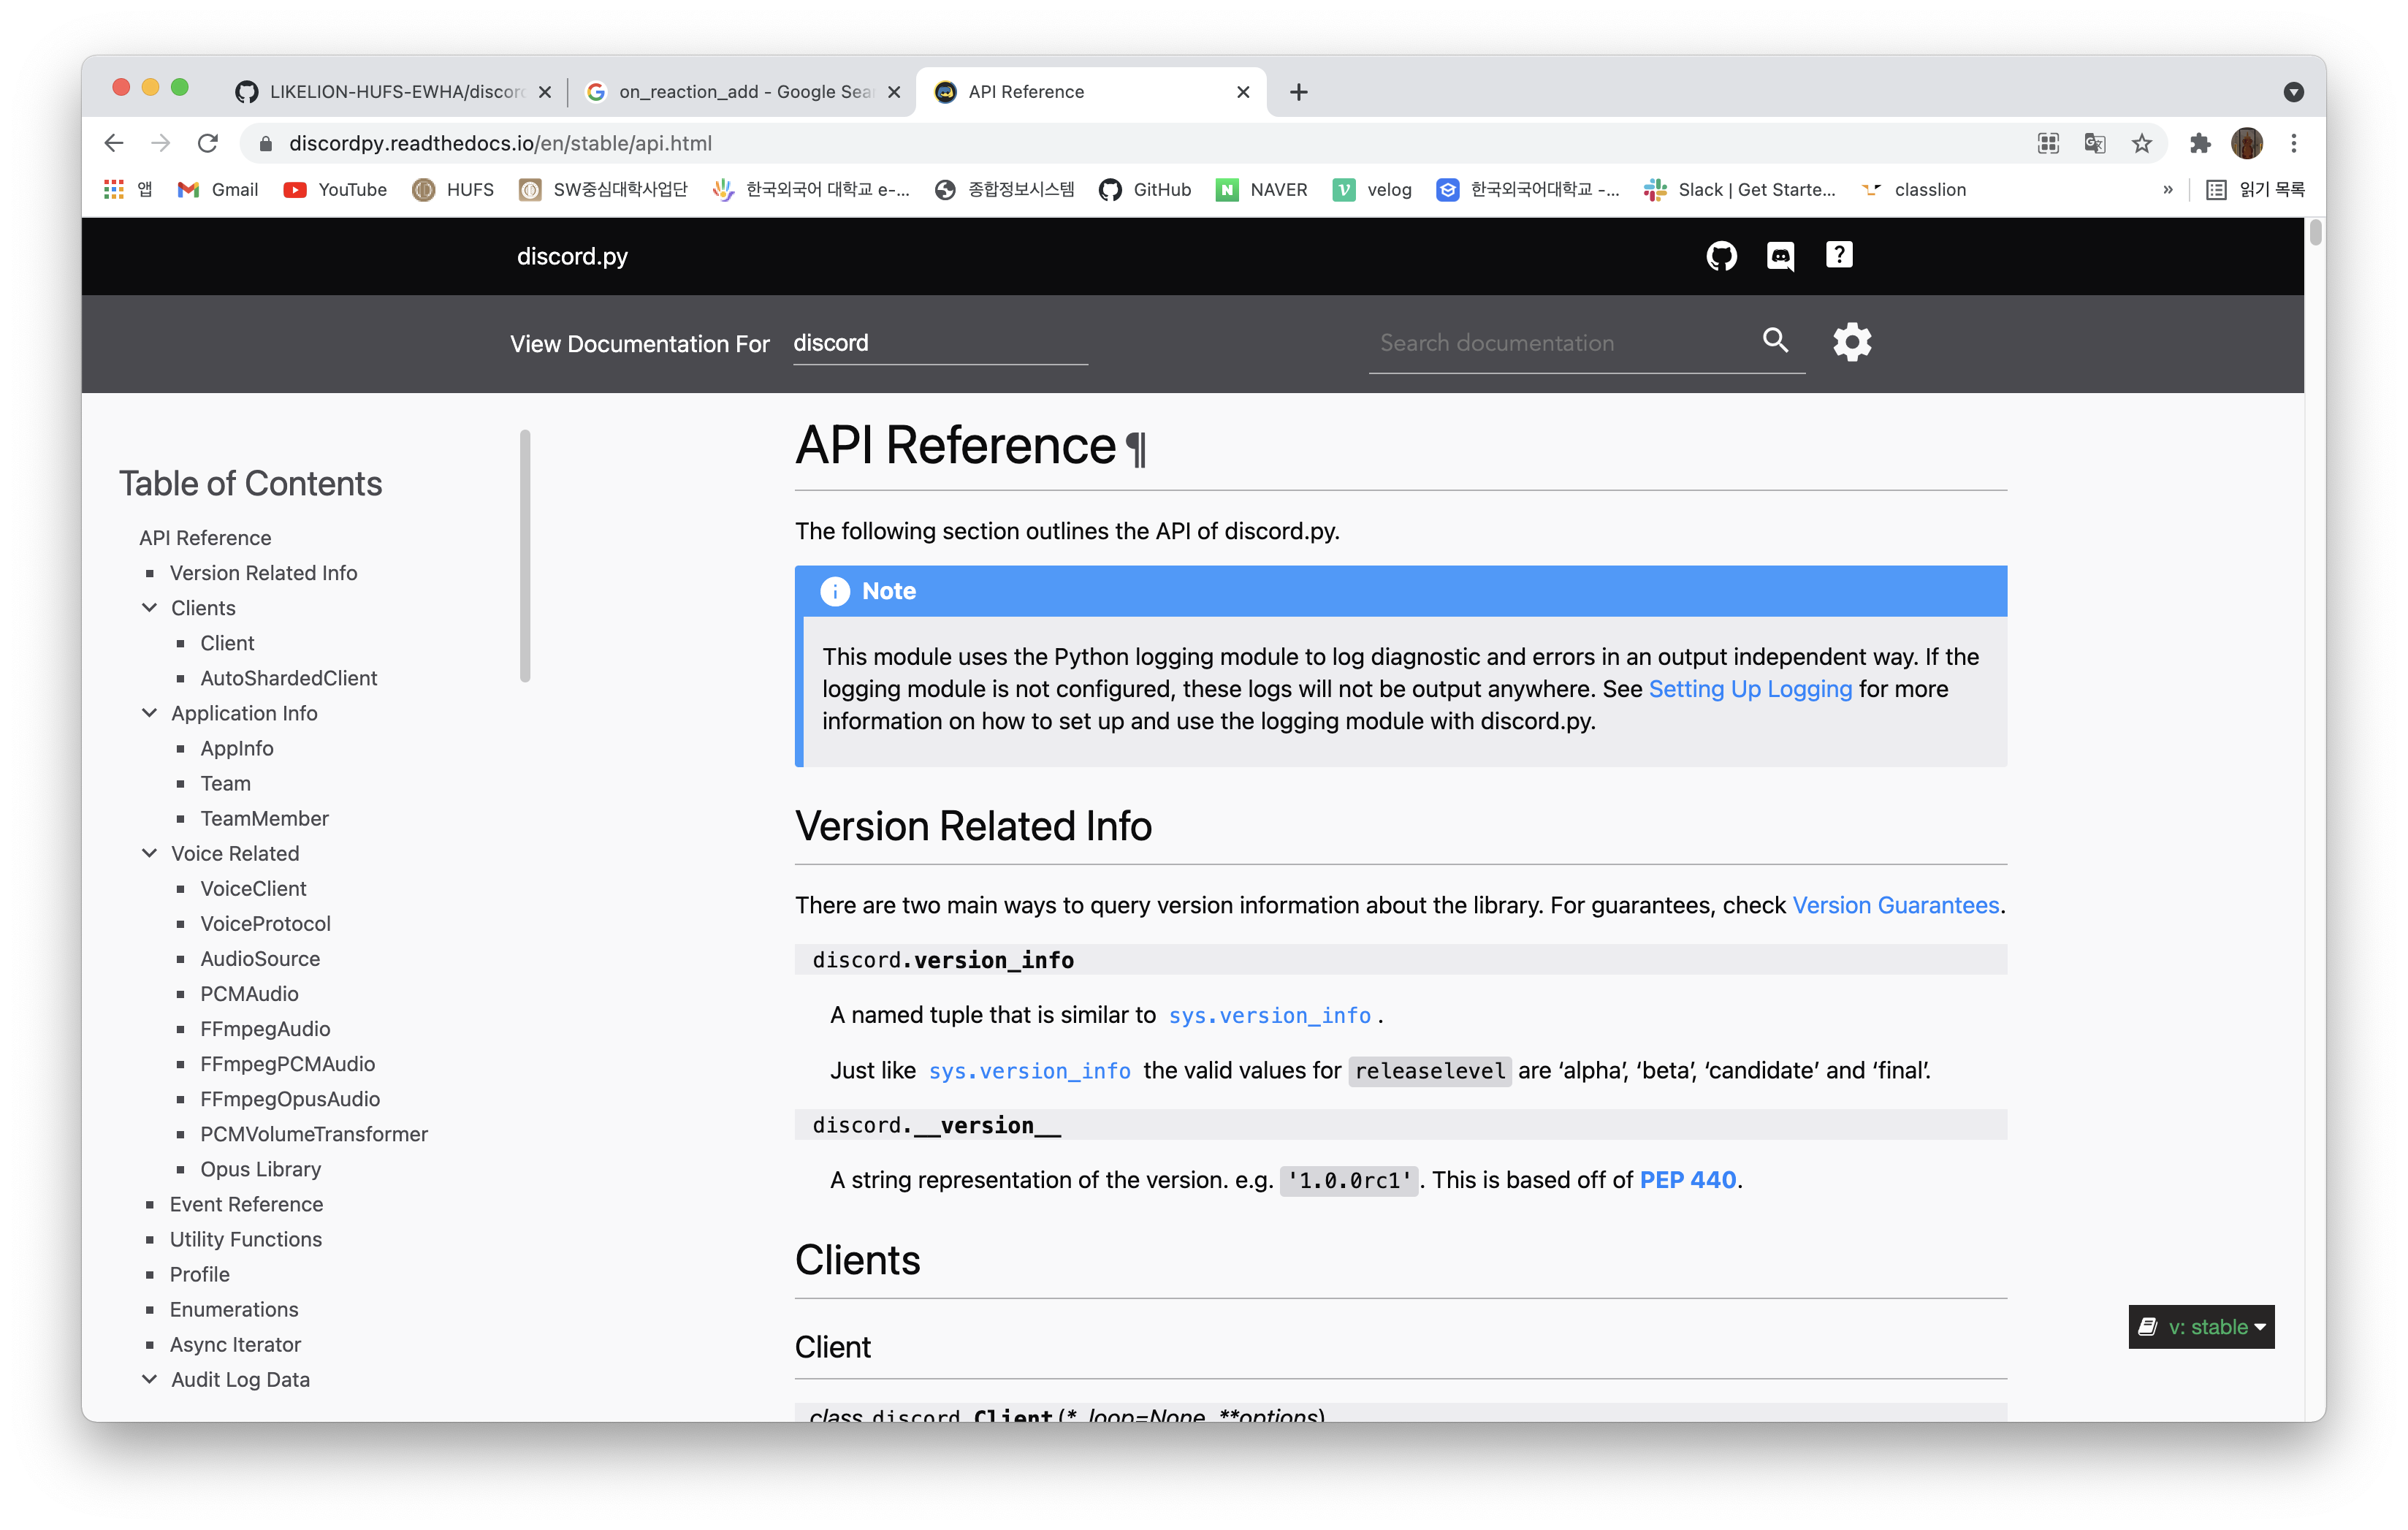
- 이곳에서 python API에 대한 소스를 얻을 수 있고 다양한 봇의 활동을 만들어 낼 수 있다.
++ python에서 discord bot을 만들면서 생기는 문제점
-
(async, import discord) 관련 문제점 해결에 관한 블로그를 첨부한다.
-
참고 : superclass.io
