.jpg)
Redux & Middleware
[ Middleware 기본 템플릿 ]
 /* 화살표 함수로 사용 */
const middleware = store => next => action => {
  // 하고 싶은 작업...
}

/* function키워드로 사용 */
function middleware(store) {
  return function (next) {
    return function (action) {
      // 하고 싶은 작업...
    };
  };
};
: Store에 여러개 Middleware 등록 가능
[ Redux에서 미들웨어를 사용 원리 ]
1) action을 dispatch
2) store에 등록된 Middleware 호출
3) 미들웨어가 끝나면 Reducer 호출
(두 번째 미들웨어가 있다면 next(action)으로 다음 미들웨어로 action을 넘겨줘야 한다)
[ Middleware 적용하기 ]
import { createStore, applyMiddleware } from 'redux';
import myLogger from './middlewares/myLogger';
...
const store = createStore(rootReducer, applyMiddleware(myLogger));
1) 'redux' 에서 'applyMiddleware' 가져오기
2) middleware 가져오기
3) store생성시 인자로 넘기기
redux-logger
- 리덕스 관련 정보를 전/후로 콘솔에 출력
- 상태 확인을 할때 유용한 미들웨어
1)
yarn add redux-logger
2) 적용import logger from 'redux-logger'; ... const store = createStore(rootReducer, applyMiddleware(logger));
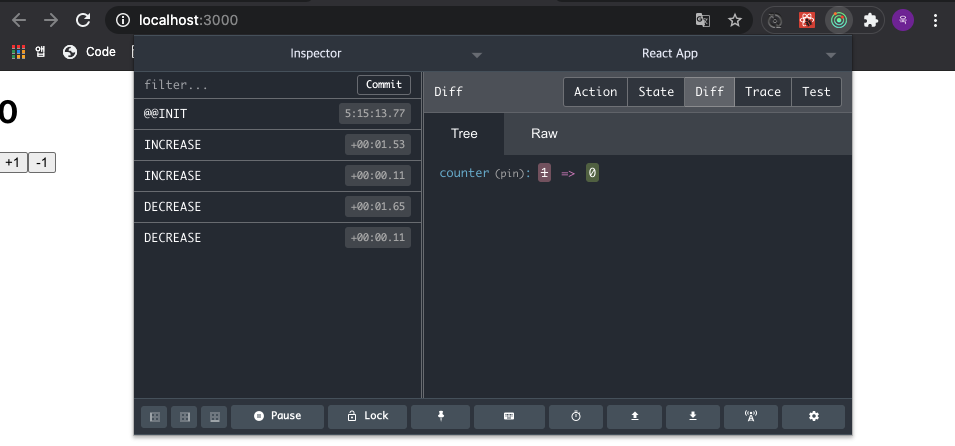
Redux DevTools 적용
- Redux 개발시 state정보를 확인할 수 있는 확장 툴
1)
yarn add redux-devtools-extension
2) applyMiddleware에 적용!import { composeWithDevTools } from 'redux-devtools-extension'; ... const store = createStore( rootReducer, composeWithDevTools(applyMiddleware(logger)) );
redux-thunk
- 액션을 함수형태로 사용할 수 있게 해주는 미들웨어
: dispatch()할 때 내부에 object가 아닌 function이 올 수 있고,
function()이 오면 getState와 dispatch를 매개변수로 받는 함수로
변환해주는게 thunk의 역할/* disaptch 내용으로 함수를 전달 가능! */ dispatch(thunkActionCreator(parameters)); ... /* 이 함수의 매개변수를 받고 dispatch와 getState를 받게 변환해준다 */ const thunkActionCreator = (parameters) => (dispatch, getState) => { // Code }
- 일반적으로는 액션객체만 다루기 때문에 그 사이에 어떤 작업을 할 수 없다
--> 그래서 thunk가 필요- 함수 사용이기 때문에 async/await 사용가능
- redux에서 비동기 작업을 처리할때 많이 사용
: react에서 '사이드 이펙트'란 API호출과 같은 유저 인터렉션(비동기작업)을 의미- (getSatate / dispatch) 2개의 매개변수를 가짐
1)
yarn add redux-thunk
2) 미들웨어에 추가import ReduxThunk from 'redux-thunk'; ... const store = createStore( rootReducer, // logger 를 사용하는 경우, logger가 가장 마지막에 와야합니다. composeWithDevTools(applyMiddleware(ReduxThunk, logger)) );
- 적용 후 액션을 함수로 호출하여 비동기 처리와 예외처리가 수월해짐
(try ~ catch / .then.().catch())
[ React에서 비동기 처리 ]
- React에서 비동기 처리를 하는 방법은 'Thunk' / 'Saga' 이렇게 두가지가 있다
- 두 방법은 사용하는 구조가 다르고 성능의 범위도 조금 다르다
- Saga는 기본적으로 필요한 구조가 많지만, 액션에 대해 상세한 핸들링 가능
- 자세한 비교 글 : https://medium.com/@ehddnjs8989/redux-thunk-vs-redux-saga-a2529c8ef0ca
React Router
: React는 보여지는 view를 위한 JS 라이브러리이기 때문에 그 외 기능은
이와 같은 third-party middleware 미들웨어를 사용해야 한다.
1)
$ yarn add react-router-dom
2) App.js 적용import { BrowserRouter as Router, Switch, Route, Link } from "react-router-dom"; ... function App() { return ( <Router> <NavBar /> <div> <Switch> <Route exact path="/" component={Auth(LandingPage, null ) } /> <Route exact path="/login" component={Auth(LoginPage, false) } /> <Route exact path="/register" component={Auth(RegisterPage, false)} /> <Route exact path="/movie/:movieId" component={Auth(MovieDetail, null)} /> <Route exact path="/favorite" component={Auth(FavoritePage, true)} /> </Switch> </div> </Router> ); }
- Router 태그로 전체를 감싼다
- Route 태그로 path와 연결시킬 component를 지정
- [ Switch vs exact ]
- exact : 주소값이 정확하게 path와 일치해야 해당 component로 보내는 Route의 속성
(설정하지 않으면 일부만 포함되도 경로로 보내버린다;)- Switch : 매치되는 하나의 Route만 실행하게 도와주는 모듈
(루트(/) 경로는 exact 해주는 것이 좋다)
(매치되는 첫번째에 보내버리므로 Route 순서에 유의)
- Route로 설정한 컴포넌트는 기본적으로 3가지 props를 가진다
- history : push / replace로 경로 이동 가능
- location : 현재 경로에 대한 정보 / QueryString 정보
- match : params 정보 등
Redirect 방법
1) Link 태그
: Link는 자동으로 a태그로 변환되어 redirect
특정 이벤트로 반응할 때에는 아래 withRouter 추천!import { BrowserRouter as Router, Switch, Route, Link } from "react-router-dom"; ... <Link to='/'>home</Link> <Link to='/about'>about</Link>
2) withRouter
: Redirect / params / querystring 정보 가져올 수 있다
(직접 Route된 컴포넌트가 아니라면 history를 상속받거나 해야되는데,
이 방법 없이도 withRouter를 통하면 바로 history, match, location을 받을 수 있다)[ 설정 ]
import { withRouter } from 'react-router-dom';

...

export default withRouter(LoginPage)
1) 'react-router-dom'에서 'withRouter' 가져오기
2) export default withRouter(모듈이름) 설정
- Redirect
props.history.push('/경로')
- params
 /* params 추출 */
  props.match.params.id
- querystring
yarn add query-string설치 후 파싱/* querystring 파싱하는 법 */ import queryString from 'query-string'; ... const query = queryString.parse(props.location.search);
3) history 받기 (Routing된 컴포넌트)
: Route로 직접 라우팅된 컴포넌트는 기본적으로 props에 history, match, location이 있다
그렇기 때문에, 라우팅된 컴포넌트에서는 바로 props에서 history를 사용해서 라우팅 하면 된다.
(직접 라우팅된 컴포넌트가 아닌 경우 라우팅된 페이지로부터 history를 props로 받거나, withRouter를 이용해야한다)
4) NavLink


