
IBOutlet & IBAction
IBOutlet
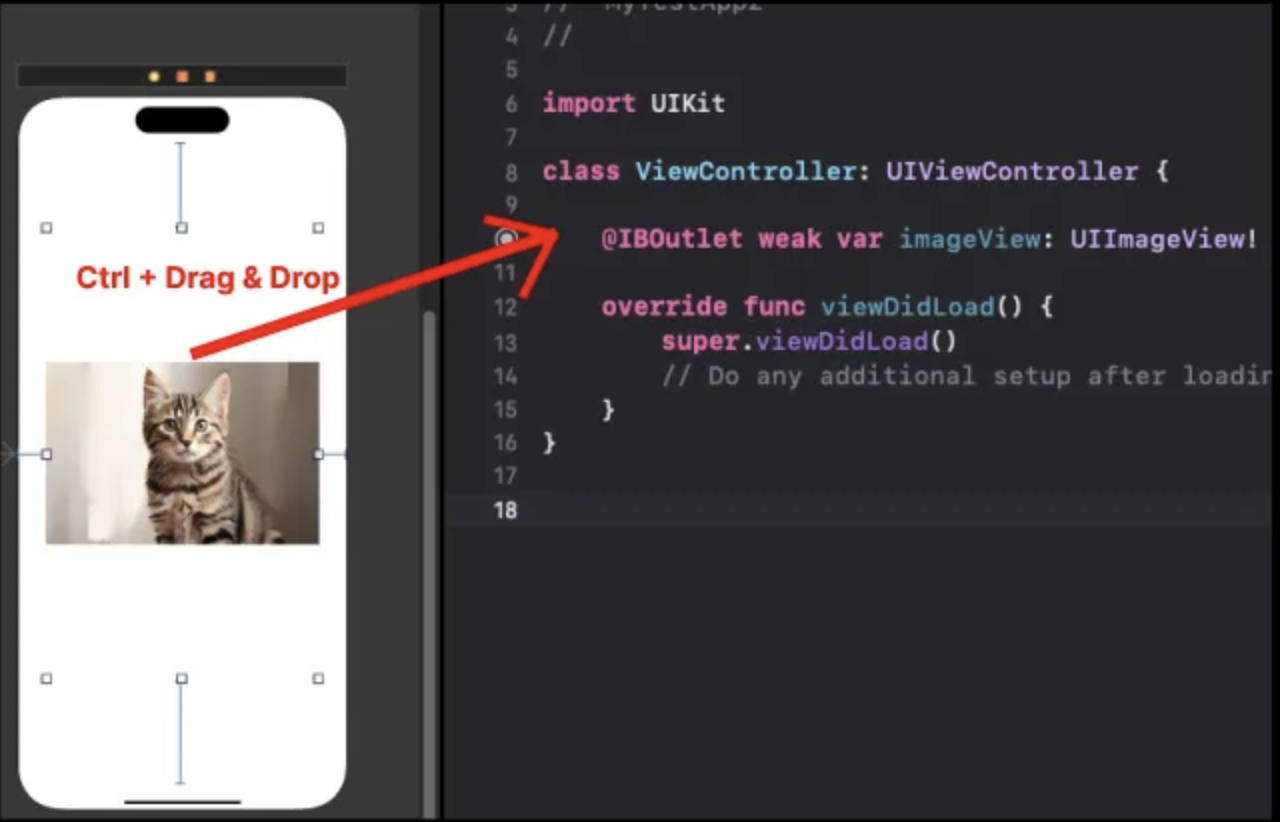
IBOutlet은 Interface Builder 와 연결된 객체.- UI 객체를 스토리보드에서
ctrl을 누른 채로Drag & Drop하면IBOutlet생성 가능. - 혹은 마우스 우클릭으로
Drag & Drop해도 됨. - `@IBOutlet weak var imageView: UIImageView!`
weak는 약한 참조를 의미 → 숙련 과정에서 자세히 공부.- 스토리보드와 UI 객체의 연결고리 역할.
- IB는
Interface Builder의 줄임말.
IBAction
IBAction 개념
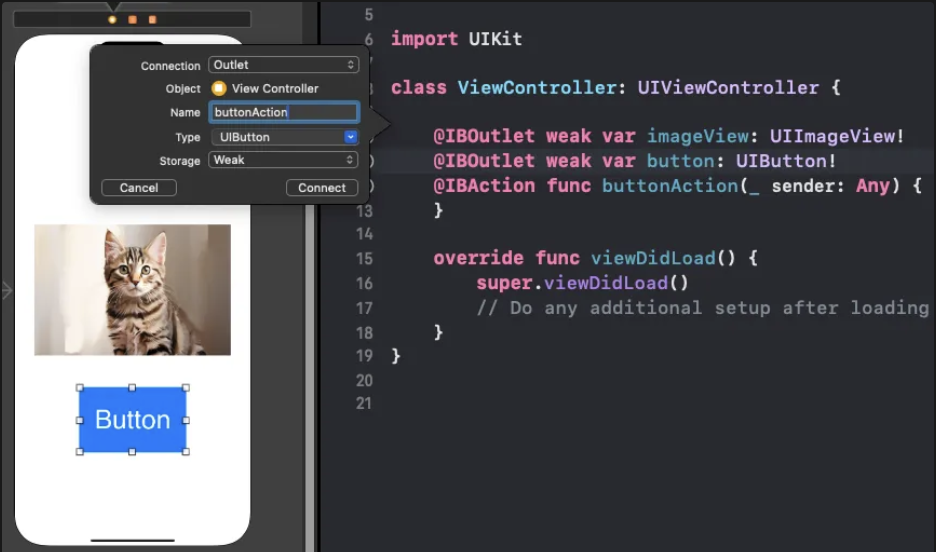
IBAction은 Interface Builder와 연결된 Action.IBOutlet생성할 때처럼 UI 객체를 스토리보드에서ctrl을 누른 채로Drag & Drop. →Connection항목에서Action선택. → 마찬가지로 마우스 우클릭으로Drag & Drop해도 됨.
- 스토리보드와 UI 액션 (이벤트)의 연결고리 역할.
- IB는 마찬가지로
Interface Builder의 줄임말.
💡 ex1) IBAction으로 버튼이 클릭 되었다는 print 문을 찍어보자.
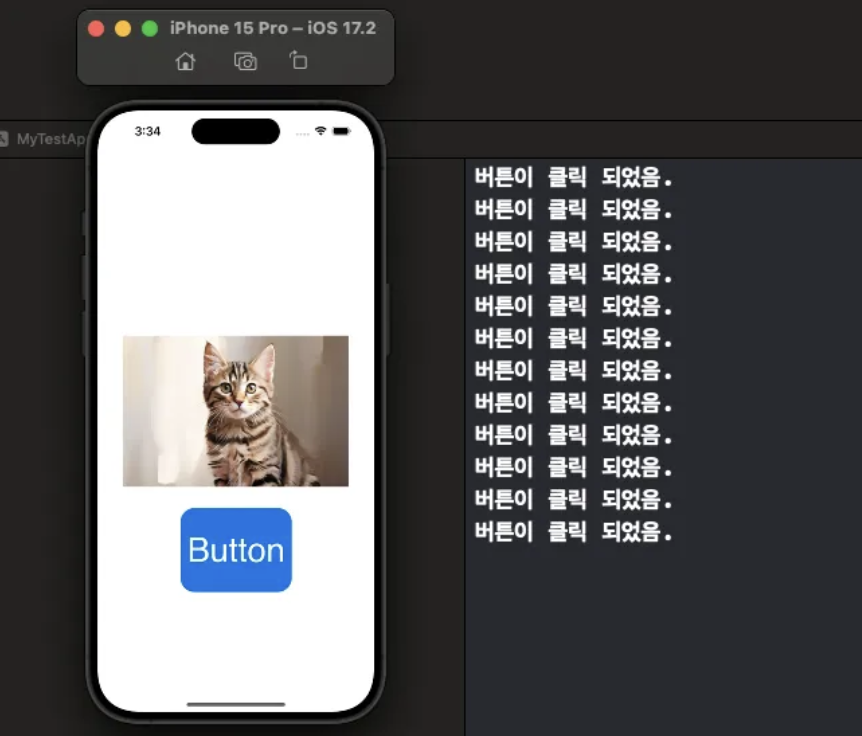
버튼이 클릭될 때마다 IBAction에 작성된 로직 실행됨.
예제 코드
import UIKit
class ViewController: UIViewController {
@IBOutlet weak var imageView: UIImageView!
@IBOutlet weak var button: UIButton!
@IBAction func buttonAction(_ sender: Any) {
print("버튼이 클릭 되었음.")
}
override func viewDidLoad() {
super.viewDidLoad()
// Do any additional setup after loading the view.
}
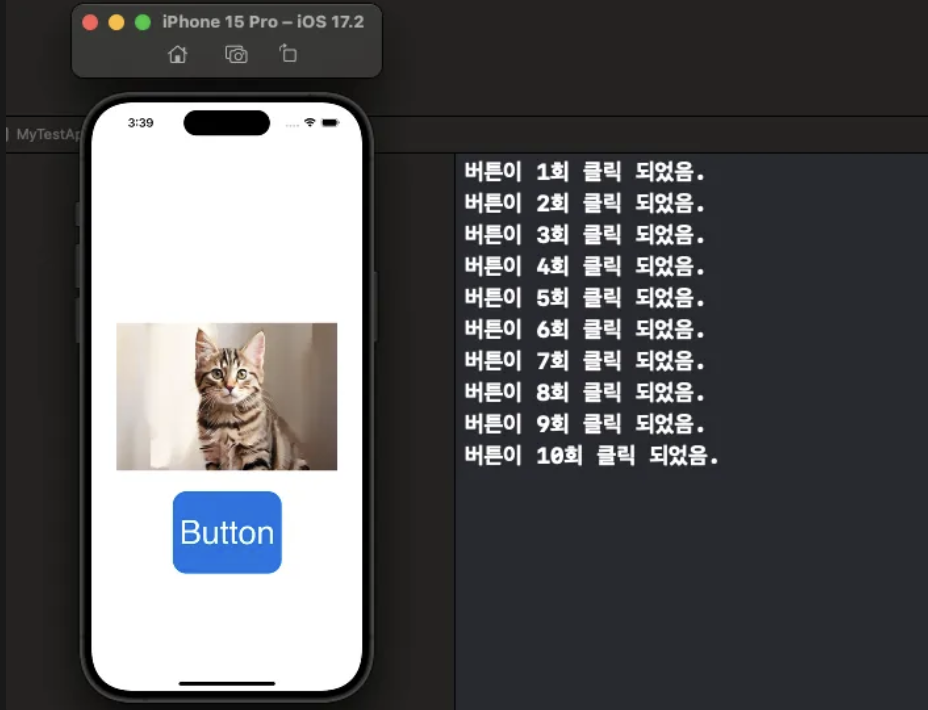
}💡 ex2) 변수를 이용해서, 버튼이 몇 번 클릭 되었는지 세도록 해보자.
예제 코드
import UIKit

class ViewController: UIViewController {

    @IBOutlet weak var imageView: UIImageView!
    @IBOutlet weak var button: UIButton!
    @IBAction func buttonAction(_ sender: Any) {
        self.number += 1
        print("버튼이 \(number)회 클릭 되었음.")
    }
    private var number: Int = 0

    override func viewDidLoad() {
        super.viewDidLoad()
        // Do any additional setup after loading the view.
    }
}
💡 ex3) 버튼을 클릭하면, 강아지 사진으로 바뀌도록 구현해보자.

⚠️ 먼저 Image asset 디렉토리에 dog.jpeg를 넣어야 한다.
예제 코드
import UIKit

class ViewController: UIViewController {

    @IBOutlet weak var imageView: UIImageView!
    @IBOutlet weak var button: UIButton!
    @IBAction func buttonAction(_ sender: Any) {
        self.imageView.image = UIImage(named: "dog")
    }

    override func viewDidLoad() {
        super.viewDidLoad()
        // Do any additional setup after loading the view.
    }
}
맨날 최선을 다하지는 마러라. 피곤해서 못산다.


썸네일보고 팔로우함;
인생 반 개이득