오늘 학습 내용 ✅
목표1
- 계좌(Account)는 ERD 그대로 “최소 정보만” 가지며,
- Account 모델에는 balance 같은 필드 절대 넣지 않음
- 모든 금액/입출금/잔액 관련 로직은 Transaction 테이블에서만 관리하는 구조
- 잔액(balance), 거래내역(+/−), 이후잔액(balance_after)은 모두 Transaction에서 계산/저장
목표2
- 거래 수정 시 balance_after 재계산
- 거래 삭제 시 auto rollback (즉, 뒤의 거래들의 balance_after가 자동으로 다시 계산됨)
- 즉, 특정 거래가 수정/삭제되면 해당 거래 이후의 모든 거래들이 다시 계산되어야 함
1. 공통 로직 — 계좌 전체 거래 재계산 함수
- 계좌 account에 대해 모든 거래를 transaction_at + id 순으로 정렬한 뒤
- balance_after를 처음부터 다시 계산
- 계좌 account에 대해 모든 거래를 transaction_at + id 순으로 정렬한 뒤
def recalc_account_transactions(account):
    transactions = account.transactions.order_by('transaction_at', 'id')

    balance = 0
    for tx in transactions:
        if tx.type == "INCOME":
            balance += tx.amount
        else:
            balance -= tx.amount

        tx.balance_after = balance
tx.save()- 1) 거래 삭제 시 auto rollback
def perform_destroy(self, instance):
    account = instance.account
    instance.delete()

    # 삭제 후 전체 balance_after 다시 계산
recalc_account_transactions(account)- 2) 거래 수정 시 balance_after 재계산
def perform_update(self, serializer):
    instance = self.get_object()
    account = instance.account

    # 새 값으로 저장
    serializer.save()

    # 수정 후 전체 거래 balance_after 재계산
    recalc_account_transactions(account)
어제의 코드 리뷰
accounts/urls.py
- path('', AccountListCreateView.as_view(), name='account_list')
- /accounts/ 로 들어오면 계좌 목록 조회 + 계좌 생성
- path('<int:pk>/', AccountDetailView.as_view(), name='account_detail')
- /accounts/3/ 같은 경로에서 특정 계좌 조회 / 수정 / 삭제
- path('', AccountListCreateView.as_view(), name='account_list')
accounts/views.py
- AccountListCreateView
- ListCreateAPIView → GET(목록), POST(생성)
- IsAuthenticated → 인증 필요
- get_queryset() → 로그인한 사용자 본인의 계좌만 조회
- perform_create() → 계좌 생성 시 자동으로 user 설정
- AccountDetailView
- RetrieveUpdateDestroyAPIView → GET/PUT/PATCH/DELETE 가능
- 유저의 계좌만 조회 가능
- AccountListCreateView
transactions/urls.py
- /transactions/ → 목록 조회 + 생성
- /transactions/3/ → 조회 + 수정 + 삭제
오늘의 코드 리뷰
- 거래(Transaction) 생성 시 잔액(balance_after)을 자동 계산
- 계좌 소유자 검증까지 처리하는 핵심 로직
    def perform_create(self, serializer):
account = serializer.validated_data['account']- 요청(body)에 들어온 account 값(FK)을 꺼내는 부분.
- 검증(validated)된 account 객체를 가져옴.
        if account.user != self.request.user:
raise PermissionDenied("이 계좌에 거래를 생성할 수 없습니다.")- 계좌 소유자 검증
- 로그인한 사용자(self.request.user) / 거래하려는 계좌(account.user)
- 두 사용자가 다른 경우 → 해당 계좌에 거래 생성 금지
- 로그인한 사용자(self.request.user) / 거래하려는 계좌(account.user)
        # 계좌의 최신 balance_after = 최근 거래 balance_after
        last_transaction = (
            account.transactions.order_by('-transaction_at', '-id').first()
)- 마지막(가장 최근) 거래 찾기
- 의미: 해당 계좌(account)의 모든 거래 중 날짜 내림차순 / id 내림차순 정렬()
- 가장 맨 위 한 개 = 최신 거래 / -id = 거래시간이 같을 경우 id값이 큰것이 최신
- 의미: 해당 계좌(account)의 모든 거래 중 날짜 내림차순 / id 내림차순 정렬()
last_balance = last_transaction.balance_after if last_transaction else 0- 마지막 잔액 값 가져오기
- 이전에 거래가 있으면 → 마지막 거래의 balance_after 사용
- 거래가 아예 없으면 → 초기 잔액을 0으로 설정
        amount = serializer.validated_data['amount']
type = serializer.validated_data['type']- amount / type 가져오기
- 요청에서 받은 금액(amount)과 거래 타입(type: INCOME | EXPENSE) 가져옴.
        # 새 잔액 계산
        if type == 'INCOME':
            new_balance = last_balance + amount
        else:
            new_balance = last_balance - amount

        # 저장
        serializer.save(
            user=self.request.user,
            balance_after=new_balance
)- 새로운 잔액 계산
- 입금(INCOME) → 더하기 / 출금(EXPENSE) → 빼기 -> 즉, balance_after(거래 후 잔액)를 계산
- serializer.save()에서 balance_after 저장
- 핵심 3가지 데이터를 저장
- user: 로그인한 사용자 / balance_after: 계산된 잔액
- 나머지 validated_data 필드들 (amount, type, account, category...)
- 핵심 3가지 데이터를 저장
부가 기능
소비패턴 분석 / 소셜 로그인
소비패턴 분석
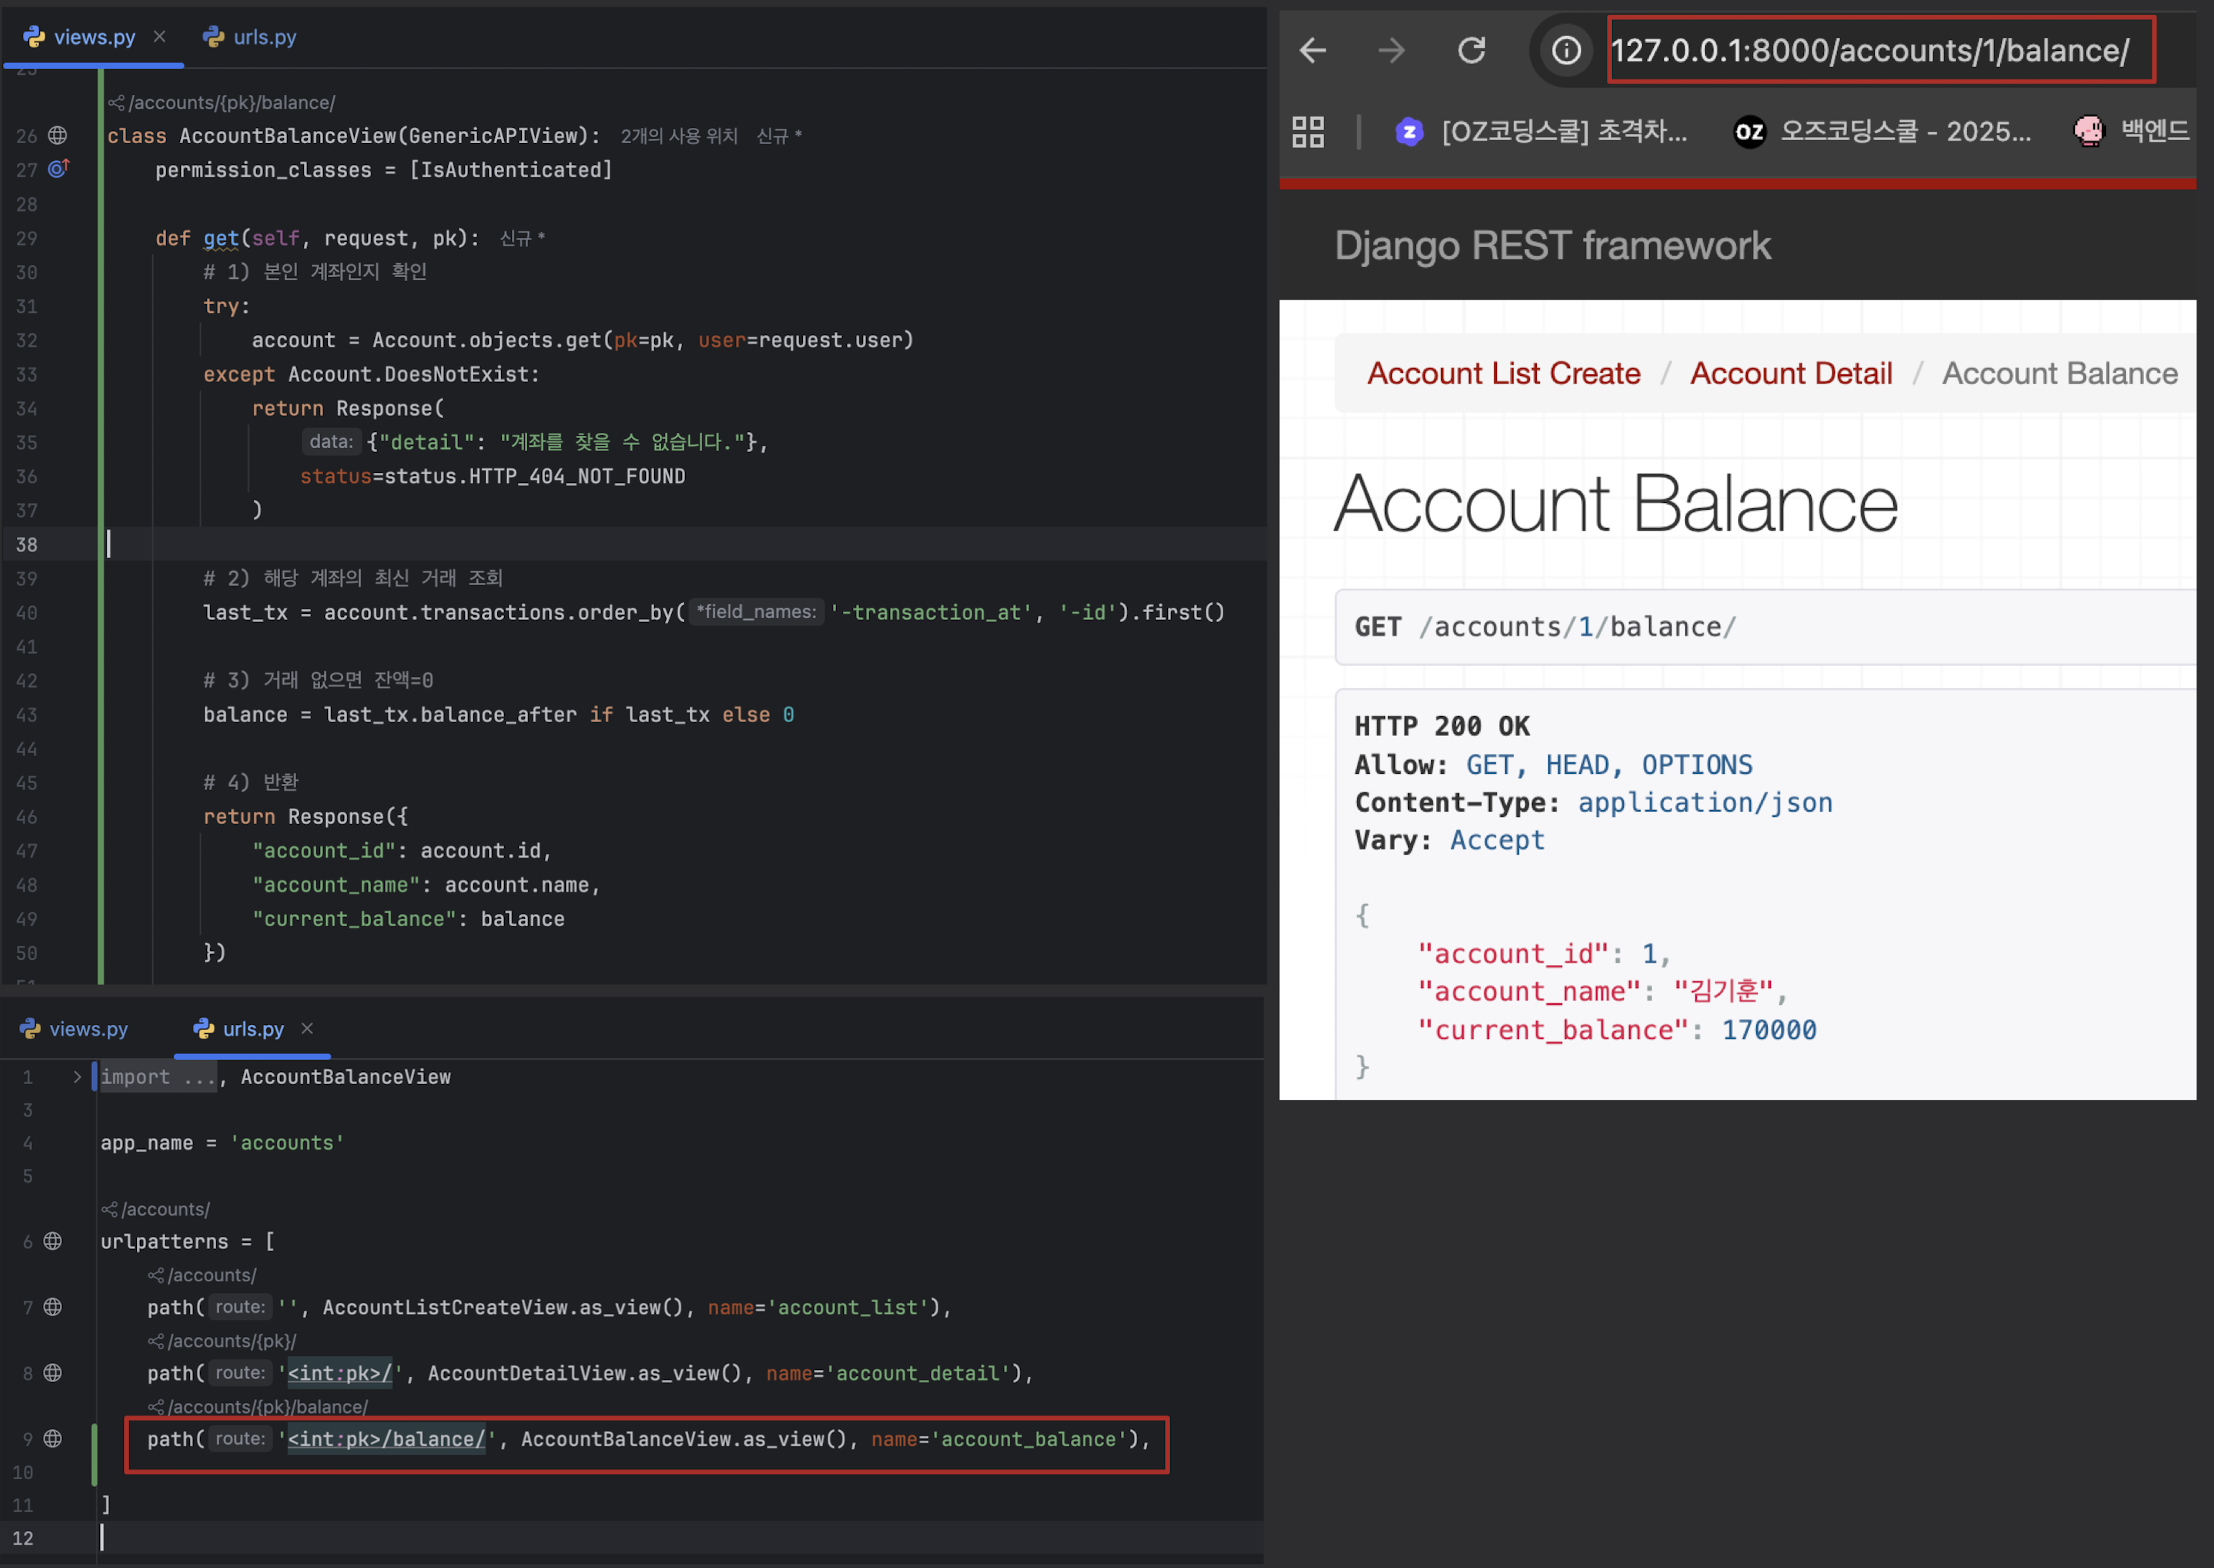
1. 현재 잔액 조회 API (GET /accounts/{id}/balance/)
# accounts/views.py
class AccountBalanceView(GenericAPIView):
    permission_classes = [IsAuthenticated]

    def get(self, request, pk):
        # 1) 본인 계좌인지 확인
        try:
            account = Account.objects.get(pk=pk, user=request.user)
        except Account.DoesNotExist:
            return Response(
                {"detail": "계좌를 찾을 수 없습니다."},
                status=status.HTTP_404_NOT_FOUND
            )

        # 2) 해당 계좌의 최신 거래 조회
        last_tx = account.transactions.order_by('-transaction_at', '-id').first()

        # 3) 거래 없으면 잔액=0
        balance = last_tx.balance_after if last_tx else 0

        # 4) 반환
        return Response({
            "account_id": account.id,
            "account_name": account.name,
            "current_balance": balance
        })

# accounts/urls.py
path('<int:pk>/balance/', AccountBalanceView.as_view(), name='account_balance'),
새롭게 알게된 내용 ✅
1. Django에서는 기본적으로 Primary Key(PK) 가 필요
- 내가 따로 PK를 지정하지 않으면 Django가 자동으로 id = models.AutoField(primary_key=True) 를 생성
# 이렇게 작성해놓으면
class Blog(models.Model):
    title = models.CharField(max_length=100)

## 실제로는
class Blog(models.Model):
    id = models.AutoField(primary_key=True)   # Django가 자동 생성
    title = models.CharField(max_length=100)
- 즉, id가 아닌 다른 이름으로라도 pk값이 한개라도 존재한다면
- id 값은 생성되지 않는다.
2. 일반적으로는 user, account로 이름 짓고 Django가 자동으로
_id붙임.
3. fields / read_only_fields 의 차이
class AccountSerializer(serializers.ModelSerializer):
    class Meta:
        model = Account
        fields = [
            'id','name', 'created_at',
        ]
        read_only_fields = ['created_at']

# 응답(JSON)
{
  "id": 1,
  "name": "국민은행",
  "created_at": "2025-11-24T05:32:00Z"
}

# 요청(POST)
## created_at에 값을 보내도 무조건 무시됨
### 실제 DB 저장 시 created_at은 자동 생성된 값으로 기록됨.
{
  "name": "우리은행",
  "created_at": "2023-01-01"
}
- fields = Serializer에서 어떤 필드를 응답/입력 대상으로 사용할지 결정하는 목록
- 클라이언트가 볼 수 있는 필드
- 클라이언트가 전송할 수 있는 필드
- 전체 출력 구조
- read_only_fields = 해당 필드는 클라이언트가 값을 수정하거나 전송할 수 없음!(오직 서버가 관리)
- POST/PUT/PATCH 요청에서 사용자가 값을 넣어도 무시됨
- Serializer에서 출력은 되지만 입력받지 않는 필드
어려운 내용(추가 학습 필요) ✅
오늘 발생한 문제(발생 했다면) ✅

안녕하세요.