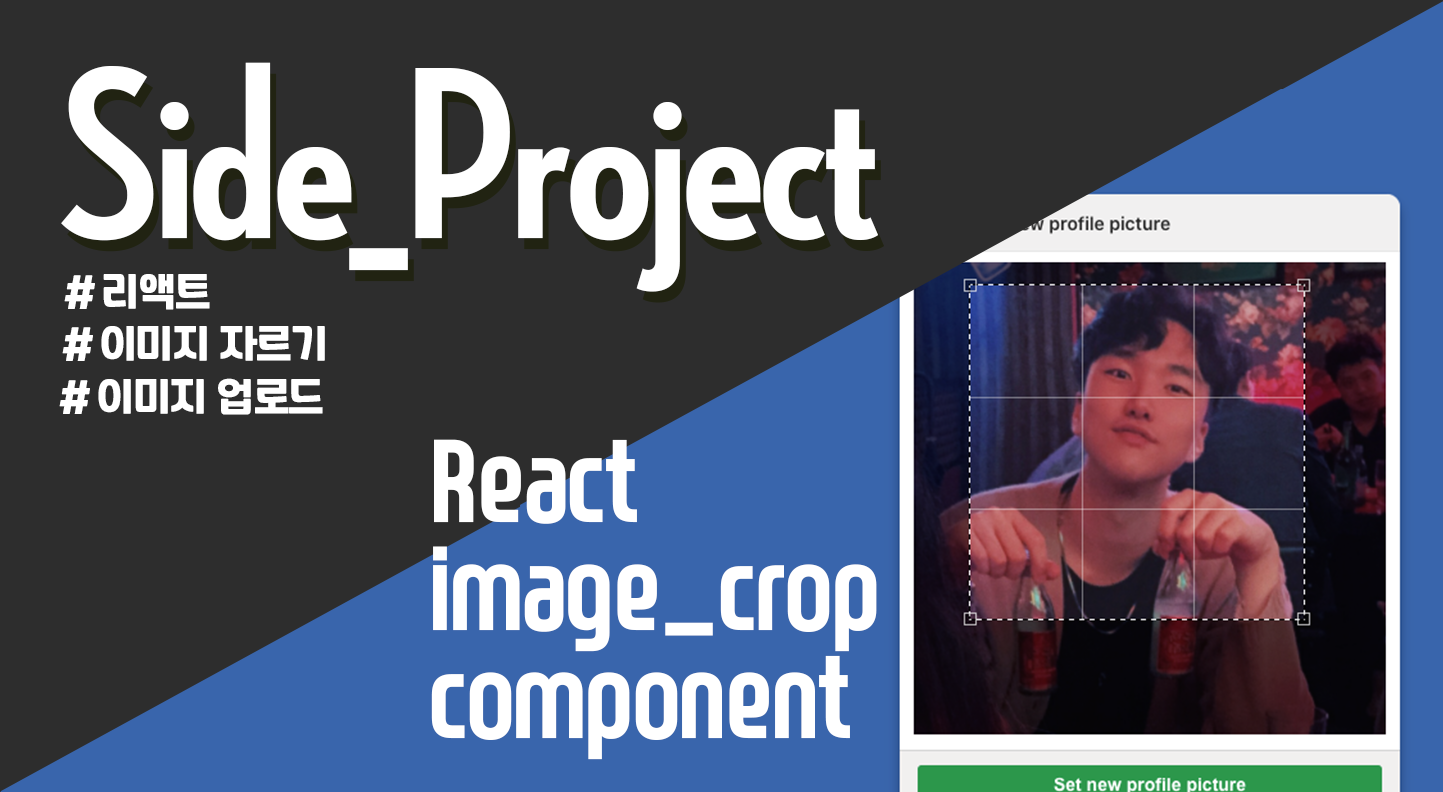
개요

현재 토이 프로젝트로 개발중인 블라인드 데이팅 서비스 Tindux는 유저 개개인의 프로필 이미지가 중요한 역활을 하기 때문에, 기존 방식대로 유저의 이미지를 통째로 받아서 업로드한 후 이미지 정중앙을 틀에 끼워넣는식의 방식은 맞지않다고 생각했다. 그래서 유저의 프로파일 이미지를 1:1 사이즈로 crop한 뒤 업로드하는 방식으로 교체하였다.
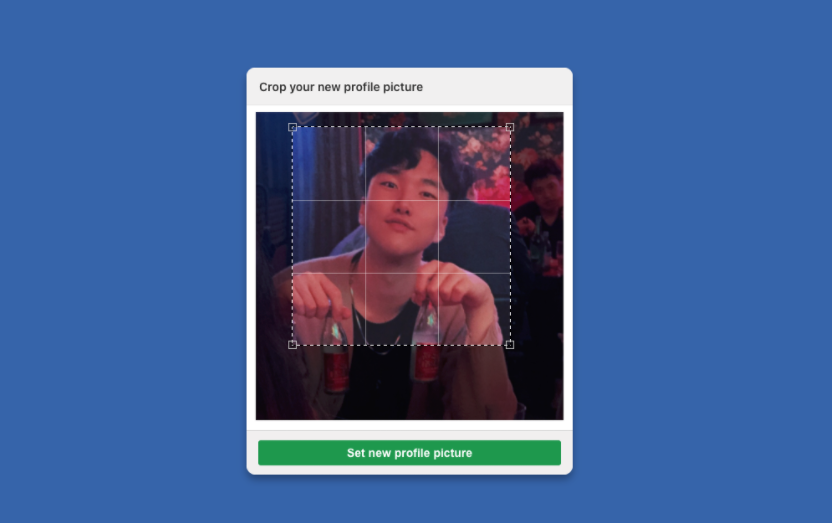
재사용을 위해 프로젝트 폴더를 따로 만들어서 그 내부에서 작업하였으며, UI는 임시로 깃허브의 유저 프로필 이미지 업로드 UI를 참고했다.
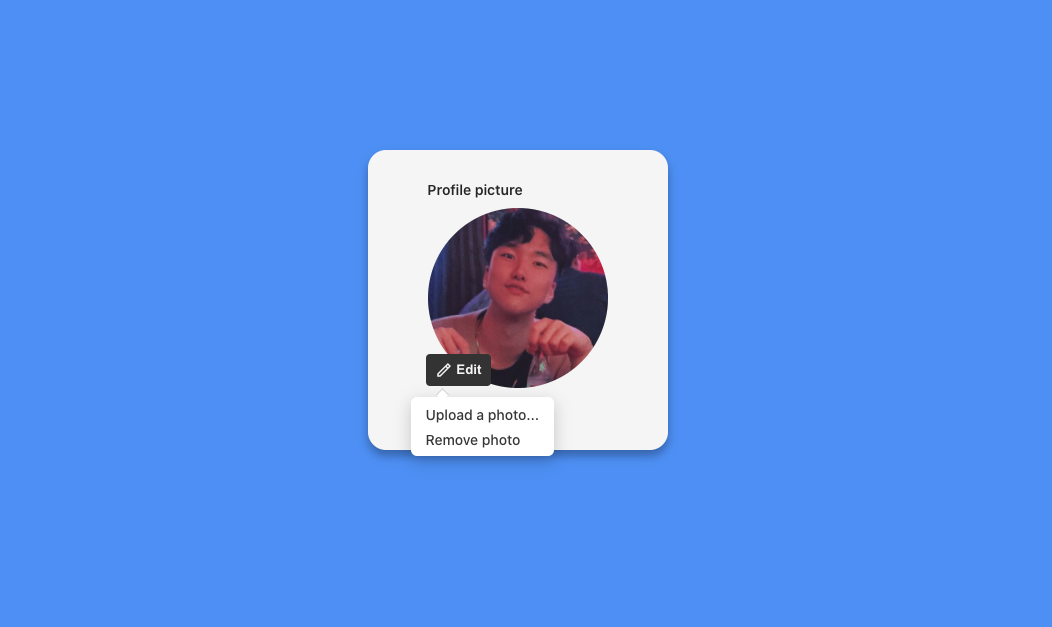
Edit 버튼을 누르면 버튼 하단에 리스트가 나오며, 'Upload a photo' 클릭 시 이미지를 자르고 업로드 할 수 있는 팝업 창이 나오도록 설계하였다. 또한, Edit 버튼을 통해서 버튼 리스트가 나왔을때 외부 영역을 클릭하면 리스트가 사라지는 기능은 'react-onclickoutside' 라이브 러리를 이용하여 손쉽게 구현했다.
Stack List
- React (v16.13.1)
- Node js / Express (서버)
- multer (서버 업로드)
- styled component (css)
- redux Saga (상태 관리)
- react icon (기타 라이브러리)
- react-onclickoutside (기타 라이브러리)
- react-image-crop (기타 라이브러리)
작업 과정
ImageCrop.js
import React, { PureComponent } from 'react';
import ReactCrop from 'react-image-crop';
import style from 'styled-components';
import 'react-image-crop/dist/ReactCrop.css';
class ImageCrop extends PureComponent {
  state = {
    src: null,
    crop: {
      unit: '%',
      width: 30,
      aspect: 5 / 5, // crop 비율을 설정 할 수 있다.
    },
    cropSrc: null,
  };

  onSelectFile = (e) => {
    if (e.target.files && e.target.files.length > 0) {
      const reader = new FileReader();
      reader.addEventListener('load', () =>
        this.setState({ src: reader.result }),
      );
      reader.readAsDataURL(e.target.files[0]);
    }
  };

  onImageLoaded = (image) => {
    this.imageRef = image;
  };

  onCropComplete = (crop) => {
    this.makeClientCrop(crop);
  };

  onCropChange = (crop, percentCrop) => {
    this.setState({ crop });
  };

  async makeClientCrop(crop) {
    if (this.imageRef && crop.width && crop.height) {
      const croppedImageUrl = await this.getCroppedImg(
        this.imageRef,
        crop,
        'newFile.jpeg',
      );
      this.setState({
        cropSrc: croppedImageUrl,
      });
    }
  }

  setNewImage = () => {
    const { cropSrc } = this.state;
    this.props.updateCropSrc(cropSrc);
    this.setState({ src: null });
  };

  getCroppedImg(image, crop, fileName) {
    const canvas = document.createElement('canvas');
    const scaleX = image.naturalWidth / image.width;
    const scaleY = image.naturalHeight / image.height;
    canvas.width = crop.width;
    canvas.height = crop.height;
    const ctx = canvas.getContext('2d');

    ctx.drawImage(
      image,
      crop.x * scaleX,
      crop.y * scaleY,
      crop.width * scaleX,
      crop.height * scaleY,
      0,
      0,
      crop.width,
      crop.height,
    );

    return new Promise((resolve, reject) => {
      canvas.toBlob((blob) => {
        if (!blob) {
          console.error('Canvas is empty');
          return;
        }
        blob.name = fileName;
        window.URL.revokeObjectURL(this.fileUrl);
        this.fileUrl = window.URL.createObjectURL(blob);
        resolve(this.fileUrl);
      }, 'image/jpeg');
    });
  }

  render() {
    const { crop, src } = this.state;
    return (
      <>
        {!src && (
          <div>
            <Square></Square>
            <UploadBtn htmlFor="ex_file">Upload a photo...</UploadBtn>
            <input
              style={{ display: 'none' }}
              type="file"
              id="ex_file"
              accept="image/*"
              onChange={this.onSelectFile}
            ></input>
          </div>
        )}
        {!src && <Btn>Remove photo</Btn>}
        <div>
          {src && (
            <BackGround>
              <CropContainer>
                <MainTextSpan>
                  <MainTextH3>Crop your new profile picture</MainTextH3>
                </MainTextSpan>
                <div
                  style={{
                    padding: '0px 11px',
                  }}
                >
                  <ReactCrop
                    src={src}
                    crop={crop}
                    ruleOfThirds
                    onImageLoaded={this.onImageLoaded}
                    onComplete={this.onCropComplete}
                    onChange={this.onCropChange}
                  />
                </div>
                <BtnDiv>
                  <SetButton onClick={this.setNewImage}>
                    Set new profile picture
                  </SetButton>
                </BtnDiv>
              </CropContainer>
            </BackGround>
          )}
        </div>
      </>
    );
  }
}

/*
... styled component
*/

export default ImageCrop;
해당 작업의 중심역활을 하는 ImageCrop.js 컴포넌트이다. react-image-crop 라이브러리를 사용했으며, 깃허브의 ui와 최대한 비슷하게 구현하기위해 파일 업로드 시 file타입의 input을 label태그를 통해 숨겨주었다.
<UploadBtn htmlFor="ex_file">Upload a photo...</UploadBtn>해당 부분이 label태그이며, styled component 사용을 위해 태그를 바꿔주었다.
  setNewImage = () => {
    const { cropSrc } = this.state;
    this.props.updateCropSrc(cropSrc);
    this.setState({ src: null });
  };
또한 위 예제 중간에 setNewImage라는 함수가 존재하는데 이는 crop을 마친 후 해당 이미지의 blob Url을 상위 컴포넌트인 UploadTab.js의 props로 전달된 함수인 updateCropSrc를 통해 상위로 전달해주는 역활을 한다.
UploadTab.js
import style from 'styled-components';
import onClickOutside from 'react-onclickoutside';

import React, { useState, useEffect } from 'react';
import { useDispatch } from 'react-redux';
import ImageCrop from './ImageCrop';
import { uploadState } from '../../modules/profileImageUpload';

function UploadTab({ EditHandler }) {
  UploadTab.handleClickOutside = () => EditHandler();

  const [cropSrc, setCropSrc] = useState();

  const updateCropSrc = (src) => {
    setCropSrc(src);
  };

  const dispatch = useDispatch();

  useEffect(() => {
    if (cropSrc !== undefined) dispatch(uploadState(cropSrc));
  }, [dispatch, cropSrc]);

  return (
    <ButtonList>
      <div>
        <ImageCrop updateCropSrc={updateCropSrc} />
      </div>
    </ButtonList>
  );
}


/*
... styled component
*/

const clickOutsideConfig = {
  handleClickOutside: () => UploadTab.handleClickOutside,
};

export default onClickOutside(UploadTab, clickOutsideConfig);
ImageCrop.js의 직계 상위 컴포넌트인 UploadTab.js이다. 해당 컴포넌트는 cropSrc라는 state 를 갖고있는데, 하위 컴포넌트의 props로 내려준
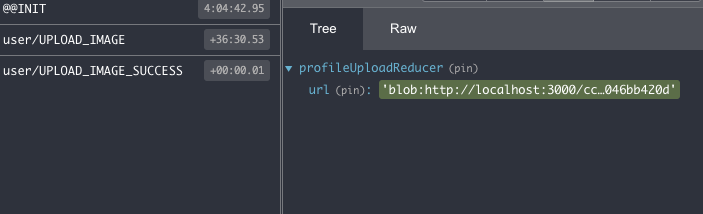
updateCropSrc함수에 위에서 설명했던 이미지 url이 담기면 setCropSrc로 상태를 업데이트 하고, useEffect 훅을 통해 dispatch되어 redux단으로 url이 넘어가게 된다.
ImageUploadContainer.js
/*
... some import
*/

const ImageUploadContainer = () => {
  const [avatar, setAvatar] = useState({
    default: defaultAvatar,
  });
  const [active, setActive] = useState(false);

  const { preview } = useSelector(({ profileUploadReducer }) => ({
    preview: profileUploadReducer.url,
  }));
  useEffect(() => {
    if (preview) {
      setAvatar({ ...avatar, default: preview });
      setActive(!active);
    }
  }, [preview]);

  const EditHandler = () => {
    setActive(!active);
  };

  const previewImage = (
    <Preview src={avatar.default} alt="profileImagie"></Preview>
  );

  /*
... styled component
*/

  export default ImageUploadContainer;
그리고 가장 최상단 요소인 ImageUploadContainer에서는 useSelector를 통해 리덕스 store에 이미지 url이 담기면, 이를 감지하고 해당 url을 이미지 태그의 src로 넣어서 미리보기를 만들어준다.