master/slave
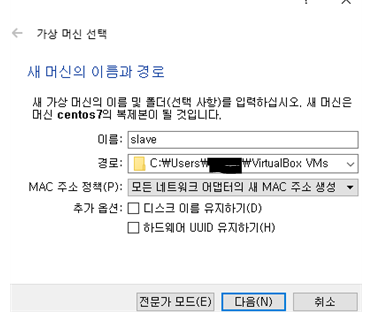
slave 서버를 만들어줍니다
호스트명 변경
[root@localhost ~]# hostnamectl set-hostname slave.test.example.com패키지 설치
[root@slave ~]# yum -y install bind bind-utils방화벽설정
[root@slave ~]# firewall-cmd --add-service=dns --permanent
success
[root@slave ~]# firewall-cmd --reload
success
서비스설정
[root@localhost ~]# nmcli con add con-name static3 ifname enp0s3 type ethernet ip4 10.0.2.101/24 gw4 10.0.2.2
연결 'static3' (da851a4e-a241-4471-8b9e-3238269df5c6)이 성공적으로 추가되었습니다.
[root@localhost ~]# nmcli con mod static3 ipv4.dns 10.0.2.100
[root@localhost ~]# nmcli con up static3
연결이 성공적으로 활성화되었습니다 (D-Bus 활성 경로: /org/freedesktop/NetworkManager/ActiveConnection/7)
서버의 /etc/named.conf 설정
zone "test.example.com" IN {
        type master;
        file "test.example.com.zone";
        allow-transfer { 10.0.2.101; };
        # slave 설정
};

zone "2.0.10.in-addr.arpa" IN {
        type master;
        file "10.0.2.100.zone";
        allow-transfer { 10.0.2.101; };
        # slave 설정
};
zone 파일 설정
[root@dns ~]# cd /var/named/
[root@dns named]# vi test.example.com.zone
$TTL 3H
@       IN SOA  test.example.com. root.test.example.com. (
                                        0       ; serial
                                        1D      ; refresh
                                        1H      ; retry
                                        1W      ; expire
                                        3H )    ; minimum
        NS      dns.test.example.com.
        NS      slave.test.example.com.
        A       10.0.2.2
dns     A       10.0.2.10
www     A       10.0.2.20
ftp     A       10.0.2.30
mail    A       10.0.2.40
blog    A       10.0.2.50
slave   A       10.0.2.101

[root@dns named]# vi 10.0.2.100.zone
$TTL 3H
@       IN SOA  test.example.com. root.test.example.com. (
                                        0       ; serial
                                        1D      ; refresh
                                        1H      ; retry
                                        1W      ; expire
                                        3H )    ; minimum
        NS      dns.test.example.com.
        NS      slave.test.example.com.
        A       10.0.2.2
10      PTR     dns.test.example.com.
20      PTR     www.test.example.com.
30      PTR     ftp.test.example.com.
40      PTR     mail.test.example.com.
50      PTR     blog.test.example.com.
101     PTR     slave.test.example.com.
slave로 이동
slave에서도 /etc/named.conf 설정
[root@slave ~]# vi /etc/named.conf
zone "test.example.com" IN {
        type slave;
        masters { 10.0.2.10; };
        file "slaves/test.example.com.zone";
         # 마스터 서버의 slaves 디렉토리에 마스터에서 다운 받아옴
        notify no;
};

zone "2.0.10.in-addr.arpa" IN {
        type slave;
        masters { 10.0.2.10; };
        file "slaves/10.0.2.100.zone";
        notify no;
};
slave는 따로 zone 파일을 만들어주지 않아도 연결 시 master에서 가져옴
시스템 활성화
[root@slave ~]# systemctl restart named/var/named/slaves 디렉토리에 복사됨
[root@slave named]# ls slaves/
10.0.2.100.zone  test.example.com.zone
client로 이동
[root@client ~]# nmcli con mod static3 +ipv4.dns 10.0.2.101
[root@client ~]# host dns.test.example.com 10.0.2.101
Using domain server:
Name: 10.0.2.101
Address: 10.0.2.101#53
Aliases:

dns.test.example.com has address 10.0.2.10
web 서비스
apache
공개형 웹 서버 프로그램
패키지 설치
# yum -y install httpd서비스 시작 및 활성화
# systemctl start httpd
# systemctl enable httpd
방화벽 설정
# firewall-cmd --add-service=http --permanent
# firewall-cmd --reload
Apache 구성
/etc/httpd/conf/httpd.conf
ServerRoot "/etc/httpd" # 구성 파일이 참조하는 위치의 기준점

Listen 80 # httpd에 모든 인터페이스의 포트 80/TCP 수신 대기(중복 금지)

Include conf.modules.d/*.conf # 모듈(ex파이썬)을 로드할 구성파일

User apache # httpd 데몬이 시작되면 실행되는 사용자 및 그룹 지정
Group apache

ServerAdmin root@localhost
# httpd에서 오류가 발생했을 때 문제를 보고하는 곳
# 로컬호스트를 사용하는 경우 서버에 이상이 생겨 다운이 되버리면 관리자가
# 메일을 볼 수 없기때문에 다른 호스트의 주소를 쓰는 것을 권장

#ServerName www.example.com:80
# 원하는 서버네임 지정 가능 default 주석처리
# 반드시 dns에 등록해줘야함


<Directory /> # 지정된 디렉토리 및 모든 하위 디렉토리에 대한 구성 지시문 설정
    AllowOverride none
    Require all denied
</Directory>

DocumentRoot "/var/www/html" # httpd가 요청된 파일을 검색할 위치 결정
<Directory "/var/www">
    AllowOverride None
    # Allow open access:
    Require all granted
</Directory>

<IfModule dir_module> # 지정된 디렉토리가 요청될 때 사용할 파일 결정
    DirectoryIndex index.html
</IfModule>

<Files ".ht*"> # <directory> 블록처럼 작동, 여기서는 와일드카드가 적용
    Require all denied
</Files>

ErrorLog "logs/error_log"  # 오류를 로깅할 위치 저장
설정법
- /etc/httpd/conf/httpd.conf에 직접 설정
- /etc/httpd/conf.d/에 설정파일 생성 후 서비스 재시작
systemctl restart httpd
웹페이지 설정
/var/www/html/에 사용하고자 하는 웹페이지 저장
[root@server ~]# cat /var/www/html/index.html
test page
[root@server ~]# curl server(서버 IP)
test page
IP에 해당하는 호스트네임 등록
/etc/hosts 기억하기❗
가상화 서비스(가상 호스트)
한 시스템에서 여러 개의 도메인과 호스트 이름을 구분하여 웹 서비스 가능
연결된 서버의 IP주소와 클라이언트가 요청한 호스트 이름의 조합에 따라 다양한 구성 설정 가능
- 이름 기반의 가상 호스팅
- 네임서버가 각 호스트명이 올바른 IP 주소로 대응하도록 가상 호스트 설정
- 하나의 IP 주소를 가지고 여러 호스트에 대해서 웹 서비스 제공
- IP 기반의 가상 호스팅
- 하나의 아파치 웹 서버에서 물리적인 네트워크 카드에 여러 개의 IP 할당
- 각 호스트 들이 서로 다른 IP 주소를 이용할 수 있도록 하는 방식
가상 호스트 구성
기본 구성 내에 블록을 사용
편리한 관리를 위해 /usr/share/doc/httpd-2.4.6/ 디렉토리 내의 템플릿 파일로 구성
1. 가상 호스트 구성 템플릿 파일인 /usr/share/doc/httpd-2.4.6/httpd-vhosts.conf 을 이용
  <VirtualHost *:@@Port@@> # IP에 대해 포트를 열어줌
    					   # *은 모든 IP에 대해
    ServerAdmin webmaster@dummy-host.example.com # 관리자설정
    DocumentRoot "@@ServerRoot@@/docs/dummy-host.example.com" # 어디에 있는 데이터를 사용할 것인지
    ServerName dummy-host.example.com #서버네임은 무엇으로 할지
    ServerAlias www.dummy-host.example.com # 다른이름로 했을 때 어떻게 전환가능한지
    ErrorLog "/var/log/httpd/dummy-host.example.com-error_log" # 에러로그
    CustomLog "/var/log/httpd/dummy-host.example.com-access_log" common # 커스텀로그
</VirtualHost>
DocumentRoot, SeverName이 중요한 내용
2. /etc/httpd/conf.d/ 디렉토리 내에 이름을 바꾸어서 복사
[root@server ~]# cp /usr/share/doc/httpd-2.4.6/httpd-vhosts.conf /etc/httpd/conf.d/site1.conf가상호스트 실습
[root@server ~]# vi /etc/httpd/conf.d/00-vhost.conf
<VirtualHost *:80>
        DocumentRoot /var/www/html0
        ServerName vhost0.test.example.com
        ServerAlias vhost0
</VirtualHost>

<Directory /var/www/html0>
        AllowOverride none
        Require all granted
</Directory>

[root@server ~]# cp /etc/httpd/conf.d/00-vhost.conf /etc/httpd/conf.d/01-vhost.conf
# 01에서는 0대신 1로
[root@server ~]# mkdir /var/www/html{0..1}
[root@server ~]# echo vhost0 test > /var/www/html0/index.html
[root@server ~]# echo vhost1 test > /var/www/html1/index.html

# /etc/hosts
127.0.0.1   localhost localhost.localdomain localhost4 localhost4.localdomain4
::1         localhost localhost.localdomain localhost6 localhost6.localdomain6
*.*.*.100 server.test.example.com server vhost1.test.example.com vhost1 vhost0.test.example.com vhost0

[root@server ~]# systemctl restart httpd
[root@server ~]# curl vhost0
vhost0 test
[root@server ~]# curl vhost1
vhost1 test
네.. 뭐.. 김건호입니다...