유저 기능을 구현하기 위해 supabase Oauth 를 사용했는데, 나는 Next.js 를 사용하기에 ssr 에서도 유저 정보에 접근이 가능해야 했다.
근데 기본적으로 supabase-js는 사용자의 session 을 저장하기 위해 localStorage 를 사용하기 때문에 서버 컴포넌트에서 supabase-js를 사용하려고 할 때는 session 값을 가져오지 못했다.
왜냐하면 localStorage 는 브라우저 저장소로 서버에는 'localStorage'라는 개념이 없기 때문이다..
이를 해결하기 위해, 서버에서 실행할 때는 supabase-js가 localStorage 대신 쿠키를 사용하도록 설정해줘야 했다.
Client 에서 로그인 하기
우선 아래와 같이 createBrowerClient 함수를 이용해 브라우저에 supabase client 를 생성해준다. 이를 통해 브라우저 환경에서 supabase 기능을 사용할 수 있다.
app/shared/lib/supabase/brower-client.ts

const SUPABASE_URL = process.env.NEXT_PUBLIC_SUPABASE_URL as string;
const SUPABASE_ANON_KEY = process.env.NEXT_PUBLIC_SUPABASE_ANON_KEY as string;

export function createClient() {
    return createBrowserClient(SUPABASE_URL, SUPABASE_ANON_KEY);
}
그 다음 로그인 로직을 아래와 같이 작성해주면, Redirect URL 로 리디렉션 되면서 자동으로 로그인이 이루어진다.
이처럼 client components 에서는 매우 간단하게 구현할 수 있다.
import { createClient } from '@/shared/lib/supabase/brower-client';

async function signInWithKakao() {
  const supabase = createClient();
  const { data, error } = await supabase.auth.signInWithOAuth({
    provider: 'kakao',
  })
}
Server 에서 로그인 하기
서버 측(SSR)에서는 localStorage와 같은 클라이언트 측 저장소를 사용할 수 없기 때문에, 쿠키를 사용하여 세션을 관리해야 한다.
따라서 서버에서 요청을 처리할 때는 cookies API를 통해 쿠키에 접근하여 세션 정보를 읽고 쓰는 방식으로 Supabase 클라이언트를 설정해야 한다.
app/shared/lib/supabase/server-client.ts

import { createServerClient, type CookieOptions } from '@supabase/ssr';
import { cookies } from 'next/headers';

export function createClient() {
    const cookieStore = cookies();

    return createServerClient(process.env.NEXT_PUBLIC_SUPABASE_URL!, process.env.NEXT_PUBLIC_SUPABASE_ANON_KEY!, {
        cookies: {
            get(name: string) {
                return cookieStore.get(name)?.value;
            },
            set(name: string, value: string, options: CookieOptions) {
                try {
                    cookieStore.set({ name, value, ...options });
                } catch (error) {
                    // The `set` method was called from a Server Component.
                    // This can be ignored if you have middleware refreshing
                    // user sessions.
                }
            },
            remove(name: string, options: CookieOptions) {
                try {
                    cookieStore.set({ name, value: '', ...options });
                } catch (error) {
                    // The `delete` method was called from a Server Component.
                    // This can be ignored if you have middleware refreshing
                    // user sessions.
                }
            },
        },
    });
}
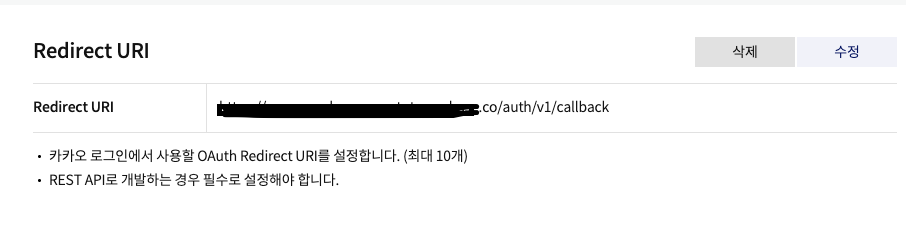
그 다음 서버 측에서 로그인을 진행하려면 추가 단계가 필요하다. signInWithOAuth 를 호출할 때, 콜백 경로를 가리키는 redirectTo URL을 제공해야 한다.
client 와 다르게 서버에서는 로그인이 이루어지면, 특정 페이지로 이동시켜서 session 정보를 cookie 에 저장하도록 하는 과정이 필요한 것이다.
const { data, error } = await supabase.auth.signInWithOAuth({
  provider,
  options: {
    redirectTo: `${location.origin}/auth/callback?next=${props.nextUrl || ''}`,
  },
})

if (data.url) {
  redirect(data.url) // use the redirect API for your server framework
}
따라서 redirect 될 페이지를 만들어줘야 한다.
여기서 세션을 관리하기 위해 cookies 객체를 사용하여 클라이언트를 설정하는데, exchangeCodeForSession 함수를 이용해 supabase 에서 세션을 성공적으로 교환하면 원하는 Url 로 redirection 시켜준다.
app/auth/callback/route.ts

import { cookies } from 'next/headers';
import { NextResponse } from 'next/server';
import { type CookieOptions, createServerClient } from '@supabase/ssr';

const SUPABASE_URL = process.env.NEXT_PUBLIC_SUPABASE_URL as string;
const SUPABASE_ANON_KEY = process.env.NEXT_PUBLIC_SUPABASE_ANON_KEY as string;

export async function GET(request: Request) {
    const { searchParams, origin } = new URL(request.url);
    const code = searchParams.get('code');
    // if "next" is in param, use it as the redirect URL
    const next = searchParams.get('next') ?? '/';

    if (code) {
        const cookieStore = cookies();
        const supabase = createServerClient(SUPABASE_URL, SUPABASE_ANON_KEY, {
            cookies: {
                get(name: string) {
                    return cookieStore.get(name)?.value;
                },
                set(name: string, value: string, options: CookieOptions) {
                    cookieStore.set({ name, value, ...options });
                },
                remove(name: string, options: CookieOptions) {
                    cookieStore.delete({ name, ...options });
                },
            },
        });
        const { error } = await supabase.auth.exchangeCodeForSession(code);
        if (!error) {
            return NextResponse.redirect(`${origin}${next}`);
        }
    }

    // return the user to an error page with instructions
    return NextResponse.redirect(`${origin}/auth/auth-code-error`);
}
만약 코드 교환에 실패하게 되면 에러 페이지로 리디렉션 되기 때문에 마찬가지로 에러 페이지도 만들어줘야 한다.
app/auth/auth-errir/page.tsx

export default function AuthError() {
    return <div>Authentication Error</div>;
}
middleware 역할
supabase 를 사용한 인증 flow 에서는 사용자의 세션을 관리하기 위해 client 측과 server 측에서 각기 다른 방법으로 접근할 수 있게 된다.
이때 middleware 가 요청을 가로채서 세션을 최신 상태로 유지하고, 필요한 경우에는 쿠키를 업데이트 하는 역할을 한다.
최상단에 middleware 파일을 생성해 아래와 같이 작성해준다.
이 파일은 Next.js 의 middleware 로서 모든 요청에 대해 updateSession 함수가 호출되어 세션 정보를 업데이트 한다.
이때 config 를 사용하면, 특정 경로에서는 세션이 업데이트 되지 않게끔 설정할 수 있다.
middleware.ts

import { type NextRequest } from 'next/server';
import { updateSession } from './shared/lib/supabase/middleware';

export async function middleware(request: NextRequest) {
    return await updateSession(request);
}

export const config = {
    matcher: [
        /*
         * Match all request paths except for the ones starting with:
         * - _next/static (static files)
         * - _next/image (image optimization files)
         * - favicon.ico (favicon file)
         * Feel free to modify this pattern to include more paths.
         */
        '/((?!_next/static|_next/image|favicon.ico|.*\\.(?:svg|png|jpg|jpeg|gif|webp)$).*)',
    ],
};
아래 middleware 파일은 updateSession 함수의 실제 구현 로직으로 supabase 클라이언트를 사용하여 사용자의 세션 정보를 가져오고, 이를 쿠키에 저장하거나 업데이트 하는 역할을 한다.
import { createServerClient, type CookieOptions } from '@supabase/ssr';
import { NextResponse, type NextRequest } from 'next/server';

const SUPABASE_URL = process.env.NEXT_PUBLIC_SUPABASE_URL as string;
const SUPABASE_ANON_KEY = process.env.NEXT_PUBLIC_SUPABASE_ANON_KEY as string;

export async function updateSession(request: NextRequest) {
    let response = NextResponse.next({
        request: {
            headers: request.headers,
        },
    });

    const supabase = createServerClient(SUPABASE_URL, SUPABASE_ANON_KEY, {
        cookies: {
            get(name: string) {
                return request.cookies.get(name)?.value;
            },
            set(name: string, value: string, options: CookieOptions) {
                request.cookies.set({
                    name,
                    value,
                    ...options,
                });
                response = NextResponse.next({
                    request: {
                        headers: request.headers,
                    },
                });
                response.cookies.set({
                    name,
                    value,
                    ...options,
                });
            },
            remove(name: string, options: CookieOptions) {
                request.cookies.set({
                    name,
                    value: '',
                    ...options,
                });
                response = NextResponse.next({
                    request: {
                        headers: request.headers,
                    },
                });
                response.cookies.set({
                    name,
                    value: '',
                    ...options,
                });
            },
        },
    });

    await supabase.auth.getUser();

    return response;
}
마무리
Next.js 는 ssr 도 고려해야 하기 때문에 supabase 를 사용하기 위해 별도로 작업해야 하는 로직이 생각보다 많았다.
처음에는 공식 문서를 아무리 봐도 이해가 어려웠는데, 그럼에도 불구하고 모든 답은 결국 문서 안에 있었다...😅
또한 Next.js 의 csr, ssr, 쿠키, localstorage, middleware... 등 이런 개념들이 제대로 잡히지 않은 상태에서 코드만 따라 작성하려다 보니 전체적인 흐름을 파악하는데 많이 힘들었다. 그래도 이번 기회에 내가 부족한 부분이 뭔지 알게되었고, 다시 한번 구현하기에 앞서 핵심을 제대로 알고 넘어가야 한다는걸 느꼈다😸