📗목차
이전 Vue3) 자식 컴포넌트에서 부모 컴포넌트로 데이터 전달(Props 방식) 포스팅에서 props로 자식 컴포넌트에서 부모 컴포넌트로 데이터를 전달하는 방식을 설명했다.
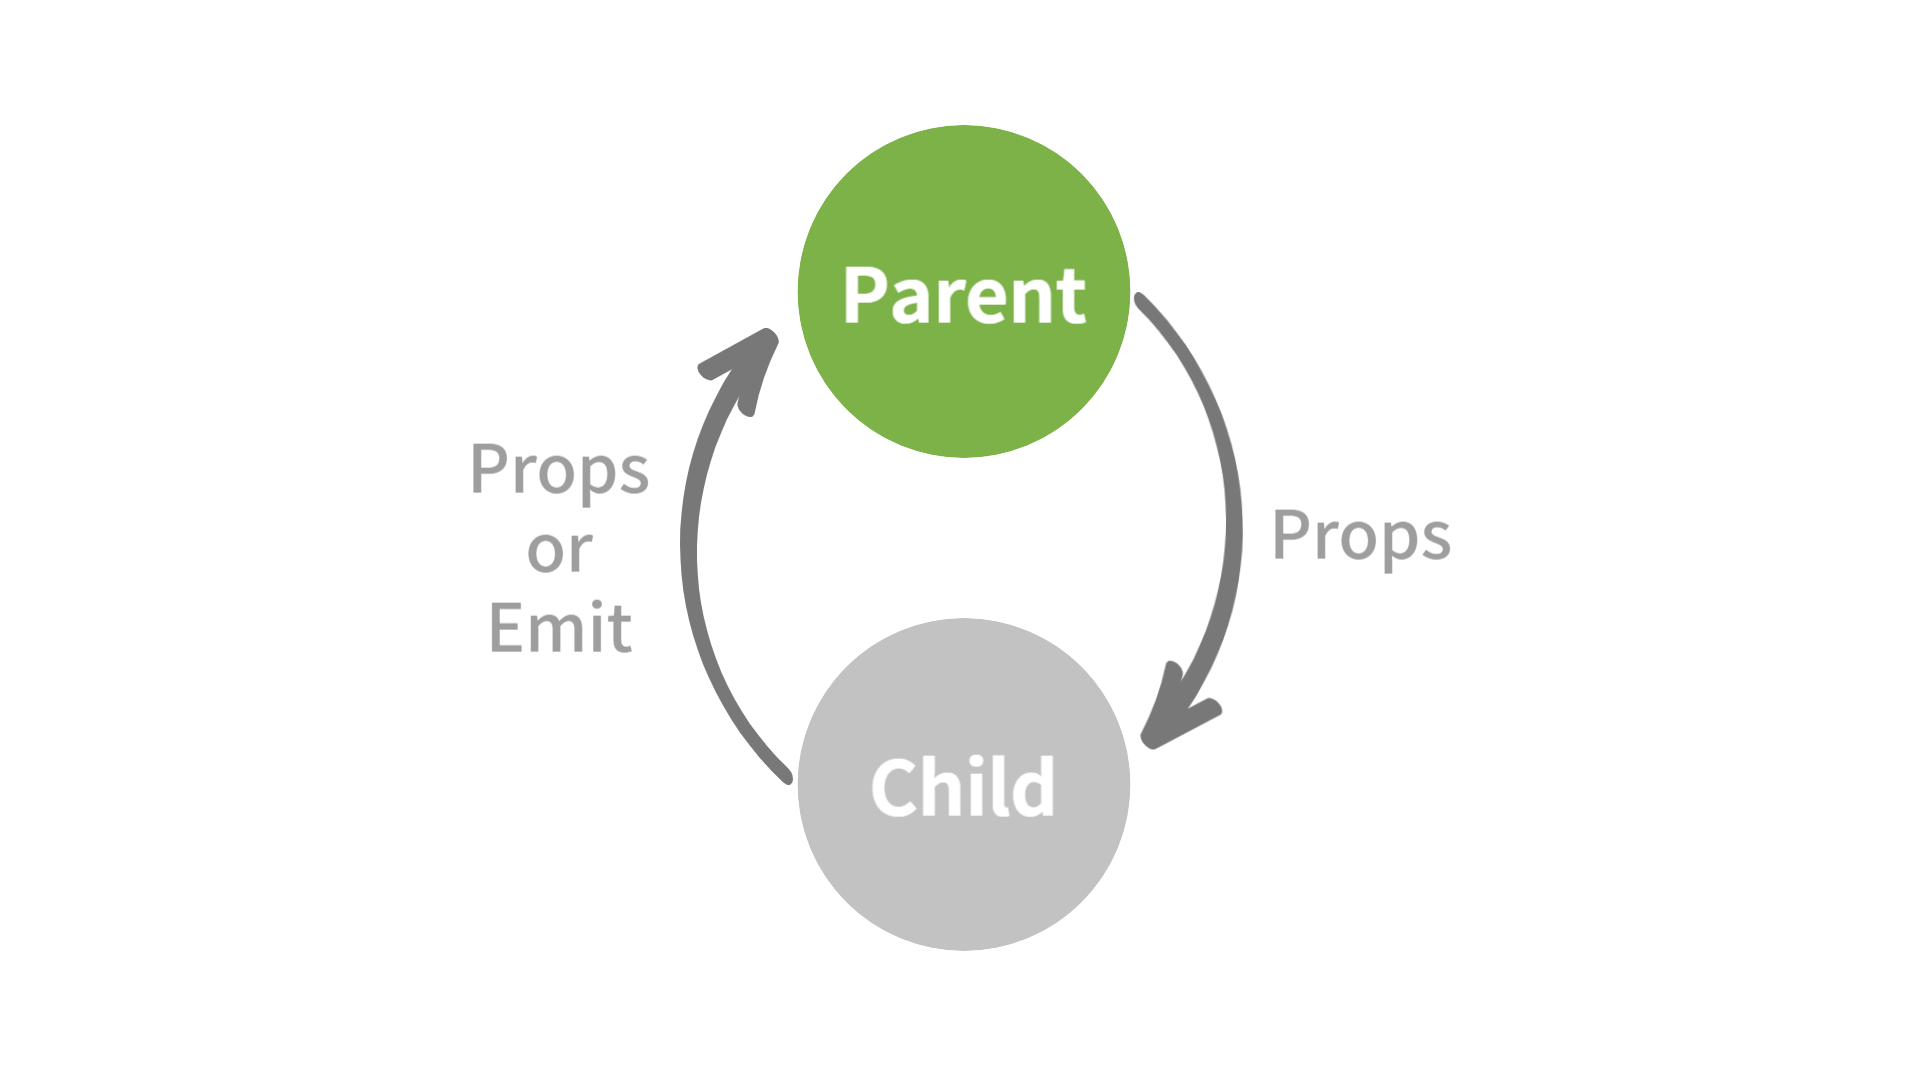
이번에는 props를 함수로 전달하는 방식이 아닌 값 자체를 emit을 사용해서 부모 컴포넌트로 전달해주는 방식을 설명해보려 한다.
1. 컴포넌트 구조
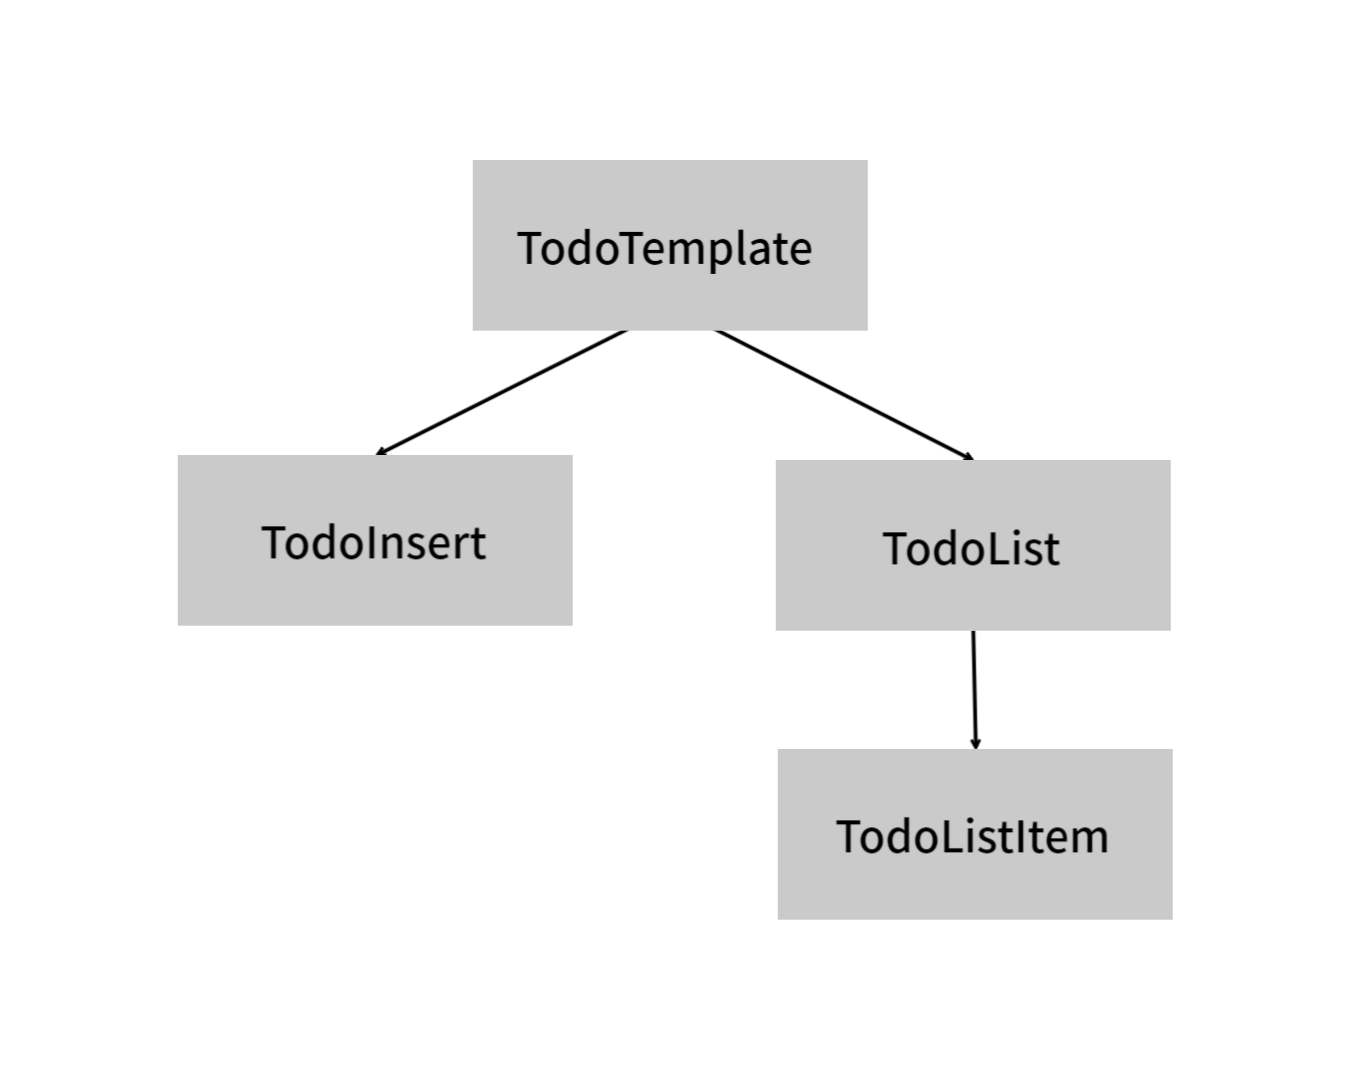
먼저 컴포넌트의 구조를 보면,
TodoTemplate가 최상위 부모 컴포넌트이고, 제일 하위 컴포넌트는 TodoListItem이다.
TodoListItem에서 TodoTemplate까지 거슬러 올라가는 과정을 살펴보자.
2. Emit 방식
❗️emit을 사용할 때 발생했던 문제
setup(props, { emit })
컴포넌트에 props를 불러왔다면, script 안에 props를 전혀 사용하지 않았다 해도 매개변수에 props를 불러와야 한다.
setup({ emit })이렇게 불러오니 계속 업데이트가 안 됐다.
데이터를 update 하는 경우에만 emit을 사용해서 부모 컴포넌트에 전달하는 방식을 설명하려 한다.
제일 하위 컴포넌트인 TodoListItem 컴포넌트에서 save 버튼만 보면 된다
TodoListItem(최하위: 자식 컴포넌트)
<template>
  <div class="list">
    <input type="checkbox" :id="item.id" v-model="isCheck" :class="{ hide: !isHide }" />
    <label :for="item.id" :class="{ checked: isCheck, hide: !isHide }">{{ item.content }}</label>

    <div class="editBox" :class="{ hide: isHide }">
      <input v-model="inputValue" />
      <button type="button" class="saveBtn" @click="onUpdateHandler(item.id, inputValue)">save</button>
    </div>

    <div class="btnBox" :class="{ hide: isEdit }">
      <button @click="toggleEdit">
        <img src="../assets/images/free-icon-edit.png" />
      </button>
      <button @click="onRemove(item.id)">
        <img src="../assets/images/free-icon-cancel.png" />
      </button>
    </div>
  </div>
</template>

<script>
import { ref } from 'vue'

export default {
  name: 'TodoListItem',
  props: {
    item: {
      type: Object,
    },
    onRemove: Function,
  },
  emits: ['editedTodo'],
  setup(props, { emit }) {
	// 셍략
    const inputValue = props.item.content

    const toggleEdit = () => {
      isHide.value = !isHide.value
      isEdit.value = !isEdit.value
    }

    const onUpdateHandler = (id, text) => {
      toggleEdit()
      emit('editedTodo', id, text)
    }
	// 생략
  },
}
</script>
save버튼을 클릭할 시,
onUpdateHandler함수가 실행돼서 해당 요소의 id와 text값을 emit메소드를 통해 부모 컴포넌트에 이벤트를 전달할 것이다.
그럼 TodoListItem의 부모 컴포넌트인 TodoList컴포넌트에 이벤트를 전달해보자.
TodoList(TodoListItem의 부모 컴포넌트)
<template>
  <div class="todoList">
    <TodoListItem v-for="item in todos" :key="item.id" :item="item" @editedTodo="onUpdate" :onRemove="onRemove" />
  </div>
</template>

<script>
import TodoListItem from './TodoListItem.vue'

export default {
  name: 'TodoList',
  props: {
    todos: Array,
    onRemove: Function,
  },
  components: { TodoListItem },
  emits: ['editedTodo'],
  setup(props, { emit }) {
    const onUpdate = (id, text) => {
      emit('editedTodo', id, text)
    }

    return {
      onUpdate,
    }
  },
}
</script>
TodoListItem의 부모 컴포넌트인 TodoList에 emit을 전달한 상태이다.
또 다시 TodoList의 부모 컴포넌트인 TodoTemplate에 emit으로 이벤트를 전달해줄 것이다.
그러기 위해서 onUpdate함수를 정의했다. onUpdate함수에서 emit으로 이벤트를 전달하는 것이다.
그럼 마지막으로 최상위 컴포넌트인 TodoTemplate에서 emit을 전달받겠다.
TodoTemplate(최상위: 부모 컴포넌트)
<template>
  <div class="title">To do List</div>
  <TodoInsert :onCreate="onCreate" />
  <div class="box">
    <TodoList :todos="todos" :onRemove="onRemove" @editedTodo="onUpdate" />
  </div>
</template>

<script>
import TodoInsert from './TodoInsert.vue'
import TodoList from '../components/TodoList.vue'
import { ref } from 'vue'

export default {
  name: 'TodoTemplate',
  components: {
    TodoInsert,
    TodoList,
  },
  setup() {
    const data = [
      { id: 0, content: '타입스크립트 공부하기' },
      { id: 1, content: '팀플하기' },
      { id: 2, content: 'Vue 공부하기' },
      { id: 3, content: '블로그 글 작성하기' },
    ]
    const todos = ref(data)

    const onCreate = text => {
      const todo = {
        id: todos.value.length + 1,
        content: text,
      }
      todos.value.push(todo)
    }

    const onUpdate = (id, text) => {
      console.log('TodoTemplate:', id, text)
      todos.value[id].content = text
      console.log('Edited todo:', todos.value.__v_raw)
    }
  // 생략
  },
}
</script>
3. 결과

TodoTemplate컴포넌트의 onUpdate 함수에 입력한 콘솔이 화면에 잘 출력되는 것을 볼 수 있다.