원래 오늘이 12일차이어야 하지만 어제 몸이 좋지않아 하루 쉬어버렸다 ㅠㅠ
오늘은 MBTI 테스트 앱을 강의를 보면서 만들어 보았습니다!
가장 먼저 메인화면 배경을 만들어 보았습니다.
이전과는 다르게 그라이데션의 형태로 만드는걸 배워보았습니다.
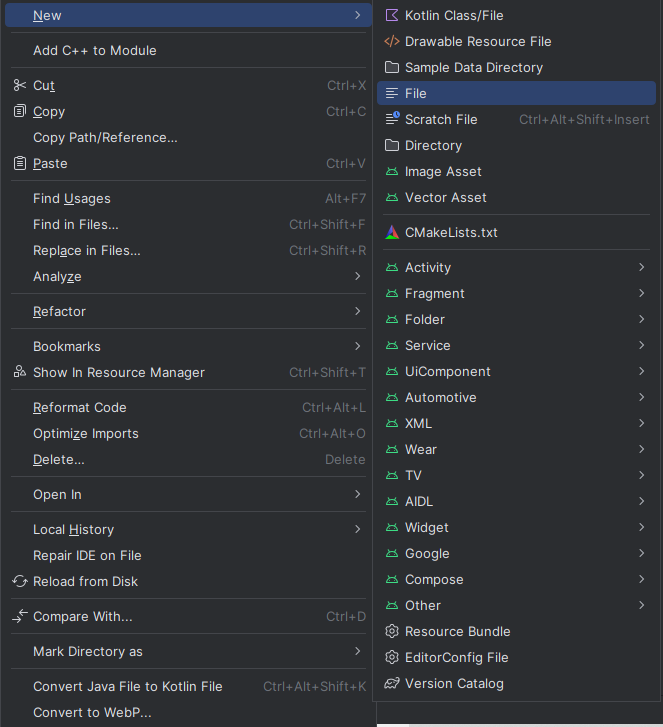 가장 먼저 drawable 폴더에 .xml 파일을 하나 생성해줍니다.
<?xml version="1.0" encoding="utf-8" ?>
<shape xmlns:android="http://schemas.android.com/apk/res/android"
    android:shape="rectangle">
    <gradient
        android:startColor="#ff2d9a59"
        android:endColor="#ff23729a"
        android:angle="90"/>
</shape>
gradient 에서 stret color와 end color를 지정해주면 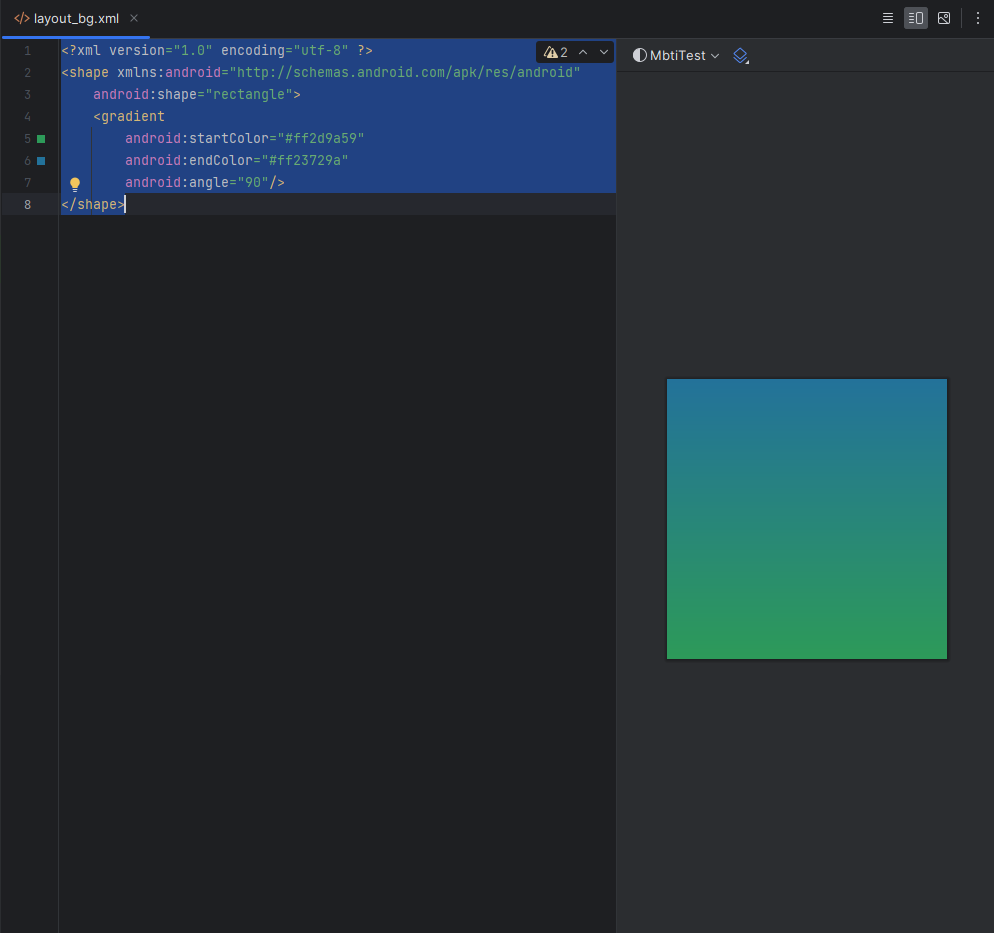 이렇게 배경으로 쓸 파일을 만들 수 있습니다.
그리고 activity_main.xml 에서 버튼과 텍스트, 화면을 꾸밀 이미지 등을 넣어주었습니다.
<TextView
        android:id="@+id/tv_maintitle"
        android:layout_width="wrap_content"
        android:layout_height="wrap_content"
        android:text="MBTI"
        android:textColor="@color/white"
        android:textSize="70sp"
        android:textStyle="bold"
        android:layout_margin="70dp"
        app:layout_constraintEnd_toEndOf="parent"
        app:layout_constraintStart_toStartOf="parent"
        app:layout_constraintTop_toTopOf="parent"/>

    <TextView
        android:id="@+id/tv_maintitle2"
        android:layout_width="wrap_content"
        android:layout_height="wrap_content"
        android:text="성격 유형 검사"
        android:textColor="@color/white"
        android:textSize="40sp"
        android:textStyle="bold"
        android:layout_marginTop="8dp"
        app:layout_constraintEnd_toEndOf="parent"
        app:layout_constraintStart_toStartOf="parent"
        app:layout_constraintTop_toBottomOf="@+id/tv_maintitle"/>
(메인화면에 표시될 텍스트 코드)
<ImageView
        android:id="@+id/iv_start"
        android:layout_width="130dp"
        android:layout_height="90dp"
        android:scaleType="fitCenter"
        android:src="@drawable/ic_start"
        android:layout_marginBottom="60dp"
        app:layout_constraintBottom_toTopOf="@id/iv_people"
        app:layout_constraintEnd_toEndOf="parent"
        app:layout_constraintStart_toStartOf="parent"/>

    <ImageView
        android:id="@+id/iv_people"
        android:layout_width="280dp"
        android:layout_height="228dp"
        android:scaleType="fitCenter"
        android:src="@drawable/bg_person2"
        app:layout_constraintBottom_toBottomOf="parent"
        app:layout_constraintEnd_toEndOf="parent"
        app:layout_constraintStart_toStartOf="parent"/>
(START 버튼의 이미지와 꾸밈용 이미지 코드)
그리고 START 버튼을 눌렀을때 다음 화면으로 넘어가도록 설정해주면 메인화면은 끝이 납니다.
먼저 다음 화면인 TestActivity를 생성해주고 MainActivity.kt에
val btn_start = findViewById<ImageView>(R.id.iv_start)

btn_start.setOnClickListener {
    val intent = Intent(this@MainActivity, TestActivity::class.java)
    startActivity(intent)
}
변수 val btn_start를 통해 iv_start 이미지와 연결시켜주고
이미지가 눌릴때 TestActivity 화면으로 넘어가도록 setOnClickListener를 이용했습니다.
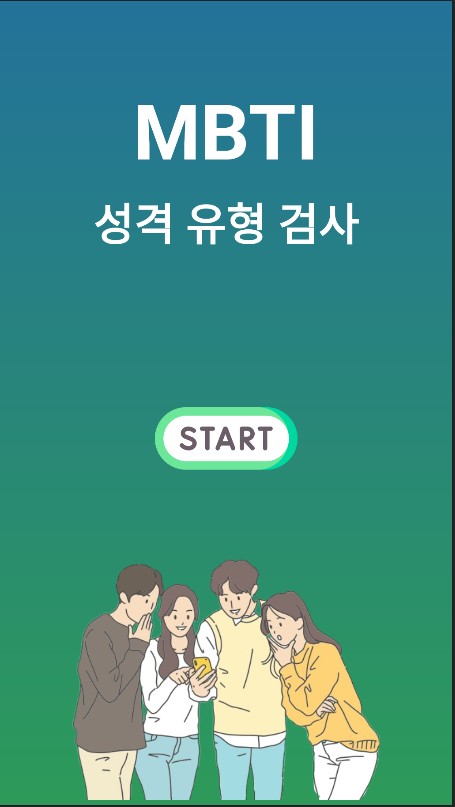 (완성된 메인화면!)
그 다음은 이제 TestActivity를 작성하여주고 하나의 fragment만 만들어 놓고 재사용하기 위해서 하나의 라이브러리를 추가해주고 시작합니다.
build.gradle.kts (Module :app)에서
implementation("androidx.viewpager2:viewpager2:1.0.0")코드를 추가해 viwpager 기능을 추가해줍니다.
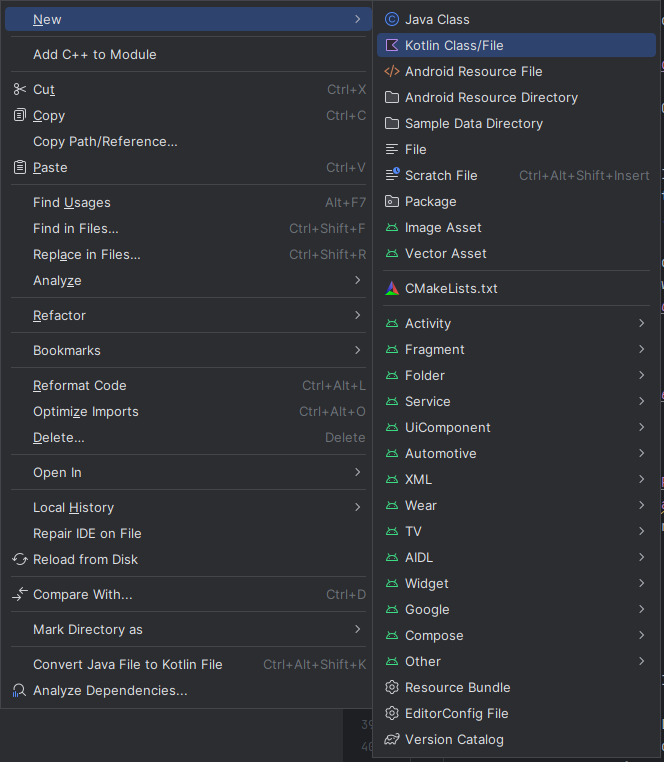 그 다음 ViewPagerAdapter와 그 안을 채워줄 QuestionFragment를 생성해줍니다.
ViewPager의 코드는
package com.example.mbtitest

import androidx.fragment.app.Fragment
import androidx.fragment.app.FragmentActivity
import androidx.viewpager2.adapter.FragmentStateAdapter

class ViewPagerAdapter(fragmentActivity : FragmentActivity) : FragmentStateAdapter(fragmentActivity) {
    override fun getItemCount(): Int {
        return 4
    }

    override fun createFragment(position: Int): Fragment {
        return QuestionFragment.newInstance(position)
    }
}
(여기서 4라는 숫자는 4개의 페이지를 쓰기때문에 나온 숫자입니다.)
그 다음 TestActivity의 레이아웃을 viewpager로 꽉 채워줍니다.
이 viewpager를 fragment로 채워주는겁니다!
<?xml version="1.0" encoding="utf-8"?>
<androidx.constraintlayout.widget.ConstraintLayout xmlns:android="http://schemas.android.com/apk/res/android"
    xmlns:app="http://schemas.android.com/apk/res-auto"
    xmlns:tools="http://schemas.android.com/tools"
    android:layout_width="match_parent"
    android:layout_height="match_parent"
    tools:context=".TestActivity">

    <androidx.viewpager2.widget.ViewPager2
        android:id="@+id/viewPager"
        android:layout_width="match_parent"
        android:layout_height="match_parent"
        app:layout_constraintBottom_toBottomOf="parent"
        app:layout_constraintEnd_toEndOf="parent"
        app:layout_constraintStart_toStartOf="parent"
        app:layout_constraintTop_toTopOf="parent" />

</androidx.constraintlayout.widget.ConstraintLayout>
TestActivity의 viewpager를 레이아웃의 viewpager와 연결을 시켜줍니다.
그리고 fragmentActivity를 넣어주는 코드, 화면이 마음대로 넘어가지 않도록 하는 코드를 작성해 줍니다.
viewPager = findViewById(R.id.viewPager)
viewPager.adapter = ViewPagerAdapter(this)
viewPager.isUserInputEnabled = false
class를 하나 생성하여 1번과 2번 선택지 중 많은 것을 결과로 나타내주는 코드를 작성해 줍니다.
class QuestuinnaireResults {
    val result = mutableListOf<Int>()

    fun addResponses(response: List<Int>) {
        val mostFrequent = response.groupingBy { it }.eachCount().maxByOrNull { it.value }?.key
        mostFrequent?.let { result.add(it) }
다음 페이지로 넘기는 함수도 작성해줍니다.
fun moveToNextQuestion() {
        if (viewPager.currentItem==3) {
            //마지막페이지 -> 결과 화면으로 이동
            //
        }else {
            val nextItem = viewPager.currentItem + 1
            if(nextItem < viewPager.adapter?.itemCount ?: 0) {
                viewPager.setCurrentItem(nextItem, true)
            }
        }
    }
마지막으로 res/values/strings.xml에 강의 자료를 넣어주면 됩니다.
이렇게 메인 화면과 질문지화면 UI까지 만들어보았고 내일 기능을 추가해서 마무리 해보겠습니다!