어제에 이어서 MBTI 테스트 앱 마무리 해보겠습니다.
먼저 QuestionFragment에 레이아웃을 가져오기 위하여
val view = inflater.inflate(R.layout.fragment_question, container, false)코드를 통해 질문지를 가져옵니다.
그리고 각 질문지의 페이지마다 맞는 타이틀 (ex.외향형 - 내향형 (E-I)) 을 가져오기 위해 코드를 작성해 줍니다.
val title: TextView = view.findViewById(R.id.tv_question_title)
title.text = getString(questiontitle[questionType])
미리 작성해둔 타이틀에서 type번째 것을 가져온다는 뜻입니다.
private var questionType: Int = 0

    private val questiontitle = listOf(
        R.string.question1_title,
        R.string.question2_title,
        R.string.question3_title,
        R.string.question4_title
    )
(미리 작성해준 questiontitle)
이제 타이틀은 했으니 질문을 만들어 보겠습니다.
val questionTextView = listOf<TextView>(
    view.findViewById(R.id.tv_question_1),
    view.findViewById(R.id.tv_question_2),
    view.findViewById(R.id.tv_question_3)
)
그 질문에 대한 대답도 만들어 줍니다.
val answerRadioGroup = listOf<RadioGroup>(
    view.findViewById(R.id.rg_answer_1),
    view.findViewById(R.id.rg_answer_2),
    view.findViewById(R.id.rg_answer_3)
)
이제 이 친구들을 for 반복문을 통해 화면에 나타나도록 하겠습니다.
for (i in questionTextView.indices){
    questionTextView[i].text = getString(questionTexts[questionType][i])

    val radioButton1 = answerRadioGroup[i].getChildAt(0) as RadioButton
    val radioButton2 = answerRadioGroup[i].getChildAt(1) as RadioButton

    radioButton1.text = getString(questionAnswers[questionType][i][0])
    radioButton2.text = getString(questionAnswers[questionType][i][1])
}- 이 for 반복문은 질문을 type에 맞게 순서대로 가져옵니다.
override fun onViewCreated(view: View, savedInstanceState: Bundle?) {
        super.onViewCreated(view, savedInstanceState)

        val answerRadioGroup = listOf<RadioGroup>(
            view.findViewById(R.id.rg_answer_1),
            view.findViewById(R.id.rg_answer_2),
            view.findViewById(R.id.rg_answer_3)
        )
(질문지를 가져왔으니 답변지도 가져와 줍니다!)
- 그리고 다음 페이지로 넘어가기위한 버튼과 만약 하나라도 답변을 하지않았을시에 대한 예외처리를 해줍니다.
val btn_next : Button = view.findViewById((R.id.btn_next))

btn_next.setOnClickListener {

    val isAllAnswered = answerRadioGroup.all { it.checkedRadioButtonId != -1 }

    if(isAllAnswered) {
        val response = answerRadioGroup.map {radioGroup ->
            val firstRadioButton = radioGroup.getChildAt(0) as RadioButton
            if(firstRadioButton.isChecked) 1 else 2
    }
    (activity as? TestActivity)?.questuinnaireResults?.addResponses(response)
    (activity as? TestActivity)?.moveToNextQuestion()
(질문에 답을 다하고 이상이 없으면 TestActivity에 fun moveToNextQuestion()로 넘어갑니다.)
else {
    Toast.makeText(context,"모든 질문에 답해주세요", Toast.LENGTH_SHORT).show()
}- 질문지에 답을 다 안했을시에 Toast를 하나 띄워줍니다.
마지막으로 이제 결과화면을 만들어 보겠습니다.
결과화면으로 쓰일 Activity를 하나 생성하여주고 TextView와 ImageView와 Button을 만들어 줍니다.
<TextView
        android:id="@+id/tv_resTitle"
        android:layout_width="wrap_content"
        android:layout_height="wrap_content"
        android:layout_marginTop="60dp"
        android:text="당신의 MBTI는?"
        android:textStyle="bold"
        android:textColor="#009688"
        android:textSize="30sp"
        app:layout_constraintEnd_toEndOf="parent"
        app:layout_constraintStart_toStartOf="parent"
        app:layout_constraintTop_toTopOf="parent"/>

    <TextView
        android:id="@+id/tv_resValue"
        android:layout_width="wrap_content"
        android:layout_height="wrap_content"
        android:layout_marginTop="32dp"
        android:text="ESTJ"
        android:textStyle="bold"
        android:textColor="#0E1C6E"
        android:textSize="50sp"
        app:layout_constraintEnd_toEndOf="parent"
        app:layout_constraintStart_toStartOf="parent"
        app:layout_constraintTop_toBottomOf="@+id/tv_resTitle"/>

    <ImageView
        android:id="@+id/iv_resImg"
        android:layout_width="match_parent"
        android:layout_height="0dp"
        android:src="@drawable/ic_estj"
        android:layout_marginBottom="10dp"
        android:layout_marginStart="16dp"
        android:layout_marginEnd="16dp"
        app:layout_constraintBottom_toTopOf="@+id/btn_res_retry"
        app:layout_constraintTop_toBottomOf="@+id/tv_resValue"
        app:layout_constraintEnd_toEndOf="parent"
        app:layout_constraintStart_toStartOf="parent"/>

    <Button
        android:id="@+id/btn_res_retry"
        android:layout_width="match_parent"
        android:layout_height="wrap_content"
        android:text="다시 테스트"
        android:textStyle="bold"
        android:textSize="18sp"
        android:textColor="@color/white"
        android:layout_margin="26dp"
        app:layout_constraintBottom_toBottomOf="parent"
        app:layout_constraintStart_toStartOf="parent"
        app:layout_constraintEnd_toEndOf="parent"/>
레이 아웃은 완성이 됐고 마지막 페이지에서 결과화면으로 출력될 수 있게 설정을 해주겠습니다.
TestActivity.kt에서 moveToNextQuestion 함수 아래로 결과화면을 보내줍니다.
val intent = Intent(this,ResultActivity::class.java)
intent.putIntegerArrayListExtra("results", ArrayList(questuinnaireResults.results))
startActivity(intent)- 그리고 이제 각 결과값을 받아서 출력시켜주는 결과창을 만들어 줍니다.
val results = intent.getIntegerArrayListExtra("results") ?: arrayListOf()(결과값을 가져오고)
val resultTypes = listOf(
    listOf("E", "I"),
    listOf("N", "S"),
    listOf("T", "F"),
    listOf("J", "P")
)

var resultString = ""
for (i in results.indices) {
    resultString += resultTypes[i][results[i]-1]
}

val tv_resValue : TextView = findViewById(R.id.tv_resValue)
tv_resValue.text = resultString
- 위에서 설정한 list값을 결과값에 맞게 레이아웃에tv_resValue로 나타내 줍니다.
val iv_ResImg :ImageView = findViewById(R.id.iv_resImg)
val imageResource = resources.getIdentifier("ic_${resultString.toLowerCase(Locale.ROOT)}", "drawable", packageName)

iv_ResImg.setImageResource(imageResource)- 위에서 나온 알파벳에 맞게 ic알파벳 이런식으로 결과에 맞는 이미지를 가져옵니다.
val btn_retry : Button = findViewById(R.id.btn_res_retry)
btn_retry.setOnClickListener {

    val intent = Intent(this, MainActivity::class.java)
    intent.flags = Intent.FLAG_ACTIVITY_CLEAR_TASK or Intent.FLAG_ACTIVITY_NEW_TASK
startActivity(intent)- 그리고 다시하기 버튼을 활성화 시켜주면 완성입니다!
확실히 조금이지만 복잡해져서 그런지 처음보는 문법도 많고 어려운 부분이 많았습니다...혼자서 과연 할 수 있을지 ㅠㅠ
화이팅 화이팅 하는걸로!
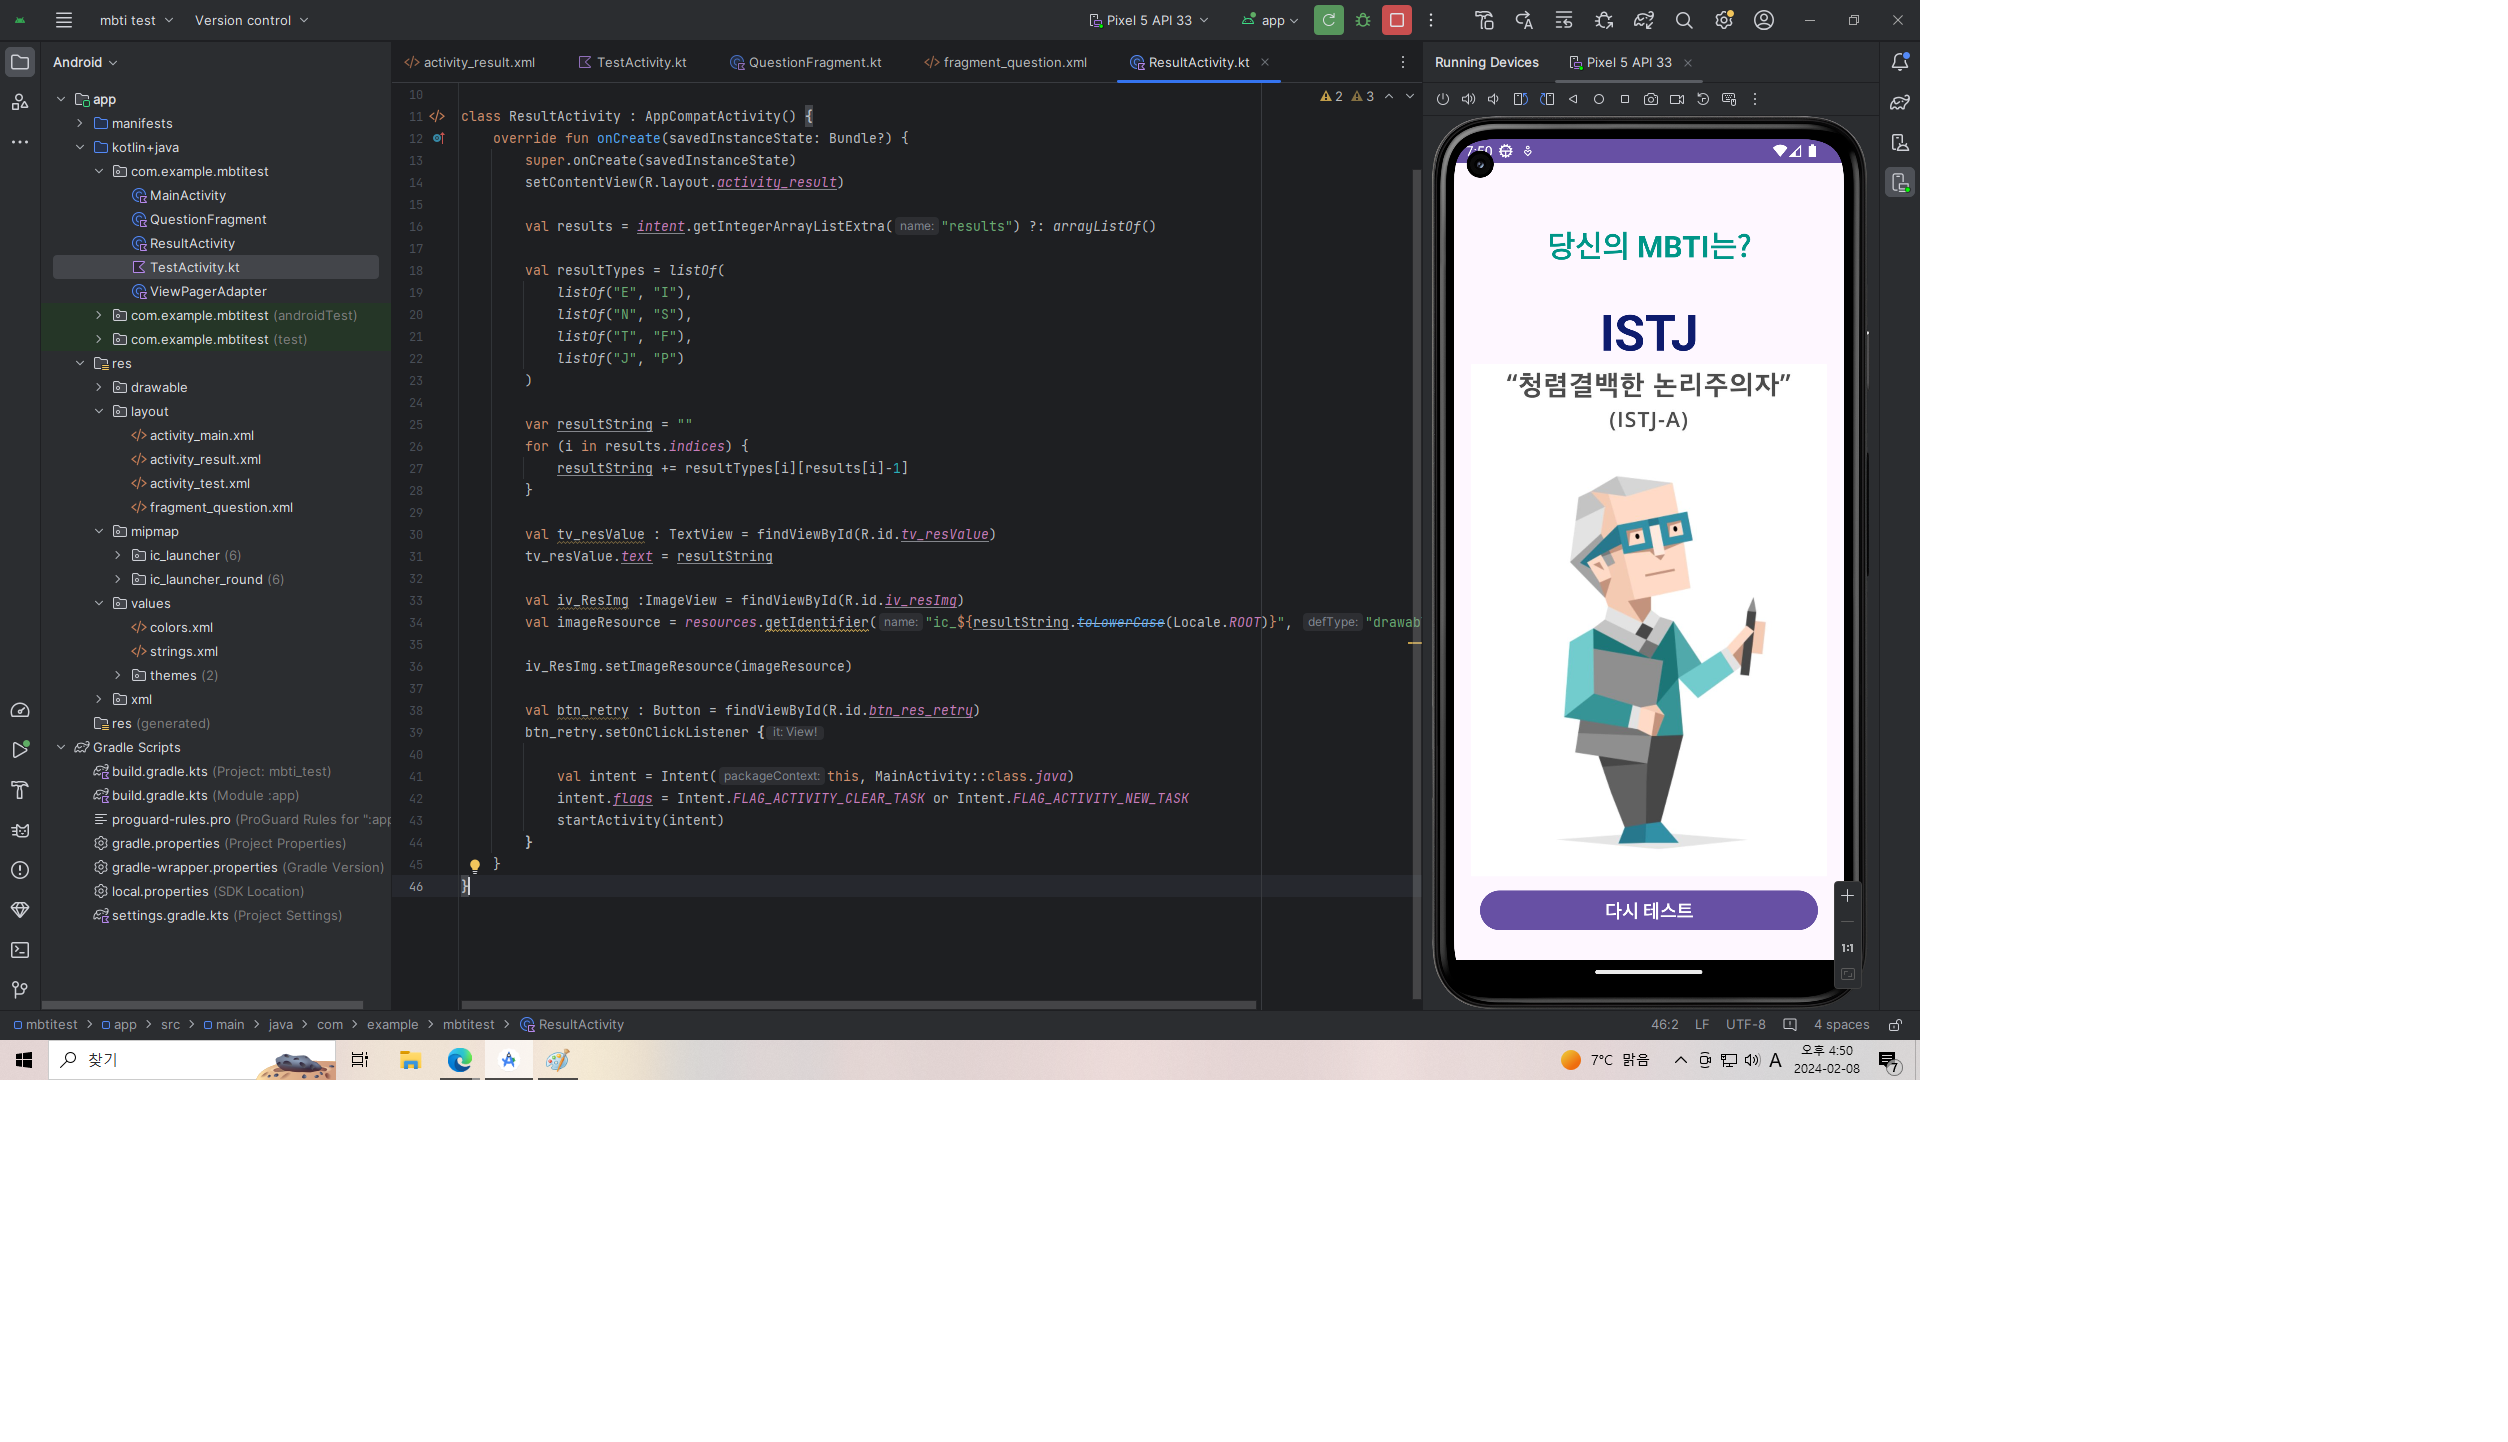 (질문지의 차이인지 오랜만에 하니까 ISTJ가 나왔습니다! 원래는 ISFJ였는데 다른건 비슷하네요 ㅎㅎ)