오늘은 강의를 보면서 BMI 계산기를 만들어 보았다.
모든게 다 새롭긴 했지만 배운 것 중에서 가장 생각나는 것 위주로 다시 한번 적어보겠습니다.
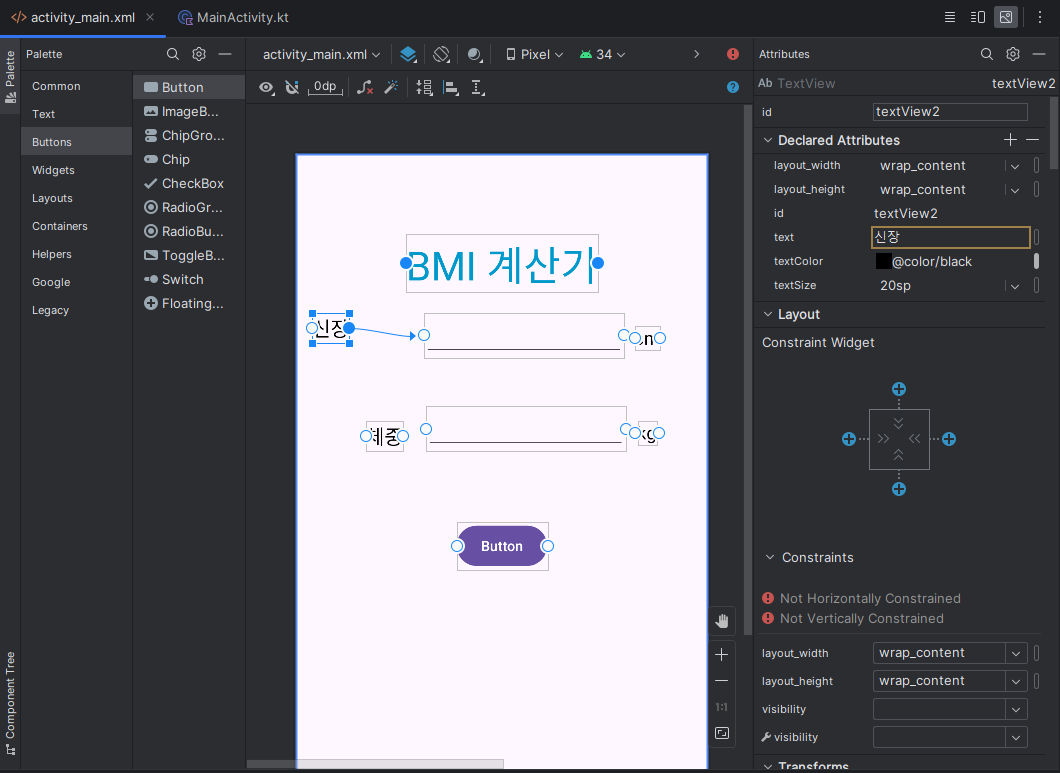
먼저 첫 화면을 만들면서 text의 색과 사이즈를 지정하고 text 사이를 붙이는걸 해보았습니다.
예전에 사이 간격에 대해서 Attributes로 숫자로만 지정이 가능한줄 알았는데 text 사이를 붙이는 것이 가능하다는걸 알게 되었습니다.
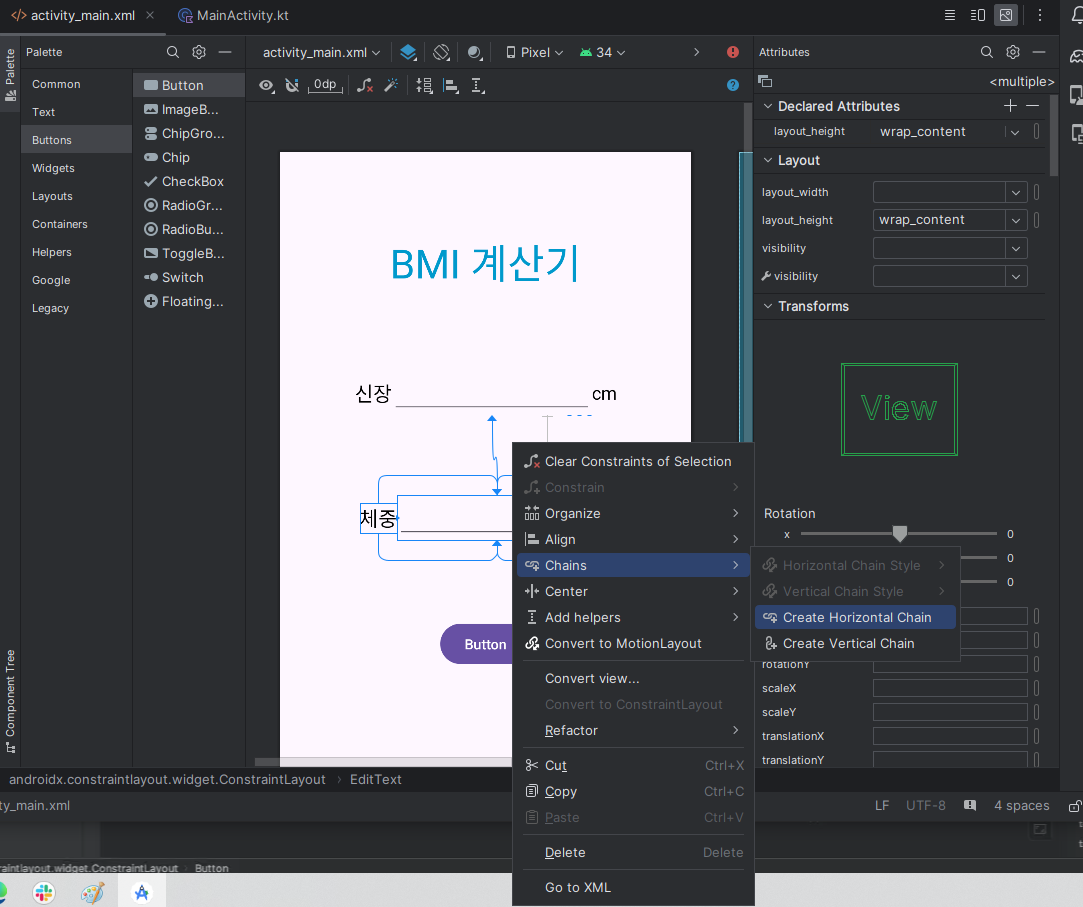
그 다음 chains를 통해서 Create Horizontal Chain을 눌러주면 중앙으로 간격 조정이 가능 하다는걸 알게되었습니다.
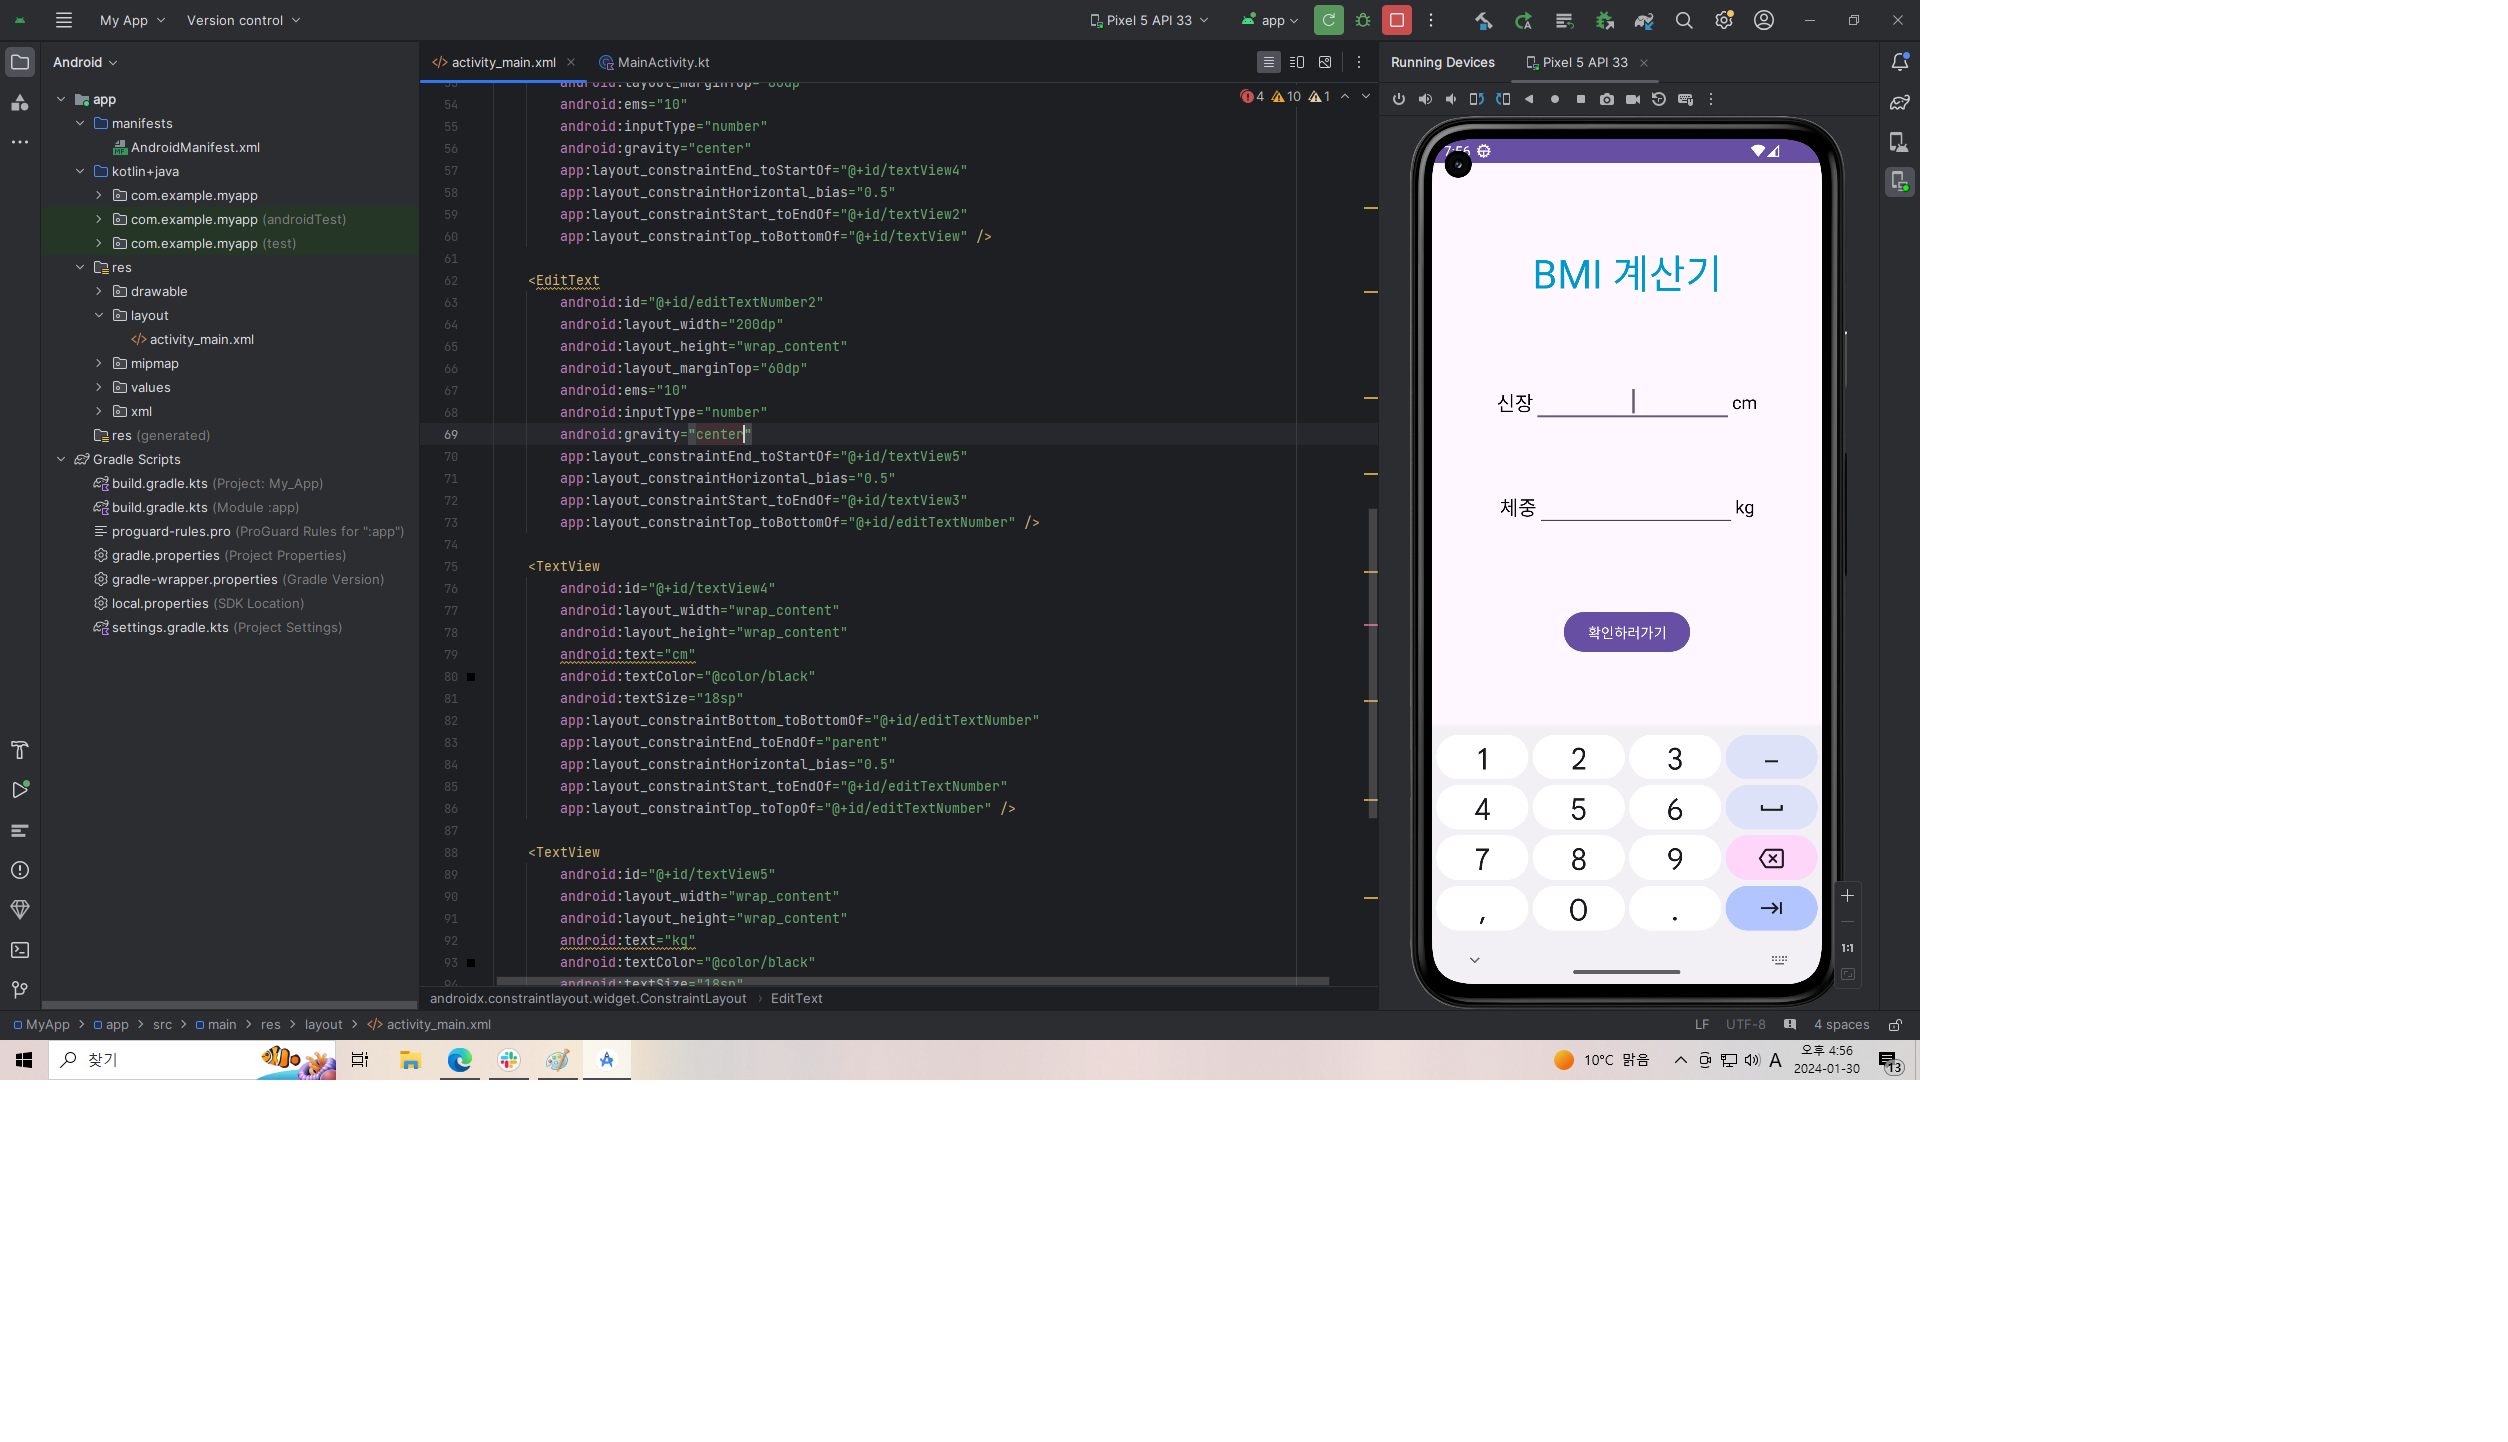 그 다음 code 화면에서 android:gravity="center" 코드를 통하여 숫자를 중앙에 쓸 수 있도록 설정해 주었습니다.
이렇게 메인화면이 완성되었고
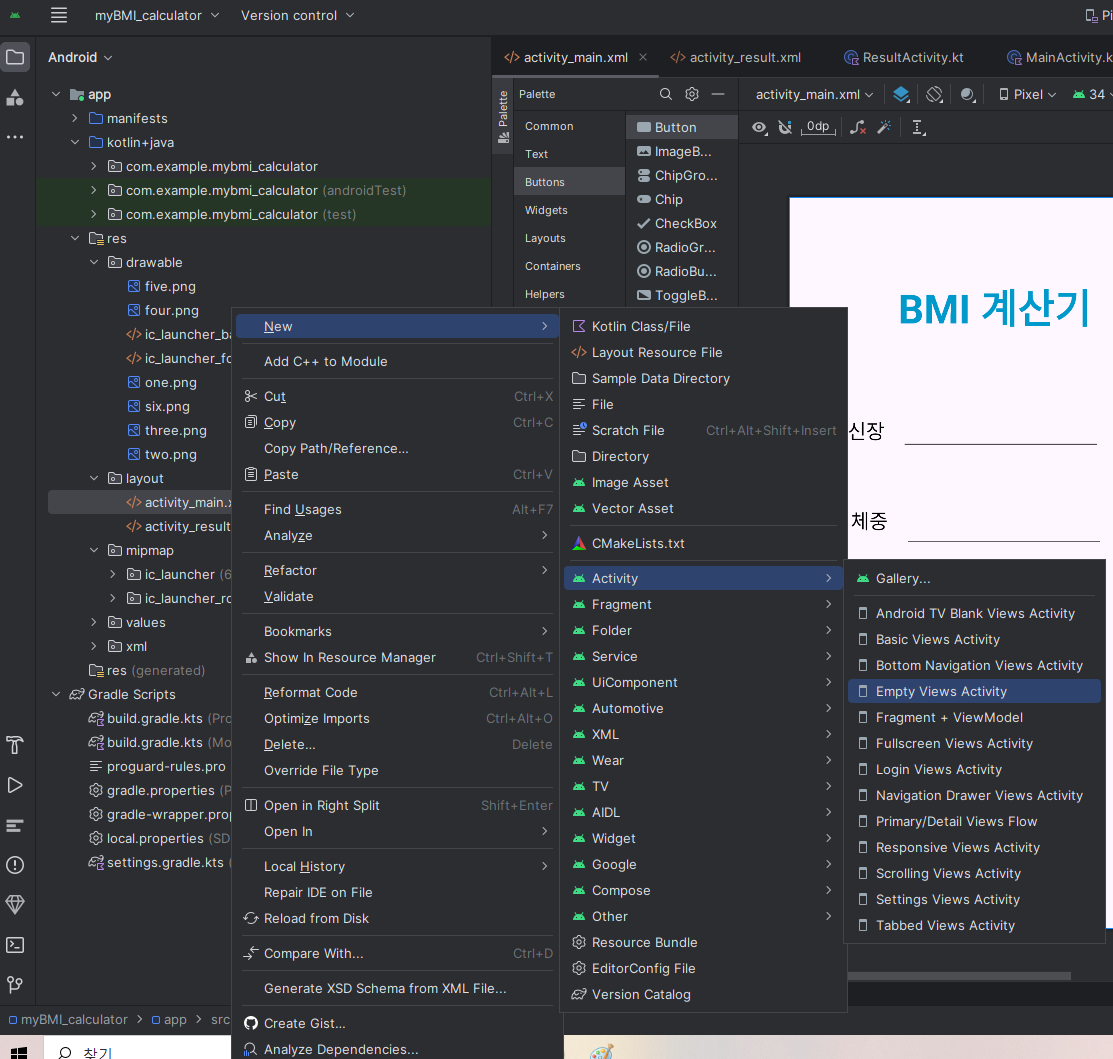
결과창을 만들어야 하기 때문에 아래화면처럼 새로운 Activity를 생성해 주었습니다.
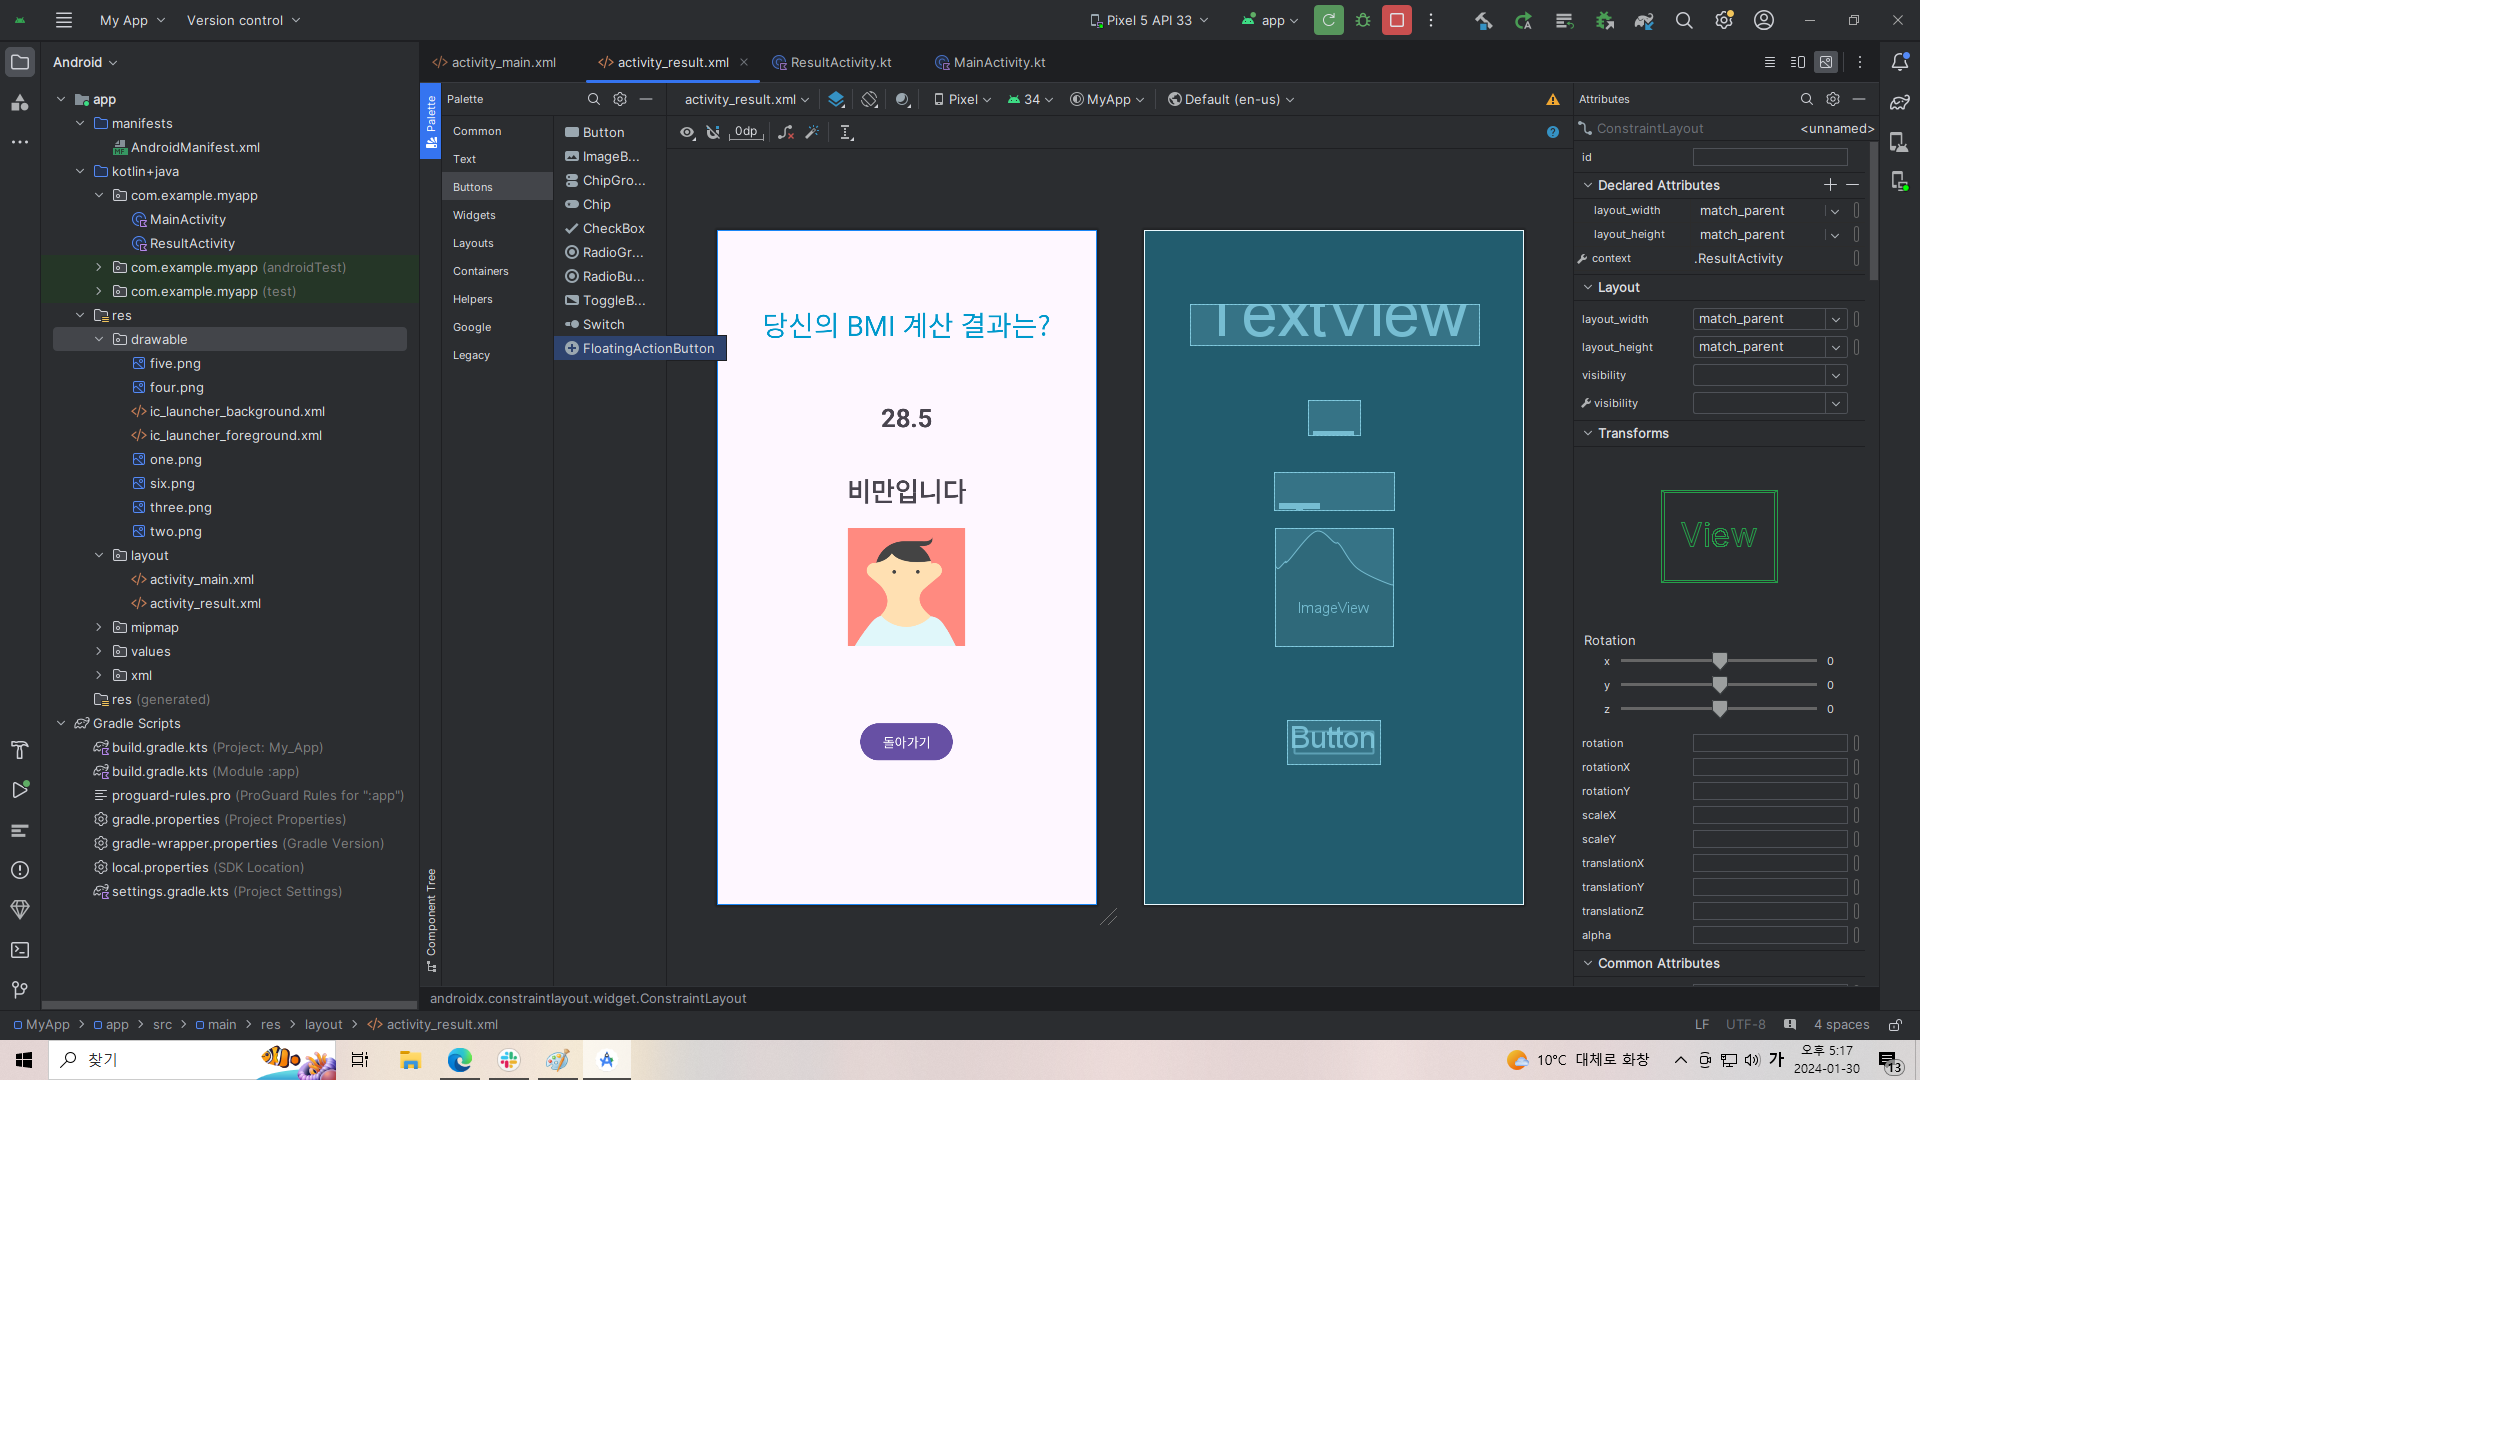 그다음 결과 화면을 만들어주고 이미지를 다운 받기위해 구글에 icon free를 검색해주면 https://www.flaticon.com/ 이 사이트를 통해 이미지를 다운받을 수 있다. 받은 이미지는
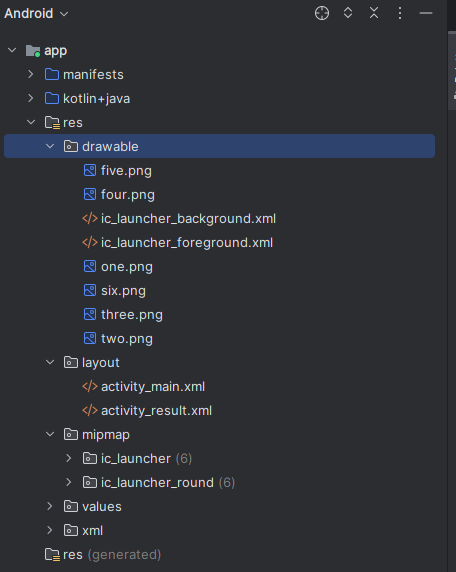 복사하여 res/deawable에 paste 해주면 이미지를 불러올 수 있습니다.(저는 계속 오류가 나서 이미지 이름을 특수문자나 대문자없이 저장하니까 됐습니다 ㅠㅠ)
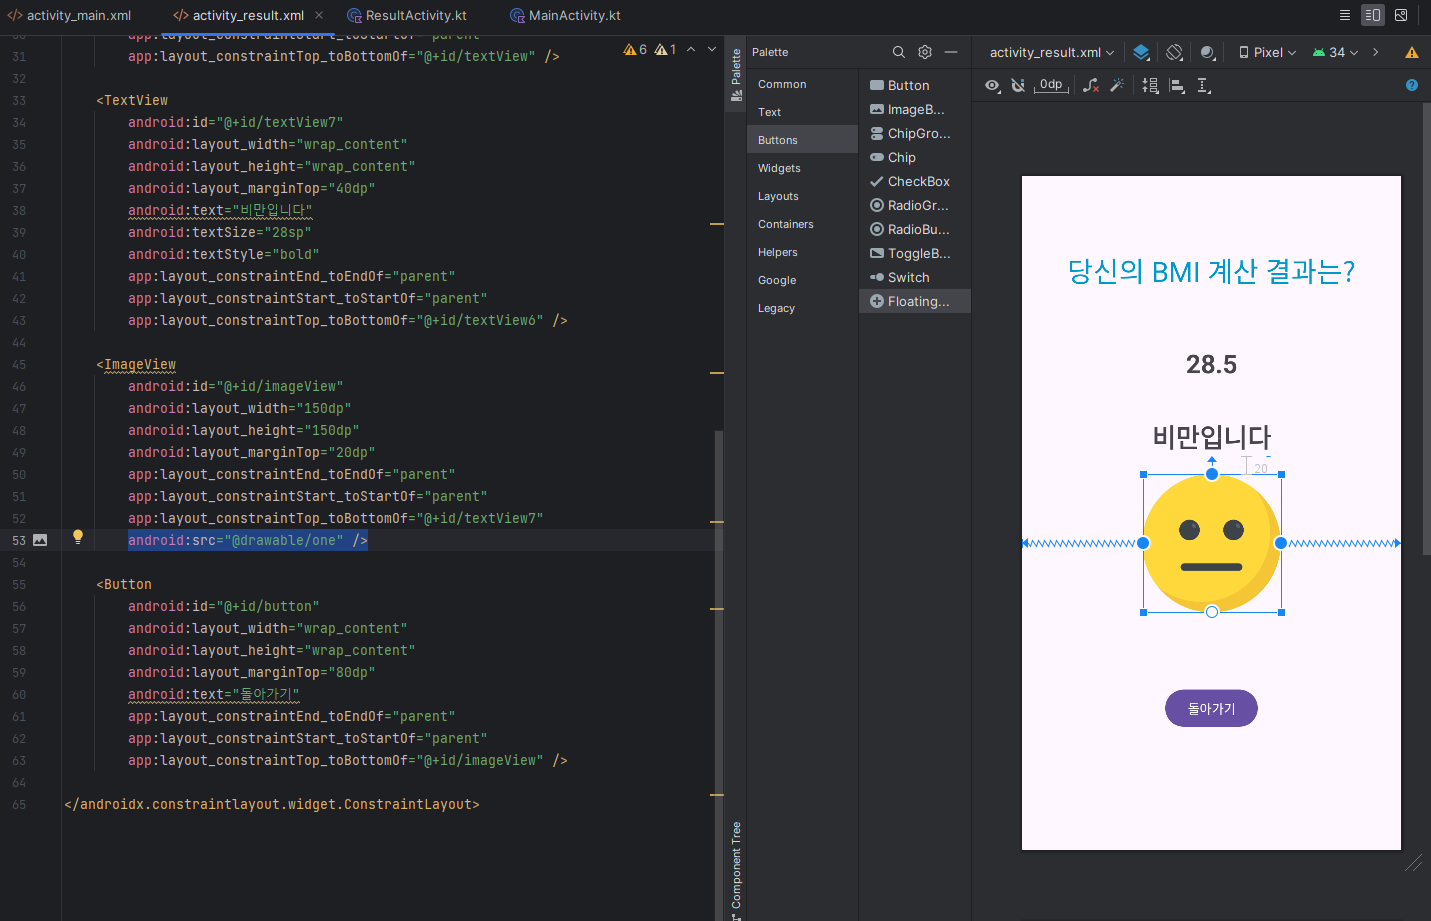
그 다음 이미지 코드에서
<ImageView
        android:id="@+id/imageView"
        android:layout_width="wrap_content"
        android:layout_height="wrap_content"
        android:layout_marginTop="20dp"
        app:layout_constraintEnd_toEndOf="parent"
        app:layout_constraintStart_toStartOf="parent"
        app:layout_constraintTop_toBottomOf="@+id/textView7"
        tools:srcCompat="@tools:sample/avatars" />
맨 마지막 코드를 지우고 내가 불러오고 싶은 이미지 코드로 바꾸면
<ImageView
        android:id="@+id/imageView"
        android:layout_width="150dp"
        android:layout_height="150dp"
        android:layout_marginTop="20dp"
        app:layout_constraintEnd_toEndOf="parent"
        app:layout_constraintStart_toStartOf="parent"
        app:layout_constraintTop_toBottomOf="@+id/textView7"
        android:src="@drawable/one" />
이런 형태로 불러올 수 있습니다.(이미지 크기를 150dp로 바꾸어 주었습니다!)
그 다음 id를 설정해주고 이제 각 코드를 연결시키고 상호작용 할 수 있게 만들어줍니다.
MainActivity.kt에서
val heightEditText = findViewById<EditText>(R.id.et_height)
//신장 입력칸에 연결된 변수
val weightEditText = findViewById<EditText>(R.id.et_weight)
//체중 입력칸에 연결된 변수
val submitButton = findViewById<Button>(R.id.btn_check)
//"확인하러가기" 버튼에 연결된 변수
변수를 입력해 주고
           val height : Int = heightEditText.text.toString().toInt()
           val weight : Int = weightEditText.text.toString().toInt()

           val intent = Intent(this, ResultActivity::class.java)
           intent.putExtra("height", height)
           intent.putExtra("weight", weight)
           startActivity(intent)
버튼을 눌렀을때 heightEditText 칸과 weightEditText 칸의 코드를 받아서 intent를 통해 넘겨주는 코드와
if(heightEditText.text.isEmpty()) {
                Toast.makeText(this, "신장을 입력해주세요", Toast.LENGTH_SHORT).show()
            }

            if(weightEditText.text.isEmpty()) {
                Toast.makeText(this, "체중을 입력해주세요", Toast.LENGTH_SHORT).show()
            }
신장과 체중을 입력하지 않았을 경우를 대비해 예외처리를 해주는 코드도 입력해주면 MainActivity의 코드 작성은 완료됩니다.
그 다음 ResultActivity의 작성은
val height = intent.getIntExtra("height", 0)
val weight = intent.getIntExtra("weight", 0)
먼저 신장과 체중 값을 받는 변수를 먼저 생성해주고
var resultText = ""
var resImage = 0
var resColor = 0

if (value < 18.5) {
    resultText = "저체중"
    resImage = R.drawable.one
    resColor = Color.YELLOW
} else if (value >= 18.5 && value < 23.0) {
    resultText = "정상 체중"
    resImage = R.drawable.two
    resColor = Color.GREEN
} else if (value >= 23.0 && value < 25.0) {
    resultText = "과체중"
    resImage = R.drawable.three
    resColor = Color.BLACK
} else if (value >= 25.0 && value < 30.0) {
    resultText = "경도 비만"
    resImage = R.drawable.four
    resColor = Color.CYAN
} else if (value >= 30.0 && value < 35.0) {
    resultText = "중정도 비만"
    resImage = R.drawable.five
    resColor = Color.MAGENTA
} else {
    resultText = "과체중"
    resImage = R.drawable.six
    resColor = Color.RED
}
결과 값의 범위를 설정 해준다.
여기서 신장의 입력값은 cm이지만 계산은 m로 해야하므로
var value = weight / (height / 100.0).pow(2.0)변수를 하나 만들어 준다.
그리고 각 코드를 이어주면 완성!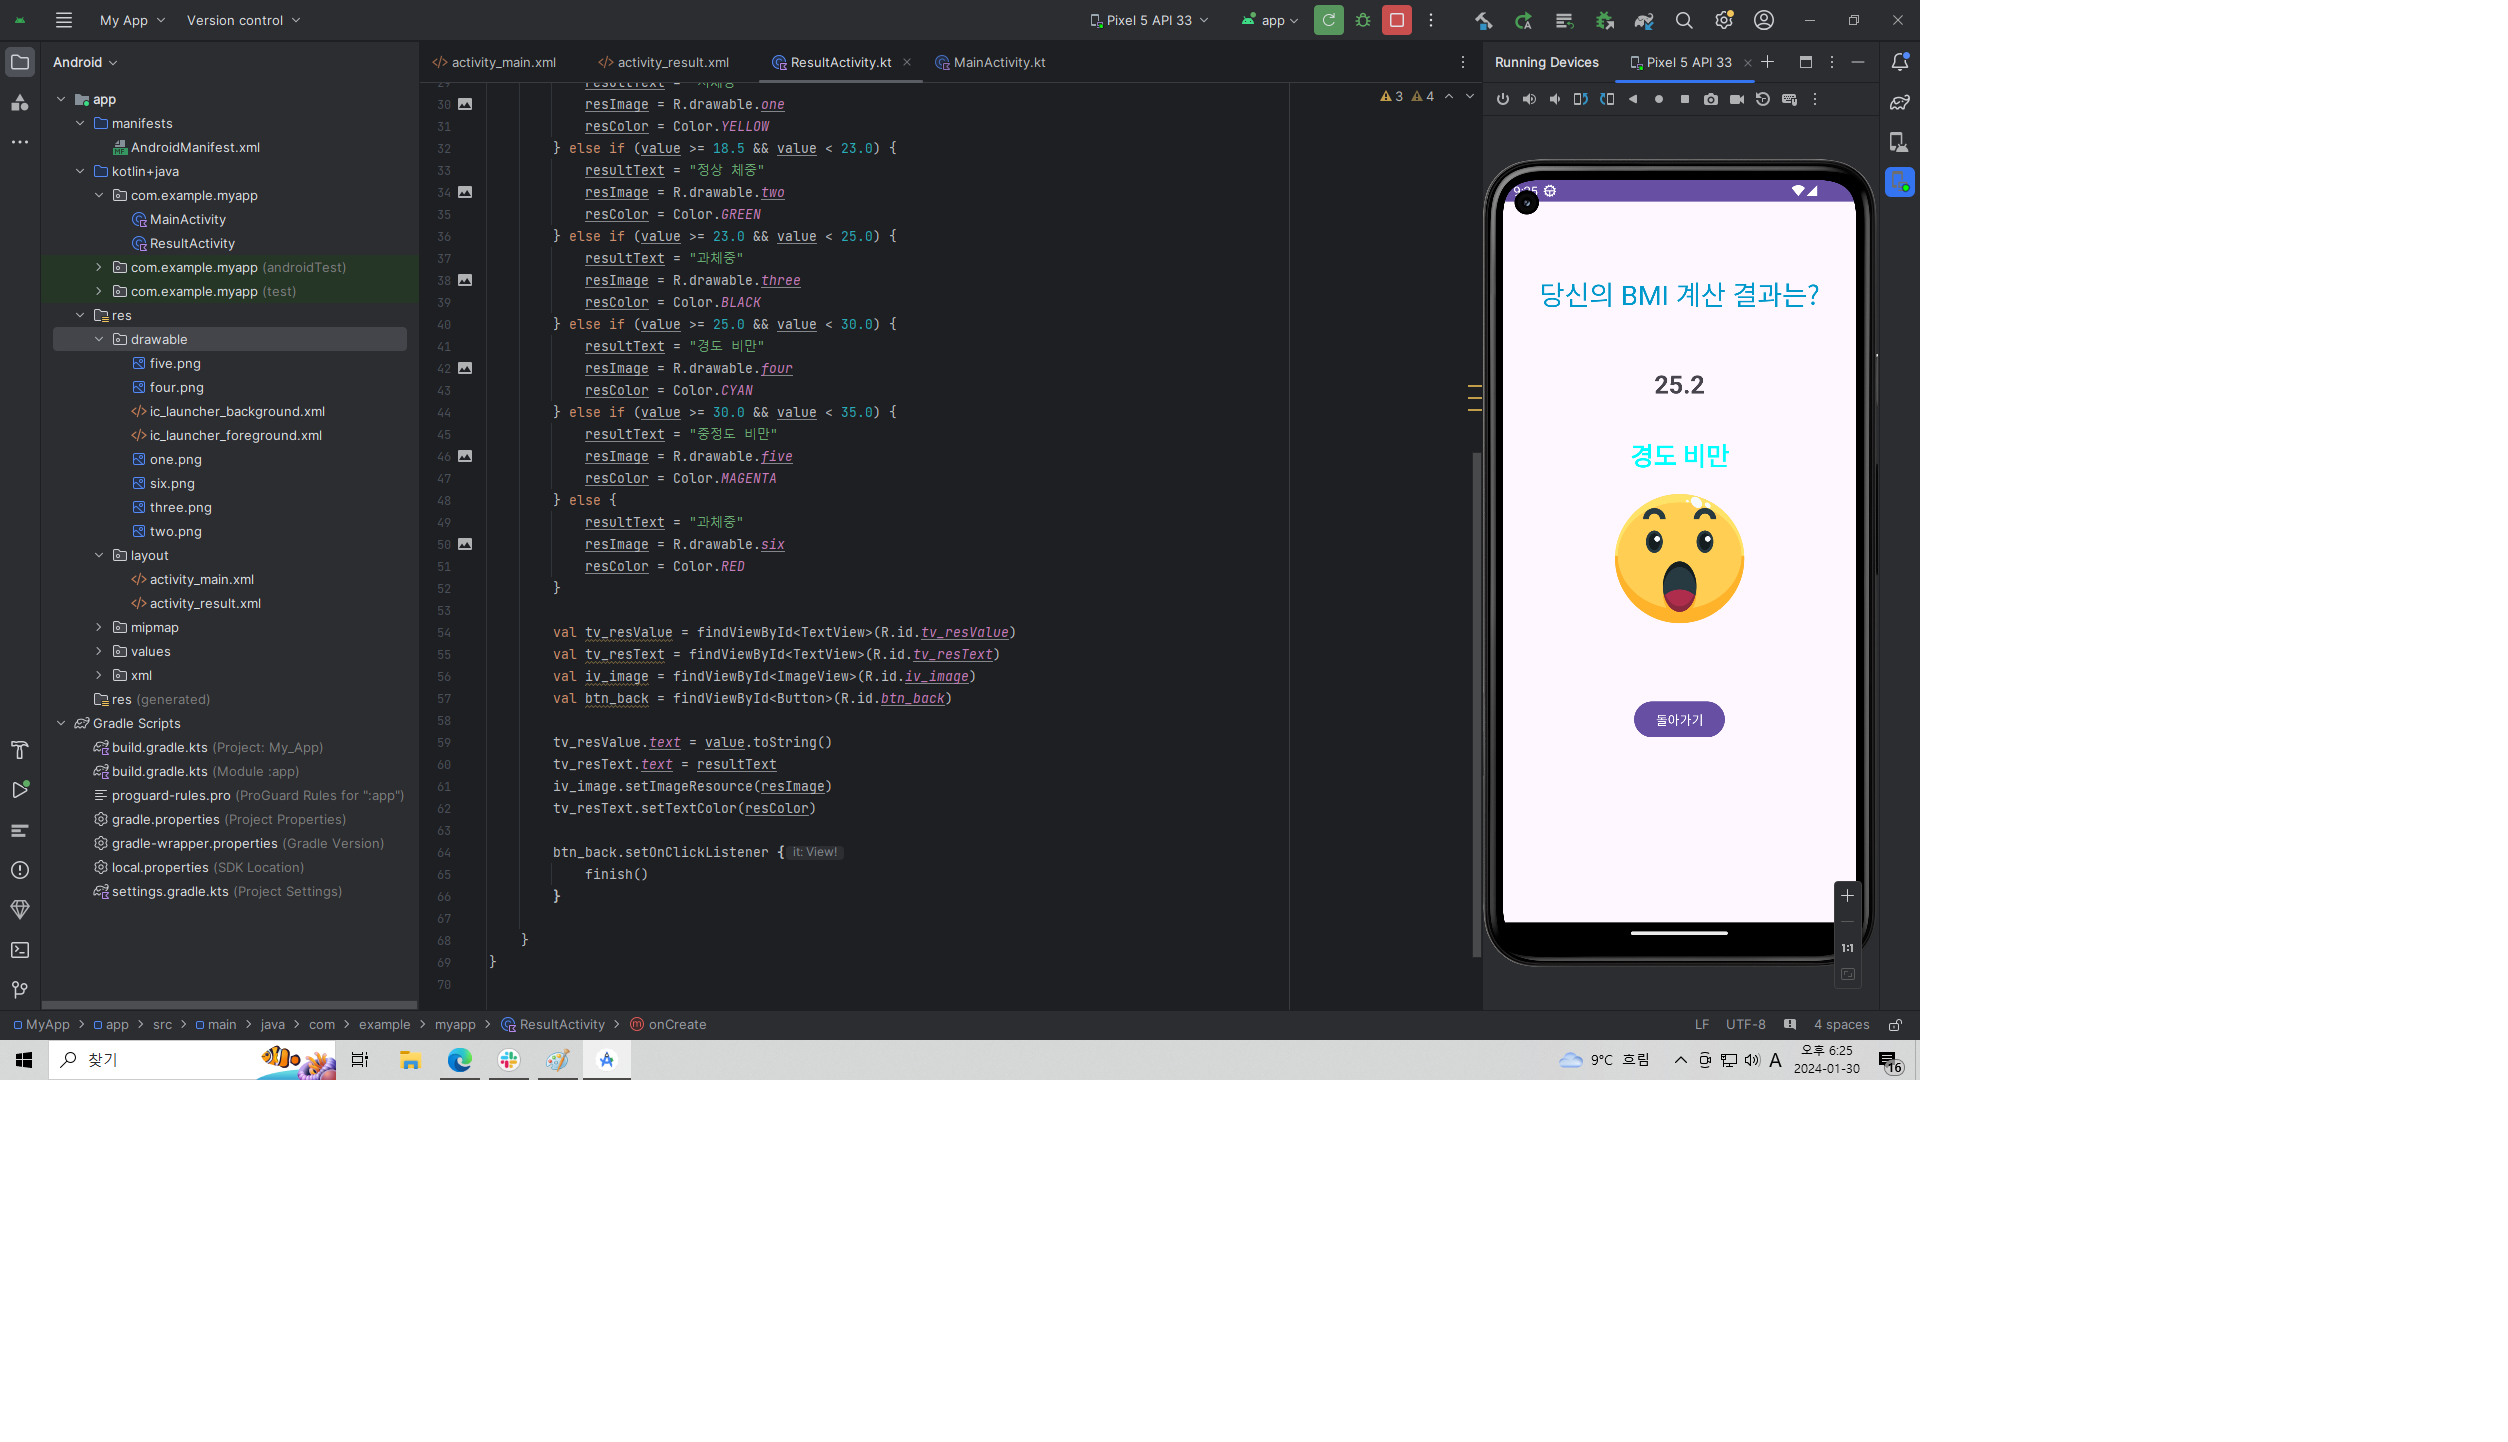 강의를 보면서 만들었지만 처음으로 만들어본 앱이라 재미있고 신기했다! 다음에는 강의를 안보고 혼자서 코드를 뜯어보며 만들어 봐야겠다!(경도 비만이라니 ㅠㅠ)