☀️ 개요
Spring Cloud Config 와 RabbitMQ / Spring Cloud Bus AMQP / Spirng Actuator 연동을 통해 Config 설정 파일 변경 시 어플리케이션 재기동 없이 Hot-Deploy 기능을 수행하도록 설정한다.
- Spring Cloud Config 와 통신할 마이크로서비스는 Spring Cloud Bus AMQP, Spring Actuator 를 dependecy 설정한다.
- 각 마이크로서비스는 RabiitMQ 서버와 연동되도록 설정한다.
- RabbitMQ 는 연동된 마이크로서비스 별로 메세지 큐를 할당한다.
- Config 설정 파일이 변경 된다.
- POST /actuator/busresh REST API 요청을 통해 Bus 안에 연동된 마이크로서비스의 RabbitMQ 메세지 큐에 메시지가 등록된다.
- 연동된 마이크로서비스가 메시지 큐의 메시지를 Consume 하면서 서버 재기동 없이 Config 설정이 Reload 된다.
-
busrefresh 요청 (Config Server로 요청)
- Spring Cloud Config / Spring Cloud Bus AMQP / Spirng Actuator 설정되어 있는 아무 클라이언트에 요청하면 bus안의 모든 클라이언트가 Relaod 됨
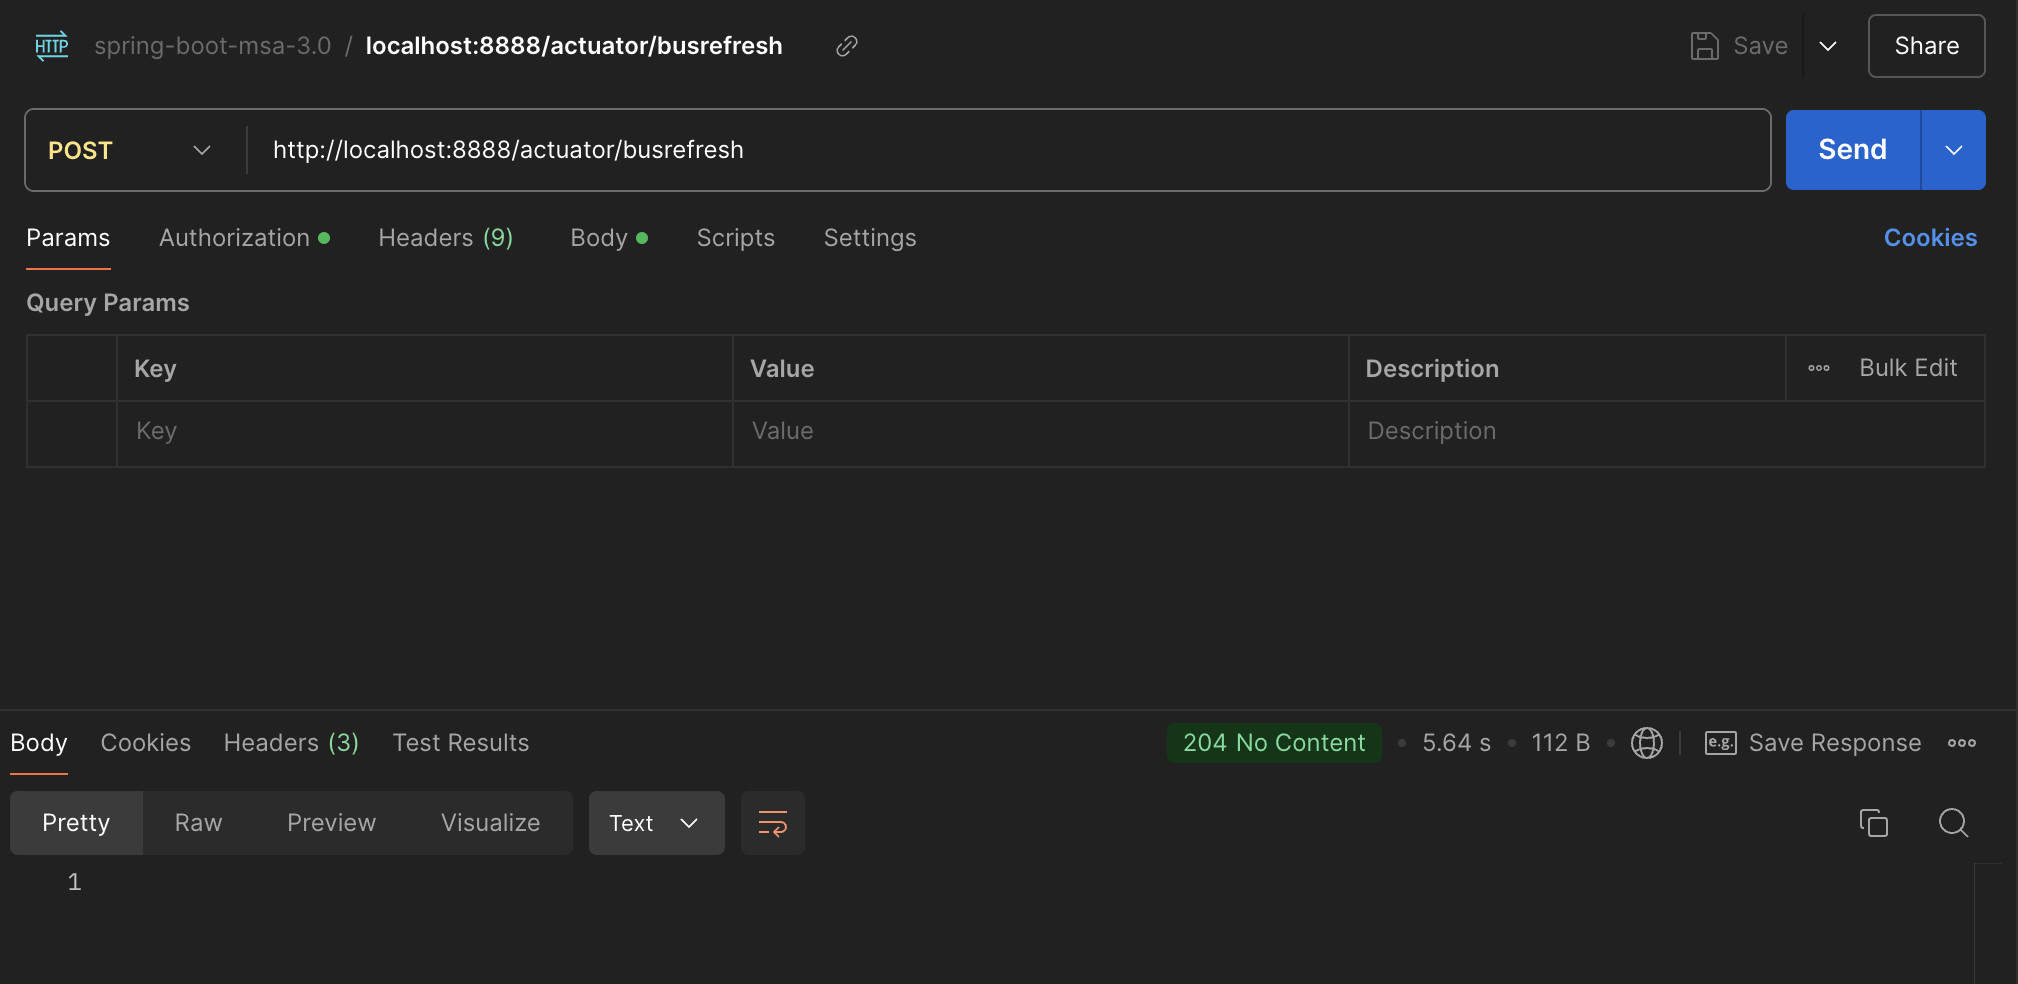
- Spring Cloud Config / Spring Cloud Bus AMQP / Spirng Actuator 설정되어 있는 아무 클라이언트에 요청하면 bus안의 모든 클라이언트가 Relaod 됨
-
busrefresh 로 인한 Config 설정 relaod 로그
- EDIARY-POINT 서비스 Hot Deploy 됨
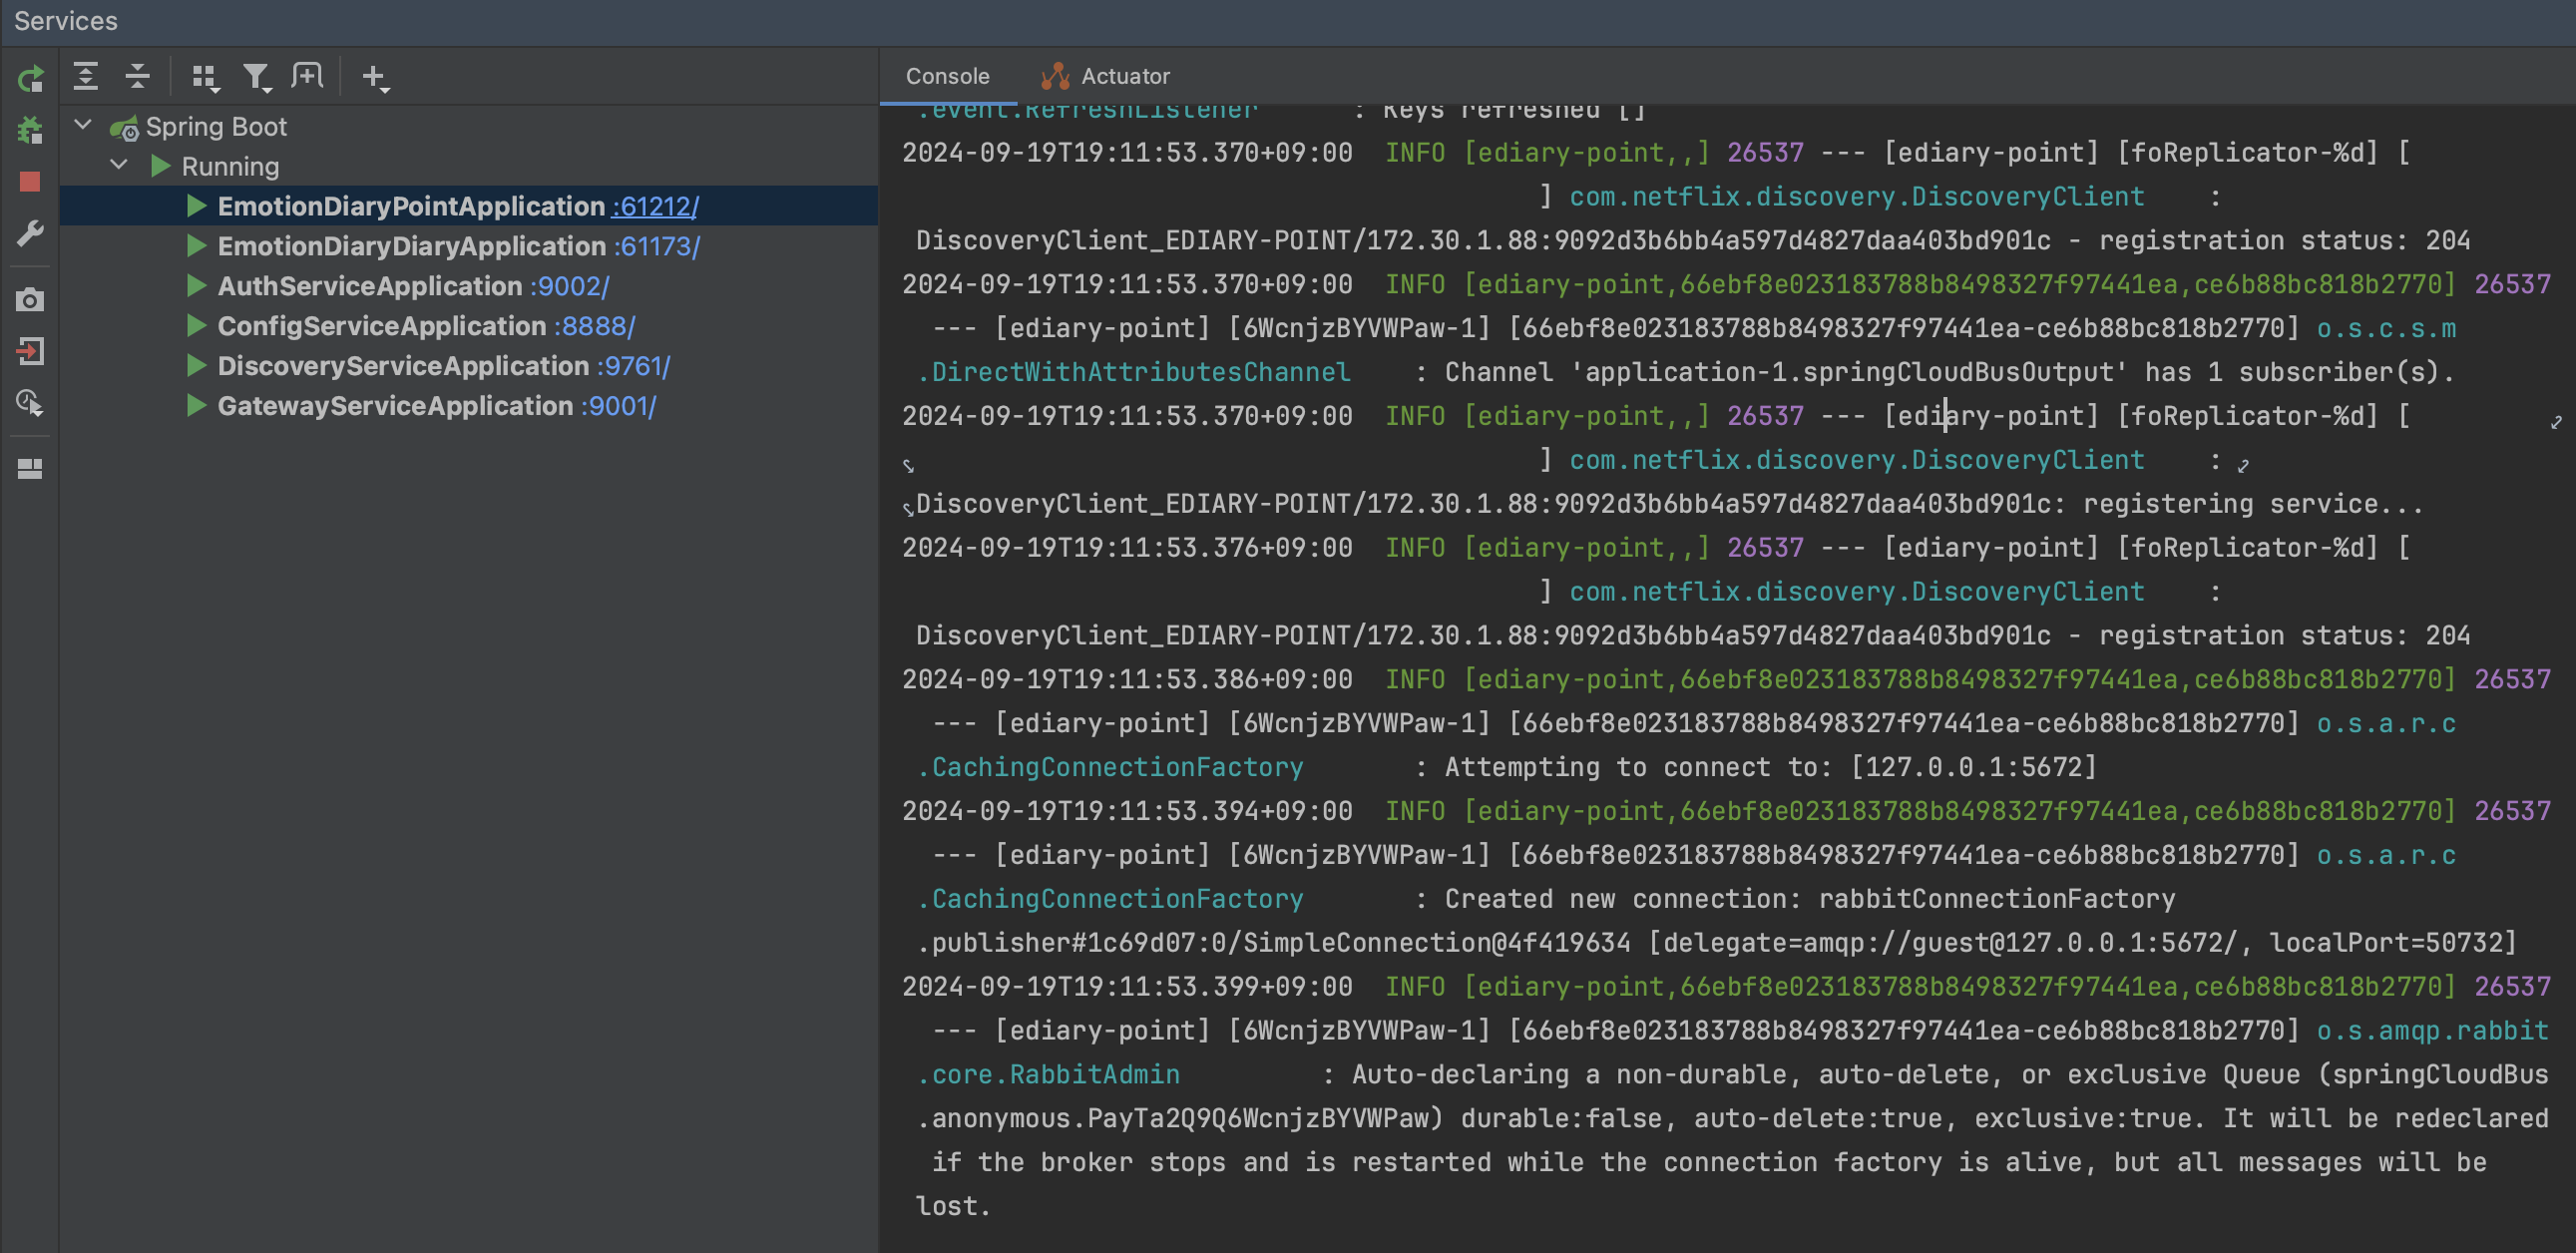
- EDIARY-POINT 서비스 Hot Deploy 됨
1️⃣ Spring Cloud Config Server
1. @EnableConfigServer
- ConfigServerConfiguration 를 import 해서 ConfigServerAutoConfiguration 이 수행되도록 설정
- @EnableConfigServer 어노테이션으로 ConfigServer 관련 자동설정 활성화
  @Target(ElementType.TYPE)
  @Retention(RetentionPolicy.RUNTIME)
  @Documented
  @Import(ConfigServerConfiguration.class)
  public @interface EnableConfigServer {

  }
@EnableConfigServer
@SpringBootApplication
public class ConfigServiceApplication {
public static void main(String[] args) {
SpringApplication.run(ConfigServiceApplication.class, args);
}
}2. ConfigServerAutoConfiguration
- ConfigServerConfiguration.Marker 빈 등록 체크 후 AutoConfiguration 설정 수행
  @Configuration(proxyBeanMethods = false)
  @ConditionalOnBean(ConfigServerConfiguration.Marker.class)
  @ConditionalOnProperty(name = ConfigServerProperties.PREFIX + ".enabled", matchIfMissing = true)
  @EnableConfigurationProperties(ConfigServerProperties.class)
  @Import({ EnvironmentRepositoryConfiguration.class, CompositeConfiguration.class, ResourceRepositoryConfiguration.class,
          ConfigServerEncryptionConfiguration.class, ConfigServerMvcConfiguration.class,
          ResourceEncryptorConfiguration.class })
  public class ConfigServerAutoConfiguration {

  }
3. application.yml
- spring.config.server.git
- GitHub Private Repository 연동 설정
- GitHub 에 등록된 SSH key를 통해 연동
- spring.config.server.bootstrap: true
- Config Server 에서 외부설정(Git, Vault)을 읽어들일 경우 true
- Spring Cloud Bootstrap : dependecy 설정 필요
- spring.rabbitmq
- rabbitmq 서버 연동 설정
- management.endpoints.web.exposure.include: health, busrefresh
- Spring Cloud Bus 와 연동되어서 actuator의 busrefresh 기능 활성화
spring:
  cloud:
    config:
      server:
        git:
          uri: git@github.com:onlydev7777/emotion-diary-conifg.git
          default-label: main
          private-key: |
            -----BEGIN EC PRIVATE KEY-----
            블라블라
            -----END EC PRIVATE KEY-----
          ignore-local-ssh-settings: true
          host-key: 블라블라
          host-key-algorithm: ecdsa-sha2-nistp256

        bootstrap: true
  rabbitmq:
    host: 127.0.0.1
    port: 5672
    username: guest
    password: guest

management:
  endpoints:
    web:
      exposure:
        include: health, busrefresh
4. bootstrap.yml
- Spring Cloud Config Server 에서 암복호화 처리 시 암복호화 key 설정
- JDK keytool 을 이용해서 JKS(Java KeyStore) 파일 생성
- Config Server 에서 해당 JKS 파일의 private & public key로 암복호화 수행
- encrypt / decrypt REST API 지원
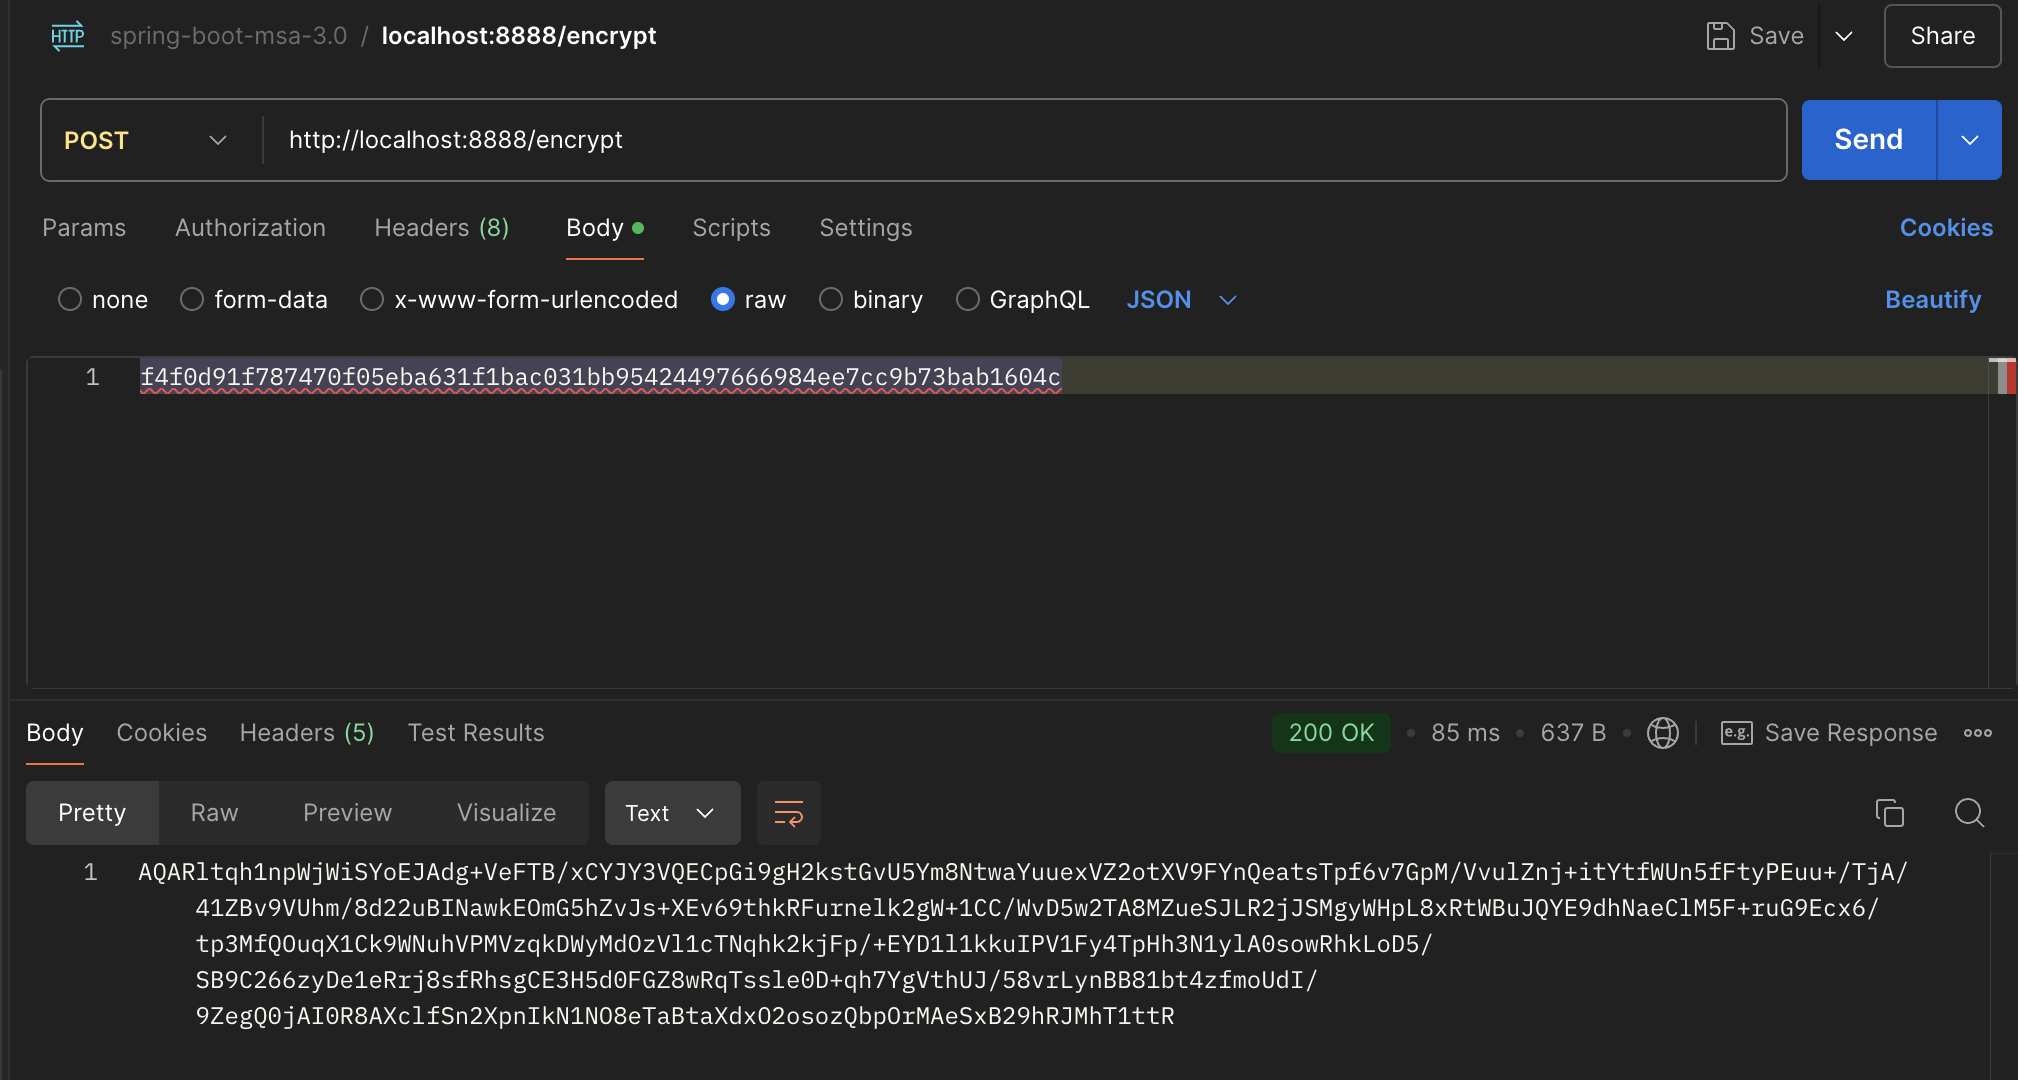
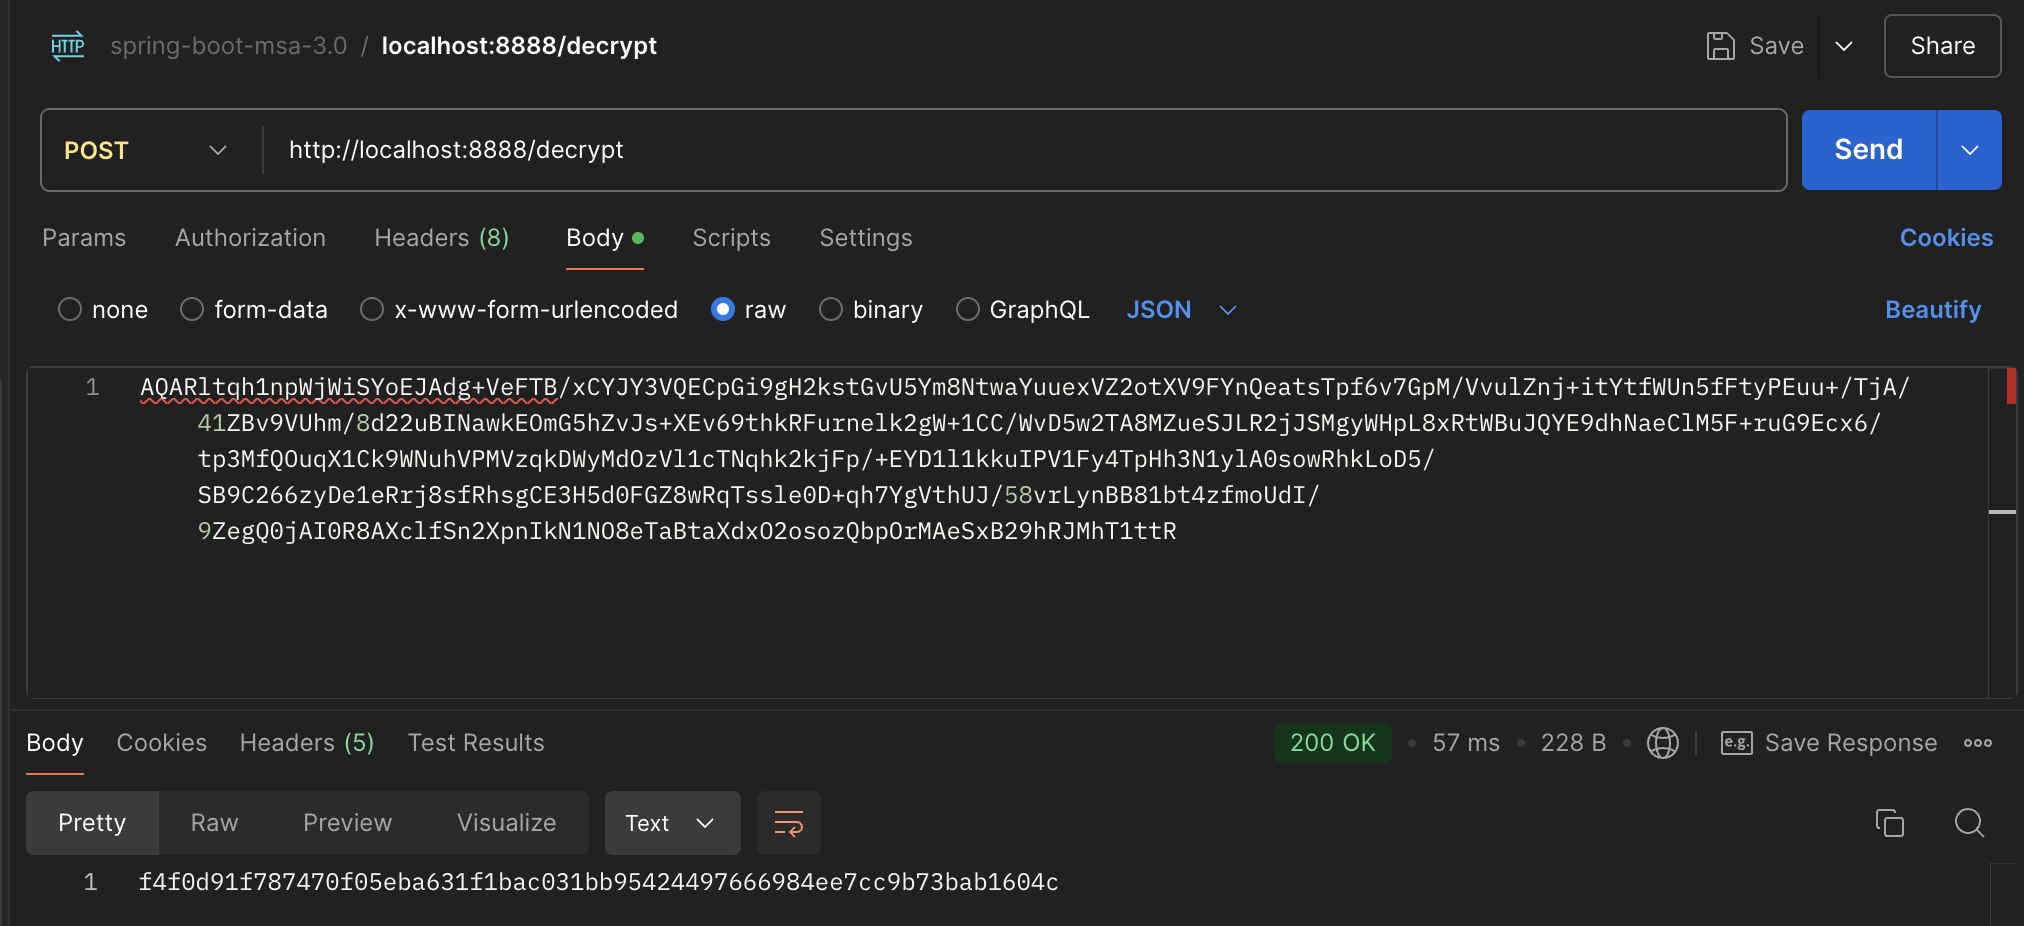
- encrypt / decrypt REST API 지원
  encrypt:
    key-store:
      location: file://${user.home}/IdeaProjects/emotion-diary-msa/config-service/apiEncryptionKey.jks
      password: 1q2w3e4r
      alias: apiEncryptionKey
2️⃣ EDIARY-DIARY : Spring Cloud Config Client 설정
Diary-Service (일기 서비스) 의 Spring Cloud Config Client 관련 설정
- dependency 설정
- spring-cloud-starter-config
- spring-cloud-starter-bootstrap
- spring-cloud-starter-bus-amqp
- spring-boot-starter-actuator
1. application.yml
- busrefresh 기능 활성화
management:
  endpoints:
    web:
      exposure:
        include: refresh, health, beans, httpexchanges, busrefresh, info, metrics, prometheus
2. bootstrap.yml
spring:
  cloud:
    config:
      uri: http://localhost:8888
name: ediary- spring.cloud.config.uri: http://localhost:8888
- Spring Cloud Config Server 설정
- Spring Cloud Config Server 에 연동된 GitHub의 Private Repository 의 ediary.yml 파일 read
- profile 이 null이면 ediary.yml 파일 read
- profile 이 dev이면 ediary-dev.yml 파일 read
- profile 이 real이면 ediary-real.yml 파일 read
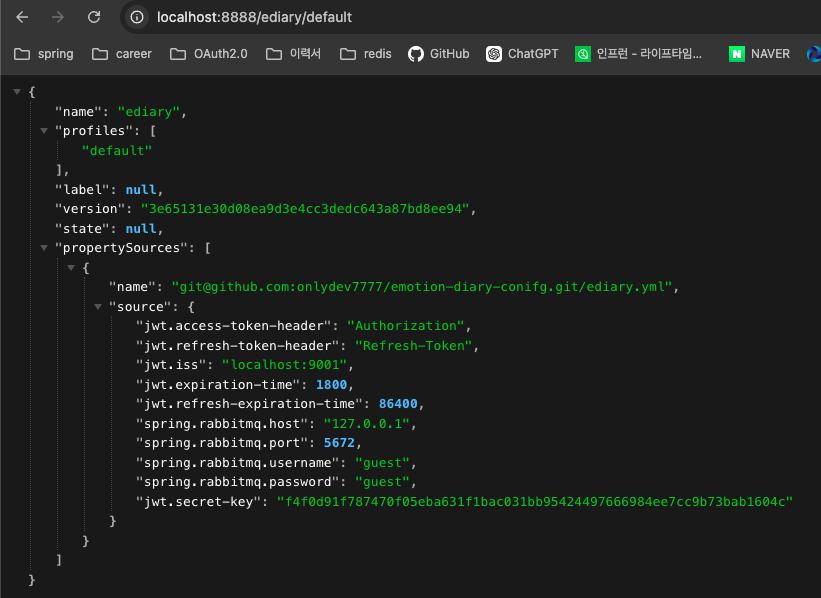
- http://localhost:8888/ediary/{profile} 로 확인 가능 (null이면 default)
3️⃣ Github Private Repository
Spring Cloud Config Server 와 연동된 Github Private Repository
Config Client 서비스 들은 해당 Repository 의 ediary 파일을 load 한다.
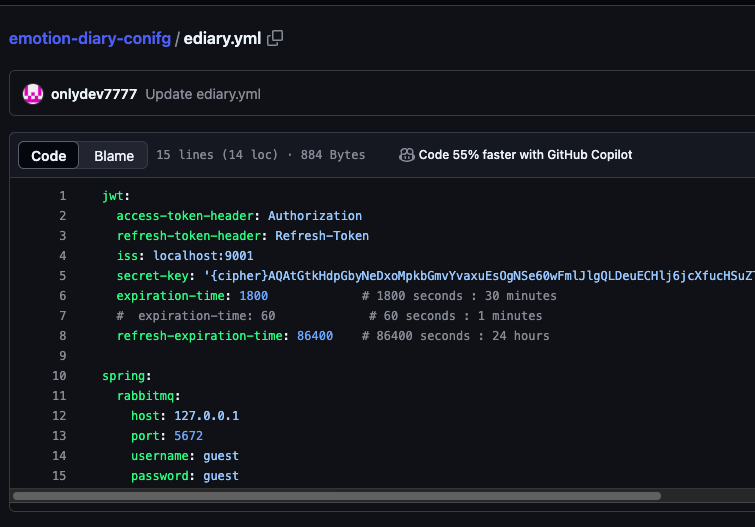
1. ediary.yml
- Config Client 에 적용될 공통 설정 파일
- JWT 설정 : JWT 설정은 모든 마이크로서비스가 공통적으로 적용되어야 함
- jwt.secret-key 값은 Config Server 의 /encrypt REST API 를 통해 암호화 된 값
- RabbitMQ 설정 : Client Server 에 변경사항을 Hot-Deploy로 적용될 RabbitMQ 서버 공통 설정
- JWT 설정 : JWT 설정은 모든 마이크로서비스가 공통적으로 적용되어야 함
- Github Private Repository 에 위치
- Config Server 설정에 따라 Config Server 로컬 혹은 Vault 서버 등에 위치할 수 있음
★ Github
front-end("front-msa" 브랜치) : https://github.com/onlydev7777/emotion-diary-react
back-end : https://github.com/onlydev7777/emotion-diary-msa
inflearn-msa : https://github.com/onlydev7777/springboot-msa-3.0/tree/master

https://github.com/onlydev7777