[React Native] FastLane으로 배포 자동화 도입하기 #2 - iOS Fastfile 작성 및 APK 추출 & iOS Match 설정
React Native
fastLane 으로 iOS match(Alias for the sync_code_signing action) 로 앱스토어 관련 인증서를 관리해보려고 한다.

공식문서: https://docs.fastlane.tools/getting-started/ios/setup/
참고: https://velog.io/@bang9dev/Fastlane-2
참고 링크에서 볼 수 있듯이, match 라는 플러그인은 빌드 및 플레이스토어/앱스토어 배포에 필요한 인증서, 서명키등을 관리할 수 있게 해주는 fastLane 플러그인이다. 인증서를 관리하는데에는 S3등 여러 방법이 있지만, 난 git-repo를 사용하기로 했다.
1. 초기 Setting
*Ruby, Gem 이 깔려 있어야 함
iOS 폴더에서, ruby version 확인 후 (2.5 or newer 여야함) fastLane이 설치가 안되어있는 분들은 공식 문서를 따라 다음 설치를 진행해주시면 된다.
source "https://rubygems.org"

gem "fastlane"

brew install fastlane
이제 본격적으로 iOS 폴더에서 fastLane을 설정해보자
fastlane init 또는 아래와 같은 방법으로 시작해도 된다.
Create a ./Gemfile in the root directory of your project with the content
source "https://rubygems.org"

gem "fastlane"
2. private git repo 생성
먼저, 인증서들을 관리할 Git private repository를 생성했다.
나는 [서비스명]-certificates 이런 이름으로 레포를 생성했다.
협업할때도 해당 레포에 연결만 하면 같은 인증서를 쓸 수 있어 편리하다.
인증서들은 추후에 match를 실행시키면 "알아서" 레포에 생성(엄밀히 말하면 업로드)된다.
나는 바보같이 미리 인증서를 레포에 업로드 해놔야 하는 것인 줄 알고 조금 헤맸다.
3. install match plugin
이제 match를 설치해 실행시켜보았다.
fastlane add_plugin match위 명령어를 실행하면 git repo를 적게 되고, 각종 로그인 수단 및 비밀번호를 치게 된다.
이 때, 서비스 비밀번호를 잘 기억해야함
4. matchFile 작성
그러면 matchFile이 생성되고,
git_url("깃헙 URL")

storage_mode("git")

type("development") # The default type, can be: appstore, adhoc, enterprise or development

# match(git_basic_authorization: '<personal access token>')


app_identifier(["com.<앱이름>"])
username("<애플 개발자 계정>")
# Your Apple Developer Portal username

# For all available options run `fastlane match --help`
# Remove the # in the beginning of the line to enable the other options

# The docs are available on https://docs.fastlane.tools/actions/match
이런 식으로 파일이 생기는데, 공식 문서를 따라하다 헷갈린 점은 git_basic_authorization을 써주는 부분이다. 사실 위 코드 중 유효한(?), 정말 필요한 코드는 storage_mode("git") 이 부분 뿐이다. 나머지는 커맨드 라인에서 이미 설정이 되어있다.
나머지 부분 다 주석처리해도 잘 돌아감!
공식문서가 어떤 것이 유효한 스텝인지, 선택 사항 병렬 나열인지 구분이 쉽지 않아 헤맬때가 종종 있는 것 같다.
5. FastFile 작성
그리고 FastFile에 다음과 같이 스크립트를 작성해주면 끝이다.
default_platform(:ios)

platform :ios do
  desc "Push a new beta build to TestFlight"
  lane :beta do
    increment_build_number(xcodeproj: "<서비스명>.xcodeproj")
    build_app(workspace: "<서비스명>.xcworkspace", scheme: "<서비스명>")
    match(app_identifier: ["com.<서비스명>"])  # 이 부분 추가
  end
end
각각의 명령어로 match를 실행할 수 있다.
fastlane match (디폴트인 development가 실행됨)
fastlane match development
fastlane match appstore
생성해둔 private repo (certificates)에 인증서가 잘 저장되고 잘 불러와지는 것을 확인할 수 있다!
xCode에서 auto로 설정해놓은 Signing & Capabilities 부분을 수동으로 변경해주어야한다. 아래 부뷴
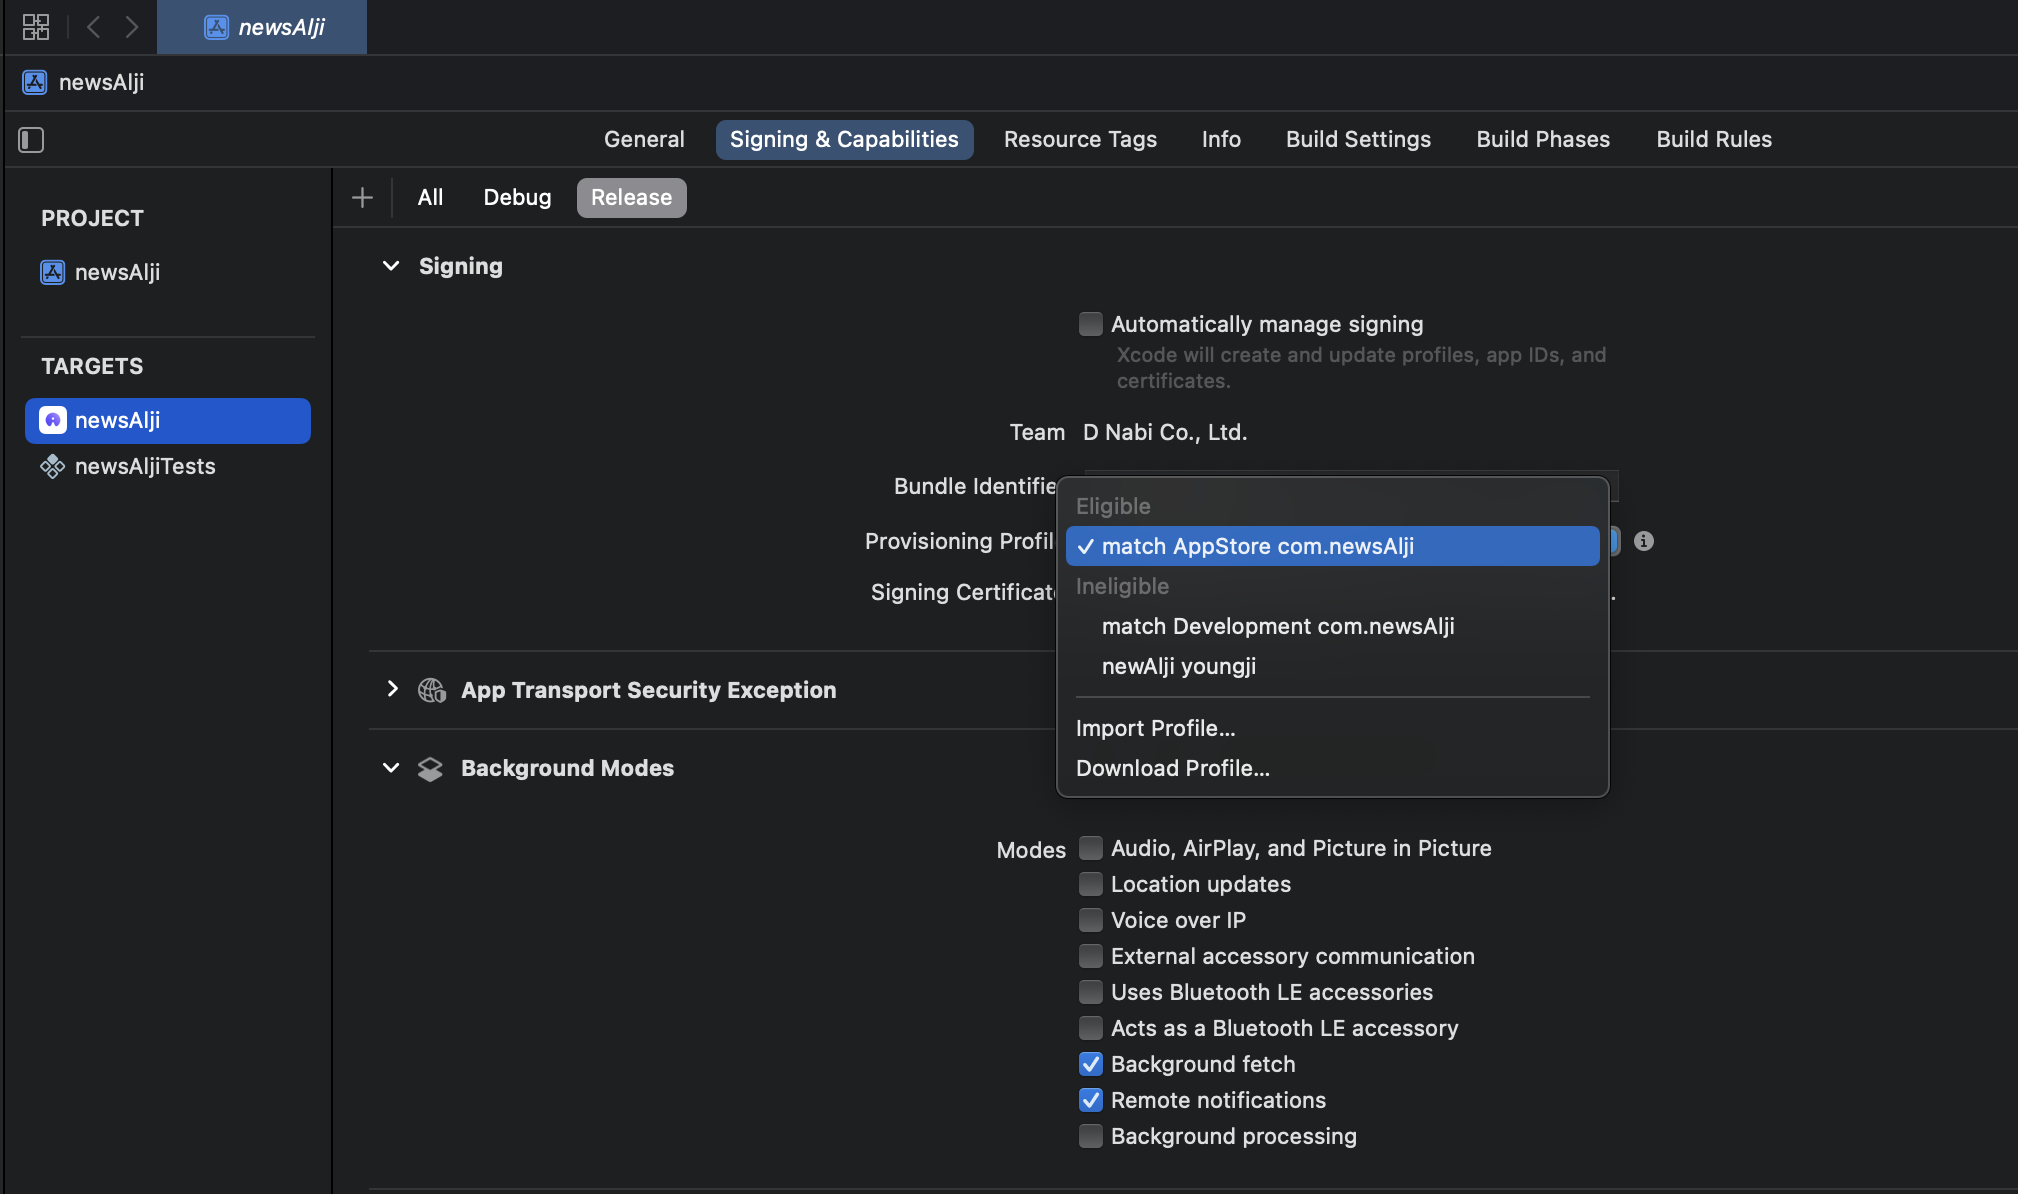
BuildSettings에서 certificates 를 검색하면, Debug 모드와 Release 모드 각각의 계정을 선택할 수 있당 (보통 Debug 모드는 애플에 협업 등록되어 있는 개발자 개인 계정, Release모드는 루트?계정으로 설정한다고 한다)
6. 완성 및 빌드
마지막으로, 아래 명령어로 빌드까지 잘 되어 ios 폴더 내에 ipa 파일이 잘 생성되는 것을 확인할 수 있다!
fastlane beta