Edit Profile
갤러리에서 이미지를 선택하고 선택한 이미지를 ImageView에 표시하는 코드입니다.
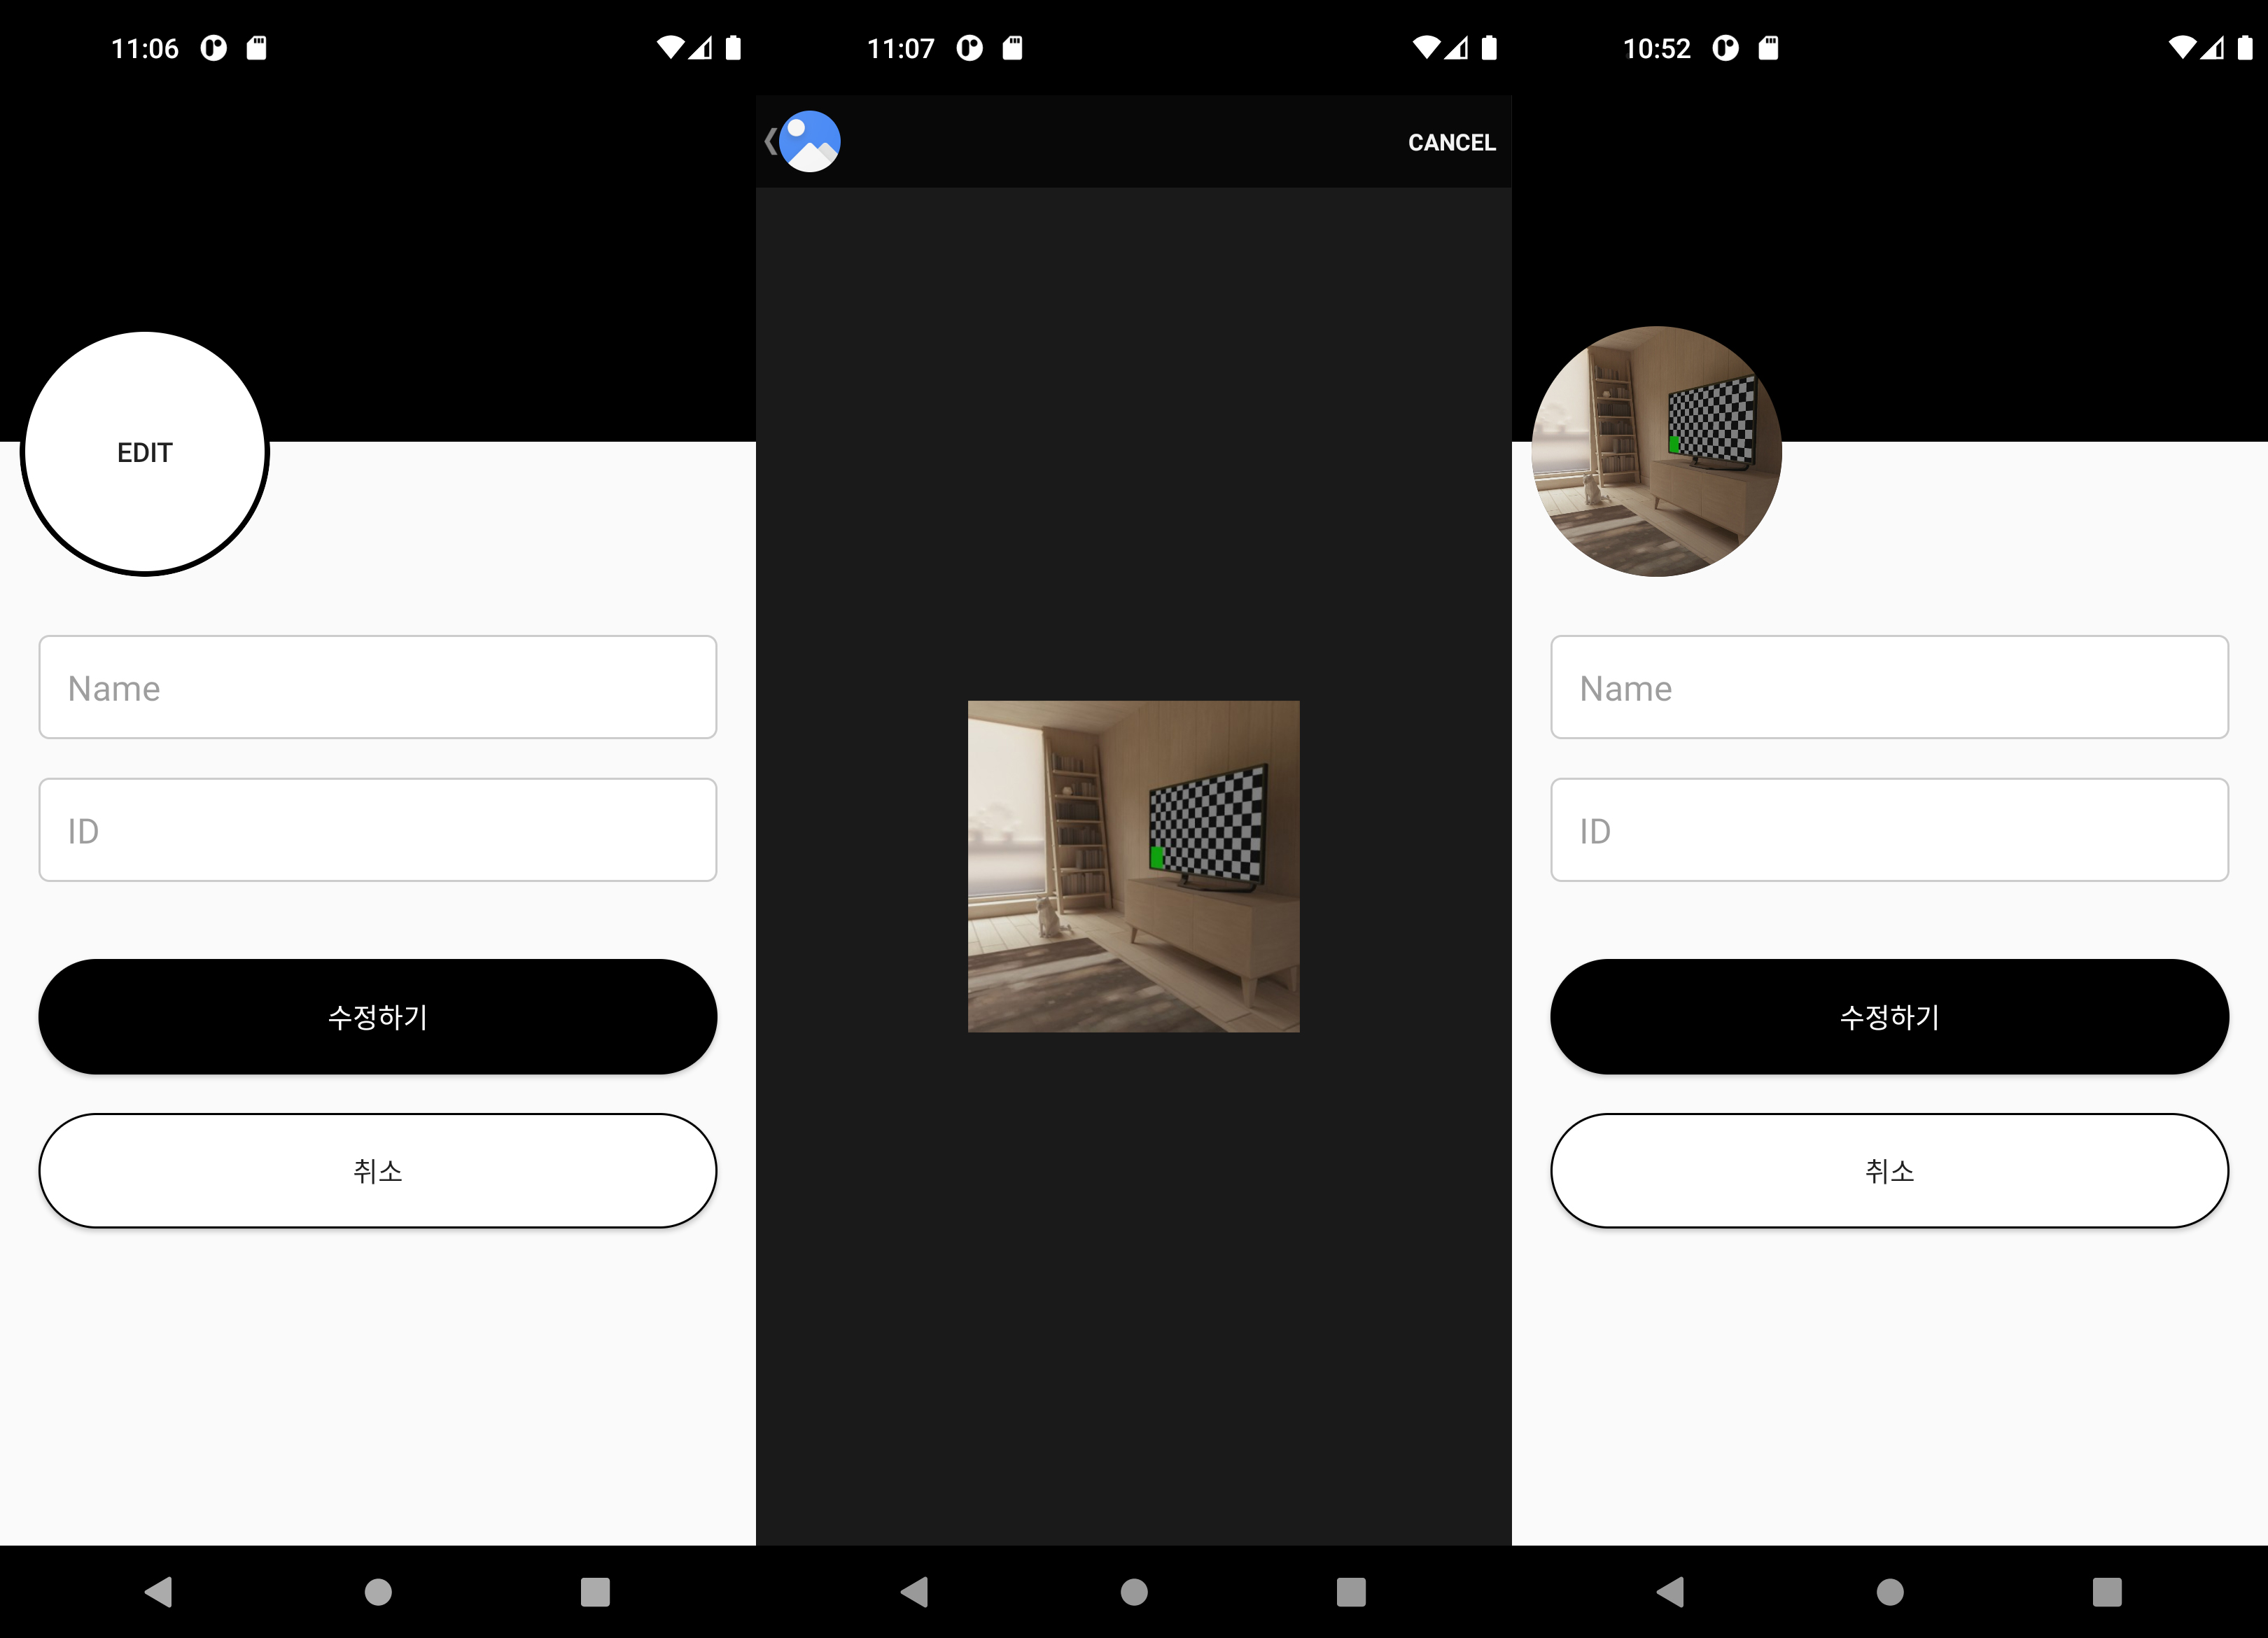
프로필의 EDIT 버튼 클릭 -> 사진첩에서 원하는 이미지 선택 -> 변경된 프로필 이미지 확인
class EditProfileActivity : AppCompatActivity() {

    private lateinit var imageView: ImageView
    private lateinit var button: Button
    private var imageUri: Uri? = null

    // 갤러리 open
    private val requestPermissionLauncher: ActivityResultLauncher<String> =
        registerForActivityResult(ActivityResultContracts.RequestPermission()) { isGranted ->
            if (isGranted) {
                openGallery()
            }
        }
    // 가져온 사진 보여주기
    private val pickImageLauncher: ActivityResultLauncher<Intent> =
        registerForActivityResult(ActivityResultContracts.StartActivityForResult()) { result ->
            if (result.resultCode == RESULT_OK) {
                val data: Intent? = result.data
                data?.data?.let {
                    imageUri = it
                    imageView.setImageURI(imageUri)
                }
            }
        }
    override fun onCreate(savedInstanceState: Bundle?) {
        super.onCreate(savedInstanceState)
        setContentView(R.layout.activity_edit_profile)

        title = "Edit Profile"
        imageView = findViewById(R.id.imgProfile)
        // 이미지 둥글게 표현하기
        imageView.clipToOutline = true
        button = findViewById(R.id.btnProfile)
        button.setOnClickListener {
            if (ContextCompat.checkSelfPermission(this, Manifest.permission.READ_EXTERNAL_STORAGE) == PackageManager.PERMISSION_GRANTED) {
                openGallery()
                // 버튼 텍스트 숨기기
                button.text = null
            } else {
                requestPermissionLauncher.launch(Manifest.permission.READ_EXTERNAL_STORAGE)
            }
        }
    }
    private fun openGallery() {
        val gallery = Intent(Intent.ACTION_PICK, MediaStore.Images.Media.INTERNAL_CONTENT_URI)
        pickImageLauncher.launch(gallery)
    }
}
코드 분석
1) ActivityResultLauncher 설정:
- requestPermissionLauncher: READ_EXTERNAL_STORAGE 권한 요청을 위한 ActivityResultLauncher를 설정합니다. 권한이 허용되면 openGallery() 메서드를 호출합니다.
- pickImageLauncher: 갤러리에서 이미지를 선택한 결과를 받기 위한 ActivityResultLauncher를 설정합니다. 이미지를 선택하면 해당 이미지의 Uri를 가져와서 imageView에 설정합니다.
2) onCreate 메서드:
- 레이아웃을 설정하고, ImageView와 Button을 초기화합니다.
- button을 클릭하면 권한이 허용되어 있으면 openGallery()를 호출하여 갤러리를 엽니다. 그렇지 않으면 권한을 요청합니다.
- button.text = null를 사용하여 버튼의 텍스트를 숨깁니다.
3) openGallery 메서드:
- 갤러리 앱을 열기 위해 Intent를 생성하고, pickImageLauncher를 통해 갤러리 액티비티를 실행합니다.
4) imageView.clipToOutline = true: ImageView를 원 모양으로 클리핑하여 UI를 둥글게 표현합니다.
✔ 트러블 슈팅
문제점 :
갤러리에서 가져온 이미지를 둥글게 표현하고 싶었는데 에뮬레이터에서는 계속해서 네모로 보여졌다.
원인 :
xml 파일에 android:clipToOutline="true" 코드를 넣으니 view에서는 동그란 이미지로 보이는데 에뮬레이터에서는 먹히지 않았다.
해결책 :
먼저 해당 기능을 구현한 분께 여쭤보니, xml이 아닌 activity에 코드를 넣어주었다 했다.
imageView = findViewById(R.id.imgProfile)
        imageView.clipToOutline = true
느낀점 :
xml과 activity에 동일한 기능이 구현될 수 있구나 생각했고, xml 파일에 직접적으로 넣었을 때에는 API31 이상에서만 사용 가능하다고 경고창이 뜬 반면 엑티비티 코드로 넣었을땐 무리없이 잘 작동하는 것을 보았다. 기능의 코드별 차이점을 분석해 봐야 겠다. 그리고 또 다른 이와 비슷한 멕락의 코드가 있는지 궁금해지기 시작했다.

나도 개발 할래

글 재미있게 봤습니다.