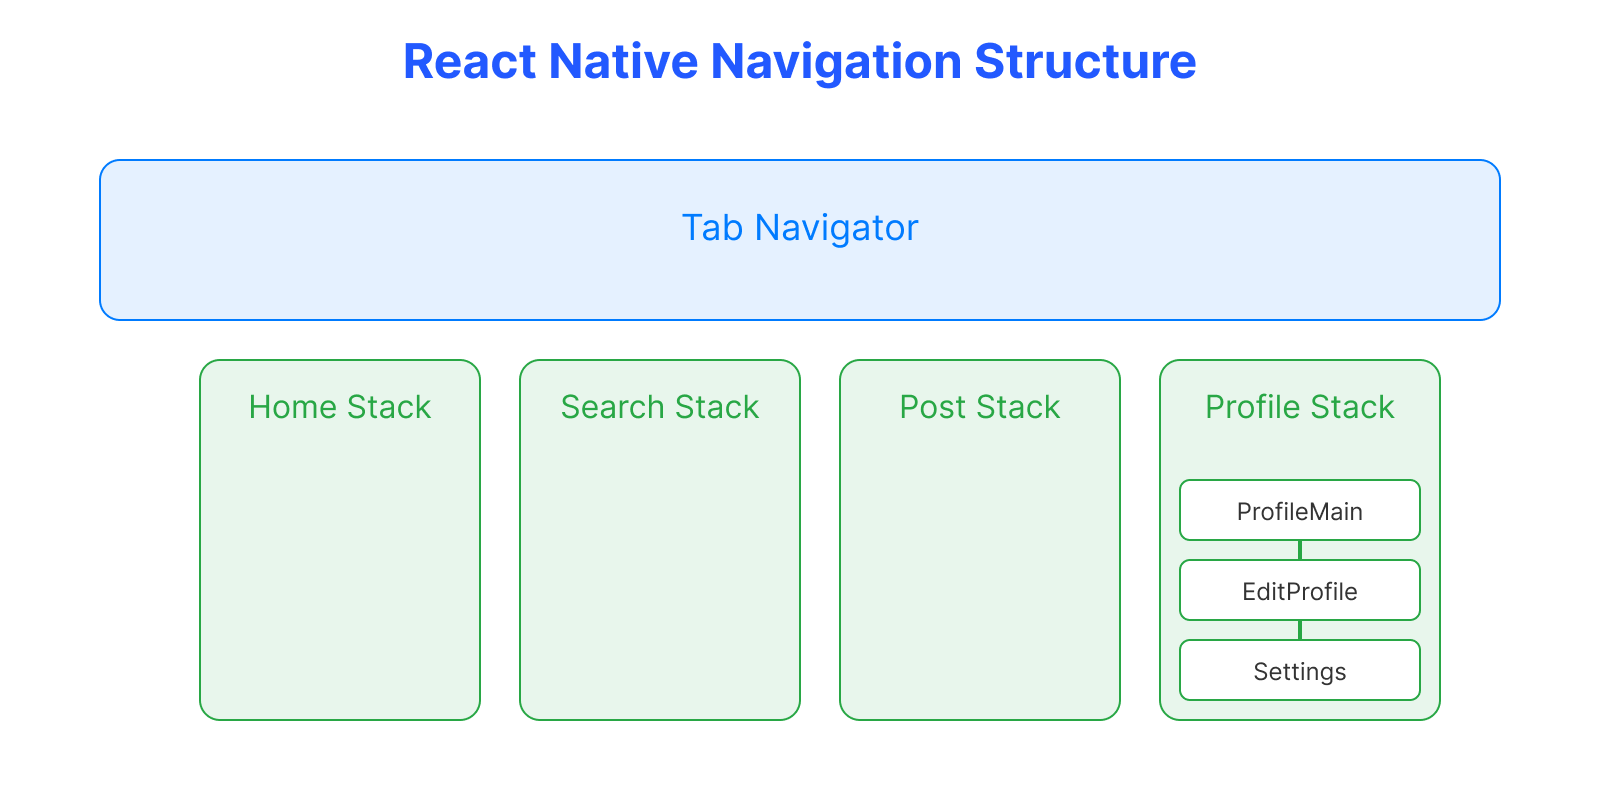
1. 네비게이션 구조 이해하기
React Native에서 네비게이션은 계층적으로 구성됩니다:
- Tab Navigator: 앱의 메인 탭을 관리 (예: 홈, 검색, 프로필)
- Stack Navigator: 각 탭 내부의 화면 전환을 관리 (예: 프로필 → 프로필 수정 → 설정)
- 중첩 네비게이션: Tab Navigator 안에 Stack Navigator를 배치하여 복잡한 네비게이션 구조 구현
2. 기본 설정 단계
2.1 필요한 패키지 설치
npm install @react-navigation/native @react-navigation/stack @react-navigation/bottom-tabs2.2 네비게이션 타입 정의
// types/navigation.ts
export type ProfileStackParamList = {
  ProfileMain: undefined;
  EditProfile: {
    userId: string;
    onUpdate?: () => void;
  };
  Settings: undefined;
};

export type HomeStackParamList = {
  Feed: undefined;
  PostDetail: { postId: string };
  Comments: { postId: string };
};
2.3 스택 네비게이터 생성
import { createStackNavigator } from '@react-navigation/stack';

const ProfileStack = createStackNavigator<ProfileStackParamList>();

const ProfileStackNavigator = () => {
  return (
    <ProfileStack.Navigator>
      <ProfileStack.Screen
        name="ProfileMain"
        component={ProfileScreen}
        options={{ headerShown: false }}
      />
      <ProfileStack.Screen
        name="EditProfile"
        component={EditProfileScreen}
      />
      <ProfileStack.Screen
        name="Settings"
        component={SettingsScreen}
      />
    </ProfileStack.Navigator>
  );
};
2.4 탭 네비게이터에 스택 추가
const Tab = createBottomTabNavigator();

export const MainTabNavigator = () => {
  return (
    <Tab.Navigator>
      <Tab.Screen
        name="Home"
        component={HomeStackNavigator}
        options={{
          tabBarIcon: ({ color }) => (
            <HomeIcon color={color} />
          ),
        }}
      />
      <Tab.Screen
        name="Search"
        component={SearchStackNavigator}
        options={{
          tabBarIcon: ({ color }) => (
            <SearchIcon color={color} />
          ),
        }}
      />
      <Tab.Screen
        name="Profile"
        component={ProfileStackNavigator}
        options={{
          tabBarIcon: ({ color }) => (
            <UserIcon color={color} />
          ),
        }}
      />
    </Tab.Navigator>
  );
};
3. 네비게이션 사용하기
3.1 화면 이동
// 방법 1: navigation prop 사용
type ProfileScreenProps = {
  navigation: StackNavigationProp<ProfileStackParamList, 'ProfileMain'>;
};

const ProfileScreen = ({ navigation }: ProfileScreenProps) => {
  return (
    <View>
      <TouchableOpacity
        onPress={() => navigation.navigate('EditProfile', {
          userId: '123',
          onUpdate: () => console.log('Profile updated')
        })}
      >
        <Text>프로필 수정</Text>
      </TouchableOpacity>

      <TouchableOpacity
        onPress={() => navigation.navigate('Settings')}
      >
        <Text>설정</Text>
      </TouchableOpacity>
    </View>
  );
};

// 방법 2: useNavigation 훅 사용
import { useNavigation } from '@react-navigation/native';
import { StackNavigationProp } from '@react-navigation/stack';

const PostCard = () => {
  const navigation = useNavigation<StackNavigationProp<HomeStackParamList, 'Feed'>>();

  return (
    <TouchableOpacity
      onPress={() => navigation.navigate('PostDetail', {
        postId: '456'
      })}
    >
      <Text>게시글 상세보기</Text>
    </TouchableOpacity>
  );
};
3.2 타입 안전성 확보
import { StackNavigationProp } from '@react-navigation/stack';

type ProfileScreenNavigationProp = StackNavigationProp
  <ProfileStackParamList>,
  'ProfileMain'
>;

const ProfileScreen = ({ navigation }: { navigation: ProfileScreenNavigationProp }) => {
  // 타입 안전한 네비게이션 사용 가능
};
4. 주의사항
- 스택을 등록하지 않고 navigate하면 화면을 찾을 수 없습니다
- 파라미터 타입을 정확히 정의해야 타입 에러를 방지할 수 있습니다
- 중첩된 네비게이션에서는 스크린 이름이 고유해야 합니다
이렇게 네비게이션을 설정하면 앱 내에서 자연스러운 화면 전환이 가능해집니다.
특히 타입스크립트를 사용할 때는 타입 정의를 꼭 해주어야 안전한 네비게이션이 가능합니다!

궁금한 것, 했던 것, 시행착오 그리고 기억하고 싶은 것들을 기록합니다.