@ 앤서블 활용
-폴더 : myansible 생성 inventory , ansible.cfg 생성
*role
- 하나의 야물 파일의 내용을 단계별로 구분 지어 놓은것.
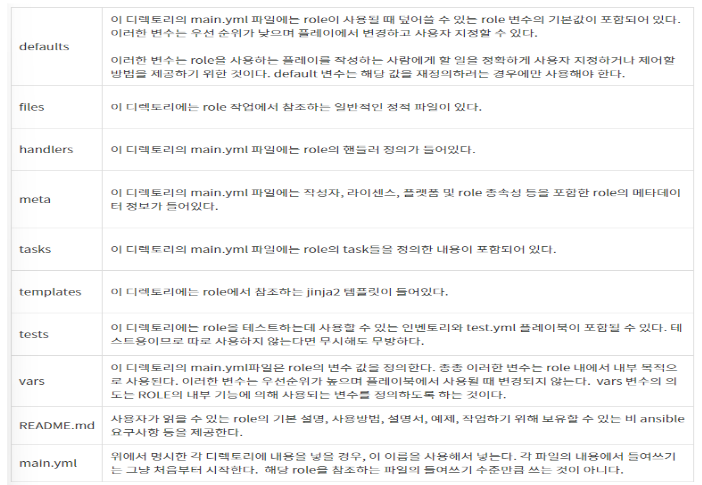
*롤 구조
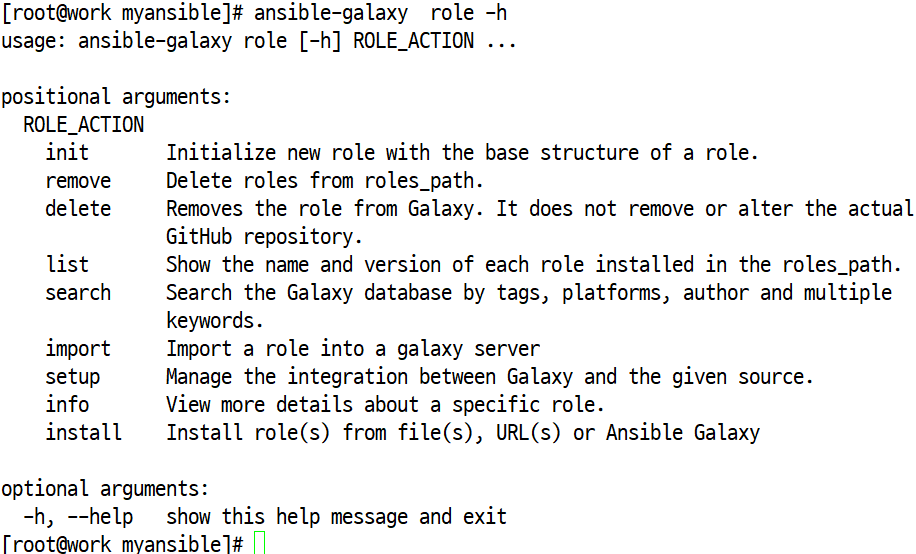
- ansible-galaxy role -h
- #ansible-galaxy role init test-role
- *tree 설치 dnf -y install tree
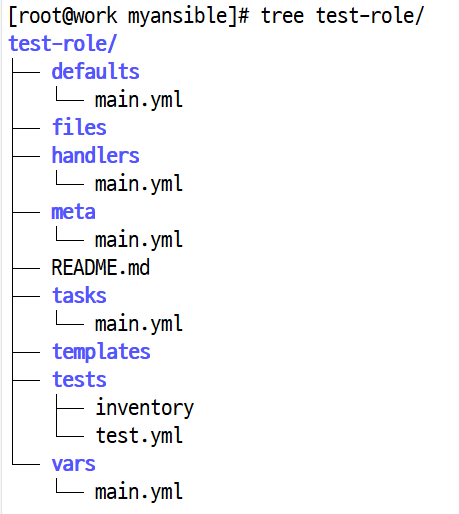
- #tree test-role
- ansible-galaxy를 이용해서 role을 통해 yaml파일 실행하기
- -h 옵션: 도와주는 옵션
- ansible-galaxy를 통해 test-role 설치(init)
- test-role 구조 살펴보기
- test-role 트리 구조로 살펴보기


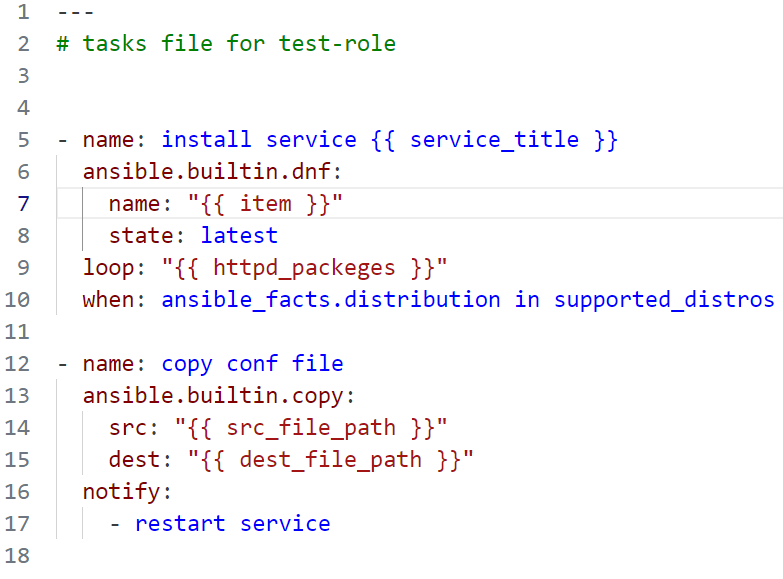
- [root@work test-role]# vi tasks/main.yml
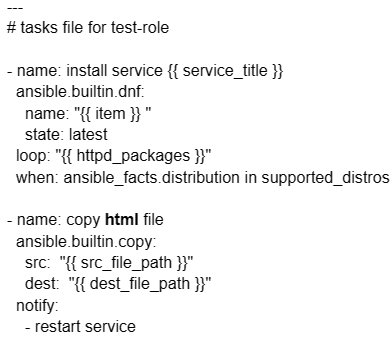
- cat 명령어로 tasks/main.yml 파일 내용 보기
- [root@work test-role]# vi tasks/main.yml 파일로 들어가서
- tasks를 통해 정의할 내용 입력(설치 내용, html 카피)

[root@work test-role]# vi files/index.html

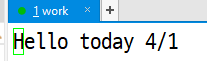
- [root@work test-role]# vi files/index.html 파일로 들어가서
- 표시할 내용 입력
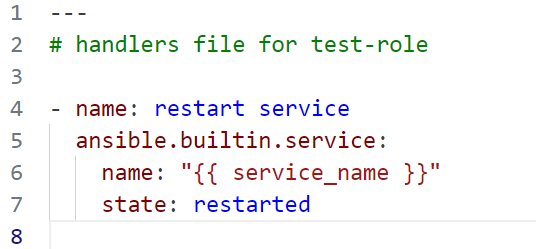
[root@work test-role]# vi handlers/main.yml
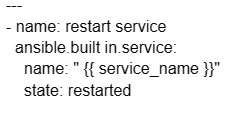
- [root@work test-role]# vi handlers/main.yml로 들어가서
- 서비스 동작을 입력(handlers)
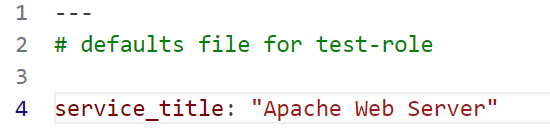
[root@work test-role]# vi defaults/main.yml

- [root@work test-role]# vi defaults/main.yml로 들어가서
- 타이틀 입력(defaults)
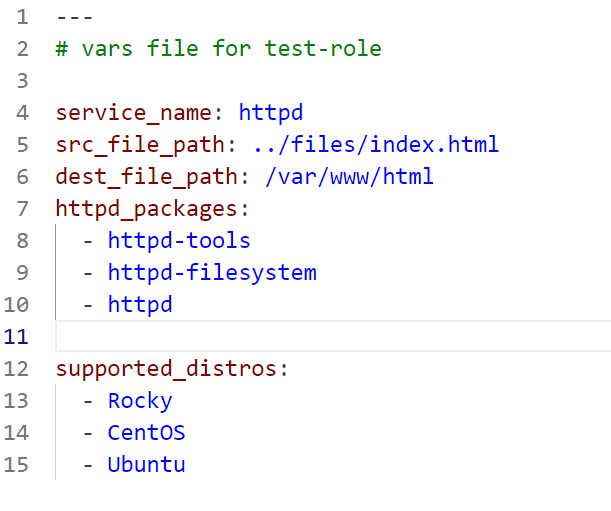
[root@work test-role]# vi vars/main.yml
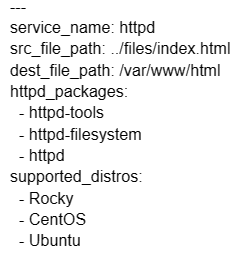
- [root@work test-role]# vi vars/main.yml로 들어가서
- httpd 출발지와 목적지 정해주기 (vars), 지원할 OS 입력
[root@work test-role]#cd .. 디렉토리 이동..
[root@work myansible]# vi role-ex.yml
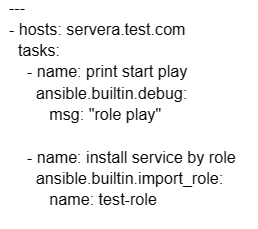
- 폴더 위치를 myansible로 들어간 후에
- [root@work test-role]# vi role-ex.yml로 들어가서
- 수행할 명령 입력(test-role)
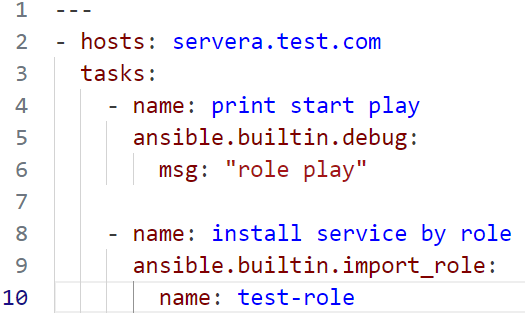
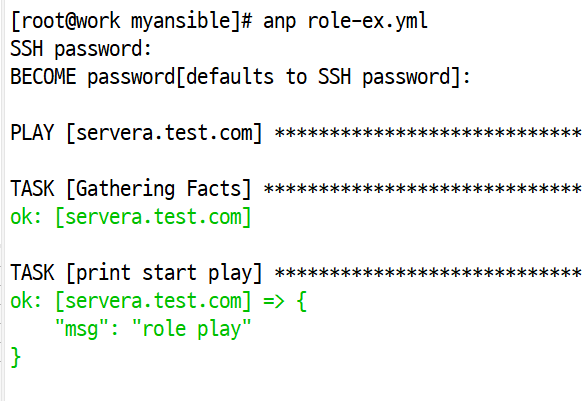
*실행 시켜 보기
- [root@work myansible]# anp role-ex.yml
- 수행 완료
*galaxy – 공유 , https://galaxy.ansible.com
- doc와 쿠버는 다른 사람이 만든 것 설치 가능(추천 수로 신뢰성을 가질 수 있다)
- ansible-galaxy 홈페이지를 들어가서 다른 사람이 만든 것 설치 가능
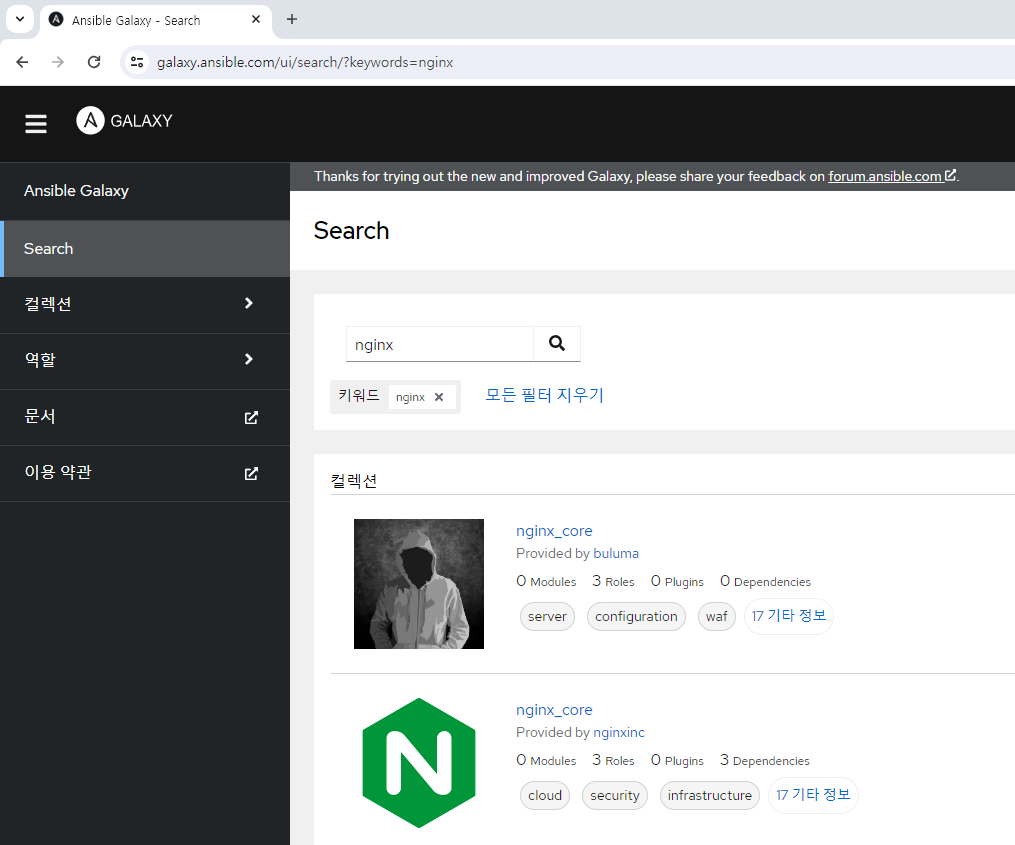
- [root@work myansible]# ansible-galaxy role search nginx --platforms Rocky
- [root@work myansible]# ansible-galaxy role search postgresql --platforms Rocky
- [root@work myansible]# alias ang="ansible-galaxy"
- [root@work myansible]# ang role info buluma.postgres
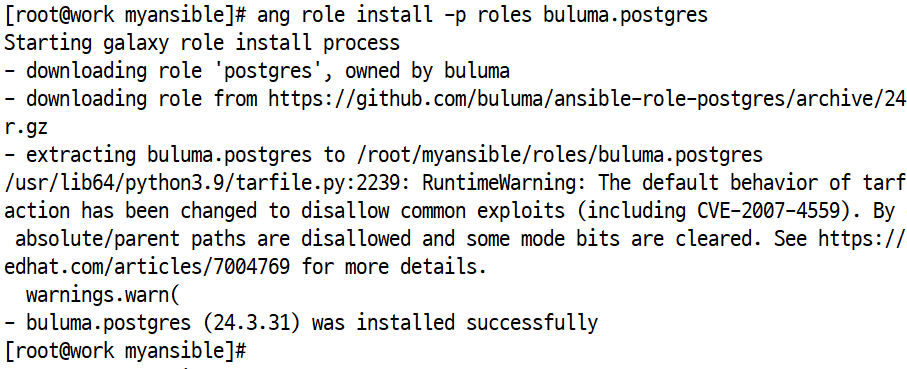
- [root@work myansible]# ang role install -p roles buluma.postgres
- [root@work myansible]# ls roles
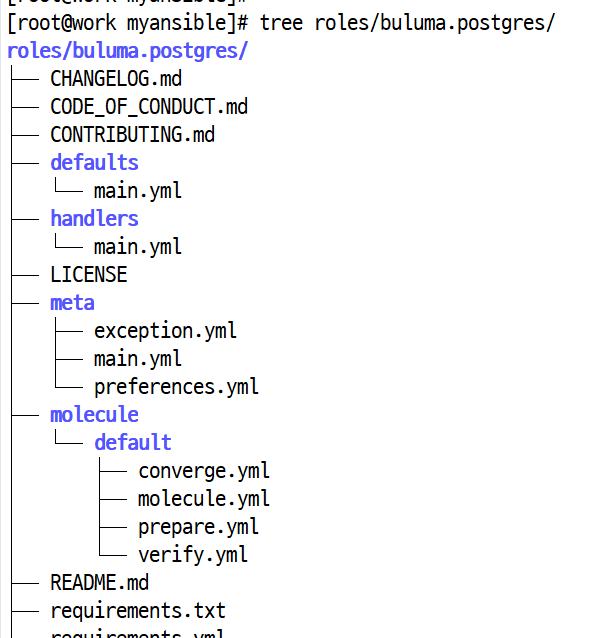
buluma.postgres - [root@work myansible]# tree roles/buluma.postgres/
- [root@work myansible]# ansible-galaxy list
- [root@work myansible]# ansible-galaxy role remove buluma.postgres
- 신뢰성, 안정성 및 확장성을 강점으로 하는 데이터베이스 시스템(postgresql)
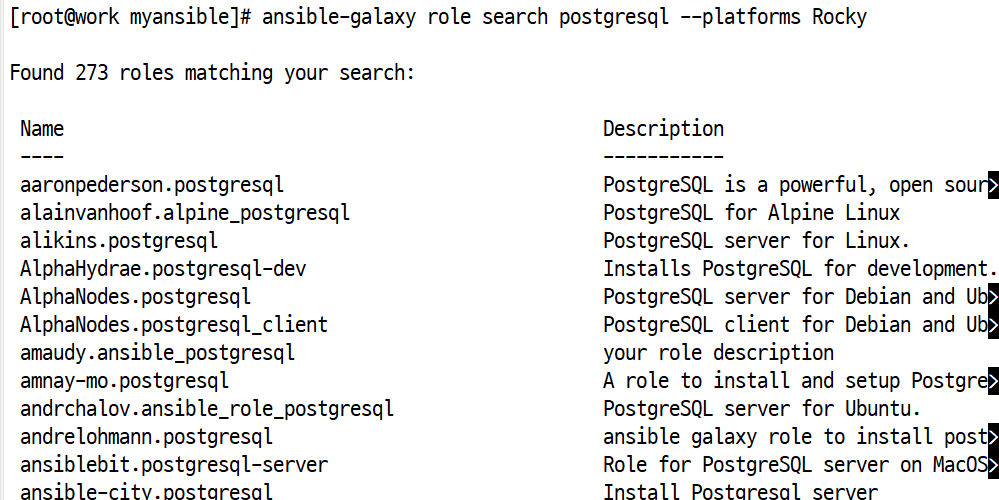
- ansible-galaxy를 통해 다른 사람이 만든 buluma.postgres를 다운로드 가능
- buluma.postgres 구조 살펴보기
- 트리로 buluma.postgres 구조 살펴보기
- buluma.postgres 삭제 하기


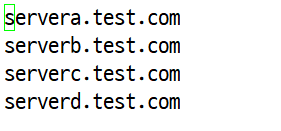
inventory 파일은 호스트만 등록
- servera.test.com
serverb.test.com
serverc.test.com
serverd.test.com
*ansible.cfg 파일에 [defaults] 항목에
- ask_vault_pass=true 추가
dnf -y install tree tar vim -> vi, vs연결
ssh root@servera.test.com , yes 1234
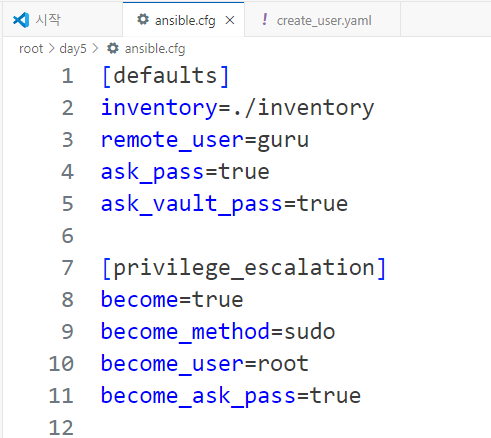
- ansible.cfg 파일 만들기
- [root@work day5]# vi inventory
- 인벤토리 내용 만들기
*시스템 구축 관련
- -사용자 생성 관련 – 야물 파일에 의해서 생성 하는데 계획성 있게 생성.
- 상황(사용자 생성 계정을 정해) /
- 방법 찾기(플레이북 작성)
- 암호화 처리 방식으로 생성 : Vault
- 모듈을 이용해서 생성 : ansible.builtin.user
- 설계 :
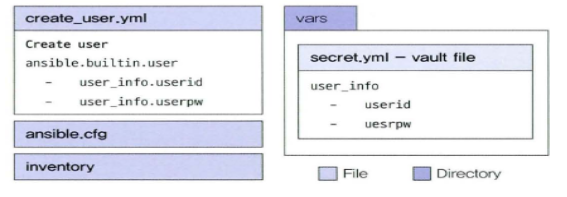
- [root@work day5]# ansible-vault create vars/secret.yaml
- New Vault password: password
- Confirm New Vault password: password
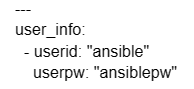
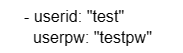
- vars/secret.yaml파일을 비밀문서로 만들고 패스워드 입력(암호: password)
- 사용자 정보 입력하기

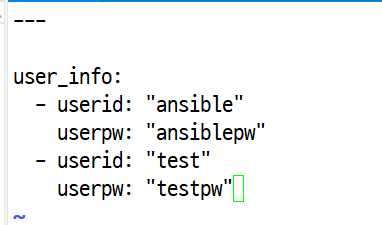
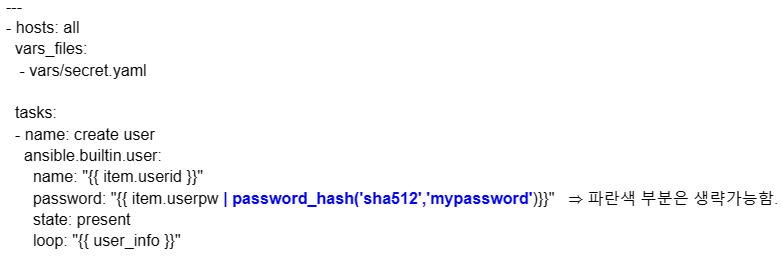
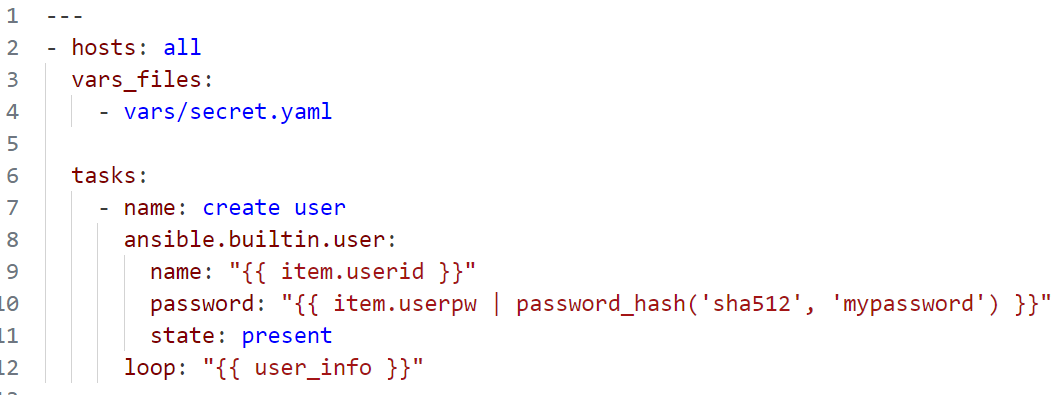
[root@work day5]# vi create_user.yaml
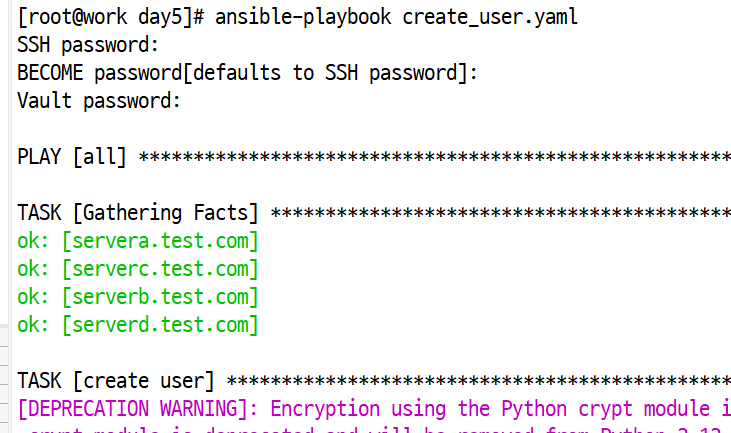
#ansible-playbook create_user.yaml
- 패스워드 : work / work / password 입력
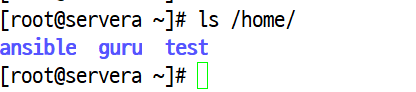
*원격접속 후 passwd / 사용자 2명 생성 확인
- guru:x:1000:1000:guru:/home/guru:/bin/bash
- ansible:x:1001:1001::/home/ansible:/bin/bash
- test:x:1002:1002::/home/test:/bin/bash
- ansible-vault edit vars/secret.yaml ⇒ secret.yaml 파일 수정 가능
- create_user.yaml파일 만들어서 사용자 만드는 내용 작성(password_hash('sha512','mypassword'): 안전하게 해싱한다)
- 실행 완료 ( ansible.cfg에 , ask_vault_pass=true 입력 한 후에)
- 사용자 생성 확인
*SSH 키 생성 / 복사 - 2가지 방법 .
- 1day 수업 메모 참조 : 1day# ssh-keygen ⇒ 키젠 생성
- #for i in {11..14}; do ssh-copy-id root@192.168.137.$i; done ⇒ 전송시키기
- 암호는 1234
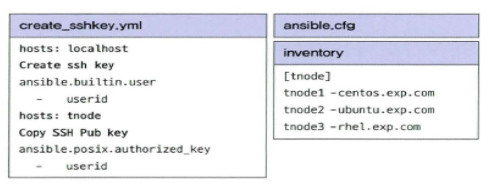
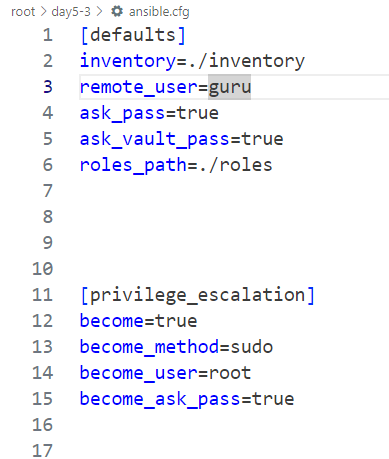
#ansible.cfg 파일 수정
- [defaults]
- inventory=./inventory
remote_user=guru
ask_pass=true
ask_vault_pass=true ⇒ 이부분 없이 실행 , 에러 발생시 추가 후 실행
roles_path = ./roles
collection_paths = ./collection
interpreter_python=auto
- inventory=./inventory
- [privilege_escalation]
- become=true
become_method=sudo
become_user=root
become_ask_pass=true
- become=true
- day5-1을 day5-2로 수정
- 인벤토리에서 tnode 추가
- ansible.cfg를 수정(경로 추가)
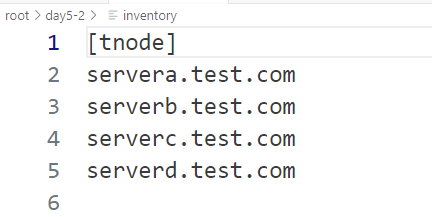
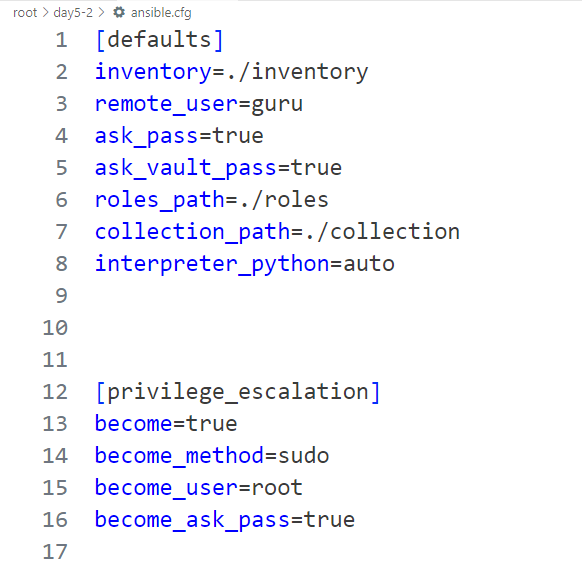
[root@work day5-2]# vi create_sshkey.yaml
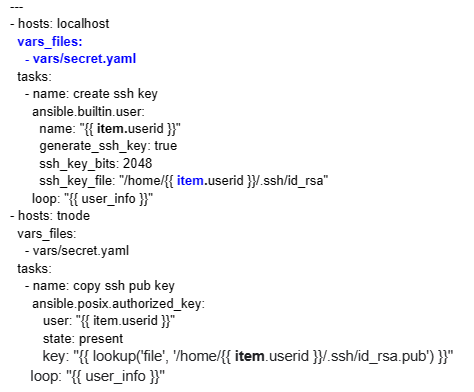
[root@work day5-2]# anp --ask-vault-pass create_sshkey.yaml
- su - ansible / su - test ⇒ ls -a: ssh키 확인 및 ssh로 접속
*기본값으로는 파란색 부분이 없이 vars 에 있는 파일과 연결해서 실행…
- 실행이 안되면 직접 연결 시켜주는 부분이 파란색 글자 부분..
*개인사용자용 전달.
- #anp -e userid=ansible creaet_sshkey.yaml
- #anp -e userid=test creaet_sshkey.yaml
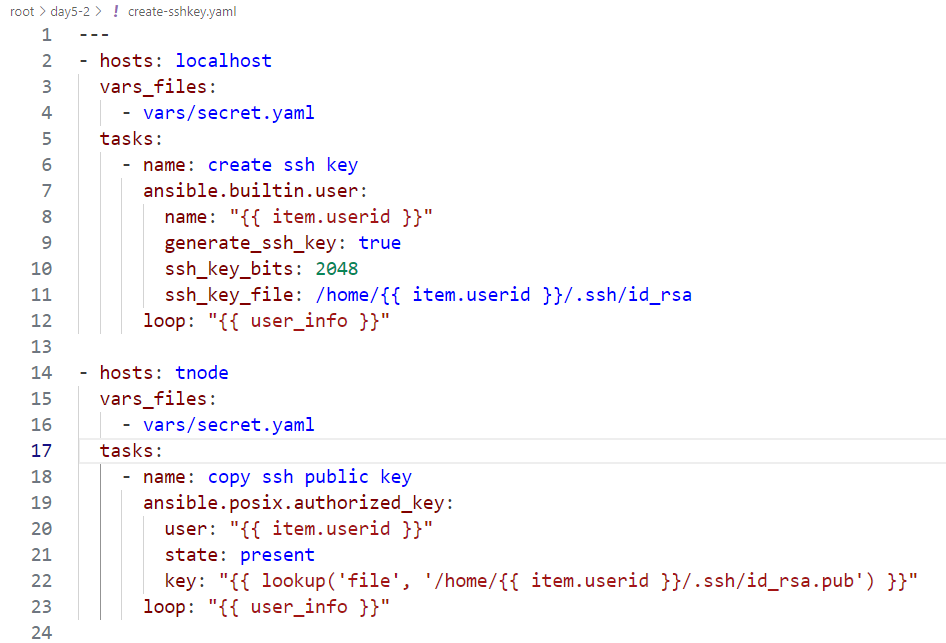
- [root@work day5-2]# vi create-sshkey.yaml
- ssh key를 생성하고 복사하는 내용 작성
- 실행 완료
- ansible 사용자 로그인을 비밀번호 없이 로그인 했으며, ssh 파일이 들어있는 것 확인


*repo 설정 ( 저장소 )
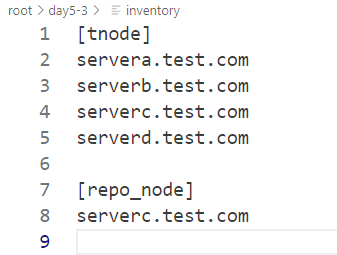
- serverc.test.com 을 repo 서버로 수정하고 진행.
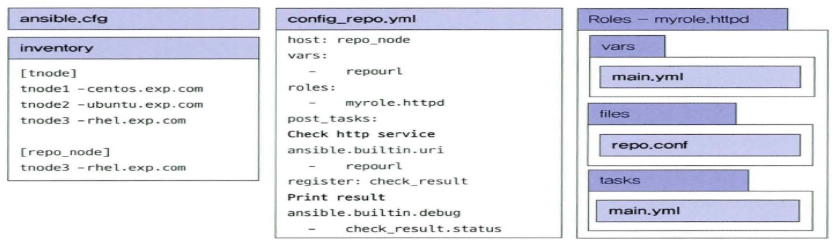
- ansible.cfg 수정
- inventory 수정
role
- vars/main.yml , files/repo.conf , tasks/main.yml , handlers/main.yml
- [root@work day5-3]# ansible-galaxy role init --init-path ./roles myrole.httpd
- Role myrole.httpd was created successfully
- [root@work day5-3]# cd roles/myrole.httpd/
- 경로를 추가해서 role 다운로드

=====================================================
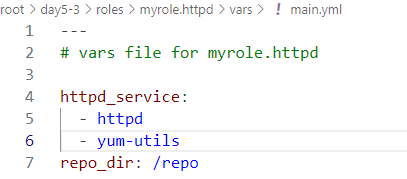
[root@work myrole.httpd]# vi vars/main.yml
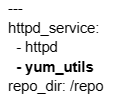
- vars.main.yml 파일 열기
- 서비스 제공 및 repo(저장소) 설정

=====================================================
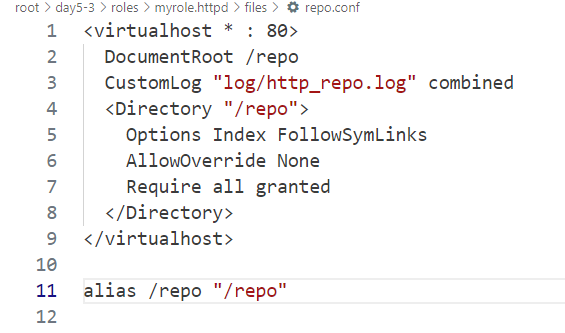
[root@work myrole.httpd]# vi files/repo.conf
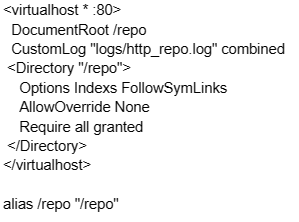
- [root@work myrole.httpd]# vi files/repo.conf 열어서
- 저장소 세부 설정
=====================================================
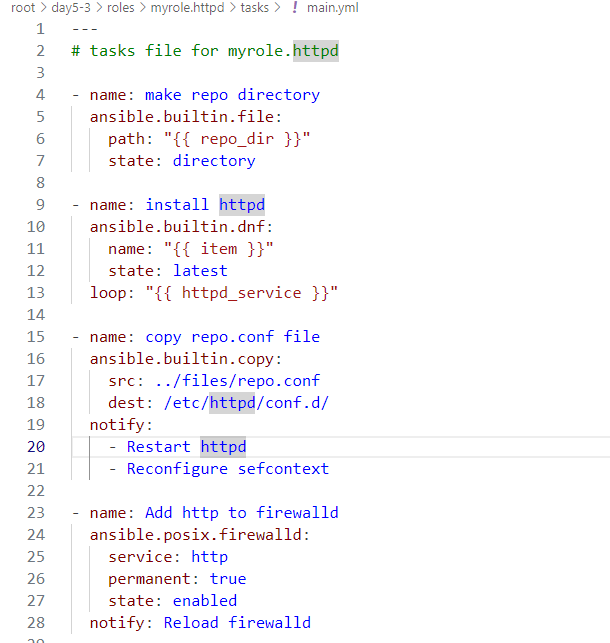
[root@work myrole.httpd]# vim tasks/main.yml
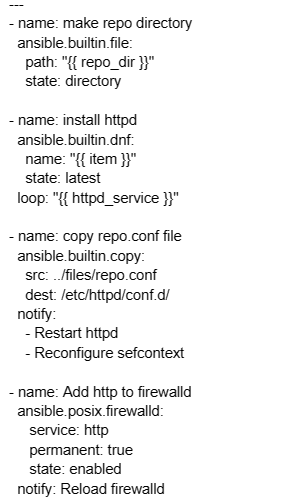
- myrole.httpd/tasks/main.yml 파일에서
- 웹 서버 설정과 작업 수행을 하는 것을 작성
=====================================================
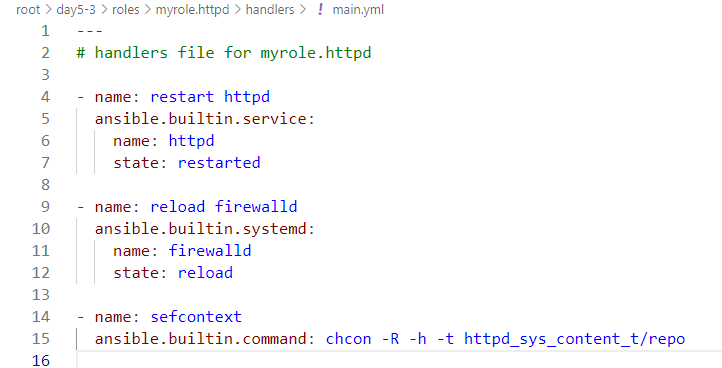
[root@work myrole.httpd]# vi handlers/main.yml
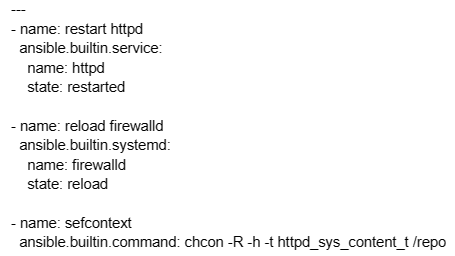
- myrole.httpd/handlers/main.yml 파일에서
- 서비스와 파일 시스템에 대한 것을 설정
[root@work day5-3]# vi config_repo.yml
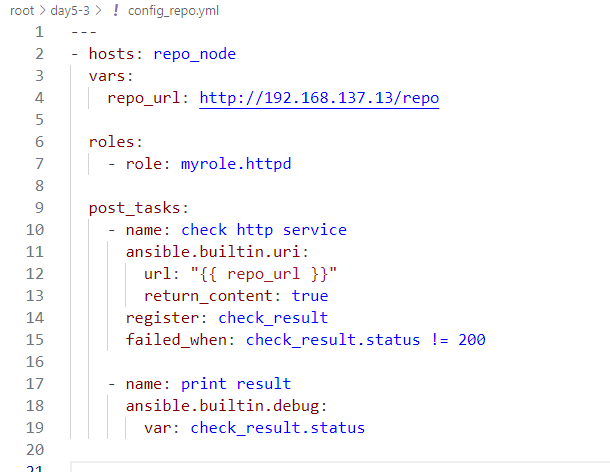
- day5-3 디렉터리에서 day5-3/config_repo.yml 파일에서
- repo_node의 호스트에 대한 작업 수행하는 플레이북 작성
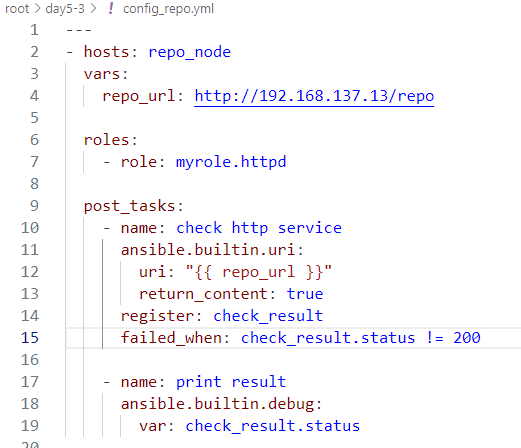
*체크
[root@work day5-3]# anp --syntax-check config_repo.yml
Vault password: work
playbook: config_repo.yml
** yum_utils 문제 해결 할것 *