저번부터 사고 싶었던 에셋이고, 세일할 때 사놨다.
..사실 내가 진짜 사고 싶었던 것은 v하이라이키였다. 사고 나서 알았다..
본문은 에셋이 제공하는 메뉴얼을 정리한 글이다.
Getting Start
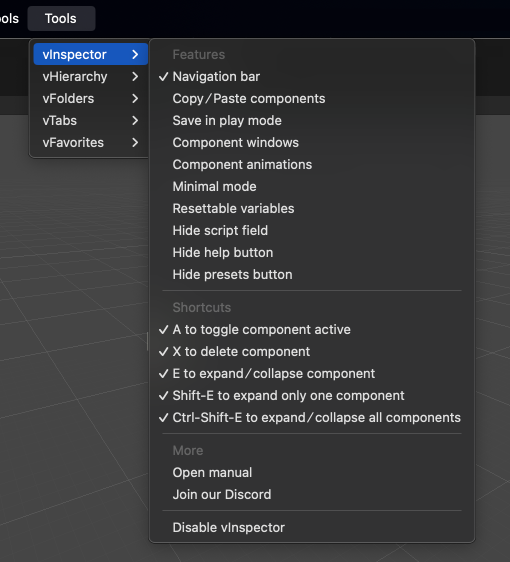
에셋에서 제공하는 기능들을 한눈에 볼 수 있다.
여기서 기본적인 기능을 끄고 킬 수 있다.
세부 내용은 Features를 참고할 것.
Features
Navigation Bar
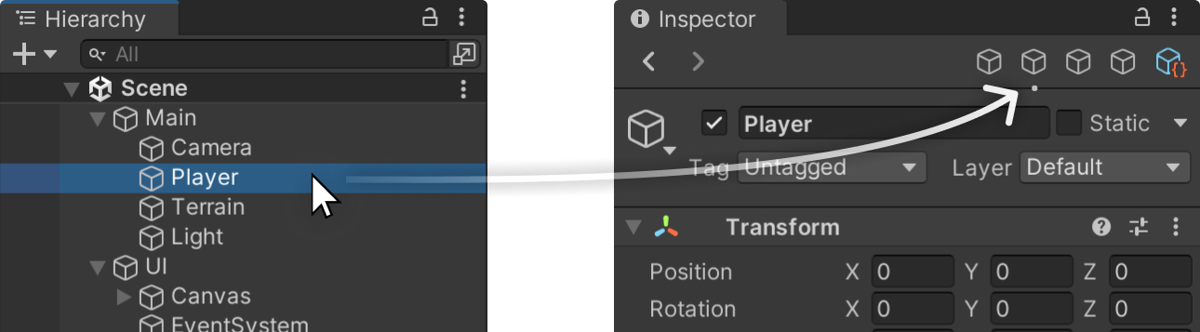
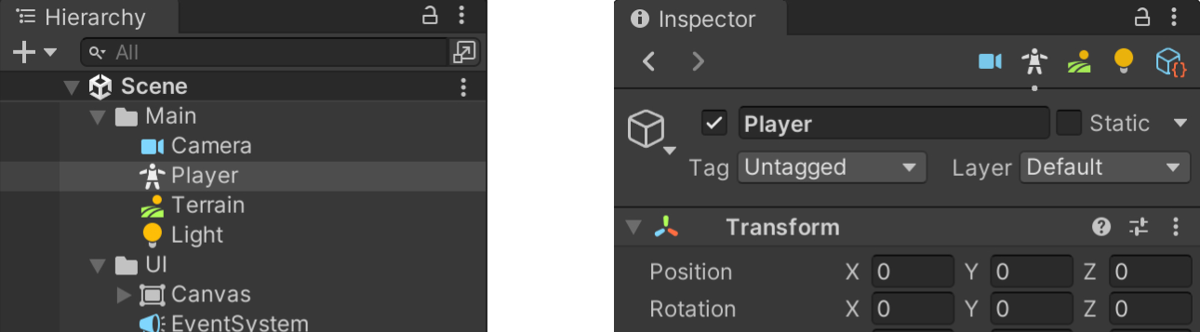
인스펙터에 특정 컴포넌트를 북마크 할 수 있다.
이게 진짜 편리하다. 다만, v하이라이키랑 같이 써야 더 편할 것 같다. 아이콘으로 등록되는데, 기본적으로 제공하는 아이콘은 몇 개 없으니까.. 좀 아쉽다.
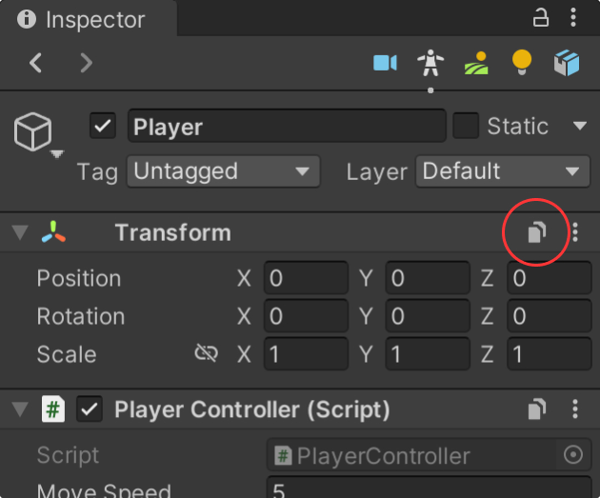
Copy/Paste components
컴포넌트 복붙을 좀 더 간편하게 할 수 있게 해준다.
-
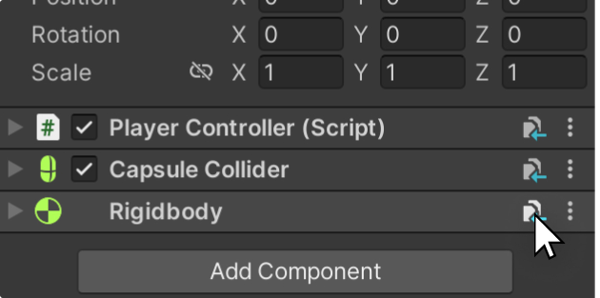
복사할 컴포넌트에 복사 버튼을 누른다.
-
붙여 넣을 컴포넌트에서 붙여 넣으면 끝!
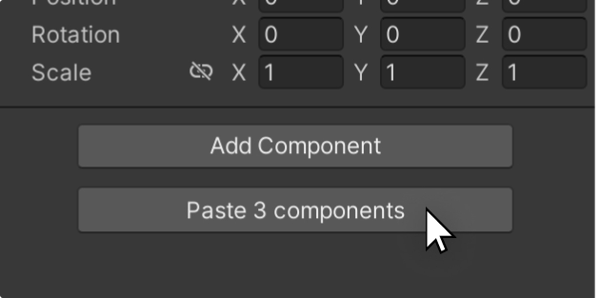
-
아니면 기존 컴포넌트에 값만 넣을 수도 있다.
공식 문서에서 권장하길, 시각적 혼란을 줄이기 위해 도움말 숨기기 버튼과 사전 설정 숨기기 버튼 기능도 활성화하는 것이 좋다고 한다.
Save in player mode
play 모드에서 컴포넌트의 값을 바꾸고 풀면 다 날라가는 빡침을 모두 한 번씩은 느껴봤을 것 같다...
이제 플레이 모드에서 수정하고 변경하고자 하는 값을 저장할 수 있다.

Compoent Windows
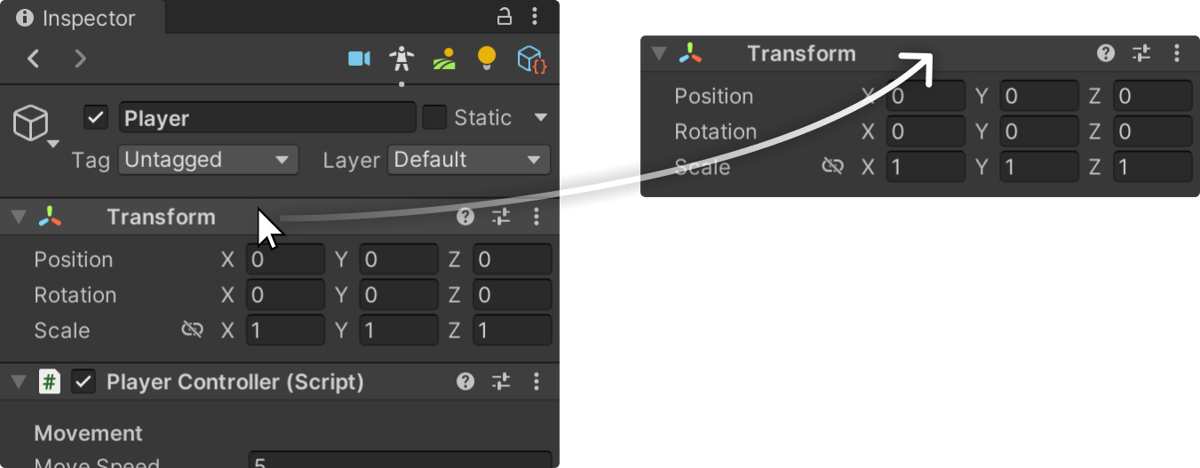
컴포넌트를 아예 별도의 윈도우로 뺄 수 있다.
필자는 모니터를 2개 쓰는데, 아주 유용할 것 같다.
Component animations
여닫을 때 약간의 애니메이션이 추가되는데, mac에서 어울릴 것 같다. 그냥 간지용.. 끄고 쓸 것 같다.
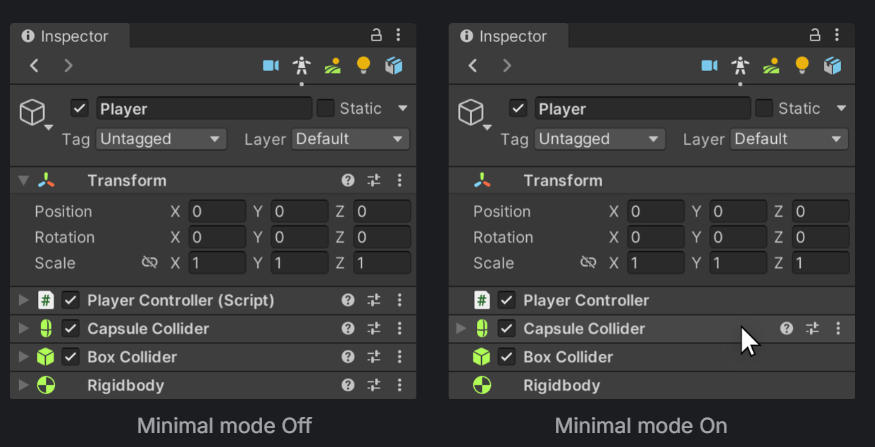
Minimal mode
뭐가 다른 건지 한참을 쳐다봤다.
Resettable variables
인스펙터의 변수값을 초기값으로 돌릴 수 있는 버튼이 있다. 딱히 쓸모 있어 보이지 않지만, 나중에 소개할 Attributes 챕터와 연계해서 쓰면 아주 유용할 것 같다.
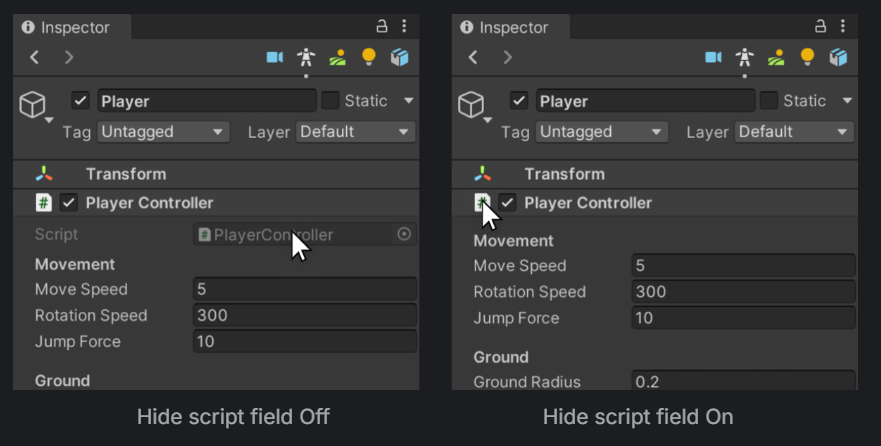
Hide script field
필자는 사용하지 않을 것 같다.
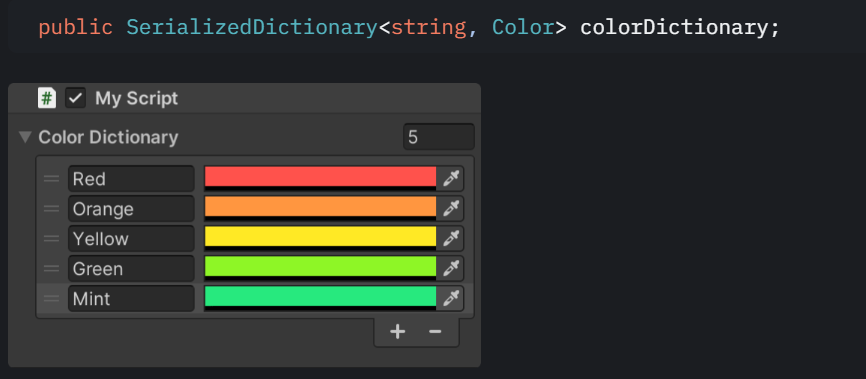
Dictionaries
이거 너~~무 유용할 것 같다!!
딕셔너리를 serialize 할 수 있도록 제공해 주는 것 같다!!
Shortcuts
Collapse/expand all components
인스펙터를 클릭한 상태에서, Ctrl-Shift-E를 누르면 모두 펼치고 접을 수 있다.
Isolate component
열고자 하는 컴포넌트를 제외하고 접을 수 있다.
해당 컴포넌트를 클릭하고, Shift-E or Shift-Click를 누르면 된다.
Delete component
삭제하고자 하는 컴포넌트에 마우스를 올려놓고 X를 누르면 된다.
Toggle component active
비활성화를 원하는 컴포넌트에 마우스를 올려놓고 A 키를 누르면 된다.
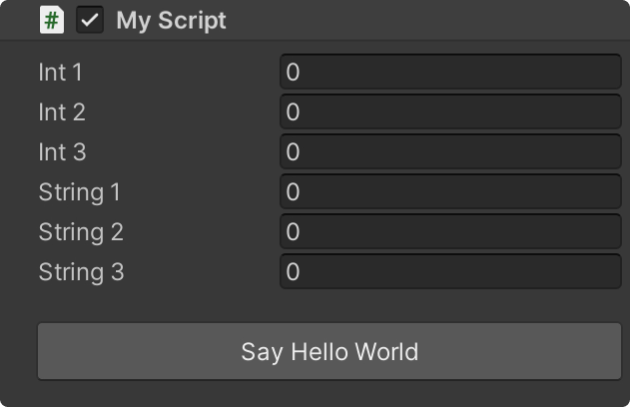
Attributes
using VInspector; Button
[Button]
public void SayHelloWorld()
{
	Debug.Log("Hello World!");
}
게다가 커스터마이징도 가능하다!
[Button("Custom name")]
public void RenamedButton() { }

[Button(size = 50, color = "red")]
public void BigRedButton() { }
Foldouts
[Foldout("Floats")]
public float float1;
public float float2;
public float float3;

[Foldout("Ints")]
public int int1;
public int int2;
public int int3;

[Foldout("Strings")]
public string string1;
public string string2;
public string string3;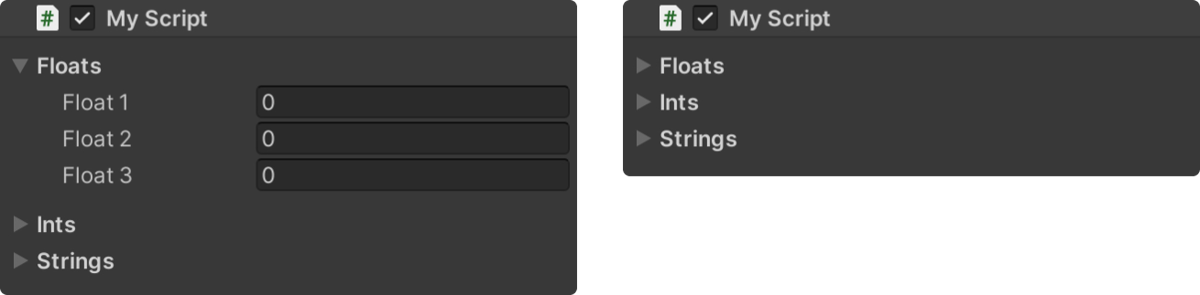
[Foldout("Floats")]
public float float1;
public float float2;
public float float3;
[Foldout("Ints")]
public int int1;
public int int2;
public int int3;
[Foldout("Strings")]
public string string1;
public string string2;
public string string3;
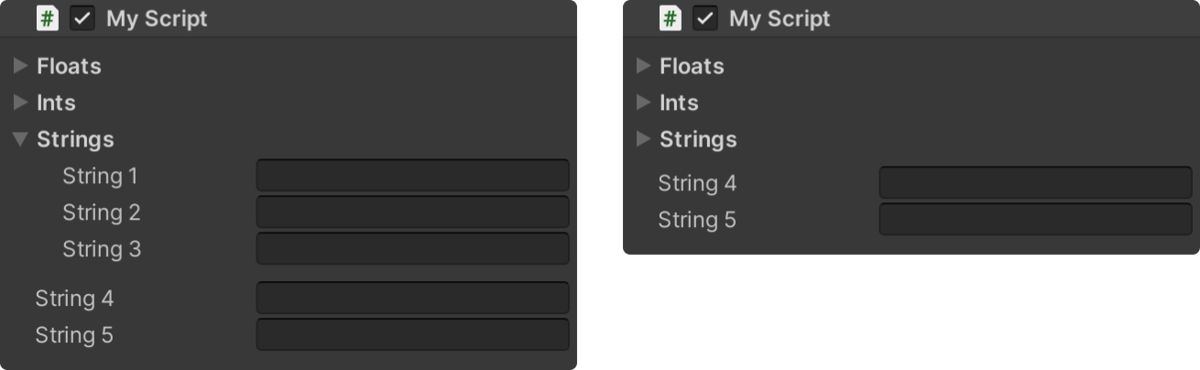
[EndFoldout]
public string string4;
public string string5;[EndFoldout]을 넣어야 그룹닫기가 되는 것 같다!
'/'를 넣어 중첩도 가능하다! (폴더 경로를 만들 듯)
[Foldout("Floats/Subfoldout 1")]
public float float1;

[Foldout("Floats/Subfoldout 2")]
public float float2;

[Foldout("Floats/Subfoldout 3")]
public float float3;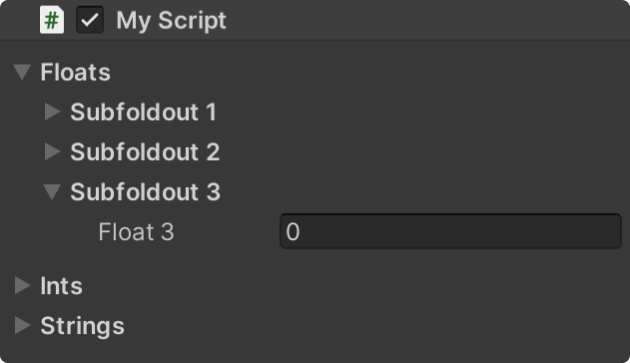
버튼도 넣을 수 있다...
[Foldout("Floats")]
public float float1
public float float2
public float float3
[Button]
public void FloatsButton() { }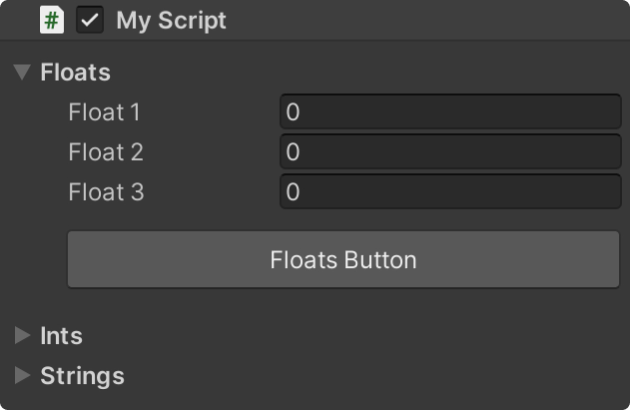
Tap
Tap 기능도 넣을 수 있다.
[Tab("Floats")]
public float float1;
public float float2;
public float float3;
public float float4;

[Tab("Ints")]
public int int1;
public int int2;
public int int3;

[Tab("Strings")]
public string string1;
public string string2;
public string string3;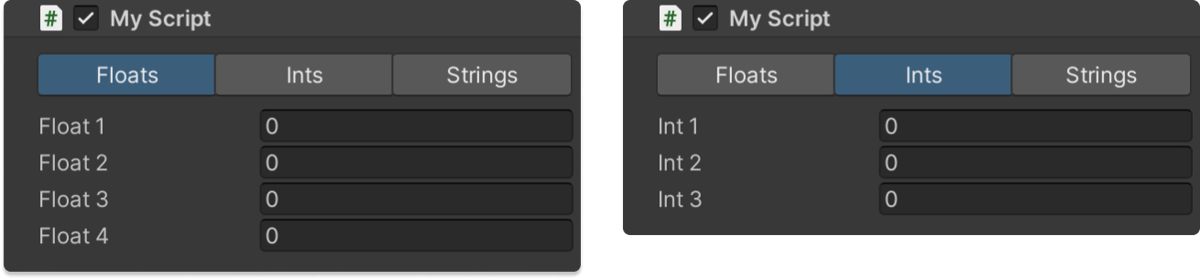
이것도 [EndTap]을 넣으면 닫을 수 있는 것 같다.
마치 [EndFoldeout]처럼!
메뉴얼에는 안 나와 있어서 잘 모르겠지만, Tap 안에서도 그룹을 나눌 수 있는지 테스트해 봐야겠다.
Showw hidden variables
보여주고 싶은 변수만 보여줄 수 있다.
기존에 있는 기능이긴 한데, 간편해 보인다.
[ShowInInspector]
private float privateFloat;

[ShowInInspector]
static float staticFloat;

[ShowInInspector]
private float propertyFloat { get; }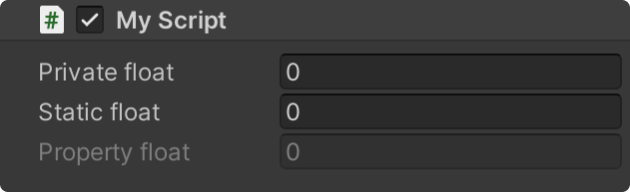
Hide and disable variables
넘무 멋진 기능이다..
bool 변수에 값에 따라서 변경할 수 있는 변수의 값이 바뀐다.
public bool isBossLevel;

[HideIf("isBossLevel")]
public int waveCount;
public int enemyCount;
public int enemyStrength;

[ShowIf("isBossLevel")]
public float bossStrength;
public float bossStamina;
public float bossSpeed;
public float bossRegen;
유사하게, 아래의 기능도 지원한다.
public bool isBossLevel;

[DisableIf("isBossLevel")]
public int waveCount;
public int enemyCount;
public int enemyStrength;

[EnableIf("isBossLevel")]
public float bossStrength;
public float bossStamina;
public float bossSpeed;
public float bossRegen;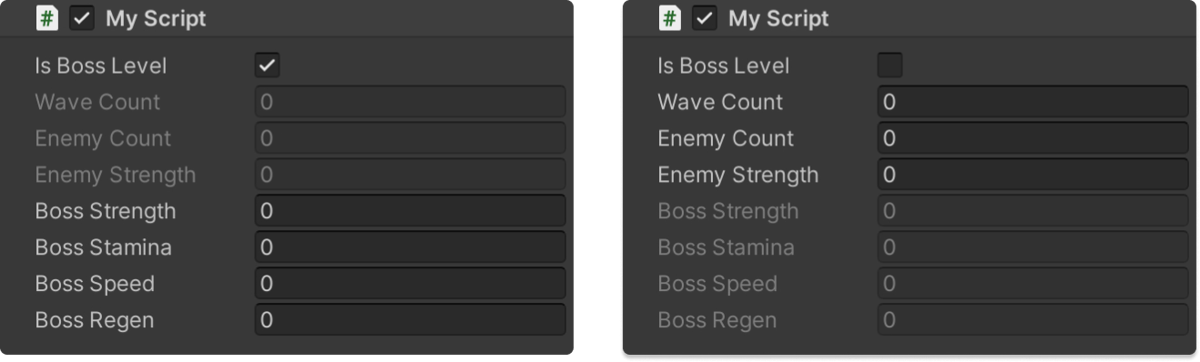
얘도 [EndIf] 속성을 통해 if 속성을 종료할 수 있다.
public bool isBossLevel;

[DisableIf("isBossLevel")]
public int waveCount;
public int enemyCount;
public int enemyStrength;

[EnableIf("isBossLevel")]
public float bossStrength;
public float bossStamina;
public float bossSpeed;
public float bossRegen;
[EndIf]

public float foo;
public float bar;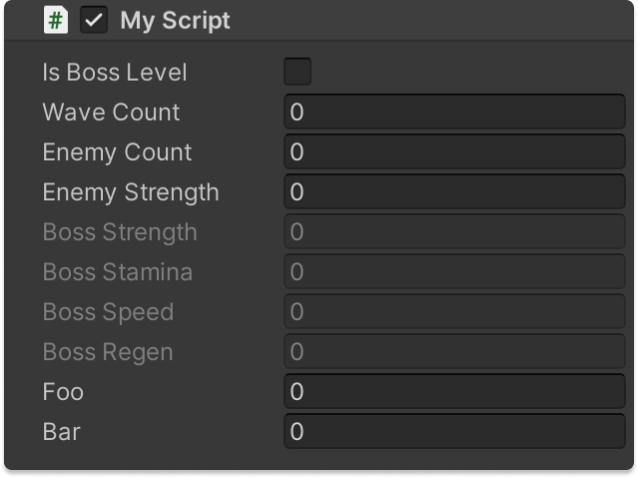
꼭 bool 변수가 아니더라도, 다양한 값으로 가능한 것 같다. 대표적으로 enum도 가능하다.
public enum LevelType { Normal, Boss }
public LevelType levelType;
[DisableIf("levelType", LevelType.Boss)]
public int waveCount;
public int enemyCount;
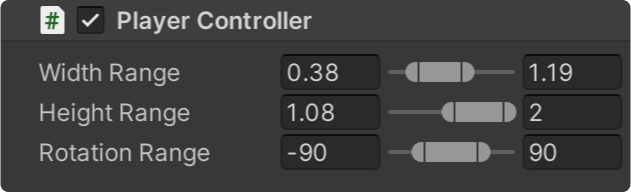
public int enemyStrength;Range sliders
Vector2 또는 Vector2Int의 slider를 생성할 수 있다.
[MinMaxSlider(0, 2)]
public Vector2 widthRange;

[MinMaxSlider(0, 2)]
public Vector2 heightRange;

[MinMaxSlider(-180, 180)]
public Vector2 rotationRange;
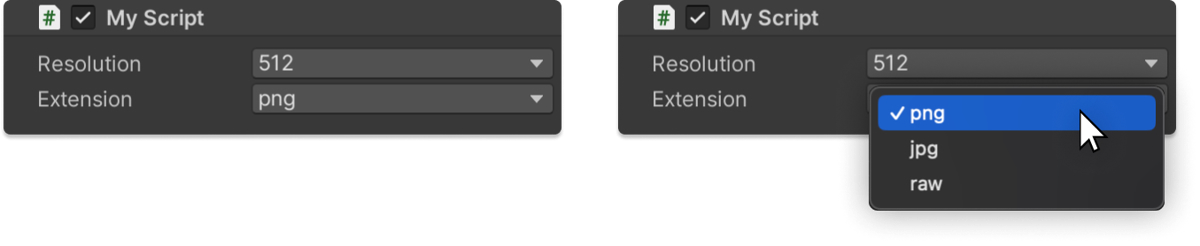
Variants
인스펙터에 들어갈 수 있는 값의 선택지를 줄 수 있는 것 같다.
[Variants(512, 1024, 2048)]
public int resolution;

[Variants("png", "jpg", "raw")]
public string extension;
Callback on Change
이거 진짜 애용할 것 같다.
디버깅 용도로 너무 간편하다!!!
변수의 값을 변경을 감지해서 콜백 함수를 등록할 수 있다.
public int level;

[OnValueChanged("level")]
public void OnLevelChanged() { }
복수도 가능하다.
public int level_player1;
public int level_player2;
public int level_player3;

[OnValueChanged("level_player1", "level_player2", "level_player3")]
public void OnLevelChanged() { }
Read-only variables
인스펙터에 읽기 전용 필드로 생성한다.
public int level;

[ReadOnly]
public int score;

[ReadOnly]
public int enemyCount;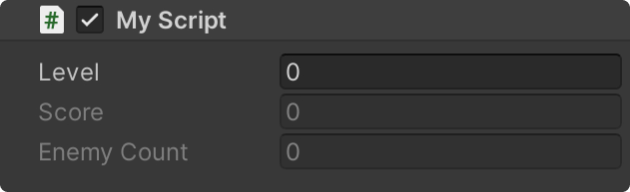
Static inspector
스태틱 변수도 인스펙터에서 볼 수 있다...!?
[ShowInInspector]
static float staticFloat1;

[ShowInInspector]
static float staticFloat2;

[Button]
static void StaticButton() { }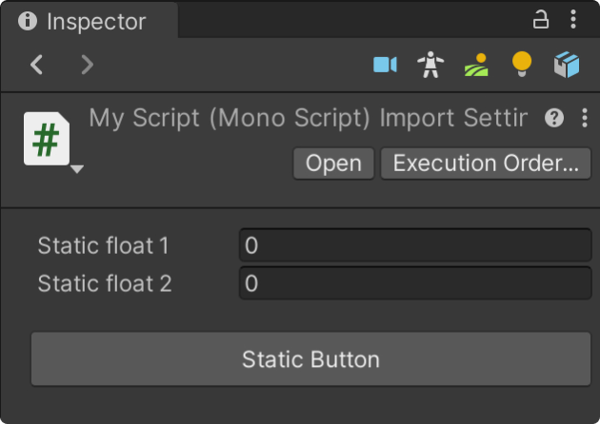
마무리
정말 간단하지만 강력한 기능들을 지원하는 것 같다.
메뉴얼이 너무 잘 되어 있고, 직관적이라 공부하기 편한 에셋이었다. 다들 사용해 보시길~~
자주 세일을 하는 것 같아서, 정가에 사기는 좀 그렇고(4만 원 정도..) 2만 원대라면 사는 것을 추천한다.