
🐶 포트원 라이브러리 사용하기
-
지난 글에서는 결제기능을 직접 HTTP 요청 코드를 작성하여 구현하였다면, 이번에는 포트원에서 만들어놓은 라이브러리를 사용하여 구현해보겠다. 라이브러리를 사용하니 확실히 간단하게 결제 기능을 구현하는것이 가능했다.
-
먼저,
pom.xml파일에 아래와 같이 레포지터리와 라이브러리 추가가 필요하다.// 레포지터리는 <dependencies> 이전에 추가 <repositories> <repository> <id>jitpack.io</id> <url>https://jitpack.io</url> </repository> </repositories> <dependency> <groupId>com.github.iamport</groupId> <artifactId>iamport-rest-client-java</artifactId> <version>0.2.23</version> </dependency> -
application.yml파일에 포트원 API 내계정의 REST API Key 와 REST API Secret을 설정해 놓는다.imp: imp-key: [자신의 키 입력] imp-secret: [자신의 시크릿 키 입력] -
아래부터는 라이브러리를 사용하여 구현한 코드이다. 구현할때 지난글에서 실시한 프론트엔드 서버와 맞물리게끔하여 작성하였고, 실제로 결제하기를 통해 검증이 완료되면 주문테이블에 주문이 생성되고, 주문상품 테이블에도 상품들에 대한 데이터가 들어가도록 작성하였다.
-
주문상품 테이블을 따로 만든 이유는 1개의 주문에 상품이 여러개 담길 수 있기 때문에 주문과 주문상품 테이블을
1:N 관계를 맺어줘서 생성하게 되었다.💻 PortoneConfig 클래스
@Configuration
public class PortoneConfig {

   @Value("${imp.imp-key}")
   private String apiKey;
   @Value("${imp.imp-secret}")
   private String apiSecretKey;

   @Bean
   public IamportClient iamportClient() {
       return new IamportClient(apiKey, apiSecretKey);
   }
}
💻 Orders 엔티티
@Entity
@Getter
@Setter
@AllArgsConstructor
@NoArgsConstructor
@Builder
public class Orders {

   @Id
   @GeneratedValue(strategy = GenerationType.IDENTITY)
   private Integer id;

   @ManyToOne(fetch = FetchType. LAZY)
   @JoinColumn(name = "User_id")
   private User user;

   @OneToMany(mappedBy = "orders")
   private List<OrdersProduct> ordersProductList = new ArrayList<>();

   @Column(nullable = false, length = 50, unique = true)
   private String impUid;
}
💻 OrdersProduct 엔티티
@Entity
@Getter
@Setter
@Builder
@NoArgsConstructor
@AllArgsConstructor
public class OrdersProduct {

   @Id
   @GeneratedValue(strategy = GenerationType.IDENTITY)
   private Integer id;

   @ManyToOne(fetch = FetchType.LAZY)
   @JoinColumn(name = "Orders_id")
   private Orders orders;

   @ManyToOne(fetch = FetchType.LAZY)
   @JoinColumn(name = "Product_id")
   private Product product;
}
💻 Product 엔티티
@Entity
@Getter
@Setter
@Builder
@NoArgsConstructor
@AllArgsConstructor
public class Product {

   @Id
   @GeneratedValue(strategy = GenerationType.IDENTITY)
   private Integer id;

   @OneToMany(mappedBy = "product")
   private List<OrdersProduct> ordersProductList = new ArrayList<>();

   @Column(nullable = false, length = 50, unique = true)
   private String name;

   @Column(nullable = false)
   private Integer price;

}
💻 레포지터리
// ✅ OrdersRepository
@Repository
public interface OrdersRepository extends JpaRepository<Orders, Integer> {
   public Optional<Orders> findByImpUid(String impUid);
}

// ✅ OrdersProductRepository
@Repository
public interface OrdersProductRepository extends JpaRepository<OrdersProduct, Integer> {
}

// ✅ ProductRepository
@Repository
public interface ProductRepository extends JpaRepository<Product, Integer> {
   public Optional<Product> findByName(String name);
}
💻 DTO
// ✅ GetListOrderRES
@Getter
@Setter
@AllArgsConstructor
@NoArgsConstructor
@Builder
public class GetListOrdersRes {
   private Integer id;
   private String userName;
   private List<ProductReadRes> products = new ArrayList<>();
}

// ✅ PostCreateOrdersReq
@Getter
@Setter
@AllArgsConstructor
@NoArgsConstructor
@Builder
public class PostCreateOrdersReq {

   private String userName;
   private String impUid;
}

// ✅ ProductReadRes
@Getter
@Setter
@NoArgsConstructor
@AllArgsConstructor
@Builder
public class ProductReadRes {

   private Integer id;
   private String name;
   private Integer price;
}

// ✅ PaymentProducts
@Getter
public class PaymentProducts {
   List<Product> products;
}
💻 OrdersService 클래스
@Service
public class OrdersService {
   private final IamportClient iamportClient;
   private final ProductService productService;
   private final OrdersRepository ordersRepository;
   private final OrdersProductRepository ordersProductRepository;

   public OrdersService(IamportClient iamportClient, ProductService productService, OrdersRepository ordersRepository, OrdersProductRepository ordersProductRepository) {
       this.iamportClient = iamportClient;
       this.productService = productService;
       this.ordersRepository = ordersRepository;
       this.ordersProductRepository = ordersProductRepository;
   }

   // ✅ 주문 상품 리스트 출력
   public List<GetListOrdersRes> list() {

       List<Orders> result = ordersRepository.findAll();

       List<GetListOrdersRes> getListOrdersResList = new ArrayList<>();
       for(Orders orders : result) {
           List<ProductReadRes> productReadResList = new ArrayList<>();
           List<OrdersProduct> ordersProductList = orders.getOrdersProductList();

           for(OrdersProduct ordersProduct : ordersProductList) {
               ProductReadRes productReadRes = ProductReadRes.builder()
                       .id(ordersProduct.getProduct().getId())
                       .name(ordersProduct.getProduct().getName())
                       .price(ordersProduct.getProduct().getPrice())
                       .build();

               productReadResList.add(productReadRes);
           }

           GetListOrdersRes getListOrdersRes = GetListOrdersRes.builder()
                   .id(orders.getId())
                   .userName(orders.getUser().getName())
                   .products(productReadResList)
                   .build();

           getListOrdersResList.add(getListOrdersRes);
       }
       return getListOrdersResList;
   }

   // ✅ 주문 및 주문상품 생성
   public void createOrder(String impUid, PaymentProducts paymentProducts) {
       Orders orders = Orders.builder()
               .user(User.builder().id(1).build())
               .impUid(impUid)
               .build();
       orders = ordersRepository.save(orders);

       for (Product product: paymentProducts.getProducts()) {
           ordersProductRepository.save(OrdersProduct.builder()
                   .orders(orders)
                   .product(product)
                   .build());
       }
   }

   // ✅ 결제 검증
   public Boolean paymentValidation(String impUid) throws IamportResponseException, IOException {
       IamportResponse<Payment> response = getPaymentInfo(impUid);
       Integer amount = response.getResponse().getAmount().intValue();

       String customDataString = response.getResponse().getCustomData();
       Gson gson = new Gson();
       PaymentProducts paymentProducts = gson.fromJson(customDataString, PaymentProducts.class);

       Integer totalPrice = productService.getTotalPrice(paymentProducts);

       if(amount.equals(totalPrice) ) {
           createOrder(impUid, paymentProducts);
           return true;
       } else{
           cancelPayment(impUid);  // 취소 기능
           return false;
       }
   }

   // ✅ 결제 정보 확인
   public IamportResponse getPaymentInfo(String impUid) throws IamportResponseException, IOException {
       IamportResponse<Payment> response = iamportClient.paymentByImpUid(impUid);

       return response;
   }

   // ✅ 결제 취소
   public void cancelPayment(String impUid) throws IamportResponseException, IOException {
       CancelData cancelData = new CancelData(impUid,true);
       iamportClient.cancelPaymentByImpUid(cancelData);
   }
}
💻 OrdersController
@RestController
@CrossOrigin("*")
public class OrdersController {

   private final OrdersService ordersService;
   private final LibraryOrdersService libraryOrdersService;

   public OrdersController(OrdersService ordersService, LibraryOrdersService libraryOrdersService) {
       this.ordersService = ordersService;
       this.libraryOrdersService = libraryOrdersService;
   }

   // ✅ 결제 검증
   @RequestMapping(method = RequestMethod.GET, value = "/validation")
   public ResponseEntity validation(String impUid) {
       try {
           if(libraryOrdersService.paymentValidation(impUid)) {
               return ResponseEntity.ok().body("ok");
           } else {
               return ResponseEntity.ok().body("error");
           }
       } catch (Exception e) {
           e.printStackTrace();
           return ResponseEntity.ok().body("error");
       }
   }

   // ✅ 주문내역 출력
   @RequestMapping(method = RequestMethod.GET, value = "/order/list")
   public ResponseEntity list() {

       return ResponseEntity.ok().body(libraryOrdersService.list());
   }
}
-
프론트엔드 서버에서 테스트를 해보면 아래와 같이 상품을 담고
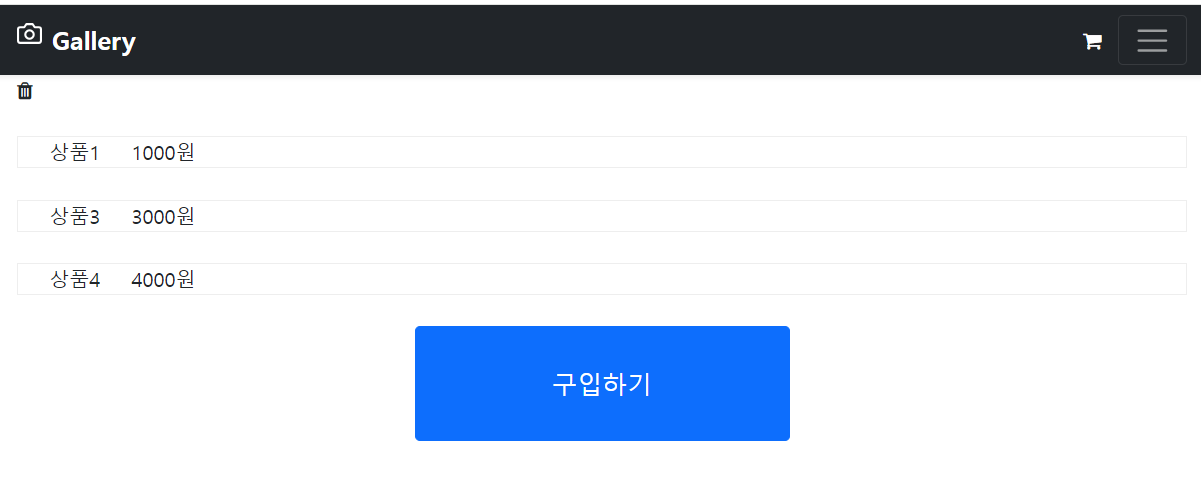
-
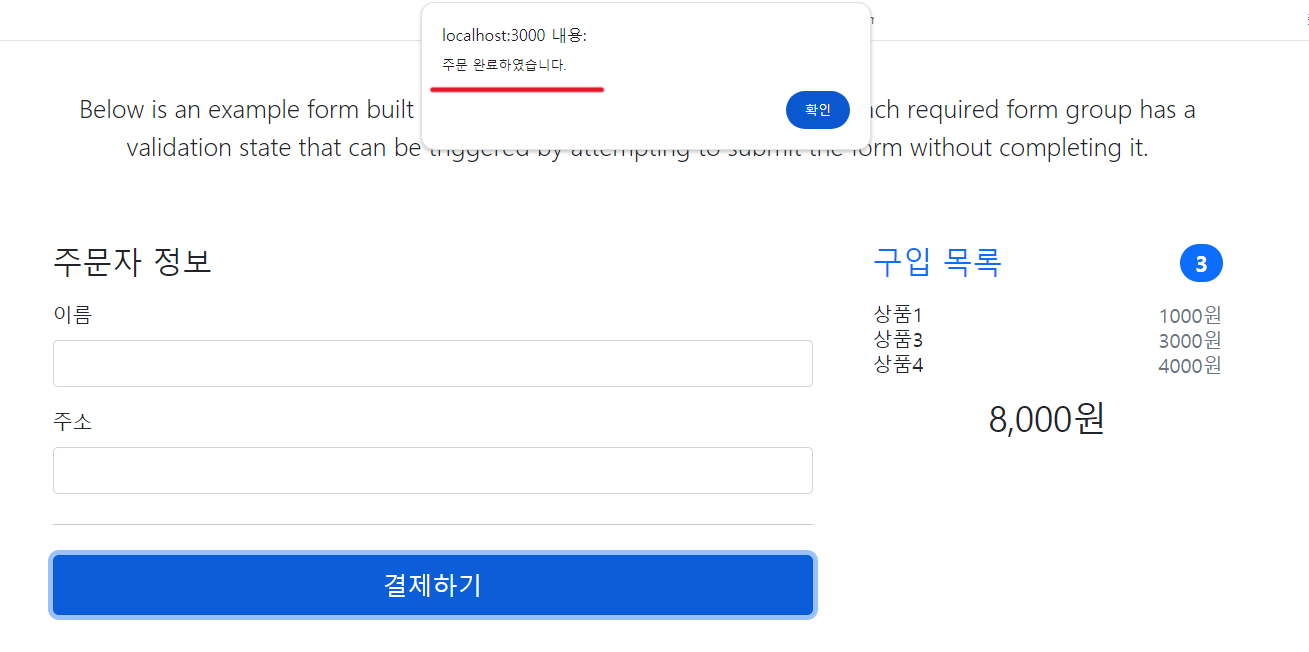
구입하기를 누른 뒤 결제하기를 클릭하면 DB에 담겨있는 상품의 가격과 비교해서 일치하면 아래처럼 "주문 완료하였습니다" 가 출력된다.
-
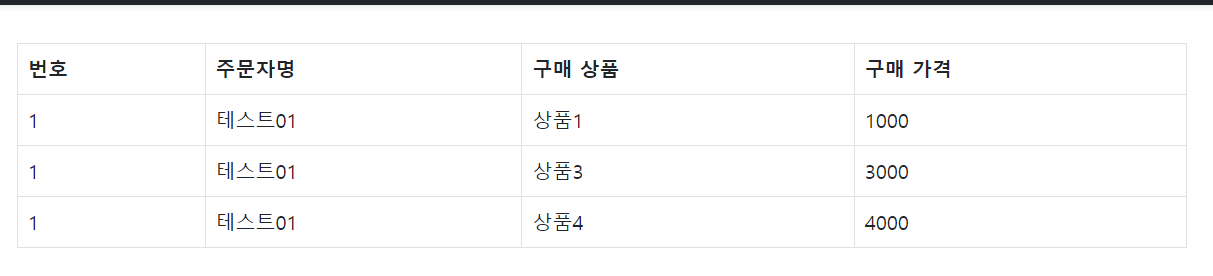
그러면 주문한 주문내역을 확인 할 수 있고,
-
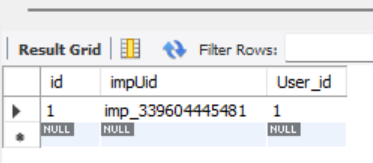
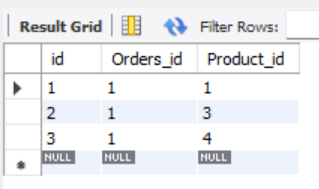
DB에서 Orders 테이블과 OrdersProduct 테이블을 확인해보면 주문한대로 데이터가 들어가 있는 것을 볼 수 있었다.
1) Orders 테이블
2) OrdersProduct 테이블
🐻 구글 이메일 인증 기능 구현하기
-
구글 이메일 인증 기능을 구현하기 위해서는 먼저 계정의 앱 비밀번호 발급이 필요하다. 구글 계정의 계정관리에서 앱 비밀번호를 검색해서 생성하면 되는데, 만약 검색해도 나오지 않는다면 2단계 보안인증이 활성화 되지 않아서이다.
-
보안에서 2단계 보안인증을 활성화 시킨 뒤 다시 검색해보면 나타날 것이다.
-
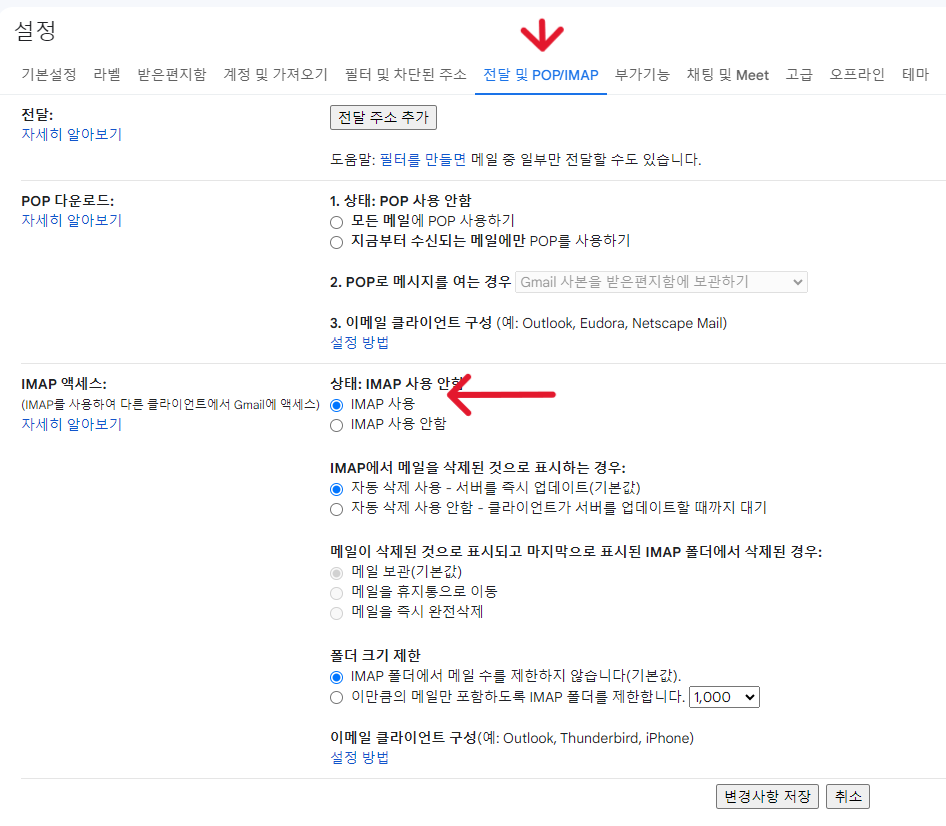
다음으로 gmail에 들어가서 오른쪽 상단의 톱니바퀴를 클릭하여 모든 설정보기를 클릭한다.

- 전달 및 POP/IMAP 클릭 후 IMAP 액세스에서 IMAP 사용으로 변경 후 변경사항 저장을 클릭해준다.
pom.xml에 라이브러리를 추가해준다.
		<dependency>
			<groupId>org.springframework.boot</groupId>
			<artifactId>spring-boot-starter-mail</artifactId>
</dependency>application.yml파일에 구글 이메일 인증 관련 설정 내용을 추가해준다.
spring:
  mail:
    host: smtp.gmail.com
    port: 587
    username: [구글 계정명]
    password: [발급 받은 앱 비밀번호]
    properties:
      mail:
        smtp:
          starttls:
            enable: true
            required: true
          auth: true
          connectiontimeout: 5000
          timeout: 5000
writetimeout: 5000-
이메일 인증에 대한 코드는 아래와 같이 구현할 수 있었다. 동작원리는 간단하게
아래와 같다.1) 클라이언트가 회원가입을 하면 회원 테이블의
isVaild속성이 false(0) 로 회원
테이블에 삽입된다.2) 이메일 인증을 위한 링크를 포함한 메일을 발송한다. 링크에는 중복되지 않는 임의의
UUID문자열을 HTTP 요청에 포함시킨다.3) 검증을 위한 EmailVerify 테이블에 email 과 발송한 UUID 문자열을 저장한다.
4) 이메일 인증 링크를 통해 요청이 들어오면 DB에 저장된 UUID와 HTTP 요청에
포함되어 온 UUID를 비교하여 같으면 회원 테이블의isValid속성을 true(1)로
바꾸는 원리이다.💻 User 엔티티
@Entity
@Builder
@Getter
@Setter
@AllArgsConstructor
@NoArgsConstructor
public class User {

  @Id
  @GeneratedValue(strategy = GenerationType.IDENTITY)
  private Integer id;

  @Column(nullable = false, length = 50, unique = true)
  private String email;

  @Column(nullable = false, length = 200)
  private String password;

  @OneToMany(mappedBy = "user", fetch = FetchType.LAZY)
  private List<Orders> ordersList = new ArrayList<>();

  @Column(nullable = false, length = 30)
  private String name;

  private Boolean isValid;  // 이메일 인증을 위한 변수
}
💻 EmailVerify 엔티티
@Entity
@Builder
@Getter
@AllArgsConstructor
@NoArgsConstructor
public class EmailVerify {

  @Id
  @GeneratedValue(strategy = GenerationType.IDENTITY)
  private Integer id;
  private String email;
  private String uuid;
}
💻 UserService 클래스
@Service
public class UserService {

  public UserService(UserRepositorty userRepositorty) {
      this.userRepositorty = userRepositorty;
  }

  // CREATE
  public PostCreateUserRes create(PostCreateUserReq postCreateUserReq) {

      User user = User.builder()
              .email(postCreateUserReq.getEmail())
              .password(postCreateUserReq.getPassword())
              .name(postCreateUserReq.getName())
              .isValid(false)
              .build();

      User result = userRepositorty.save(user);

      PostCreateUserRes response = PostCreateUserRes.builder()
              .id(result.getId())
              .email(result.getEmail())
              .name(result.getName())
              .build();

      return response;
  }

  // UPDATE
  public void update(String email) {
      Optional<User> result = userRepositorty.findByEmail(email);
      if(result.isPresent()) {
          User user = result.get();
          user.setIsValid(true);
          userRepositorty.save(user);
      }
  }
}
💻 EmailVerifyService 클래스
@Service
public class EmailVerifyService {

  private final EmailVerifyRepository emailVerifyRepository;

  public EmailVerifyService(EmailVerifyRepository emailVerifyRepository) {
      this.emailVerifyRepository = emailVerifyRepository;
  }

  public void create(String email, String uuid) {
      emailVerifyRepository.save(EmailVerify.builder()
                      .email(email)
                      .uuid(uuid)
              .build());
  }

  public Boolean verify(String email, String uuid) {
      Optional<EmailVerify> result = emailVerifyRepository.findByEmail(email);
      if(result.isPresent()) {
          EmailVerify emailVerify = result.get();
          if(emailVerify.getUuid().equals(uuid)) {
              return true;
          }
      }
      return false;
  }
}
💻 UserController 클래스
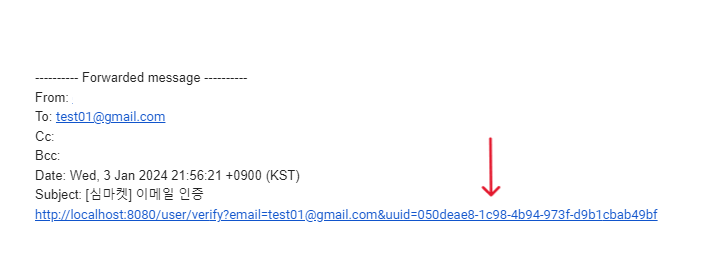
@RestController
@RequestMapping("/user")
public class UserController {
  private final UserService userService;
  private final JavaMailSender emailSender;

  private final EmailVerifyService emailVerifyService;

  public UserController(UserService userService, JavaMailSender emailSender, EmailVerifyService emailVerifyService) {
      this.userService = userService;
      this.emailSender = emailSender;
      this.emailVerifyService = emailVerifyService;
  }

  // 인증
  @RequestMapping(method = RequestMethod.GET, value = "/verify")
  public ResponseEntity verify(String email, String uuid){
      if(emailVerifyService.verify(email, uuid)) {
          userService.update(email); // 이메일 인증이 완료되면 회원의 isValid를 false -> true로 바꿔줌
          return ResponseEntity.ok().body("ok");
      }
      return ResponseEntity.ok().body("error");
  }

  // 회원 가입
  @RequestMapping(method = RequestMethod.POST, value = "/create")
  public ResponseEntity create(PostCreateUserReq postCreateUserReq) {
      PostCreateUserRes postCreateUserRes = userService.create(postCreateUserReq);

      SimpleMailMessage message = new SimpleMailMessage();
      message.setTo(postCreateUserReq.getEmail());
      message.setSubject("[심마켓] 이메일 인증"); // 메일 제목

      String uuid = UUID.randomUUID().toString();
      message.setText("http://localhost:8080/user/verify?email="+postCreateUserReq.getEmail()+"&uuid="+uuid);    // 메일 내용

      emailSender.send(message);

      emailVerifyService.create(postCreateUserReq.getEmail(), uuid);

      return ResponseEntity.ok().body(postCreateUserRes);
  }
}
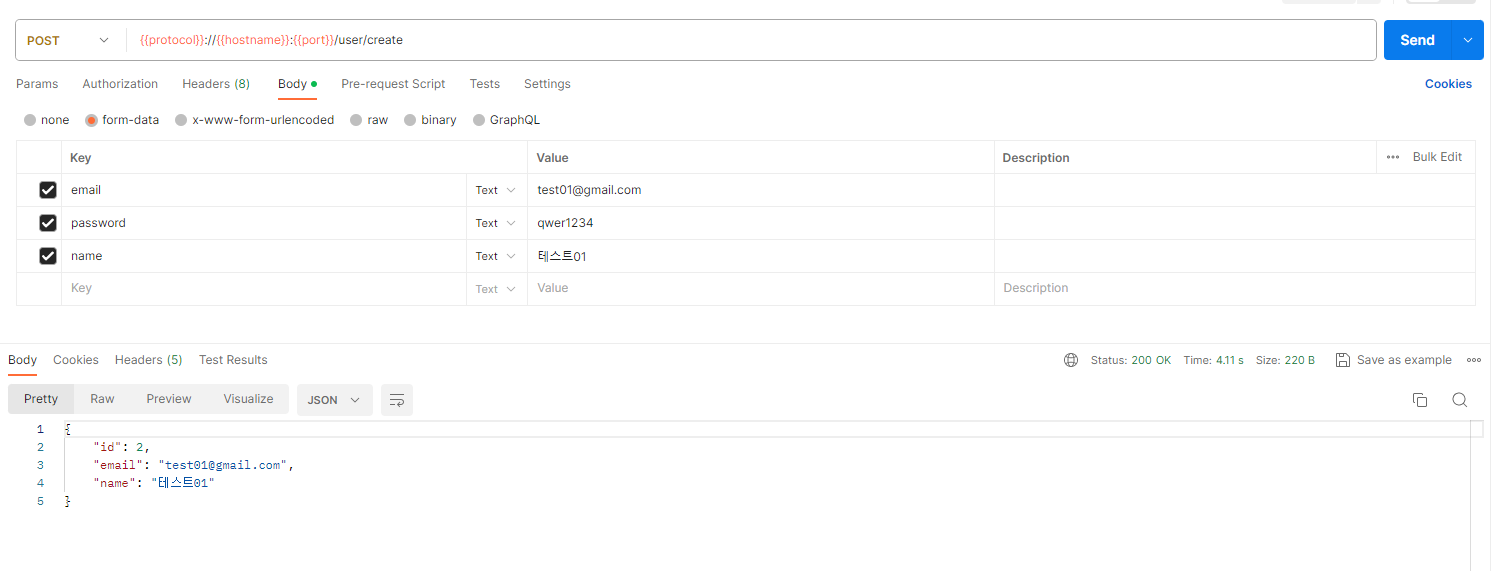
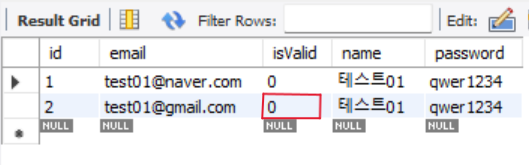
- 포스트맨을 이용하여 회원가입을 해보면 아래와 같이 회원가입이 정상적으로 되고,
DB를 확인해보면isVaild가 0 으로 들어가 있는 것을 확인할 수 있다.
- 구글 계정으로 로그인하여 gmail 을 확인해보면 아래와 같이 인증 메일이 와있을 것이다.
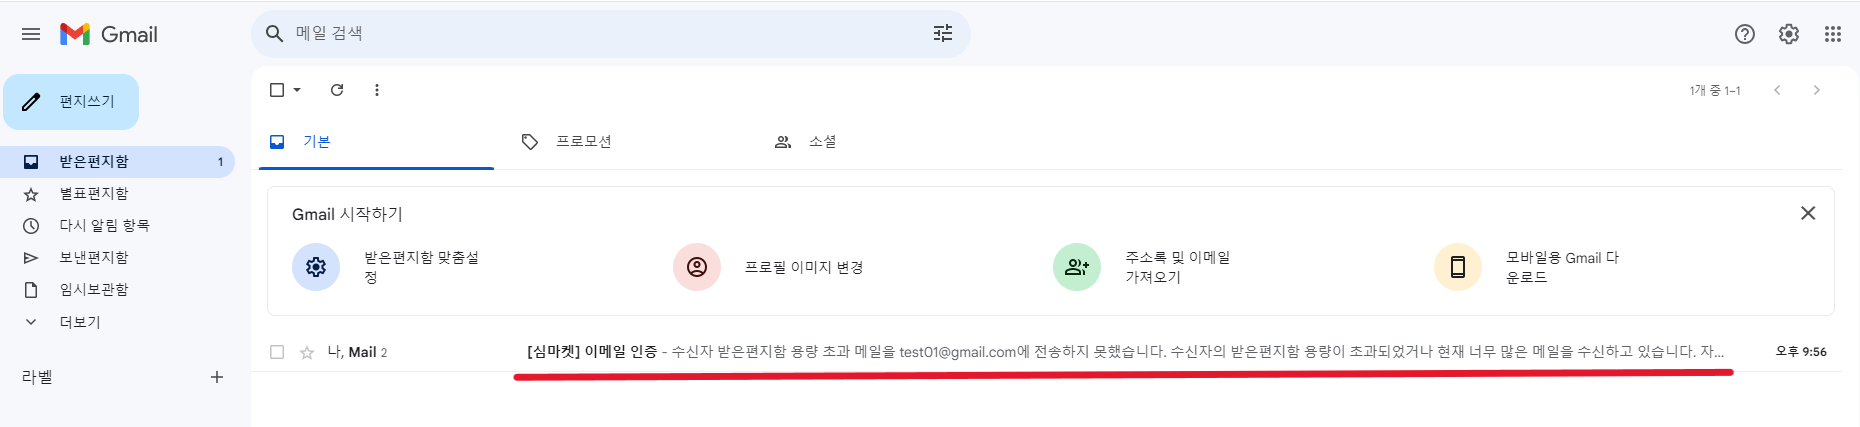
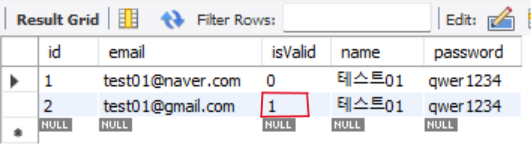
- 메일을 클릭하여 보내온 링크를 클릭해보면 인증이 완료되어 DB를 확인하면
isValid가 0에서 1로 바뀌어 있는것을 확인 할 수 있다.
오늘의 느낀점 👀
-
확실히 라이브러리를 사용하면 복잡한 기능들을 간단하고 쉽게 구현하는 것이 가능하다는것을 오늘 다시한번 깨달을 수 있었다.
-
라이브러리를 가져다가 쓰는것도 좋으나, 어떤 원리로 동작하는지 알고 쓰는것 또한 중요하다고 생각이 든다. 무작정 갖다 쓰는 것이 아닌, 동작 원리정도는 알고 사용하자 생각을 머리에 박아둬야 겠다.