GitHub Actions로 Jest Test 및 Postman API 문서 생성 워크플로우 구성하기
개요
- Node.js API 개발 환경에서 Jest 프레임워크 설치 및 기본 사용 방법
- Swagger-autogen OpenAPI 문서 생성 및 Postman API documentation 변환 방법
- 위의 내용을 자동화하는 Github Actions workflow 작성
전체 디렉토리 구조 참고
project-root/
├── docs/
│   ├── swagger.js
│   ├── swagger-output.json
│   ├── postman.js
│   ├── postman-output.json
├── src/
│   ├── apis
│    ├── routes
│     ├── tests
│      └── test.route.ts
│     └── index.ts
│   └── index.ts
├── tests/
│   ├── tests.test.ts
├── tsconfig.json
├── jest.config.js
└── package.json
1. Jest+Supertest를 사용한 API 테스트
1.1 Jest 및 Supertest의 역할
- Jest : 단위 및 통합 테스트를 위한 테스트 프레임워크
- Supertest : Express 애플리케이션의 HTTP 요청 테스트를 위한 라이브러리
1.2 기본 설정 및 테스트 코드
1. Jest와 Supertest 설치
$ npm install --save-dev jest supertest
$ npm install --save-dev @types/supertest @types/jest
2. Jest 설정
Jest는 ECMAScript 모듈을 지원하지 않습니다.
ts-jest를 설치하여 TypeScript 파일을 처리하도록 설정해야 합니다.
ts-jest 설치
$ npm install --save-dev ts-jestjest.config.js 작성
// jest.config.js
module.exports = {
  preset: 'ts-jest',
  testEnvironment: 'node',
  transform: {
    '^.+\\.ts$': 'ts-jest',
  },
  moduleFileExtensions: ['ts', 'js'],
  moduleNameMapper: {
    '^@/(.*)$': '<rootDir>/src/$1',  // '@' 경로 별칭을 'src' 폴더로 매핑
  },
  rootDir: './',  // Jest에서 프로젝트 루트로 설정
};
프로젝트를 세팅할 때 경로 별칭을 설정해두었기 때문에 jest 설정 파일에서 moduleNameMapper 옵션도 설정해주었습니다.
tsconfig.json 에 tests 경로 추가
// tsconfig.json
{
  "compilerOptions": {
    "target": "ES6",
    "module": "commonjs",
    "esModuleInterop": true,
    "skipLibCheck": true,
    "strict": true
  },
  "include": ["src/**/*.ts", "tests/**/*.ts"],
  "exclude": ["node_modules"]
}
3. 테스트 코드 작성
// tests/tests.test.ts
import request from 'supertest';
import { app } from '../src/index';

let server: any;

beforeAll(async () => {
  const appInstance = await app();  // app()을 호출하여 실제 앱 인스턴스를 생성
  server = appInstance.listen(8002); // 서버를 테스트 포트에서 실행
});

afterAll(() => {
  server.close(); // 테스트 후 서버 종료
});

describe('GET /tests', () => {
  it('should return response 200', async () => {
    const res = await request(server).get('/api/v1/tests'); // 실제 서버에 요청
    expect(res.status).toBe(200);
  });
});
1.3 테스트 실행
package.json script 추가
// pacakge.json
"scripts": {
    "test": "jest --detectOpenHandles --forceExit"
}- detectOpenHandles : 테스트 후 열린 이벤트 모두 닫기
- forceExit : 테스트 후 강제 종료
테스트 실행
$ npm run test 테스트 성공 화면
2. Swagger-autogen OpenAPI 문서화
2.1 Swagger-autogen?
https://swagger-autogen.github.io/docs
Swagger-autogen은 Express 라우트를 분석하여 OpenAPI 문서를 자동으로 생성하는 라이브러리 입니다.
2.2 기본 설정
1. swagger-autogen 설치
$ npm install --save-dev swagger-autogen2. glob 설치
$ npm install glob --save-dev
$ npm i --save-dev @types/glob
routes/ 경로의 서브 디렉토리 탐색을 위해 glob 라이브러리를 설치합니다.
3. Swagger-autogen 설정
docs/swagger.js 생성
// docs/swagger.js

const swaggerAutogen = require('swagger-autogen')();
const glob = require('glob');
const path = require('path');

const doc = {
  info: {
    title: 'node-feature-api-collection',
    description: 'node-feature-api-collection API documentation using swagger-autogen',
  },
  host: 'localhost:3000',
  basePath: '/api/v1',
  schemes: ['http'],
};

const outputFile = './swagger-output.json';

const routesDir = path.join(__dirname, '../src/apis/routes');
const endpointsFiles = glob.sync(`${routesDir}/**/*.route.ts`);

swaggerAutogen(outputFile, endpointsFiles, doc).then(() => {
  console.log('Swagger documentation generated');
});
test.route.ts 코드 및 경로
// src/apis/routes/tests/test.route.ts
import express, {Router} from 'express';

import TestsController from '@/features/tests/tests.controller';

const router: Router = express.Router();

export default ({ app } : { app: Router }) => {
    app.use('/', router);

    router.get('/tests', TestsController.getTest);
};
2.3 openAPI 문서 생성
package.json에 script 추가
// pacakge.json
"scripts": {
    "docs": "npm run docs/swagger.js"
}
실행
$ npm run docs생성된 swagger-output.json 확인
// docs/swagger-output.json
{
"swagger": "2.0",
"info": {
"title": "node-feature-api-collection",
"description": "node-feature-api-collection API documentation using swagger-autogen",
"version": "1.0.0"
},
"host": "localhost:3000",
"basePath": "/api/v1",
"schemes": [
"http"
],
"paths": {
"/tests": {
"get": {
"description": "",
"responses": {
"default": {
"description": ""
}
}
}
}
}
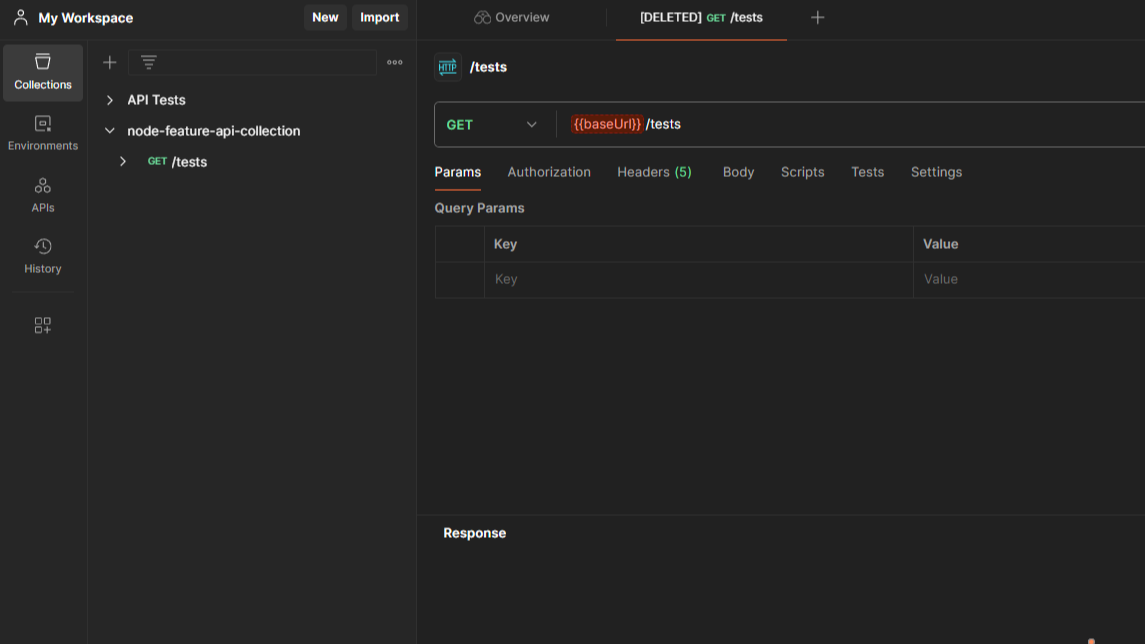
}swagger-output.json 파일을 postman collection에 import 하는 방법으로 API 문서를 생성할 수 있습니다.
3. Github Actions로 Jest Test 및 Postman API 자동 업데이트
3.1 Postman API key 설정
Postman API Key 발급
1. Postman에 로그인합니다.
2. 오른쪽 상단의 프로필 아이콘을 클릭한 후, Settings > API로 이동합니다.
3. Generate API Key를 클릭하여 API Key를 생성합니다.
Postman Collection ID 확인
Postman에서 Collection을 선택 후 URL 확인
예: https://app.postman.com/collections/xxxxxxxxxxxxxxxx
3.2 OpenAPI를 Postman collection 변환
1. openapi-to-postmanv2 설치
https://www.npmjs.com/package/openapi-to-postmanv2
$ npm install --save-dev openapi-to-postmanv22. 코드 작성 및 실행
docs/postman.js 생성
// docs/postman.js
const fs = require('fs');
const path = require('path');

const Converter = require('openapi-to-postmanv2');
const openapiData = fs.readFileSync(path.join(__dirname, './swagger-output.json'), {encoding: 'UTF8'});

Converter.convert({ type: 'string', data: openapiData },
  {}, (err, conversionResult) => {
    if (!conversionResult.result) {
      console.log('Could not convert', conversionResult.reason);
    }
    else {
      const postmanCollection = {
        collection: conversionResult.output[0].data
      }
      // console.log('The collection object is: ', postmanCollection);

      fs.writeFileSync(path.join(__dirname, 'postman-output.json'), JSON.stringify(postmanCollection, null, 2), 'utf-8');
      console.log('Postman collection has been saved to postman-output.json');
    }
  }
);
pacakge.json script 추가
// package.json
"docs-convert": "node docs/postman.js"
실행
$ npm run docs-convert생성된 postman-output.json 확인
{
  "collection": {
    "item": [
      {
        "id": "e032a026-61eb-46e9-9cf3-92f4bfb895d4",
        "name": "/tests",
        "request": {
          "name": "/tests",
          "description": {
            "content": "",
            "type": "text/plain"
          },
          "url": {
            "path": [
              "tests"
            ],
            "host": [
              "{{baseUrl}}"
            ],
            "query": [],
            "variable": []
          },
          "method": "GET",
          "auth": null
        },
        "response": [
          {
            "id": "b6382bc4-b70c-4548-b157-99075c6180e4",
            "originalRequest": {
              "url": {
                "path": [
                  "tests"
                ],
                "host": [
                  "{{baseUrl}}"
                ],
                "query": [],
                "variable": []
              },
              "method": "GET",
              "body": {}
            },
            "status": "Internal Server Error",
            "code": 500,
            "header": [
              {
                "key": "Content-Type",
                "value": "text/plain"
              }
            ],
            "body": "",
            "cookie": [],
            "_postman_previewlanguage": "text"
          }
        ],
        "event": [],
        "protocolProfileBehavior": {
          "disableBodyPruning": true
        }
      }
    ],
    "event": [],
    "variable": [
      {
        "type": "string",
        "value": "http://localhost:3000/api/v1",
        "key": "baseUrl"
      }
    ],
    "info": {
      "_postman_id": "35fd5fd8-22e2-4541-a185-1b80b721a0fc",
      "name": "node-feature-api-collection",
      "schema": "https://schema.getpostman.com/json/collection/v2.1.0/collection.json",
      "description": {
        "content": "node-feature-api-collection API documentation using swagger-autogen",
        "type": "text/plain"
      }
    }
  }
}
3.3 Github Actions workflow
1. Github repository에 secrets 추가
Secrets 설정
GitHub 저장소에 다음 Secrets를 추가:
- POSTMAN_API_KEY: Postman API 키.
- POSTMAN_COLLECTION_ID: Postman Collection ID.
2. workflow 작성
.github/workflows/deploy.yml 생성
#deploy.yml
#master branch 로 pull request 가 merge 되었을 때 실행

on:
  pull_request:
  	type:
    	- closed
    branches:
    	- master

jobs:
  deploy:
    runs-on: ubuntu-latest
    environment: production

    steps:
      - name: Checkout Code
        uses: actions/checkout@v3

      - name: Setup Node.js
        uses: actions/setup-node@v3
        with:
          node-version: '22'

      - name: Cache Node Modules
        uses: actions/cache@v3
        id: cache
        with:
          path: node_modules
          key: npm-packages-${{ hashFiles('./package-lock.json') }}

      - name: Install Dependencies
        if: steps.cache.outputs.cache-hit != 'true'
        run: npm install
        working-directory: ./

      - name: Run Tests
        run: npm run test

      - name: Generate Swagger Documentation
        run: npm run docs

      - name: Convert Swagger Documentation to Postman Collection
        run: npm run docs-convert

      - name: Upload to Postman
        env:
          POSTMAN_API_KEY: ${{ secrets.POSTMAN_API_KEY }}
          POSTMAN_COLLECTION_ID: ${{ secrets.POSTMAN_COLLECTION_ID }}
        run: |
          POSTMAN_JSON_PATH="./docs/postman-output.json"

          curl -X PUT \
            "https://api.getpostman.com/collections/$POSTMAN_COLLECTION_ID" \
            -H "X-Api-Key: $POSTMAN_API_KEY" \
            -H "Content-Type: application/json" \
            --data @$POSTMAN_JSON_PATH
3. 결과
master 브랜치로의 Closed 된 모든 Pull Request에서 다음 작업이 자동으로 실행됩니다.
- Jest 테스트 실행
- OpenAPI 문서 생성
- Postman collection으로 변환
- Postman collection 업데이트
업데이트 된 Postman collection은 publish 기능을 활용하여 쉽게 공유할 수 있습니다.
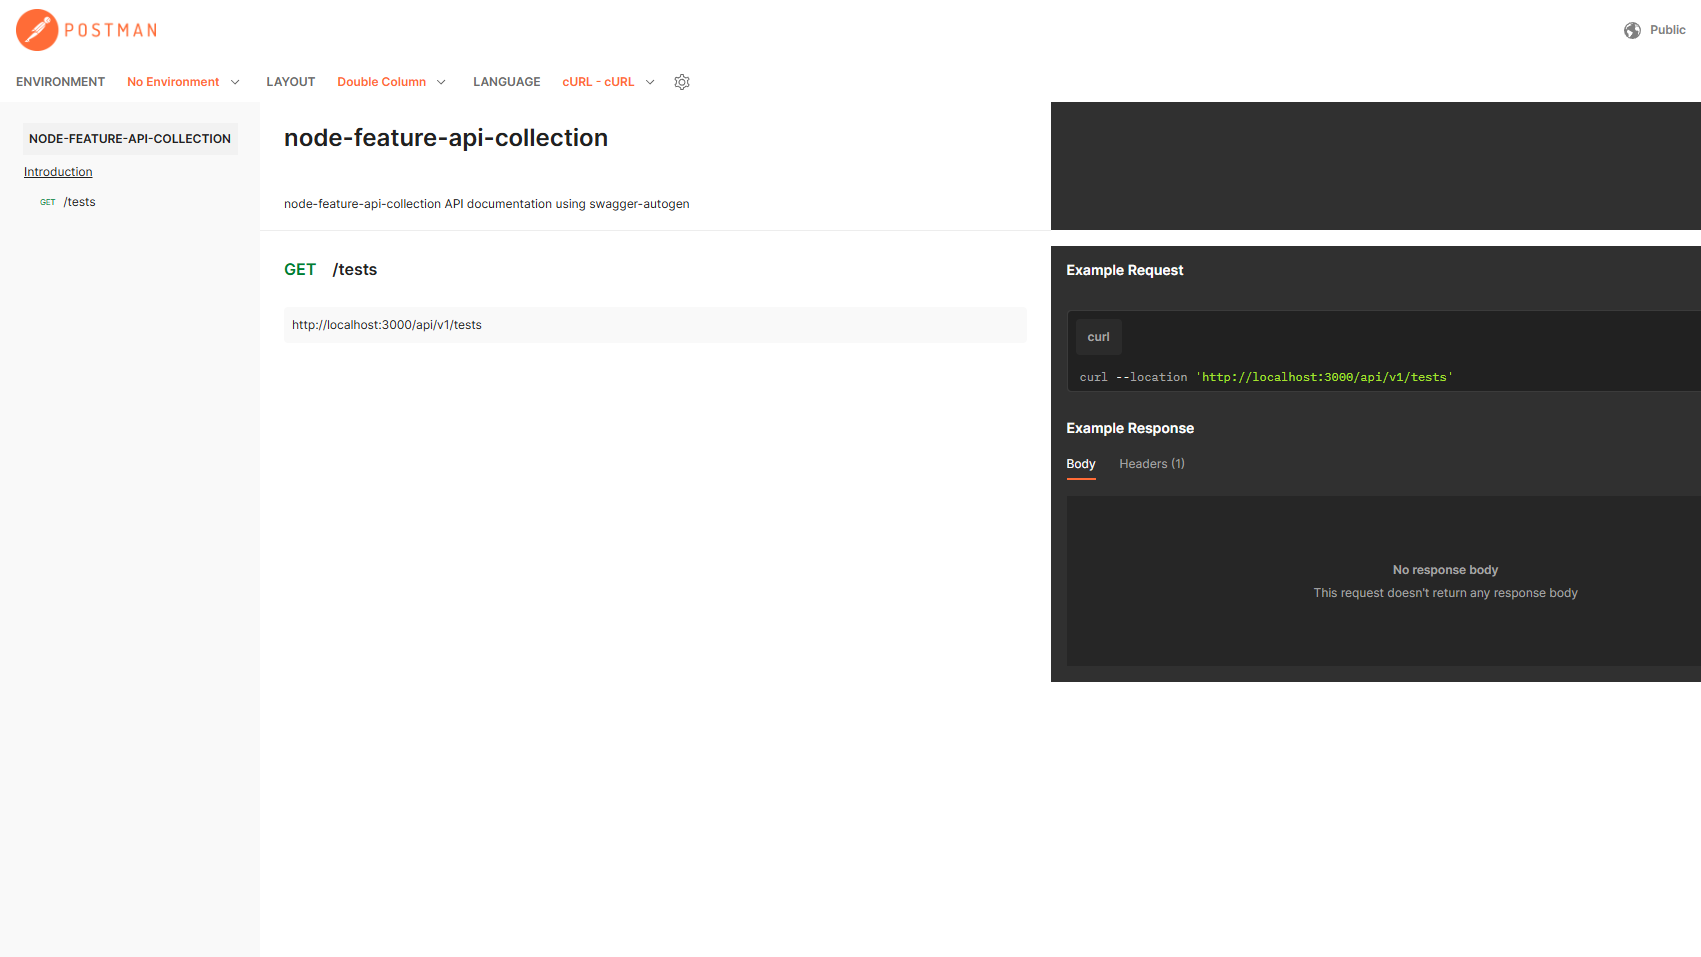 공유된 문서 페이지
마무리
이번 글에서는 Node.js API 서버를 개발할 때 겪었던 초기 고민들을 되짚어보며, Node.js 개발 환경에서 Jest와 Supertest를 활용한 기본적인 API 테스트 작성법과 Swagger-autogen을 사용한 OpenAPI 문서화, 그리고 이를 자동화하는 Github Actions workflow 설정 방법을 정리해보았습니다.
앞으로 더 정교한 테스트 코드 작성과 문서화 자동화의 확장 등으로 계속 개선해 나가는 여정을 기록해 보려고 합니다.