
이 시리즈는 Rust 공식문서를 통해 공부한 흔적임을 밝힙니다.
어느 새 공식문서의 마지막 장에 도착했다.
우리는 지금까지 배웠던 내용을 적용하고 또 새로운 내용을 배워가며
간단한 웹서버를 만들어보고자 한다.
우리가 만들 웹서버는 최선의 웹서버는 아니며 성능보다는 학습에 중점을 둔 실습임을 밝힌다.
우리는 다음과 같은 과정으로 웹서버를 구현할 것이다.
- TCP와 HTTP에 대해 간단히 배운다.
Learn a bit about TCP and HTTP. - 소켓을 통해 TCP 연결을 listen한다.
Listen for TCP connections on a socket. - 소규모 HTTP 요청을 구문분석한다.
Parse a small number of HTTP requests. - 적절한 HTTP 응답을 생성한다.
Create a proper HTTP response. - 쓰레드 풀을 통해 서버의 처리량을 개선한다.
Improve the throughput of our server with a thread pool.
이번 시간에는 HTTP 응답을 생성하는 부분까지 단일 쓰레드 환경에서 작성할 것이며
다음 시간에 쓰레드 풀을 통해 이를 개선하는 작업을 할 것이다.
TCP와 HTTP
이 프로토콜들에 대한 설명은 여기서 하는 것보다
구글에 검색해보는 쪽이 더 이해하기 쉽겠지만
간단하게 설명하고 넘어가도록 하겠다.
TCP Transmission Control Protocol
TCP는 정보가 어떻게 한 서버에서 다른 서버로 전송되는지 세부사항을 기술하지만 그 정보가 무엇인지 특정하지 않는 저수준 프로토콜이다.
TCP is the lower-level protocol that describes the details of how information gets from one server to another but doesn’t specify what that information is.
HTTP HyperText Transfer Protocol
HTTP는 TCP를 기반으로 만들어졌으며 요청과 응답의 내용을 정의한다. 기술적으로는 다른 프로토콜과 함께 사용할 수도 있지만, TCP를 통해 자료를 전송하는 게 일반적이다.
HTTP builds on top of TCP by defining the contents of the requests and responses. It’s technically possible to use HTTP with other protocols, but in the vast majority of cases, HTTP sends its data over TCP.
TCP 연결 listening
새 프로젝트를 생성해 TCP 연결을 listening하는 코드를 작성해보자.
우리는 127.0.0.1:7878 주소로 들어오는 TCP 스트림을 listen할 것이며
stream이 들어오면 성공적으로 연결되었음을 출력할 것이다.
주소는 IP:PORT로 구성되는데,
127.0.0.1은 로컬 호스트를 의미하고
7878은 미국식 알파벳 전화번호에서 rust를 숫자로 나타낸 값이다.
// 그리고 원자번호로는 백금백금이라는 건 여담... 이건 정말 우연이다;;
그리고 마침 HTTP는 이 포트번호를 허용한다.
peter@hp-laptop:~/rust-practice$ mkdir chapter20
peter@hp-laptop:~/rust-practice$ cd chapter20/
peter@hp-laptop:~/rust-practice/chapter20$ cargo new hello
     Created binary (application) `hello` package
peter@hp-laptop:~/rust-practice/chapter20$ cd hello/
peter@hp-laptop:~/rust-practice/chapter20/hello$ vi src/main.rs
src/main.rsuse std::net::TcpListener; fn main() { let listener = TcpListener::bind("127.0.0.1:7878").unwrap(); for stream in listener.incoming() { let _stream = stream.unwrap(); println!("Connection established!"); } }
TcpListener::bind 함수는 인자로 전달된 주소를 bind하는 TcpListener 인스턴스를
Result<T, E> 형태로 반환하는데,
관리자 권한을 요구하는 1024보다 작은 숫자의 포트에 연결을 시도하거나
서로 다른 프로세스에서 같은 포트에 연결을 시도할 경우 Err가 반환된다.
우리는 코드의 단순화를 위해 Err 반환 시 종료되도록 unwrap을 사용하였다.
incoming 메서드는 TcpListener 인스턴스로부터 TcpStream 반복자를 반환하며
이 스트림은 우리가 멀티 쓰레드에서 했던 것처럼 데이터를 전송하는 데 사용된다.
멀티 쓰레드에서 사용하는 스트림과는 조금 차이가 있지만 말이다.
클라이언트가 서버에 연결을 요청하고 서버가 응답을 생성하여 스트림을 통해 전송한다.
그리고 우리가 작성한 코드는 서버에 연결 요청을 성공하면
실제 연결 여부와는 별개로 문자열을 출력한다.
이 상태에서 프로그램을 실행하고 127.0.0.1:7878에 접속해보자.
peter@hp-laptop:~/rust-practice/chapter20/hello$ cargo run
   Compiling hello v0.1.0 (/home/peter/rust-practice/chapter20/hello)
    Finished dev [unoptimized + debuginfo] target(s) in 0.31s
     Running `target/debug/hello`
Connection established!
Connection established!
Connection established!
Connection established!
Connection established!
Connection established!
Connection established!
Connection established!
Connection established!
Connection established!
Connection established!
Connection established!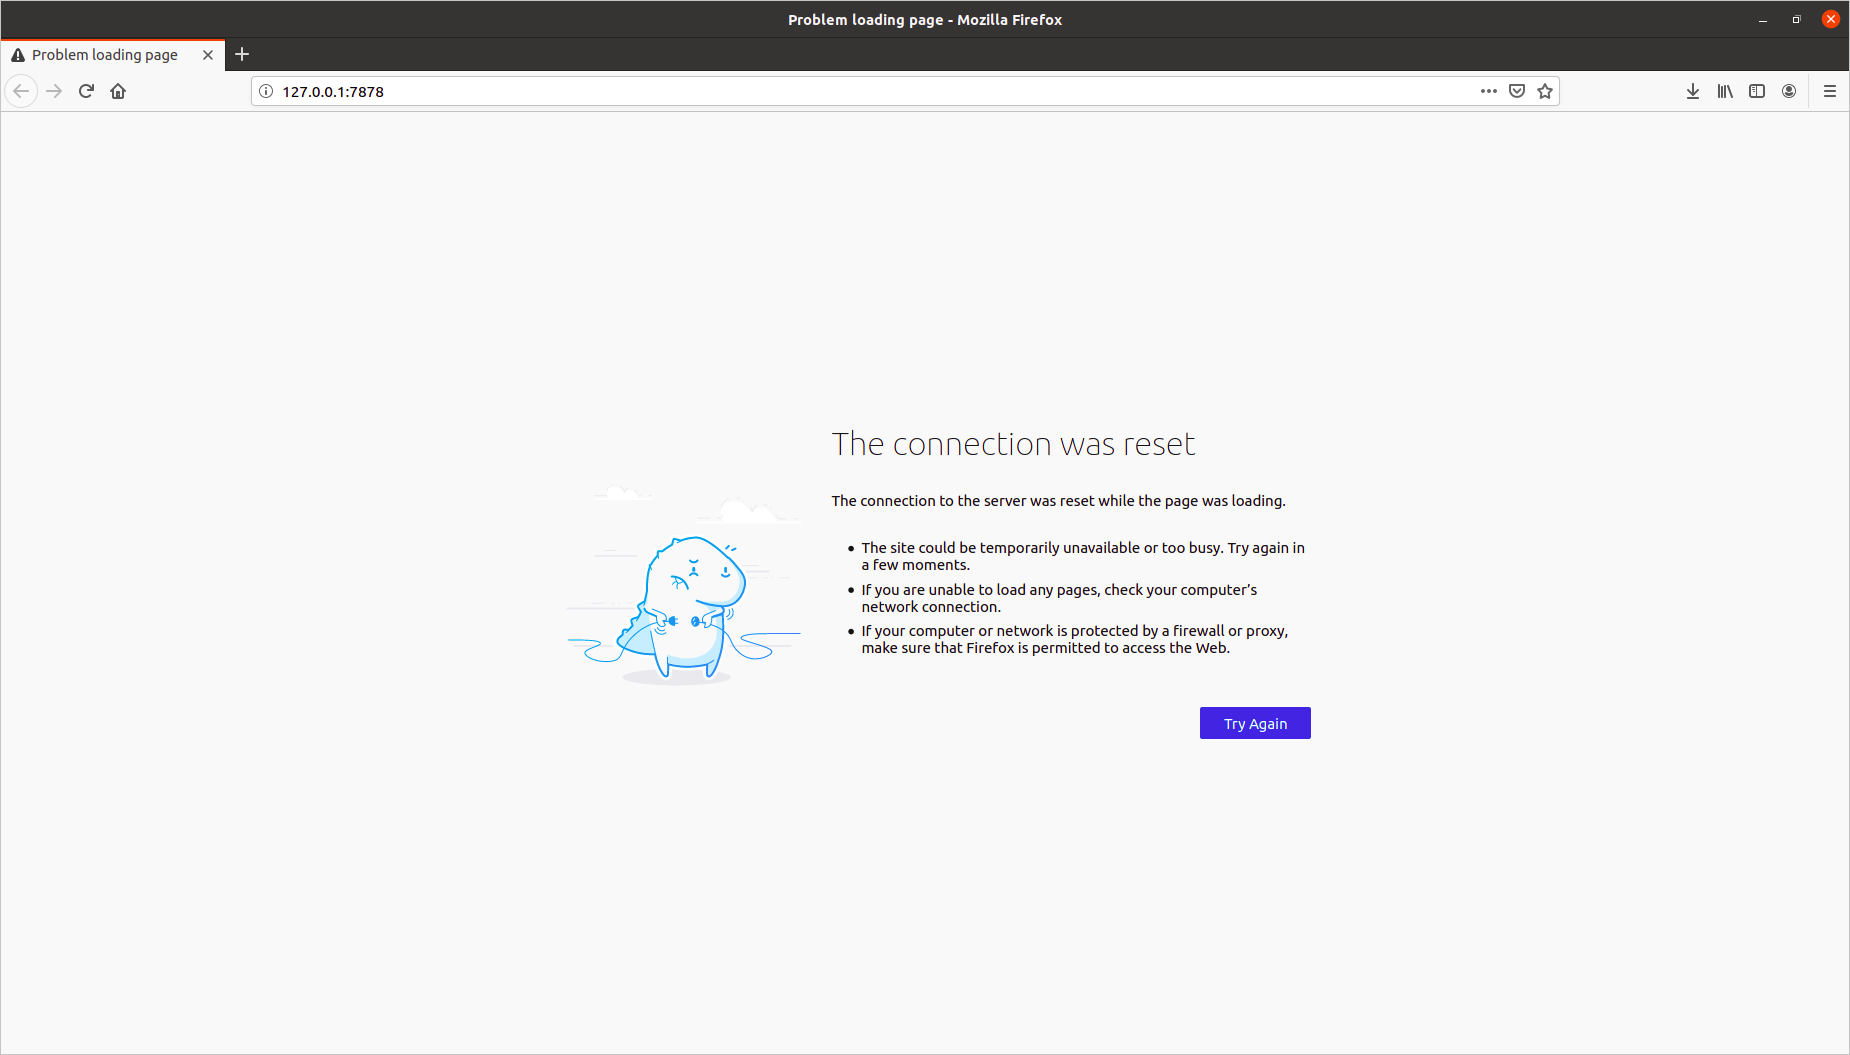
서버로부터 응답 받은 게 없기에 브라우저는 연결하지 못했다고 한다.
하지만 요청은 이루어졌기에 터미널에 Connection established!는 출력된다.
이 때, 여러 개의 Connection established!가 출력되는데
페이지에 대한 요청뿐만 아니라 다른 자원들에 대한 요청도 함께 이루어지는 것도 있고,
경우에 따라서는 응답받지 못했을 때 몇 번 정도 자동으로 재시도 하는 경우도 있다.
우리 프로그램은 스트림이 열려 있는 동안 종료되지 않으므로
ctrl + c를 통해 종료 시그널을 보내야 강제 종료할 수 있다.
요청 읽기
이번에는 클라이언트 역할을 하는 브라우저가 보낸 요청을 읽어보자.
요청을 읽는 기능은 TCP 연결 코드와 분리하여 별개의 함수로 작성하도록 하겠다.
peter@hp-laptop:~/rust-practice/chapter20/hello$ vi src/main.rs
src/main.rsuse std::io::prelude::*; use std::net::TcpListener; use std::net::TcpStream; fn main() { let listener = TcpListener::bind("127.0.0.1:7878").unwrap(); for stream in listener.incoming() { let stream = stream.unwrap(); handle_connection(stream); } } fn handle_connection(mut stream: TcpStream) { let mut buffer = [0; 1024]; stream.read(&mut buffer).unwrap(); println!("Request: {}", String::from_utf8_lossy(&buffer[..])); }
peter@hp-laptop:~/rust-practice/chapter20/hello$ cargo run
   Compiling hello v0.1.0 (/home/peter/rust-practice/chapter20/hello)
    Finished dev [unoptimized + debuginfo] target(s) in 0.27s
     Running `target/debug/hello`
Request: GET / HTTP/1.1
Host: 127.0.0.1:7878
User-Agent: Mozilla/5.0 (X11; Ubuntu; Linux x86_64; rv:80.0) Gecko/20100101 Firefox/80.0
Accept: text/html,application/xhtml+xml,application/xml;q=0.9,image/webp,*/*;q=0.8
Accept-Language: en-US,en;q=0.5
Accept-Encoding: gzip, deflate
Connection: keep-alive
Upgrade-Insecure-Requests: 1


# snip
TcpStream 인스턴스는 내부적으로 얼마나 읽었는지 저장하기 때문에
읽기 연산만 하더라도 가변성을 적용하여 선언해야 한다.
우리는 간단히 1024bytes 버퍼를 생성하고 0으로 채웠다.
그리고 read 메서드에 전달함으로써 요청으로 전달된 메시지를 버퍼에 담았다.
버퍼에 담긴 메시지는 String::from_utf8_lossy를 통해 문자열로 변환된다.
_lossy는 이 함수가 유효하지 않은 UTF-8 값을 대체 문자로 처리함을 의미한다.
프로그램을 실행하고 브라우저로 해당 주소에 접속하면
여전히 접속되지 않지만 터미널에 요청 데이터가 출력되는 것을 확인할 수 있다.
HTTP 요청에 대하여...
HTTP 요청은 다음과 같은 형식을 따른다.
Method Request-URI HTTP-Version CRLF
headers CRLF
message-body
앞서 살펴본 예제에서는 다음과 같았다.
GET / HTTP/1.1
Host: 127.0.0.1:7878
User-Agent: Mozilla/5.0 (X11; Ubuntu; Linux x86_64; rv:80.0) Gecko/20100101 Firefox/80.0
Accept: text/html,application/xhtml+xml,application/xml;q=0.9,image/webp,*/*;q=0.8
Accept-Language: en-US,en;q=0.5
Accept-Encoding: gzip, deflate
Connection: keep-alive
Upgrade-Insecure-Requests: 1
첫 번째 줄 Method Request-URI HTTP-Version CRLF는 요청 줄로,
클라이언트가 요청하는 정보를 나타낸다.
Method에는 GET, POST와 같은 요청 방식이 명시된다.
여담: GET 방식과 POST 방식 비교
- GET
URL에 사용자 요청 데이터를 추가하는 방식으로, URL 길이로 인해 4KB까지 요청 가능하며 URL에 데이터가 표현되어 보안 상의 취약성을 가지고 있다.- POST
사용자 요청 데이터가 소켓을 통해 따로 전송하는 방식으로, 데이터의 크기 제한이 없으며 다른 사람이 데이터를 확인할 수 없다.
우리 예제에서는 GET 방식이 사용되었음을 확인할 수 있다.
Request-URI는 어떤 URI Uniform Resource Identifier를 요청하는지 나타낸다.
URI는 통합 자원 식별자라고 번역되며, 시스템 상의 자원의 위치를 경로로 나타낸 것이다.
우리 예제에서는 root에 해당하는 /를 요청하였다.
그 뒤에는 HTTP-Version으로, 우리 예제에서는 HTTP/1.1다.
CRLF는 개행하여 다음줄 처음으로 이동함을 의미하고
그 아래로 헤더들이 이어지는 것을 확인할 수 있다.
GET 방식은 헤더까지만 있고 본문이 존재하지 않는다.
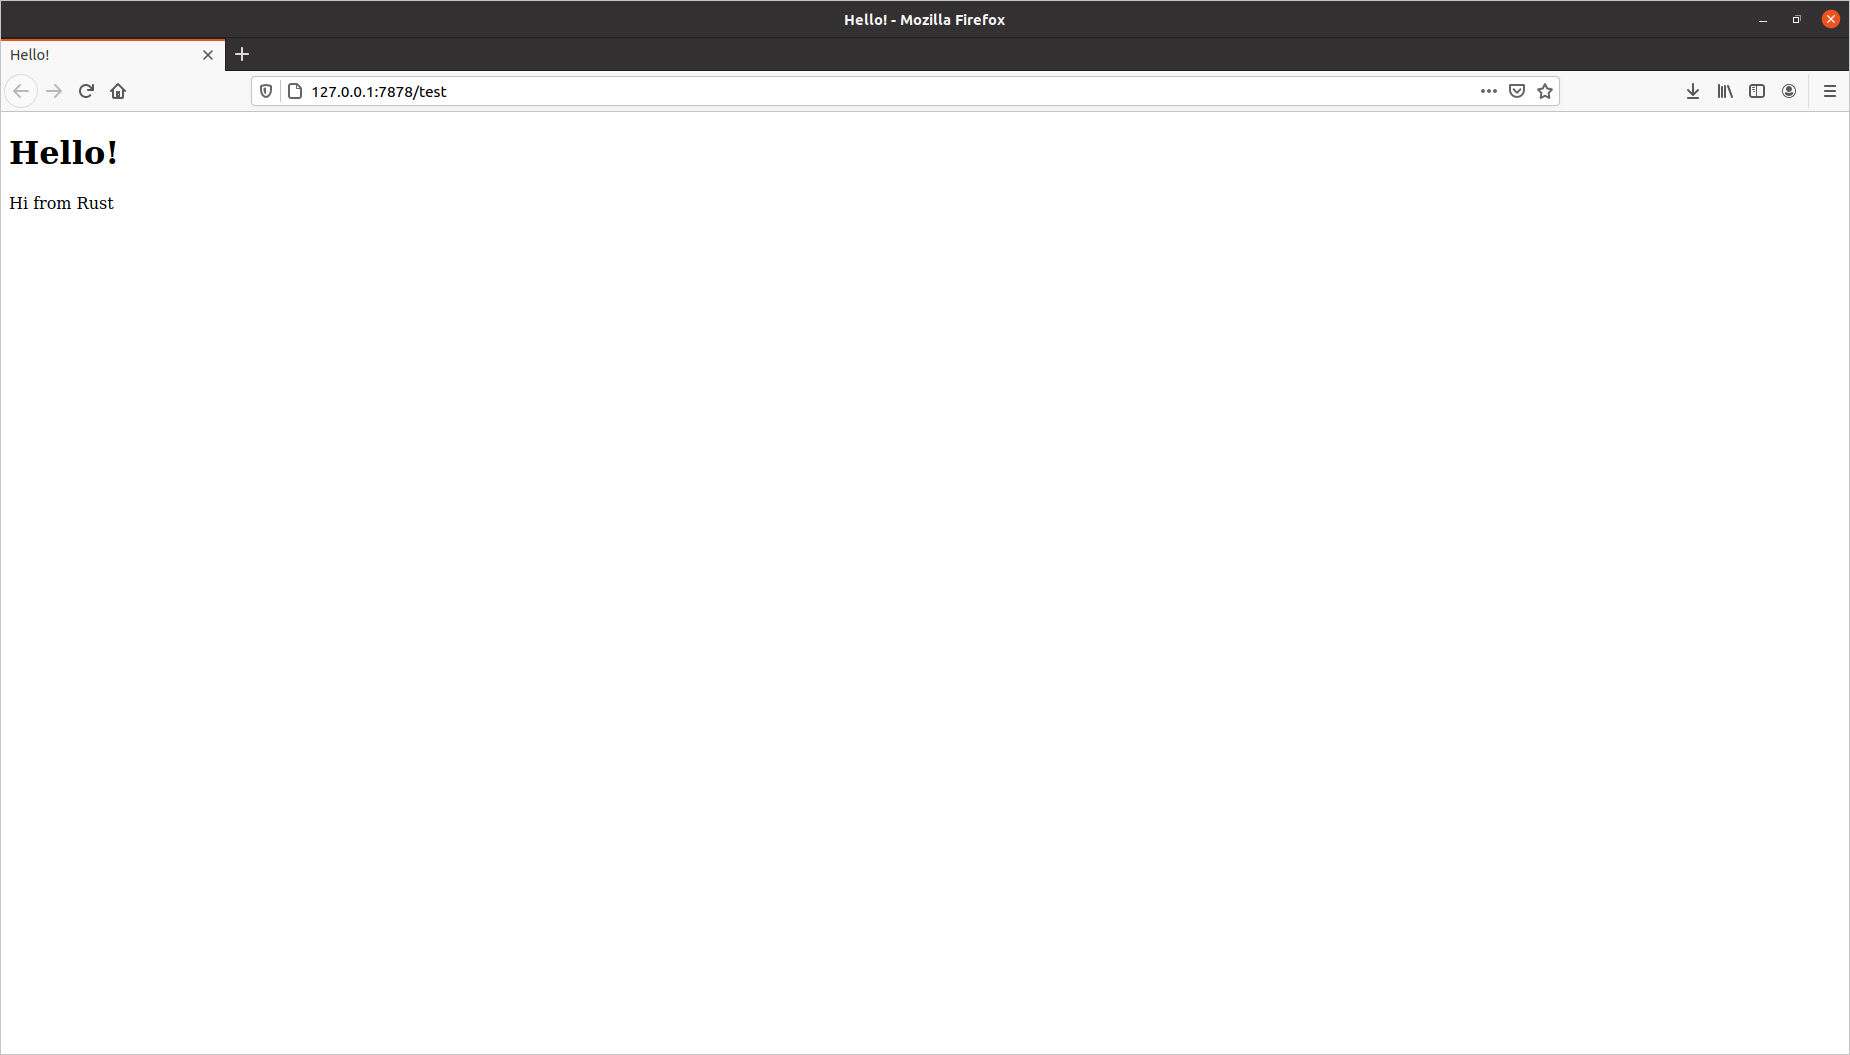
만약 우리가 127.0.0.1:7878가 아니라 127.0.0.1:7878/test와 같이 주소를 바꾼다면
HTTP 요청의 URI 또한 /test와 같이 변경되는 것을 확인할 수 있을 것이다.
응답 쓰기
그럼 이제 요청에 대한 응답을 작성해보자.
HTTP 응답은 다음과 같은 형식을 따른다.
HTTP-Version Status-Code Reason-Phrase CRLF
headers CRLF
message-body
첫 번째 줄 HTTP-Version Status-Code Reason-Phrase CRLF는 상태 줄로,
HTTP 버전과 요청의 결과에 해당하는 상태 코드, 상태코드에 대한 설명으로 구성된다.
예를 들어, HTTP 버전이 HTTP/1.1이고 성공적으로 응답이 전달됨을
헤더와 본문 없이 상태 줄만 전달한다면 HTTP/1.1 200 OK\r\n\r\n를 전달할 수 있다.
우리가 작성한 예제의 handle_connection 함수에서
요청을 출력하는 부분을 지우고 응답을 보내는 코드로 변경해보자.
peter@hp-laptop:~/rust-practice/chapter20/hello$ vi src/main.rs
src/main.rs// snip fn handle_connection(mut stream: TcpStream) { let mut buffer = [0; 1024]; stream.read(&mut buffer).unwrap(); //println!("Request: {}", String::from_utf8_lossy(&buffer[..])); let response = "HTTP/1.1 200 OK\r\n\r\n"; stream.write(response.as_bytes()).unwrap(); stream.flush().unwrap(); }
TcpStream을 통해 요청에 대한 응답을 보낼 땐
write 메서드에 응답을 byte로 변환하여 보내야 한다.
write의 매개변수 자료형이 &[u8]이기 때문이다.
응답을 보낼 때도 코드의 단순화를 위해 오류가 발생하면 그대로 종료되도록 unwrap을 사용한다.
flush는 write 메서드를 통해 작성한 것이 실제로 작성이 완료됨을 보장하기 위한 코드로
작성이 완료될 때까지 프로그램의 실행을 멈추고 기다린다.
이제 터미널에서 cargo run을 실행하고 브라우저를 다시 열어 주소에 접속해보자.
peter@hp-laptop:~/rust-practice/chapter20/hello$ cargo run
   Compiling hello v0.1.0 (/home/peter/rust-practice/chapter20/hello)
    Finished dev [unoptimized + debuginfo] target(s) in 0.35s
     Running `target/debug/hello`

이제 오류가 발생하지 않고 빈 화면이 뜨는 것을 확인할 수 있다.
HTML 반환
이제 빈 페이지가 아닌, 어떤 데이터를 응답과 함께 전송해보도록 하자.
HTML 문서를 하나 작성하고, 이것을 응답으로 전달할 것이다.
peter@hp-laptop:~/rust-practice/chapter20/hello$ vi hello.html
hello.html<!DOCTYPE html> <html lang="en"> <head> <meta charset="utf-8"> <title>Hello!</title> </head> <body> <h1>Hello!</h1> <p>Hi from Rust</p> </body> </html>
peter@hp-laptop:~/rust-practice/chapter20/hello$ vi src/main.rs
src/main.rsuse std::fs; // snip fn handle_connection(mut stream: TcpStream) { let mut buffer = [0; 1024]; stream.read(&mut buffer).unwrap(); //println!("Request: {}", String::from_utf8_lossy(&buffer[..])); let contents = fs::read_to_string("hello.html").unwrap(); let response = format!( "HTTP/1.1 200 OK\r\nContent-Length: {}\r\n\r\n{}", contents.len(), contents, ); stream.write(response.as_bytes()).unwrap(); stream.flush().unwrap(); }
이제 다시 실행하고 접속하면 우리가 작성한 HTML 문서를 확인할 수 있다.

그런데 우리가 작성한 코드는 어떤 URI에 대해서도 이 페이지를 보여준다.
일반적인 웹 사이트는 URI에 따라 다른 페이지를 보여주는데 말이다.
사실 그렇게 요청에 맞는 응답을 보내주는 게 합리적이긴 하다.
따라서 우리도 URI에 따라 선택적으로 응답하는 코드를 작성해보도록 하자.
선택적 응답
요청에 따른 선택적 응답을 위해서는 handle_connection 함수를 또 수정해야 한다.
HTTP 요청의 요청줄이 GET / HTTP/1.1\r\n라면 지금처럼 HTML 문서를 전달하고
다른 URI가 전달되었을 경우에는 404 Not Found를 띄우도록 작성해보자.
그리고 이를 위한 404.html 파일도 작성하도록 하겠다.
peter@hp-laptop:~/rust-practice/chapter20/hello$ vi src/main.rs
src/main.rs// snip fn handle_connection(mut stream: TcpStream) { let mut buffer = [0; 1024]; stream.read(&mut buffer).unwrap(); //println!("Request: {}", String::from_utf8_lossy(&buffer[..])); let get = b"GET / HTTP/1.1\r\n"; if buffer.starts_with(get) { let contents = fs::read_to_string("hello.html").unwrap(); let response = format!( "HTTP/1.1 200 OK\r\nContent-Length: {}\r\n\r\n{}", contents.len(), contents, ); stream.write(response.as_bytes()).unwrap(); stream.flush().unwrap(); } else { let status_line = "HTTP/1.1 404 NOT FOUND\r\n\r\n"; let contents = fs::read_to_string("404.html").unwrap(); let response = format!( "{}{}", status_line, contents, ); stream.write(response.as_bytes()).unwrap(); stream.flush().unwrap(); } }
peter@hp-laptop:~/rust-practice/chapter20/hello$ vi 404.html
404.html<!DOCTYPE html> <html lang="en"> <head> <meta charset="utf-8"> <title>Hello!</title> </head> <body> <h1>Oops!</h1> <p>Sorry, I don't know what you're asking for.</p> </body> </html>
자, 이제 루트 페이지에서는 hello.html의 내용이 뜨지만
URI를 변경하여 접속하면 404.html의 내용이 뜨는 것을 확인할 수 있다.
peter@hp-laptop:~/rust-practice/chapter20/hello$ cargo run
   Compiling hello v0.1.0 (/home/peter/rust-practice/chapter20/hello)
    Finished dev [unoptimized + debuginfo] target(s) in 0.34s
     Running `target/debug/hello`

그런데 다시 handle_connection 함수를 살펴보니 코드 중복이 상당히 많다.
사실 if 블록과 else 블록은 상태 줄과 파일 이름 외에는 동일하게 작성할 수 있는 코드다.
그런 의미에서 이 부분에 대한 리팩토링을 진행해보자.
리팩토링
상태 줄과 파일 이름 외에는 동일하게 작성할 수 있으니
이 둘을 별개의 변수로 분리하고 나머지는 같은 코드를 공유하도록 변경해보자.
요청 줄의 내용에 따라 상태 줄과 파일 이름을 결정하고
그 뒤로는 그 변수들에 어떤 값이 들어있든 동일하게 작동하도록 하면 된다.
peter@hp-laptop:~/rust-practice/chapter20/hello$ vi src/main.rs
src/main.rs// snip fn handle_connection(mut stream: TcpStream) { let mut buffer = [0; 1024]; stream.read(&mut buffer).unwrap(); //println!("Request: {}", String::from_utf8_lossy(&buffer[..])); let get = b"GET / HTTP/1.1\r\n"; let (status_line, filename) = if buffer.starts_with(get) { ("HTTP/1.1 200 OK\r\n\r\n", "hello.html") } else { ("HTTP/1.1 404 NOT FOUND\r\n\r\n", "404.html") }; let contents = fs::read_to_string(filename).unwrap(); let response = format!( "{}{}", status_line, contents, ); stream.write(response.as_bytes()).unwrap(); stream.flush().unwrap(); }
훨씬 깔끔해졌고 가독성도 더 높아졌다.
그리고 다른 요청 줄에 대한 분기를 추가하고자 한다고 해도
리팩토링 하기 이전보다 훨씬 쉽게 추가할 수 있게 되었다.
단지 조건문에 buffer.starts_with 을 통해 다른 요청 줄을 조건으로 추가하면 된다.
이 포스트의 내용은 공식문서의 20장 1절 Building a Single-Threaded Web Server에 해당합니다.