
DAY 19 | Flutter 데모 앱 만들기: 비휘발 데이터 사용하기
우리는 shared_preferences를 통해 앱이 종료된 후에도 데이터가 남아있도록 구현할 것이다. 이 녀석은 앱 바깥 로컬 영역에 데이터를 저장하는데, 덮어씌워질 수도 있고 날아갈 수도 있어서 안전성은 조금 떨어진다. 주로 환경 설정 데이터처럼 데이터가 날아가도 default 값을 사용하여 운영할 수 있는 데이터를 담아둔다.
지금까지 우리가 한 것과 같은 앱 boundary 내 통신은 메모리 통신이기 때문에 속도가 빠르다. 앱 바깥에 저장되어 있는 로컬 데이터와 통신할 때는 속도가 느려지고 리모트 데이터와 통신할 땐 훨씬 더 느리다. 따라서 외부 데이터 통신을 할 땐 concurrency를 통한 제어를 해야 한다.
Future 로 감싼 채 전달된 비동기 데이터를 화면에 뿌리는 방법은 여러 가지가 있지만 가장 쉬운 건 FutureBuilder 다. 필요에 따라 나중엔 난이도가 높지만 손이 덜 가는 방식을 쓰게 될 수도 있지만 이걸로도 충분히 잘 구현할 수 있다.
FutureBuilder 를 사용한 widget
FutureBuilder 는 future property와 builder property를 필수로 갖는다. future property는 Future<T> type이며, 이 녀석의 Generic type을 FutureBuilder<T> 로 명시해 주는 게 일반적이다. builder property는 Widget Function(BuildContext, AsyncSnapshot<T>) type이며, future property에 전달된 값을 적절히 활용하여 widget을 build하는 코드를 가진다.
우리는 Dart에서 Future 를 배울 때 Future 가 세 가지 상태를 갖는다는 것을 배웠다.
- Uncompleted (아직 asynchronous 작업이 끝나지 않음)
- Completed
- Completed with a value (asynchronous 작업이 정상 종료됨)
- Completed with an error (asynchronous 작업 중 오류 발생)
이에 따라 builder property에 전달되는 callback function에도 각 상태에 따른 코드를 작성해 주어야 한다. 따라서 FutureBuilder 의 기본 형태는 다음과 같다.
FutureBuilder<Object?>(
  future: myFuture,
  builder: (context, snapshot) {
    if (snapshot.connectionState == ConnectionState.waiting) {
      // Uncompleted 상태에 대한 처리
    }
    if (snapshot.hasError) {
      // Completed with an error 상태에 대한 처리
    }
    // Completed with a value 상태에 대한 처리
    data = snapshot.data;
    return Container();
  },
)
메인 화면 대시보드의 오늘의 운동 시간을 FutureBuilder 로 감싸 보자. 오늘의 운동 시간을 담은 DashboardCard 의 info property로 전달된 Column 을 FutureBuilder 로 감쌀 것이다. 마우스 호버 시 전구 모양으로 뜨는 Context Action에서 [Wrap with FutureBuilder]를 선택하여 감쌀 수 있다.
future 에는 _dailyMinutes 에 해당하는 int 값이 들어가므로 우리의 FutureBuilder 는 FutureBuilder<int> 로 작성한다. future 에 WorkoutManager.getTodayWorkoutMinutes() 를 직접 전달하여 이 녀석이 return하는 Future<int> 를 future property에 담아도 되지만, 이렇게 할 경우 function이 필요 이상으로 자주 호출되는 이슈가 발생할 수 있다. 지금 상황에서는 크게 문제되지 않지만 비용이 많이 드는 remote database를 사용하는 등의 상황에서는 리소스 낭비가 문제로 이어질 수 있다. 따라서 별도의 variable을 선언하여 사용하도록 한다.
variable을 선언하여 사용할 경우 값이 자동으로 갱신되지 않기 때문에 lifecycle function을 사용해야 한다. initState() 를 통해 최초로 생성될 때 WorkoutManager.getTodayWorkoutMinutes() 를 호출하게 하고,didUpdateWidget() 을 통해 WorkoutHomePage 로의 화면 이동이 있을 때 또 호출하게 할 수 있다. go_router 방식의 특성 상 다른 화면에 다녀 오면 widget tree가 갱신되어 didUpdateWidget() 이 trigger되기 때문이다.
builder property에 전달되는 callback function에는 Future 의 상태에 따른 예외처리 코드를 추가해 준다.
lib/workout_home_page.dart// 앞 부분 생략 class _WorkoutHomePageState extends State<WorkoutHomePage> { // final int _dailyMinutes = 450; final int _dailyGoal = 500; final int _dailyKcal = 2400; final int _monthlyHours = 403; final int _monthlyGoal = 450; final int _lastMonthlyHours = 393; final NumberFormat commaThousands = NumberFormat.decimalPattern(); late Future<int> _todayMinutes; void initState() { super.initState(); _todayMinutes = WorkoutManager.getTodayWorkoutMinutes(); } void didUpdateWidget(covariant WorkoutHomePage oldWidget) { super.didUpdateWidget(oldWidget); _todayMinutes = WorkoutManager.getTodayWorkoutMinutes(); } // 생략 }
lib/workout_home_page.dart>_WorkoutHomePageState>build()// 앞 부분 생략 info: FutureBuilder<int>( future: _todayMinutes, builder: (context, snapshot) { if (snapshot.connectionState == ConnectionState.waiting) { return Center(child: CircularProgressIndicator()); } if (snapshot.hasError) { return Center(child: Text('Data Error')); } int? data = snapshot.data; return Column( mainAxisAlignment: MainAxisAlignment.spaceEvenly, children: [ Stack( alignment: Alignment.center, children: [ SizedBox( width: 120, height: 120, child: CircularProgressIndicator( value: data! / _dailyGoal, color: Colors.blue, backgroundColor: colorScheme.outlineVariant, ), ), Padding( padding: EdgeInsetsGeometry.symmetric( vertical: 20, ), child: Text.rich( textAlign: TextAlign.center, TextSpan( children: [ TextSpan( text: '운동 시간\n', style: textTheme.titleMedium ?.copyWith( color: colorScheme.outline, ), ), TextSpan( text: '$data분', style: textTheme.titleLarge ?.copyWith( color: Colors.blue, fontWeight: FontWeight.bold, ), ), ], ), ), ), ], ), Text.rich( textAlign: TextAlign.center, TextSpan( children: [ TextSpan( text: '소모 칼로리\n', style: textTheme.bodyMedium?.copyWith( color: colorScheme.outline, ), ), TextSpan( text: '${commaThousands.format(_dailyKcal)} kcal', style: textTheme.bodyLarge?.copyWith( color: Colors.blue, fontWeight: FontWeight.bold, ), ), ], ), ), ], ); }, ), // 뒷 부분 생략
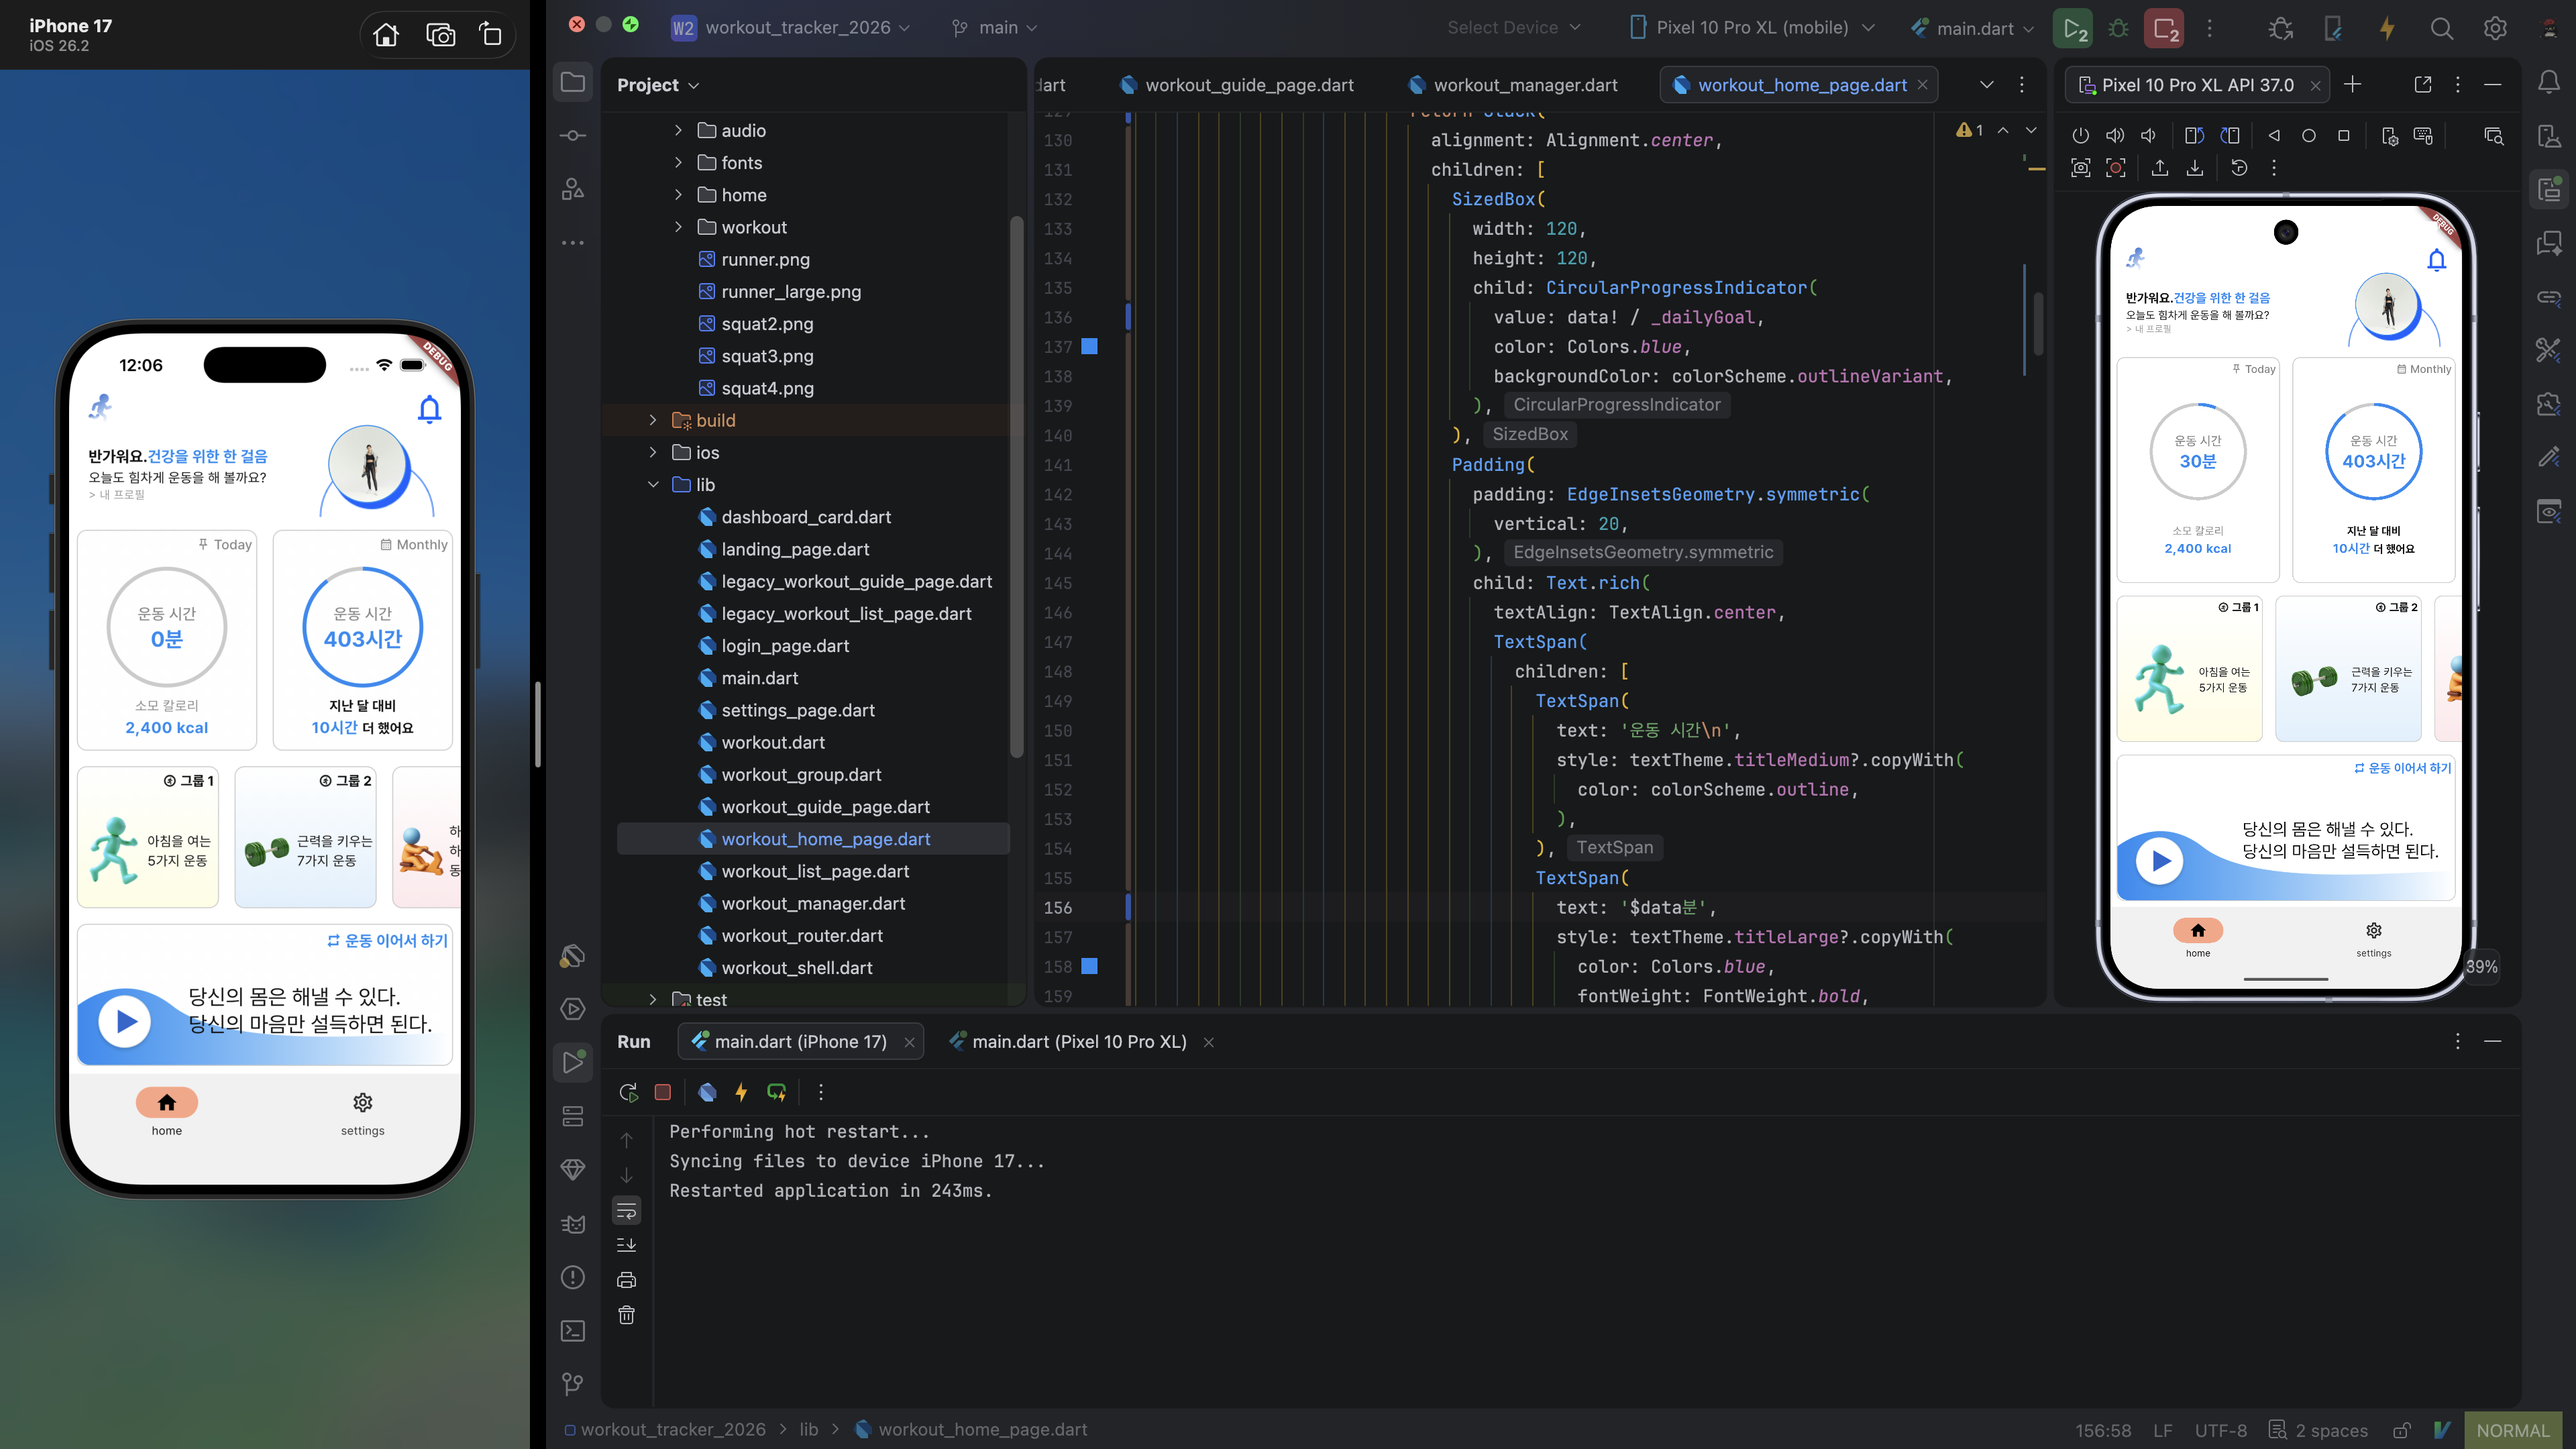
좌측은 아무 운동이 이루어지지 않은 상태. 우측은 운동 하나 하고 나온 상태.
여러 개의 데이터를 사용하는 FutureBuilder
지금은 오늘의 운동 시간만 shared_preferences 및 FutureBuilder 를 사용하도록 구현되어 있다. 그런데 논리적으로 생각할 때 비휘발 데이터로 로컬에 저장되어야 할 것들이 더 남아 있다.
- 오늘의 운동 시간 (구현 완료)
- 오늘의 소모 칼로리
- 이번 달 운동 시간
- 지난 달 운동 시간 ("N시간 더 했어요" 용)
- 마지막으로 하던 운동 ([운동 이어서 하기] 용)
오늘의 운동 시간과 오늘의 소모 칼로리는 하나의 대시보드 카드에 묶여 있는 연관 데이터이기 때문에 FutureBuilder 를 공유하도록 구현하면 좋을 것 같다. 마찬가지로 우측 월간 운동 시간 카드도 하나의 FutureBuilder 를 사용한다. 그리고 하단의 [운동 이어서 하기]도 하나의 FutureBuilder 를 사용하면 좋을 것 같다.
개별 FutureBuilder 를 따로 구현하는 건 지금까지 배웠던 걸로 할 수 있는데 두 개 이상의 데이터가 묶여 있는 FutureBuilder 는 어떻게 구현할 수 있을지 생각해 보아야 한다.
여기서 쓸 만한 방식은 class와 record가 있다. 가독성과 타입 안정성 등을 고려했을 때 class로 구현하는 게 가장 좋지만, boilerplate가 많아 개발 performance가 떨어진다. record를 사용하는 게 그럭저럭 합리적인 지점이다.
record는 Python의 tuple과 비슷한 느낌이다. 생성 후 값을 바꿀 수 없고, 서로 다른 type의 데이터를 한 번에 담을 수 있어 function에서 여러 개의 값을 return 하고자 할 때 유용하다는 공통점이 있다.
Dart의 record는 Python의 tuple과 달리 이름을 지정할 수 있어 Map에 타입 안정성을 더한 절충안으로 쓸 수 있을 것 같다. 보통은 이름 없이 positional로 쓴 다는 모양이지만.
Python이었으면 tuple을 썼을 것 같고, Rust였으면 impl 없는 struct 를 썼을 것 같다. class는 struct보다 boilerplate가 많은 느낌이라 애매하군. 여기선 record가 확실히 합리적일 것 같다.
데이터가 같이 바뀔 수도 있고 따로 바뀔 수도 있는 경우라면 각각을 읽고 쓰는 static method를 구현하고 하나로 묶어주어야겠지만, 어차피 운동 하나 하면 시간과 칼로리는 같이 오를 테니 기존에 작성한 getTodayWorkoutMinutes() 와 increaseTodayWorkoutMinutes() 를 수정하도록 하겠다.
lib/workout_home_page.dartimport 'package:flutter/material.dart'; import 'package:go_router/go_router.dart'; import 'package:intl/intl.dart'; import 'dashboard_card.dart'; import 'workout_manager.dart'; class WorkoutHomePage extends StatefulWidget { const WorkoutHomePage({super.key}); State<WorkoutHomePage> createState() => _WorkoutHomePageState(); } class _WorkoutHomePageState extends State<WorkoutHomePage> { // final int _dailyMinutes = 450; final int _dailyGoal = 500; // final int _dailyKcal = 2400; final int _monthlyHours = 403; final int _monthlyGoal = 450; final int _lastMonthlyHours = 393; final NumberFormat commaThousands = NumberFormat.decimalPattern(); // late Future<int> _todayMinutes; late Future<({int calories, int minutes})> _todayData; void initState() { super.initState(); // _todayMinutes = WorkoutManager.getTodayWorkoutMinutes(); // WorkoutManager.resetTodayWorkoutData(); _todayData = WorkoutManager.getTodayWorkoutData(); } void didUpdateWidget(covariant WorkoutHomePage oldWidget) { super.didUpdateWidget(oldWidget); // _todayMinutes = WorkoutManager.getTodayWorkoutMinutes(); _todayData = WorkoutManager.getTodayWorkoutData(); } // 생략 }
lib/workout_home_page.dart>_WorkoutHomePageState>build()// 앞 부분 생략 info: FutureBuilder<({int minutes, int calories})>( // future: _todayMinutes, future: _todayData, // MODIFIED! builder: (context, snapshot) { if (snapshot.connectionState == ConnectionState.waiting) { return Center(child: CircularProgressIndicator()); } if (snapshot.hasError) { return Center(child: Text('Data Error')); } // int? data = snapshot.data; final workoutMinutes = snapshot.data?.minutes ?? 0; // MODIFIED! final workoutCalories = snapshot.data?.calories ?? 0; // MODIFIED! return Column( mainAxisAlignment: MainAxisAlignment.spaceEvenly, children: [ Stack( alignment: Alignment.center, children: [ SizedBox( width: 120, height: 120, child: CircularProgressIndicator( value: workoutMinutes / _dailyGoal, // MODIFIED! color: Colors.blue, backgroundColor: colorScheme.outlineVariant, ), ), Padding( padding: EdgeInsetsGeometry.symmetric( vertical: 20, ), child: Text.rich( textAlign: TextAlign.center, TextSpan( children: [ TextSpan( text: '운동 시간\n', style: textTheme.titleMedium ?.copyWith( color: colorScheme.outline, ), ), TextSpan( text: '$workoutMinutes분', // MODIFIED! style: textTheme.titleLarge ?.copyWith( color: Colors.blue, fontWeight: FontWeight.bold, ), ), ], ), ), ), ], ), Text.rich( textAlign: TextAlign.center, TextSpan( children: [ TextSpan( text: '소모 칼로리\n', style: textTheme.bodyMedium?.copyWith( color: colorScheme.outline, ), ), TextSpan( text: '${commaThousands.format(workoutCalories)} kcal', // MODIFIED! style: textTheme.bodyLarge?.copyWith( color: Colors.blue, fontWeight: FontWeight.bold, ), ), ], ), ), ], ); }, ), // 뒷 부분 생략
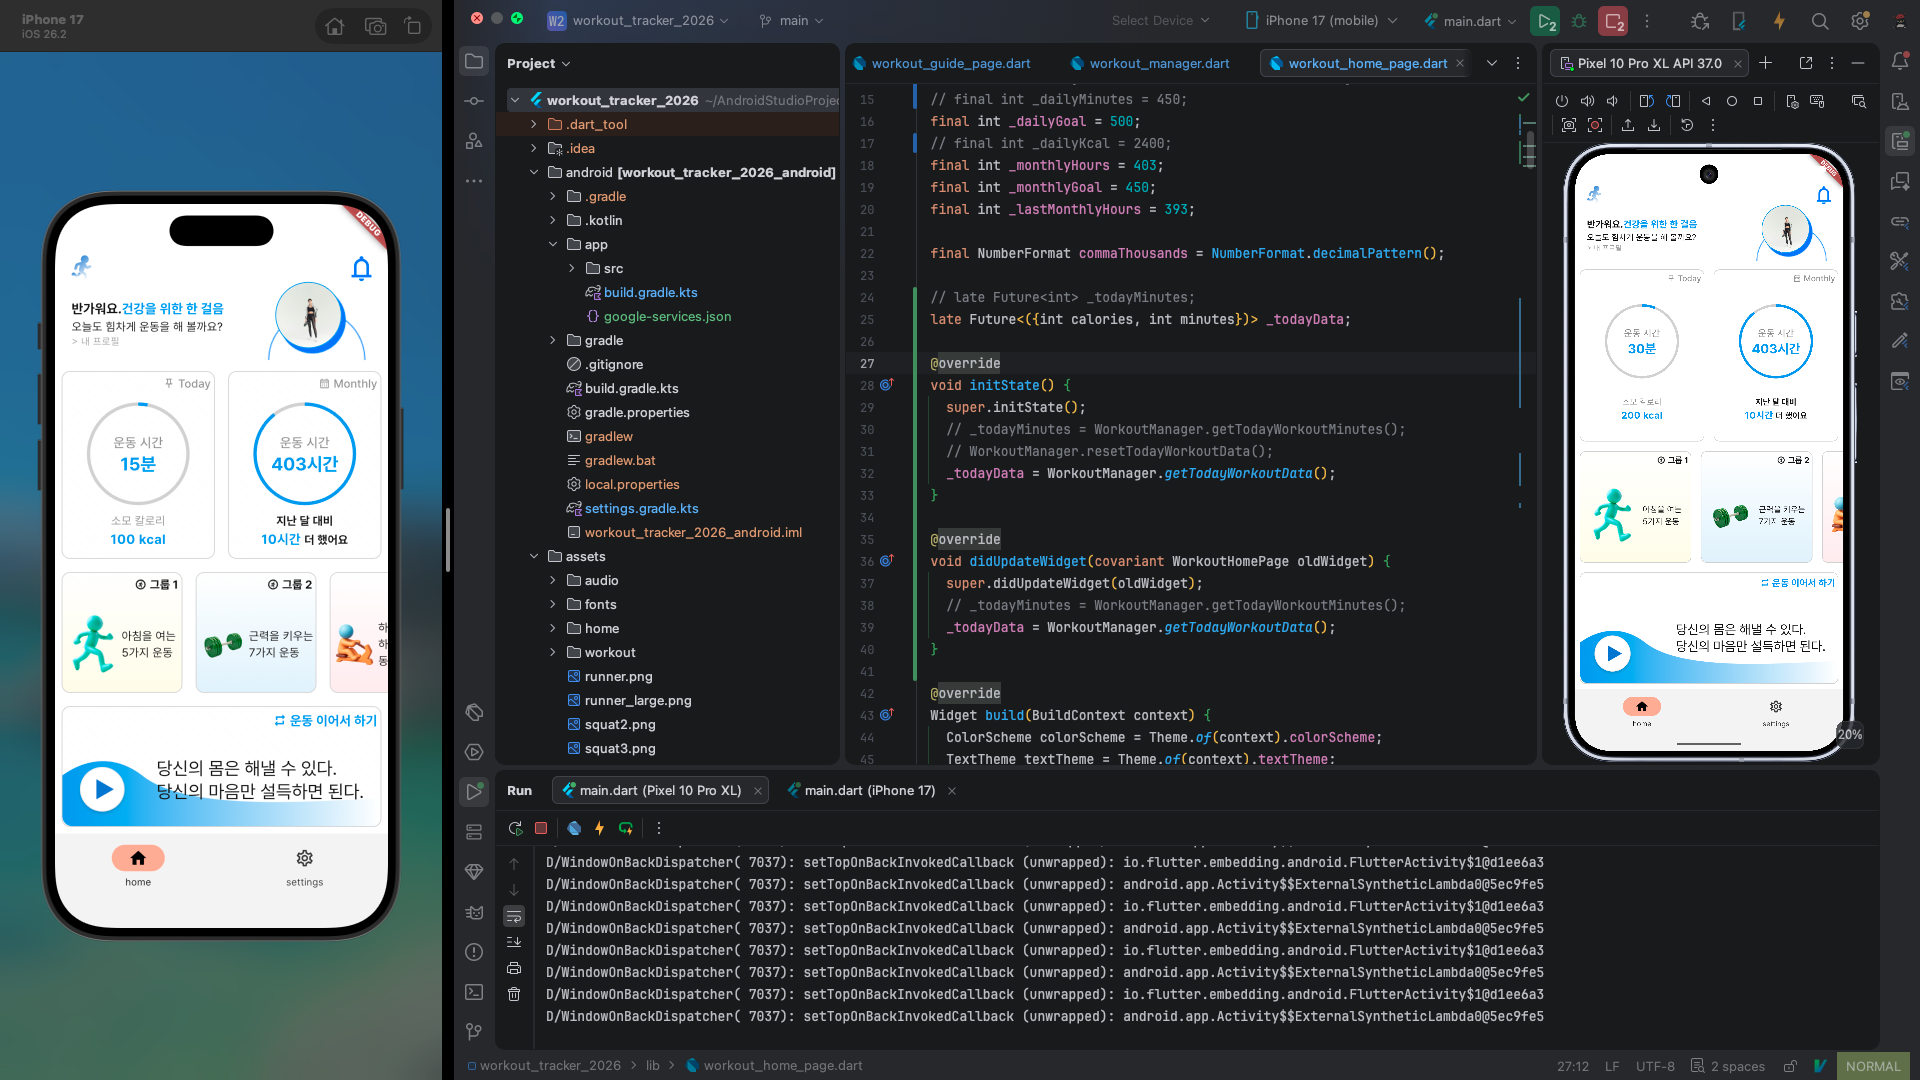
여기선 월간 운동 카드 데이터까지 다루지는 않겠다.
운동 이어서 하기
WorkoutGuidePage 에 들어갈 때마다 현재 groupIndex 및 workoutIndex 를 저장하고 [운ㄷ농 이어서 하기]를 누르면 해당 운동으로 이동하는 로직을 작성한다. 처음에는 WorkoutListPage 에 들어가면 groupIndex 를, WorkoutGuidePage 에 들어가면 workoutIndex 를 저장하게 할까 했는데, 언젠가 deep link를 통해 WorkoutGuidePage 에 들어가는 상황이 발생할 경우 정상적으로 작동하지 않게 되어 버리기 때문에 이와 같이 작성하였다.
저장되어 있는 값이 없을 경우 읽어들일 때 -1 이라는 값이 들어가는데, 이 값이 전달되었을 경우에는 최근 운동이 존재하지 않는다는 알림을 띄우도록 했다.
lib/workout_mananger.dart// 앞 부분 생략 static Future<({int groupIndex, int workoutIndex})> getRecentWorkout() async { int recentGuideIndex = await asyncPrefs.getInt('recentGuideIndex') ?? -1; int recentWorkoutIndex = await asyncPrefs.getInt('recentWorkoutIndex') ?? -1; return (groupIndex: recentGuideIndex, workoutIndex: recentWorkoutIndex); } static Future<void> setRecentWorkout(int groupIndex, int workoutIndex) async { await asyncPrefs.setInt('recentGuideIndex', groupIndex); await asyncPrefs.setInt('recentWorkoutIndex', workoutIndex); } // 뒷 부분 생략
lib/workout_home_page.dart// 앞 부분 생략 Expanded( flex: 2, child: DashboardCard( routeOnTap: () { continueWorkout(); // NEW! }, labelIcon: Icon( Icons.repeat_outlined, size: textTheme.titleMedium?.fontSize, color: Colors.blue, fontWeight: FontWeight.bold, ), labelText: Text( '운동 이어서 하기', style: textTheme.titleMedium?.copyWith( color: Colors.blue, fontWeight: FontWeight.bold, ), ), info: Stack( children: [ Align( alignment: Alignment.bottomLeft, child: Image.asset('assets/home/continue.png'), ), Align( alignment: Alignment.centerRight, child: Padding( padding: EdgeInsetsGeometry.only(right: 20), child: Text( '당신의 몸은 해낼 수 있다.\n당신의 마음만 설득하면 된다.', style: textTheme.titleLarge, ), ), ), ], ), ), ), // 뒷 부분 생략
lib/workout_guide_page.dart// 앞 부분 생략 void initState() { super.initState(); _player.setReleaseMode(ReleaseMode.loop); workouts = WorkoutManager.groups[widget.groupIndex].workouts; _workoutIndex = widget.workoutIndex; _currentWorkout = workouts[_workoutIndex]; _remainSeconds = _currentWorkout.minutes * 60; WorkoutManager.increaseTodayWorkoutData(minutes: _currentWorkout.minutes, calories: _currentWorkout.kcal); WorkoutManager.setRecentWorkout(widget.groupIndex, _workoutIndex); // NEW! } // 생략 void _next() { _workoutIndex = (_workoutIndex + 1) % workouts.length; _currentWorkout = workouts[_workoutIndex]; _remainSeconds = _currentWorkout.minutes * 60; WorkoutManager.increaseTodayWorkoutData(minutes: _currentWorkout.minutes, calories: _currentWorkout.kcal); WorkoutManager.setRecentWorkout(widget.groupIndex, _workoutIndex); // NEW! } void _prev() { _workoutIndex = (_workoutIndex - 1) % workouts.length; _currentWorkout = workouts[_workoutIndex]; _remainSeconds = _currentWorkout.minutes * 60; WorkoutManager.increaseTodayWorkoutData(minutes: _currentWorkout.minutes, calories: _currentWorkout.kcal); WorkoutManager.setRecentWorkout(widget.groupIndex, _workoutIndex); // NEW! } // 뒷 부분 생략
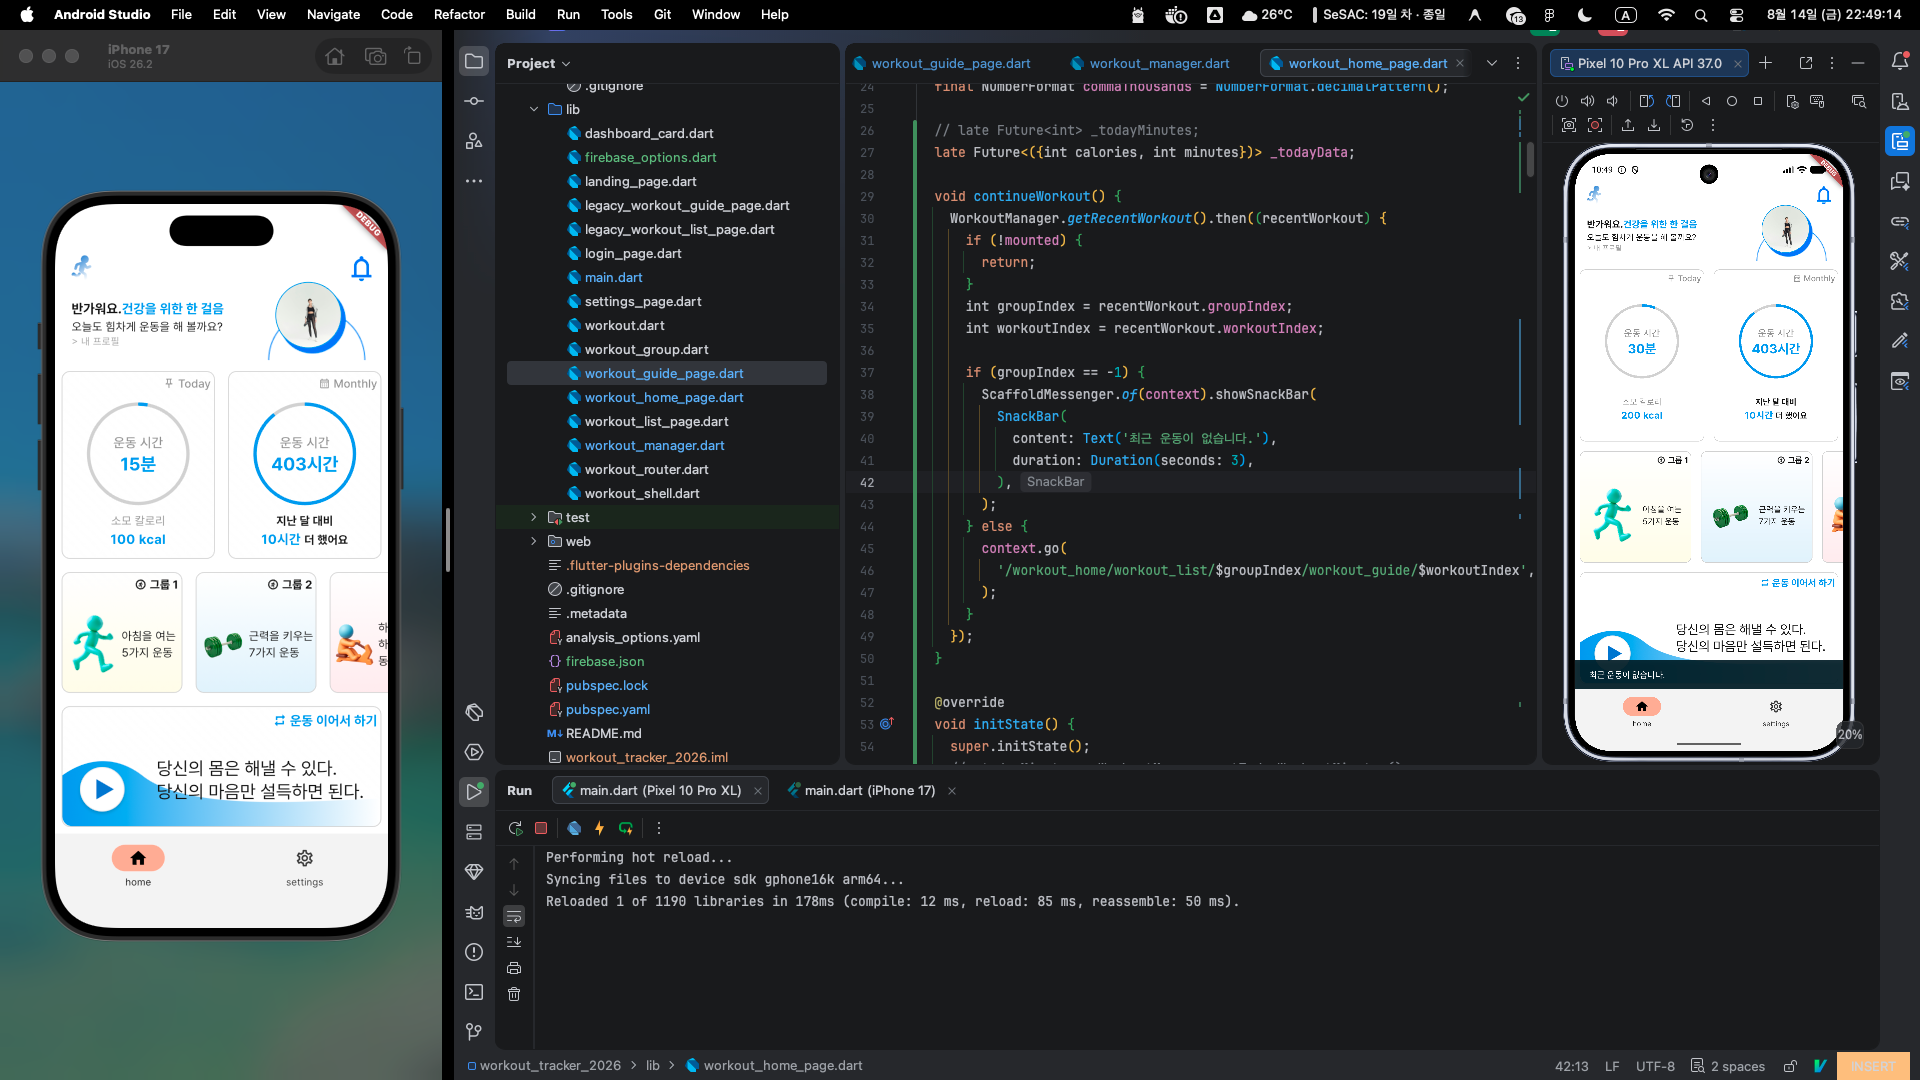
Firebase 설정
Firebase는 앱 개발 시 backend를 서비스로서 제공해 준다. 이런 걸 BaaS(Backend as a Service)라고 한다. 처음에는 RealtimeDatabase 및 부가적인 몇 가지로 시작된 서비스인데 점점 확장되어 이제는 중소형 앱 서비스 수준에서 흔히 선택하는 서비스가 되었다.
백엔드를 구측하는 것과의 차이
백엔드 서버 구측 Firebase 사용 낮은 서버 비용 높은 서버 비용 새로운 게 필요해도 인프라 비용 추가 안됨 새로운 거 추가되는 만큼 인프라 비용 추가 높은 인건비 낮은 인건비 규모가 큰 앱 개발 시 유리 중소형 서비스 개발 시 유리 보통은 규모가 커지면 앱 자체를 리뉴얼하기 때문에 대형 서비스를 목표로 하더라도 Firebase로 시작하여 추후 서버 비용이 인건비를 넘어서는 규모가 되었을 때 그 외의 아키텍처도 재설계하며 리뉴얼하는 게 유리하다.
Firebase 설정을 해 보자. 나는 지금은 방치되어 있는 옛 포트폴리오 사이트를 Firebase로 호스팅하기도 했고 학생 때 건드려 보던 것도 있어 언젠가의 흔적들이 좀 있더라. 아무튼 [새 프로젝트 만들기] 를 눌러 프로젝트를 생성한다.
이때, 프로젝트 이름은 중복될 수 있지만 프로젝트 ID는 중복되지 않는다. 내 프로젝트뿐만 아니라 전세계 모두에게서 중복될 수 없다. 프로젝트 ID는 기본적으로 프로젝트 이름과 동일하게 설정되지만 기존에 존재하는 프로젝트와 이름이 겹칠 경우 임의의 해시 값이 뒤에 붙는다.
프로젝트 이름을 지을 때는 중복된 이름의 프로젝트가 없었지만 최종적으로 생성 버튼을 눌렀을 때 그 사이에 그 이름을 가진 프로젝트가 생성된다면 ID 충돌이 발생하여 오류가 발생할 수 있다. (그렇기 때문에 강사님과는 다른 이름으로 프로젝트를 생성했는데 그 사이에 어느 수강생이 같은 이름으로 프로젝트 생성을 해버렸는지 강사님이 ID 충돌을 겪으시더라.)
하여간 프로젝트를 생성하고 나면 다음과 같은 화면이 뜬다.
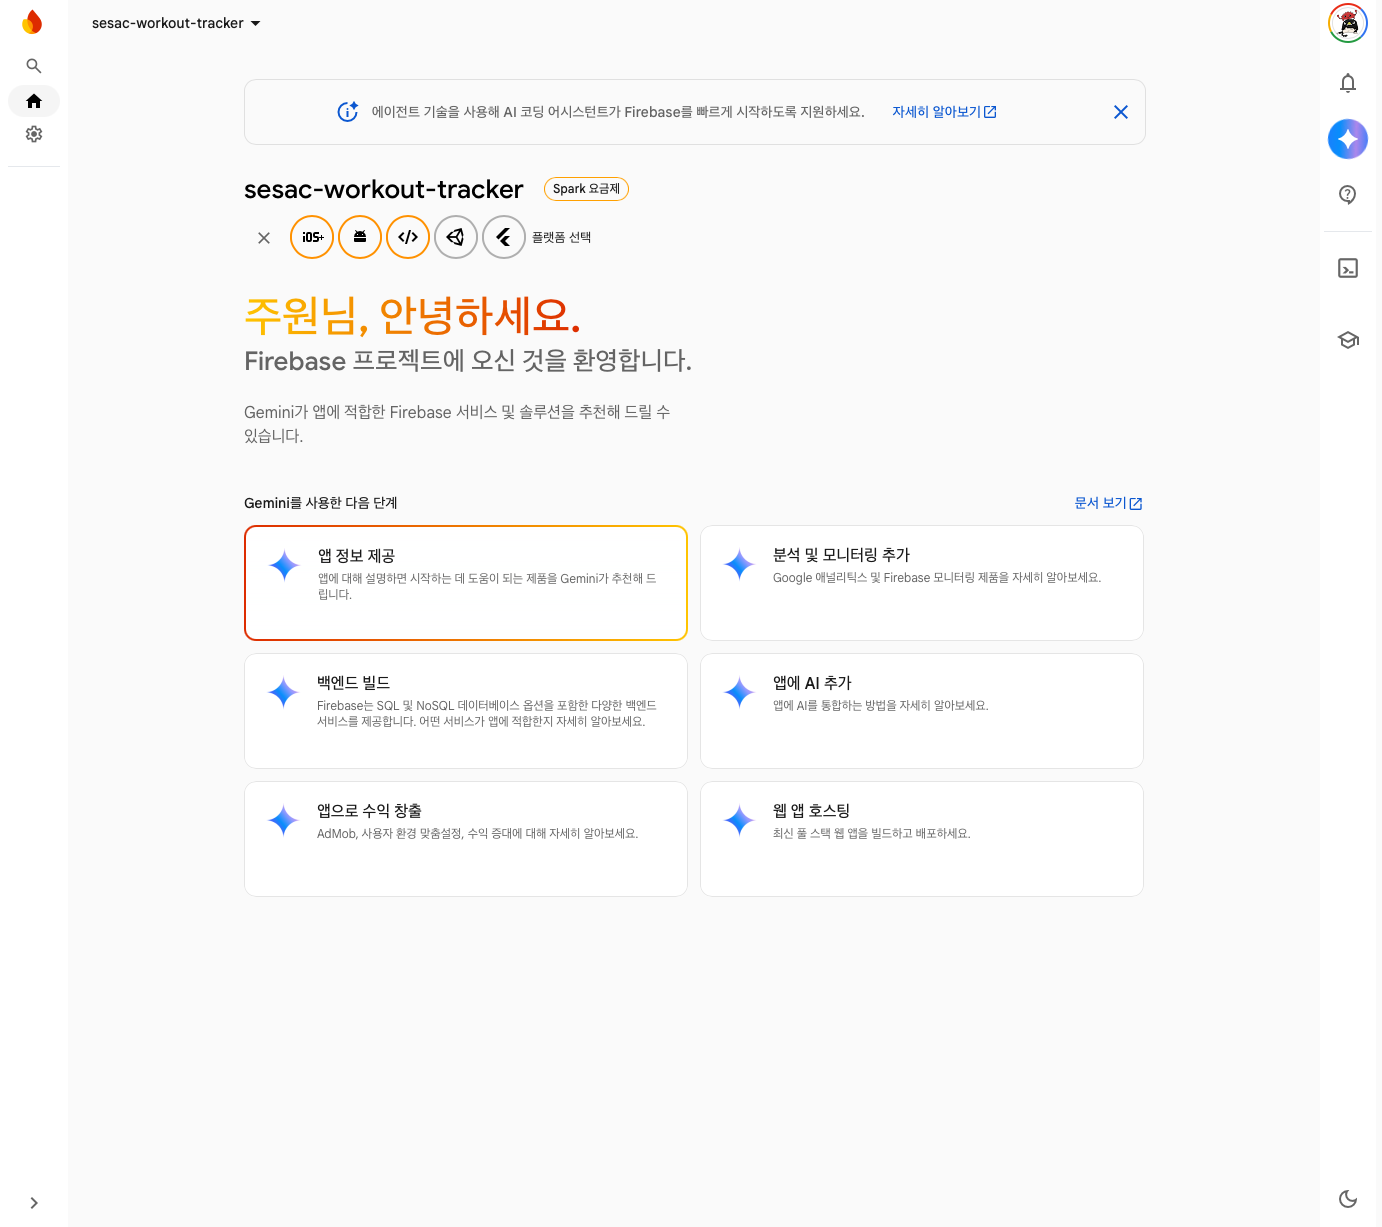
앱 추가 버튼을 누르고 Flutter 프로젝트를 선택한다.
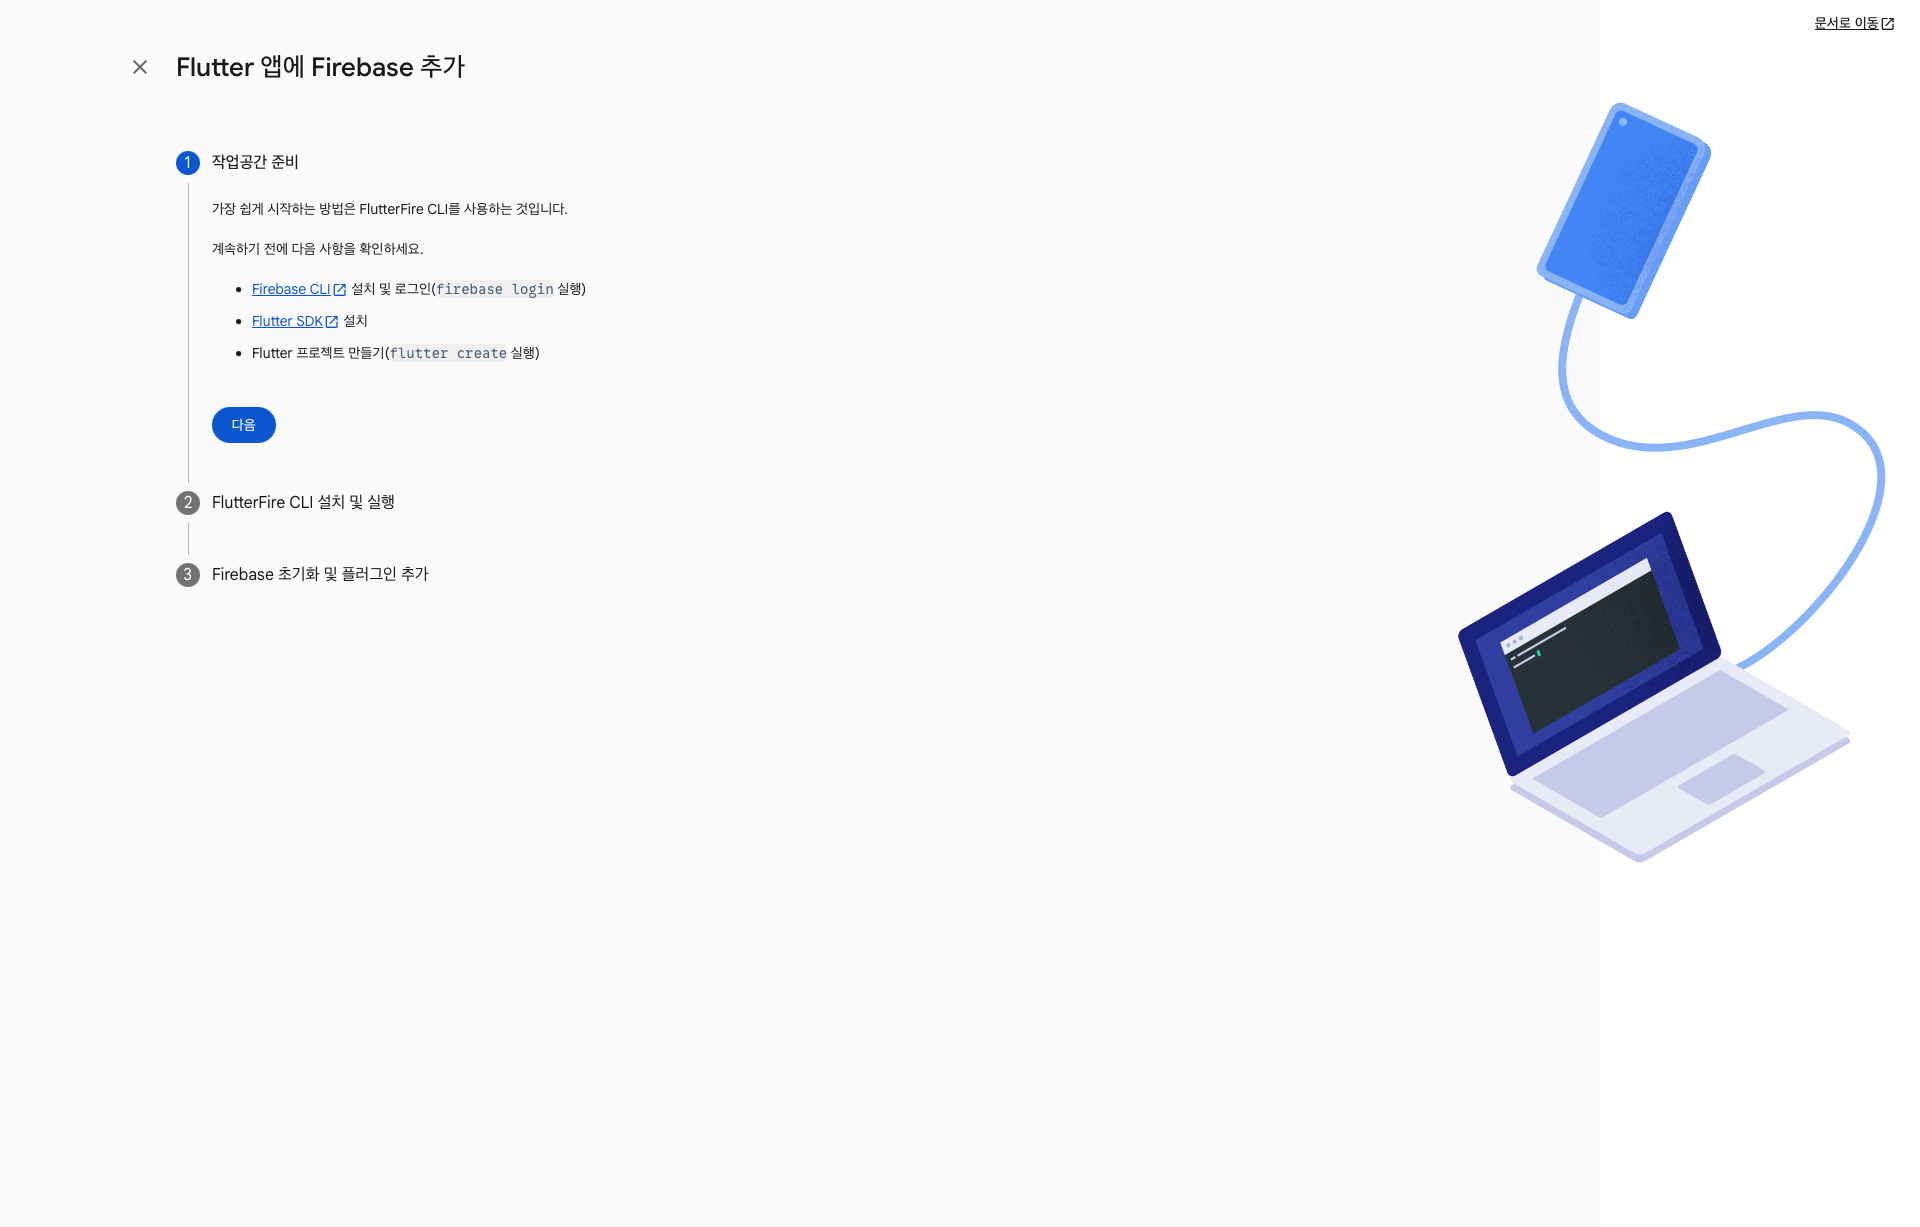
Firebase는 이미 설치되어 있으니 그냥 다음을 누르면 되고, FlutterFire는 프로젝트 root에서 활성화 해주도록 하자.
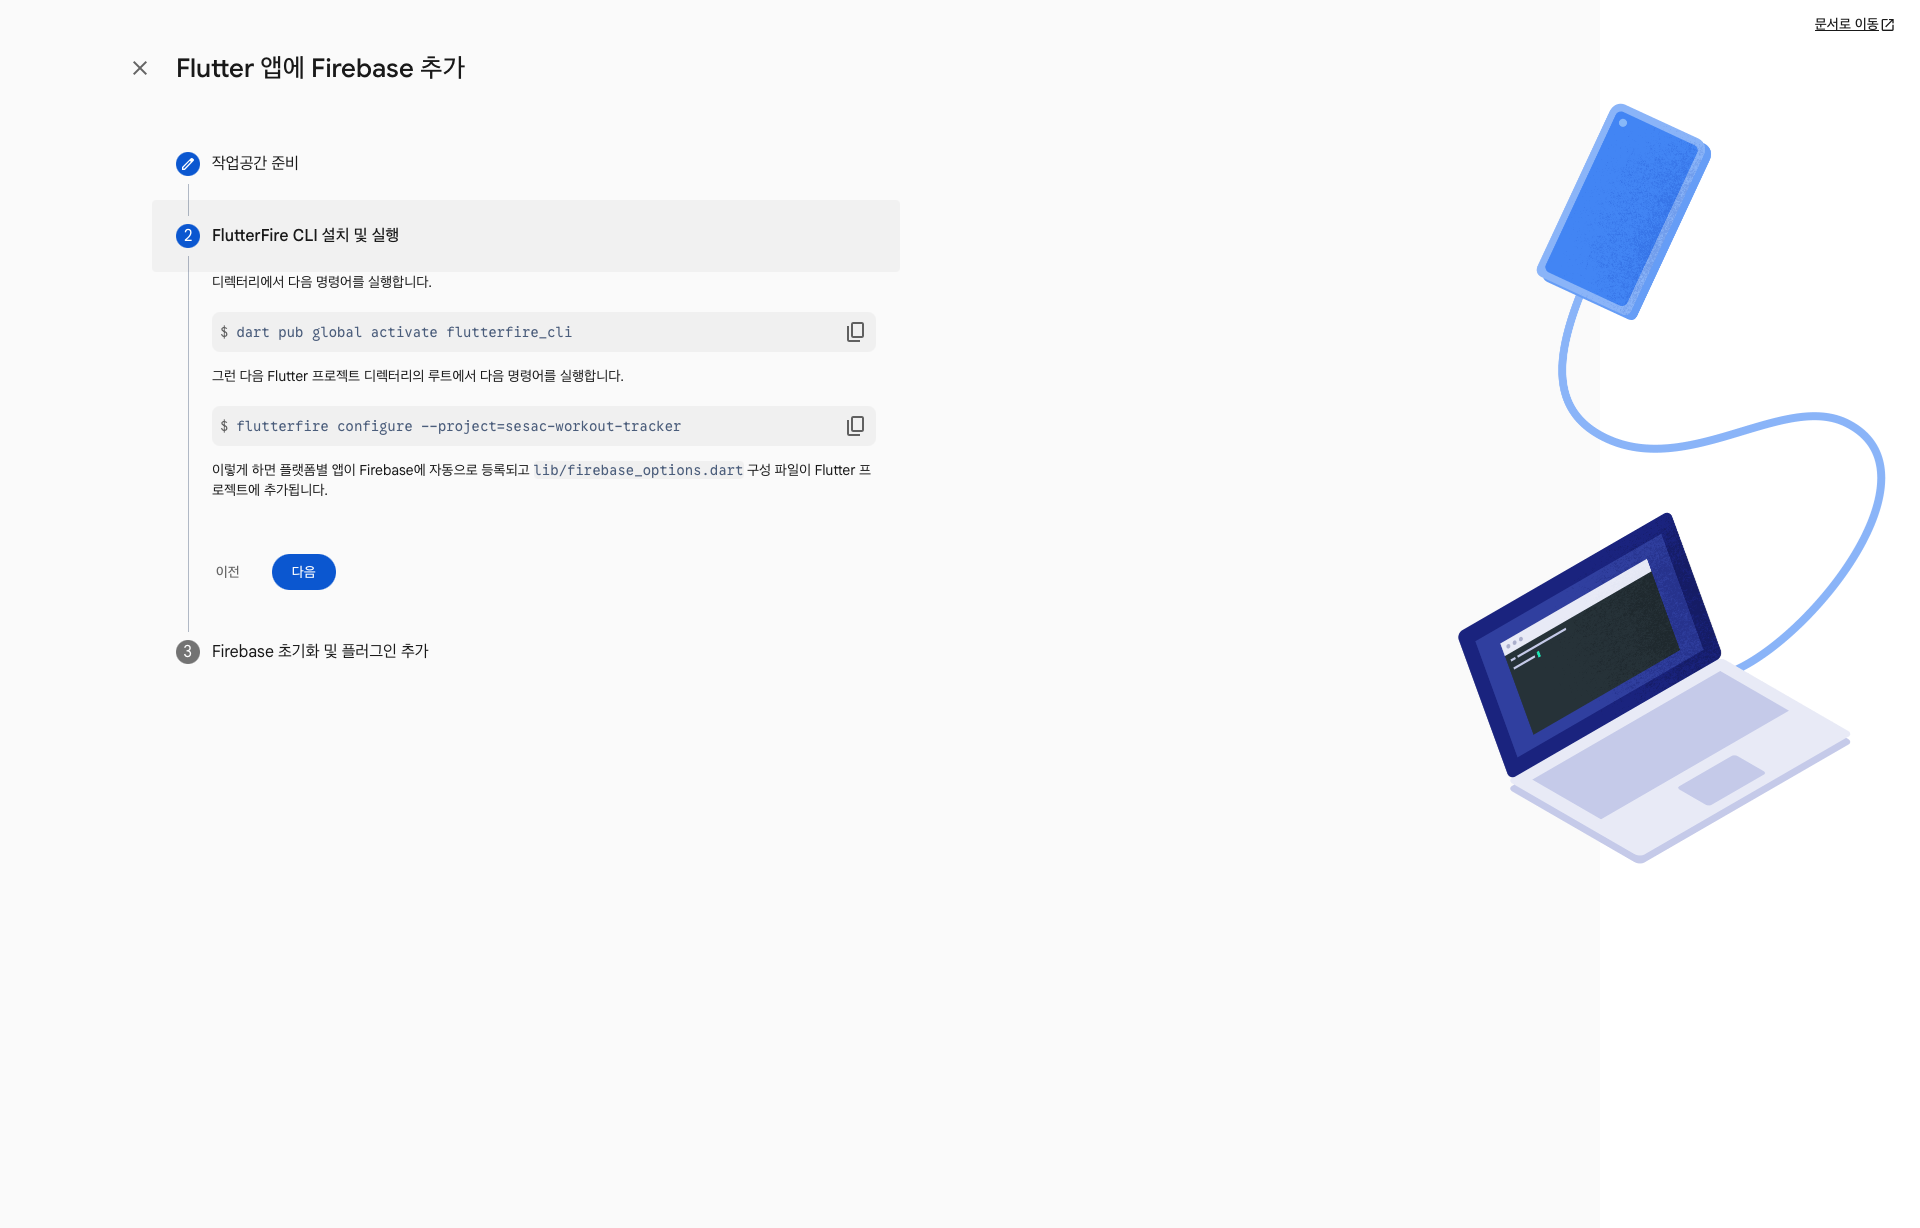
이때, Flutter 프로젝트 연결이 처음이라면 다음과 같은 메시지가 뜨는데, 환경변수 설정을 해주어야 FlutterFire CLI를 사용할 수 있다는 것을 놓치지 말도록 하자.
Warning: Pub installs executables into $HOME/.pub-cache/bin, which is not on your path.
You can fix that by adding this to your shell's config file (.zshrc, .bashrc, .bash_profile, etc.):

  export PATH="$PATH":"$HOME/.pub-cache/bin"

Activated flutterfire_cli 1.4.1.
강사님은 기존에 프로젝트를 했었기에 이런 경고가 뜨지 않았기에 수강생들이 안 된다고 할 때 당황하신 듯하다. 나는 이게 떴을 때 습관처럼 ~/.zshrc 에 저걸 붙여 넣었는데 개발이 익숙하지 않은 분들은 이걸 쉽게 놓치는 모양이다.
흥미와 적성에 맞진 않아도 그럭저럭은 할 수 있는 클라이언트 개발을 밀고 나가는 게 맞는지, 다른 길을 찾는 게 맞는지. 사실 더 생각하다가는 생각만 하고 행동하지 않을 것 같아서, 그래도 뭐라도 시도해 보는 게 낫겠지 싶어서 삼성디딤돌장학금 준다길래 SeSAC에 그나마 개설된 개발 과정을 신청했던 거긴 하다.
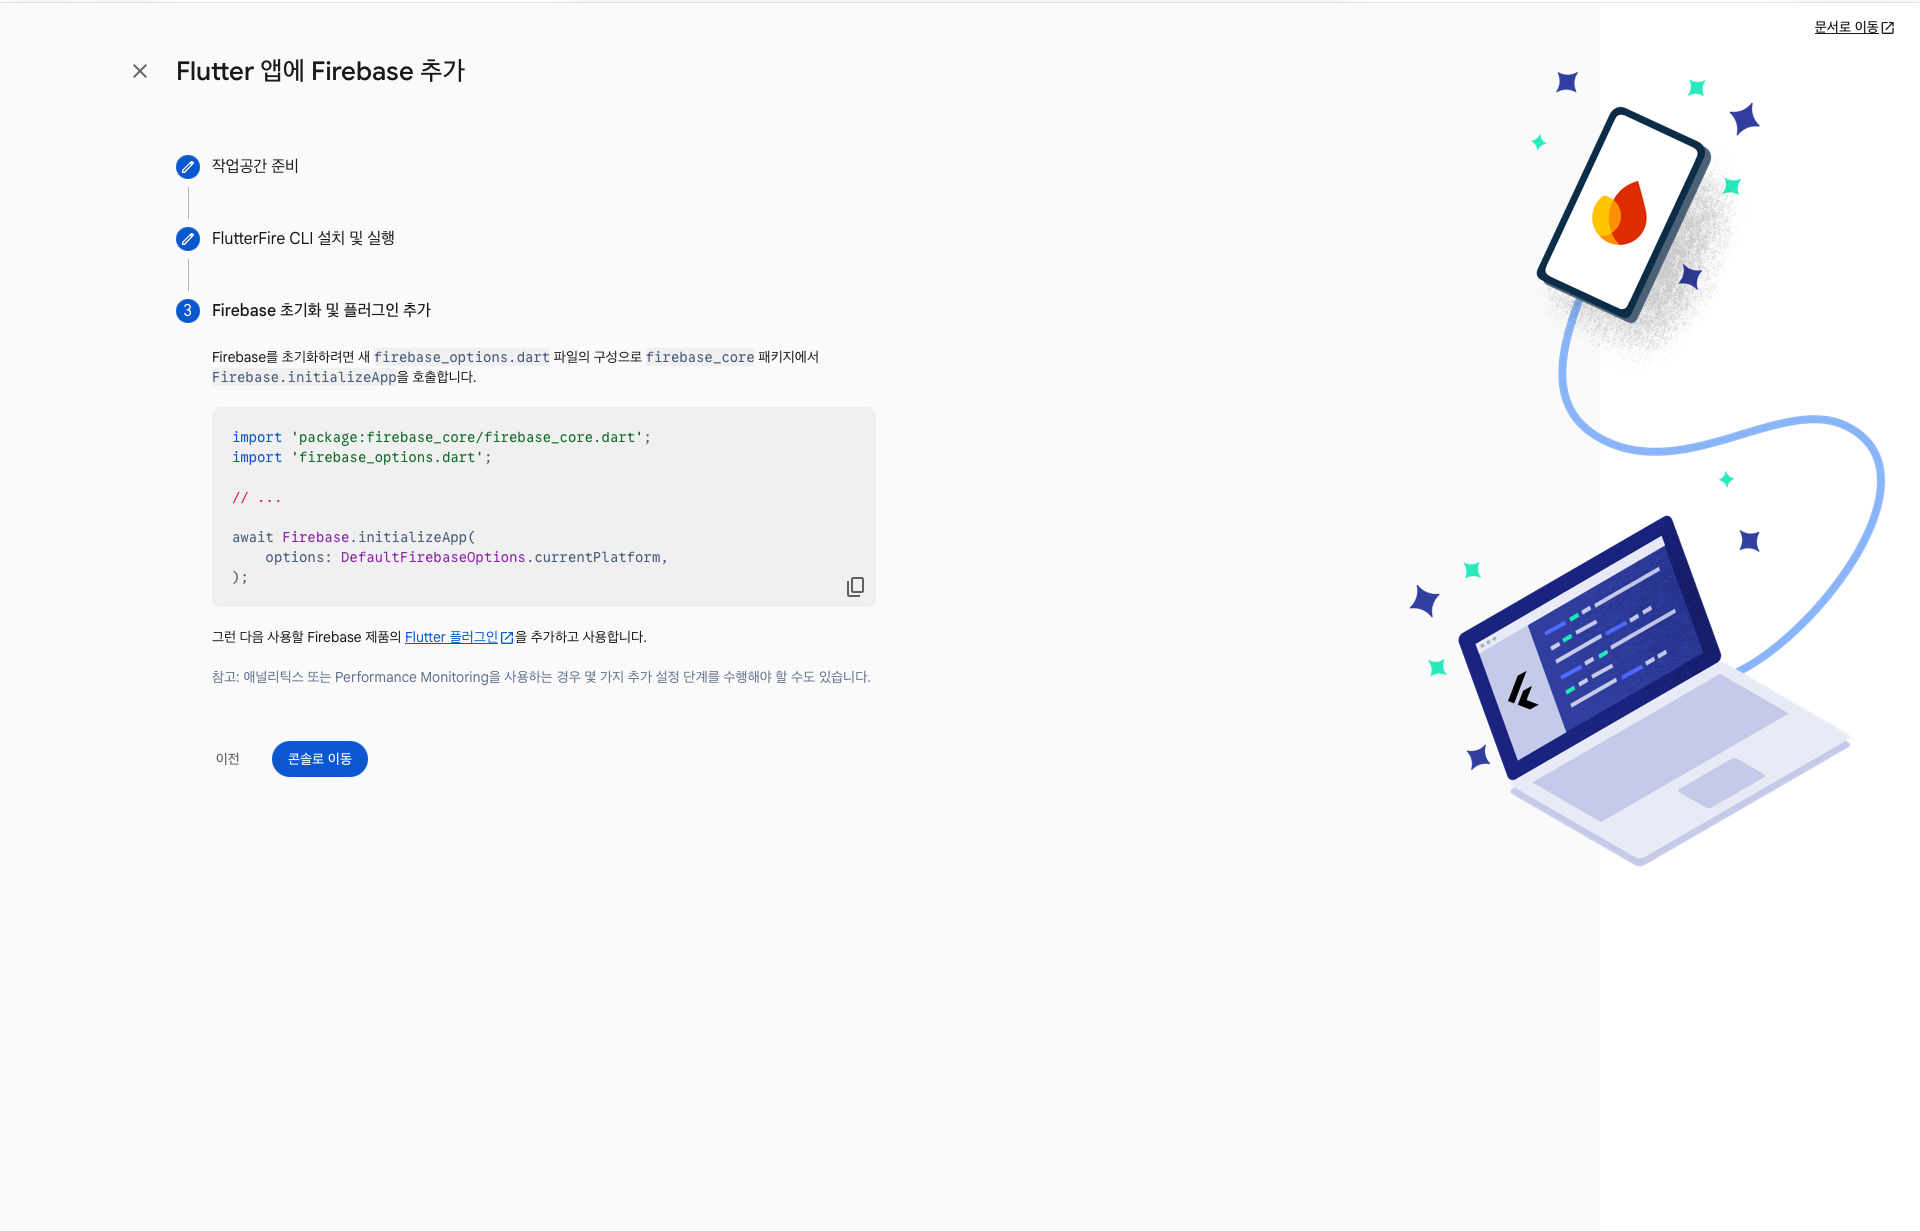
firebase_core를 가져와서 [pub get] 해준 뒤 lib/main.dart 에 코드를 추가한다.
lib/main.dartimport 'package:firebase_core/firebase_core.dart'; import 'firebase_options.dart'; import 'package:flutter/material.dart'; import 'package:flex_color_scheme/flex_color_scheme.dart'; import 'workout_router.dart'; void main() async { WidgetsFlutterBinding.ensureInitialized(); await Firebase.initializeApp( options: DefaultFirebaseOptions.currentPlatform, ); runApp(const MyApp()); } // 이하 생략
이대로 Restart를 하면 Minimal SDK 오류가 뜬다. 안드로이드 애뮬레이터는 잘 build 되었지만 iOS 시뮬레이터는 15.0 이상의 platform version이 필요한 모양이다.
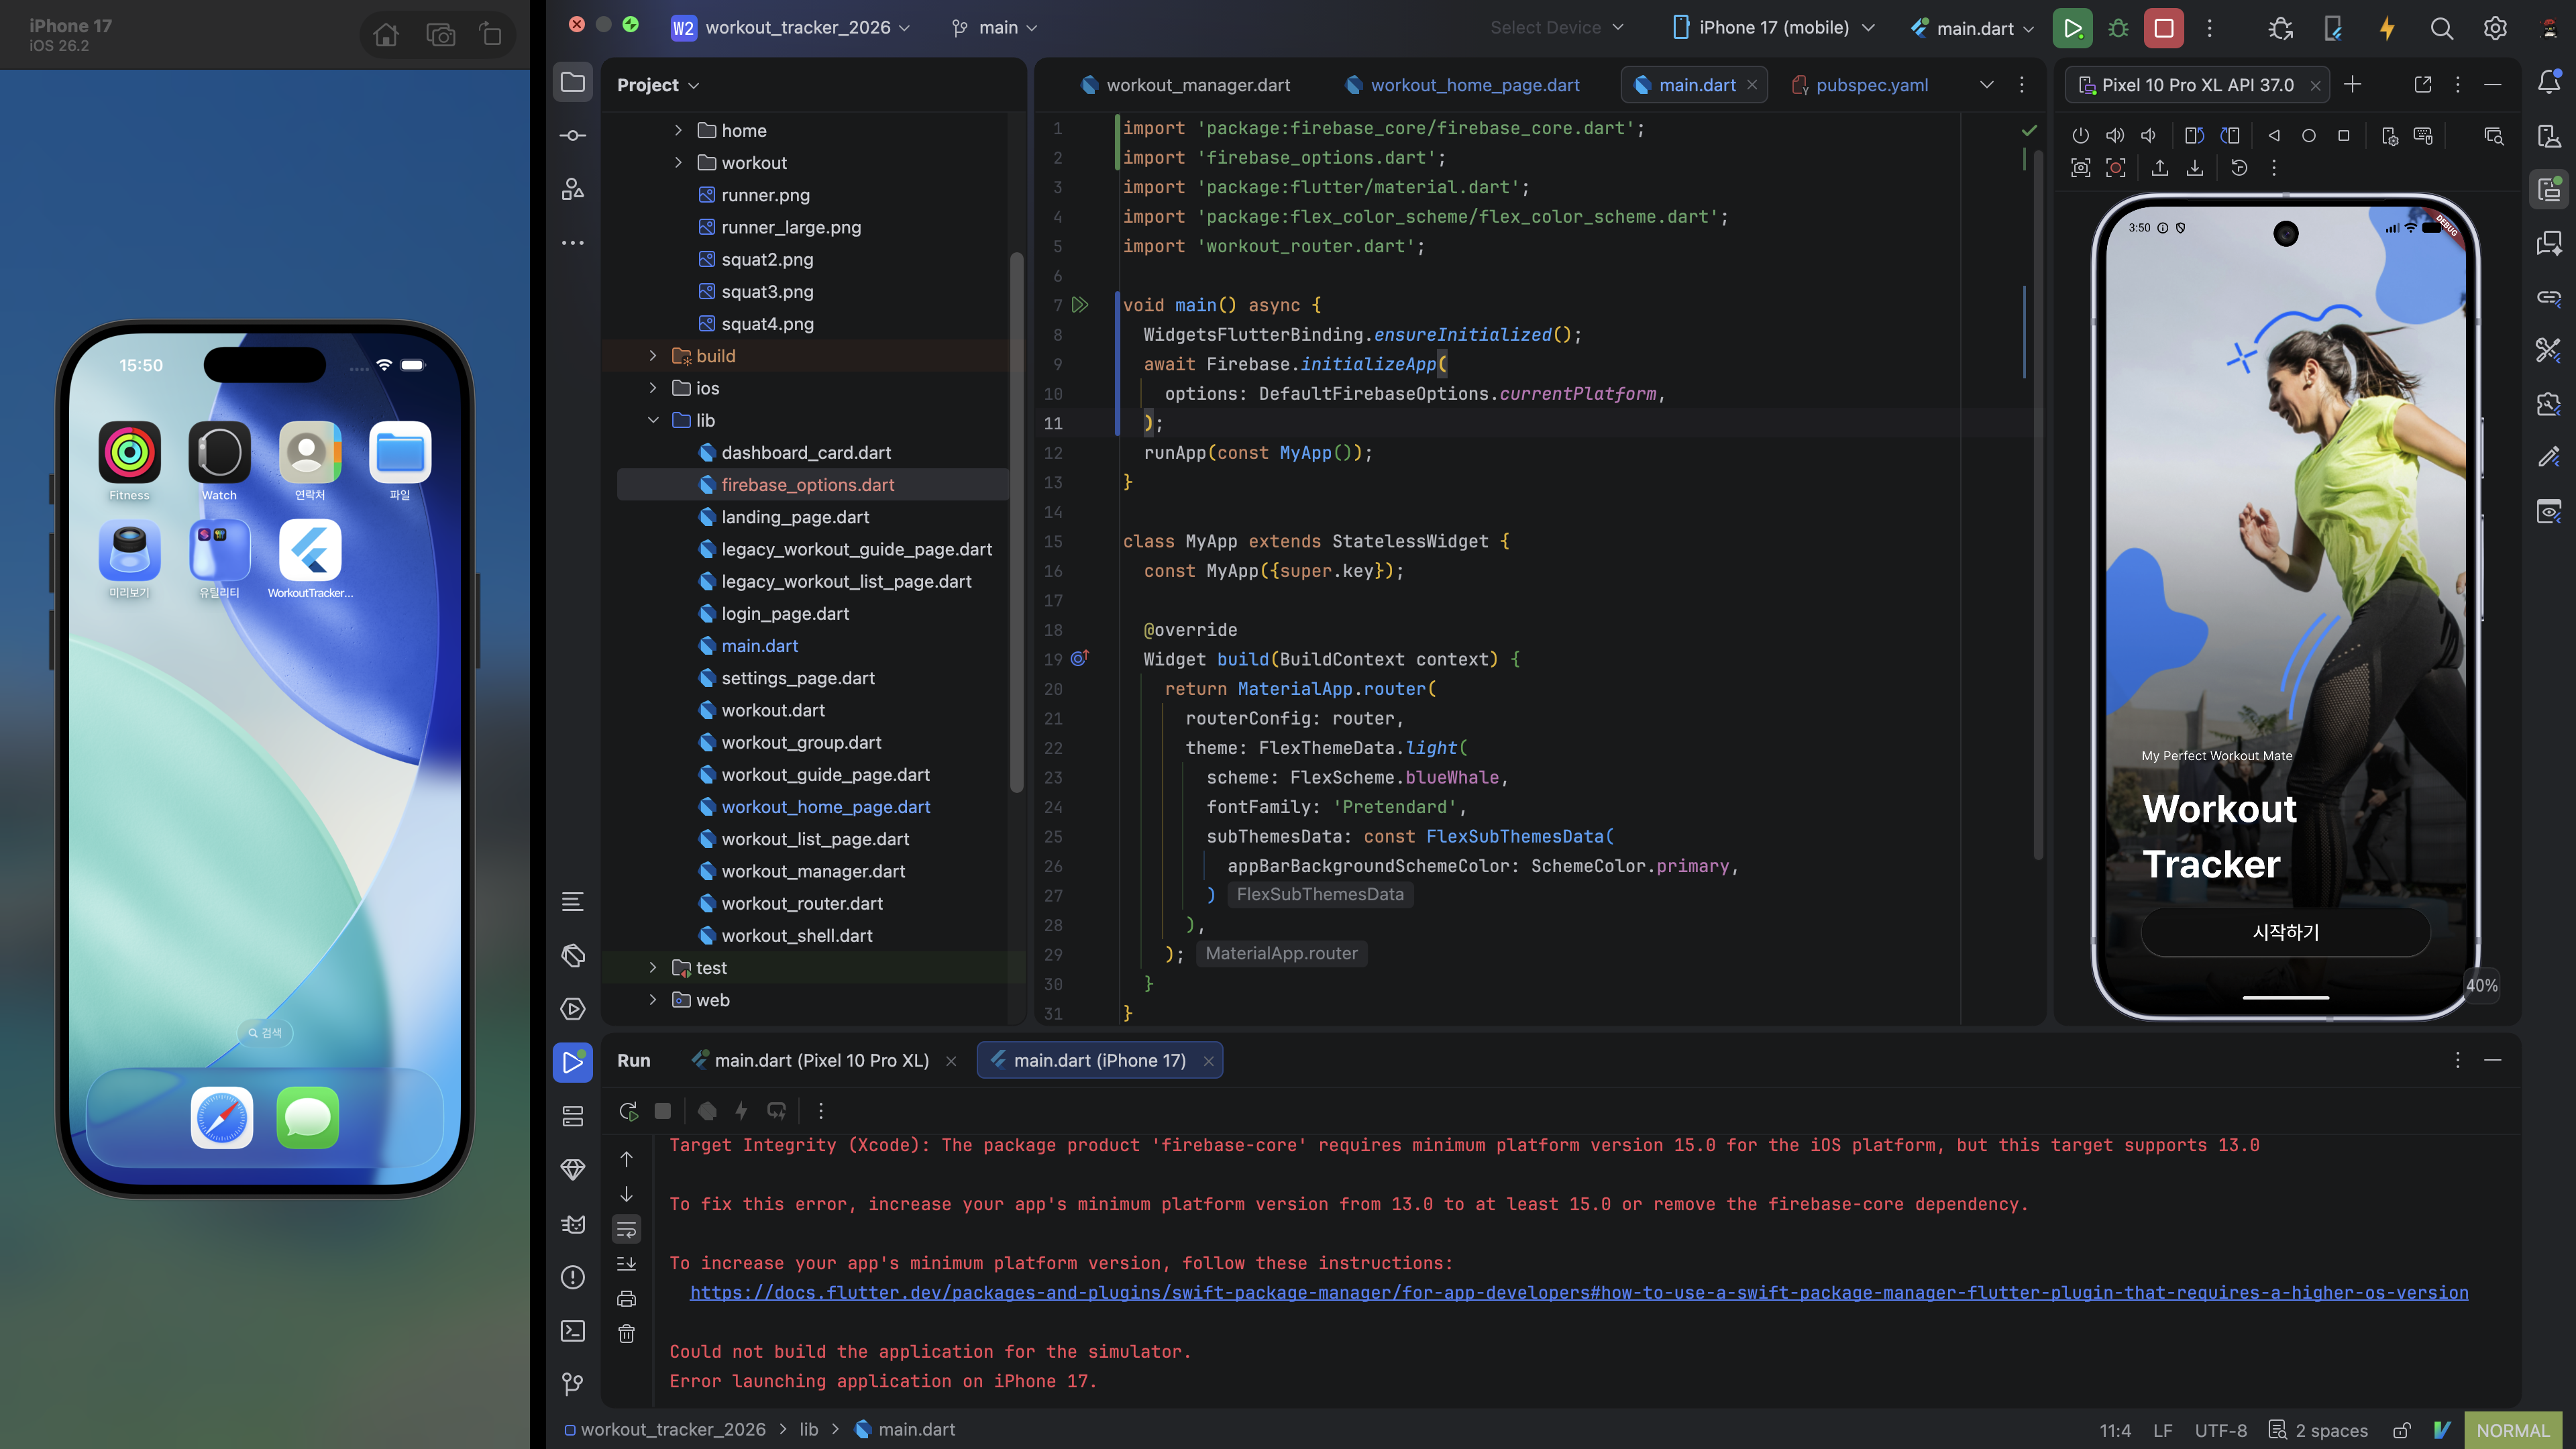
ios/Runner.xcworkspace 를 XCode에서 열어서 [Targets > Runner]의 [Minimum Deployments]를 15.0 이상의 값으로 수정한다.
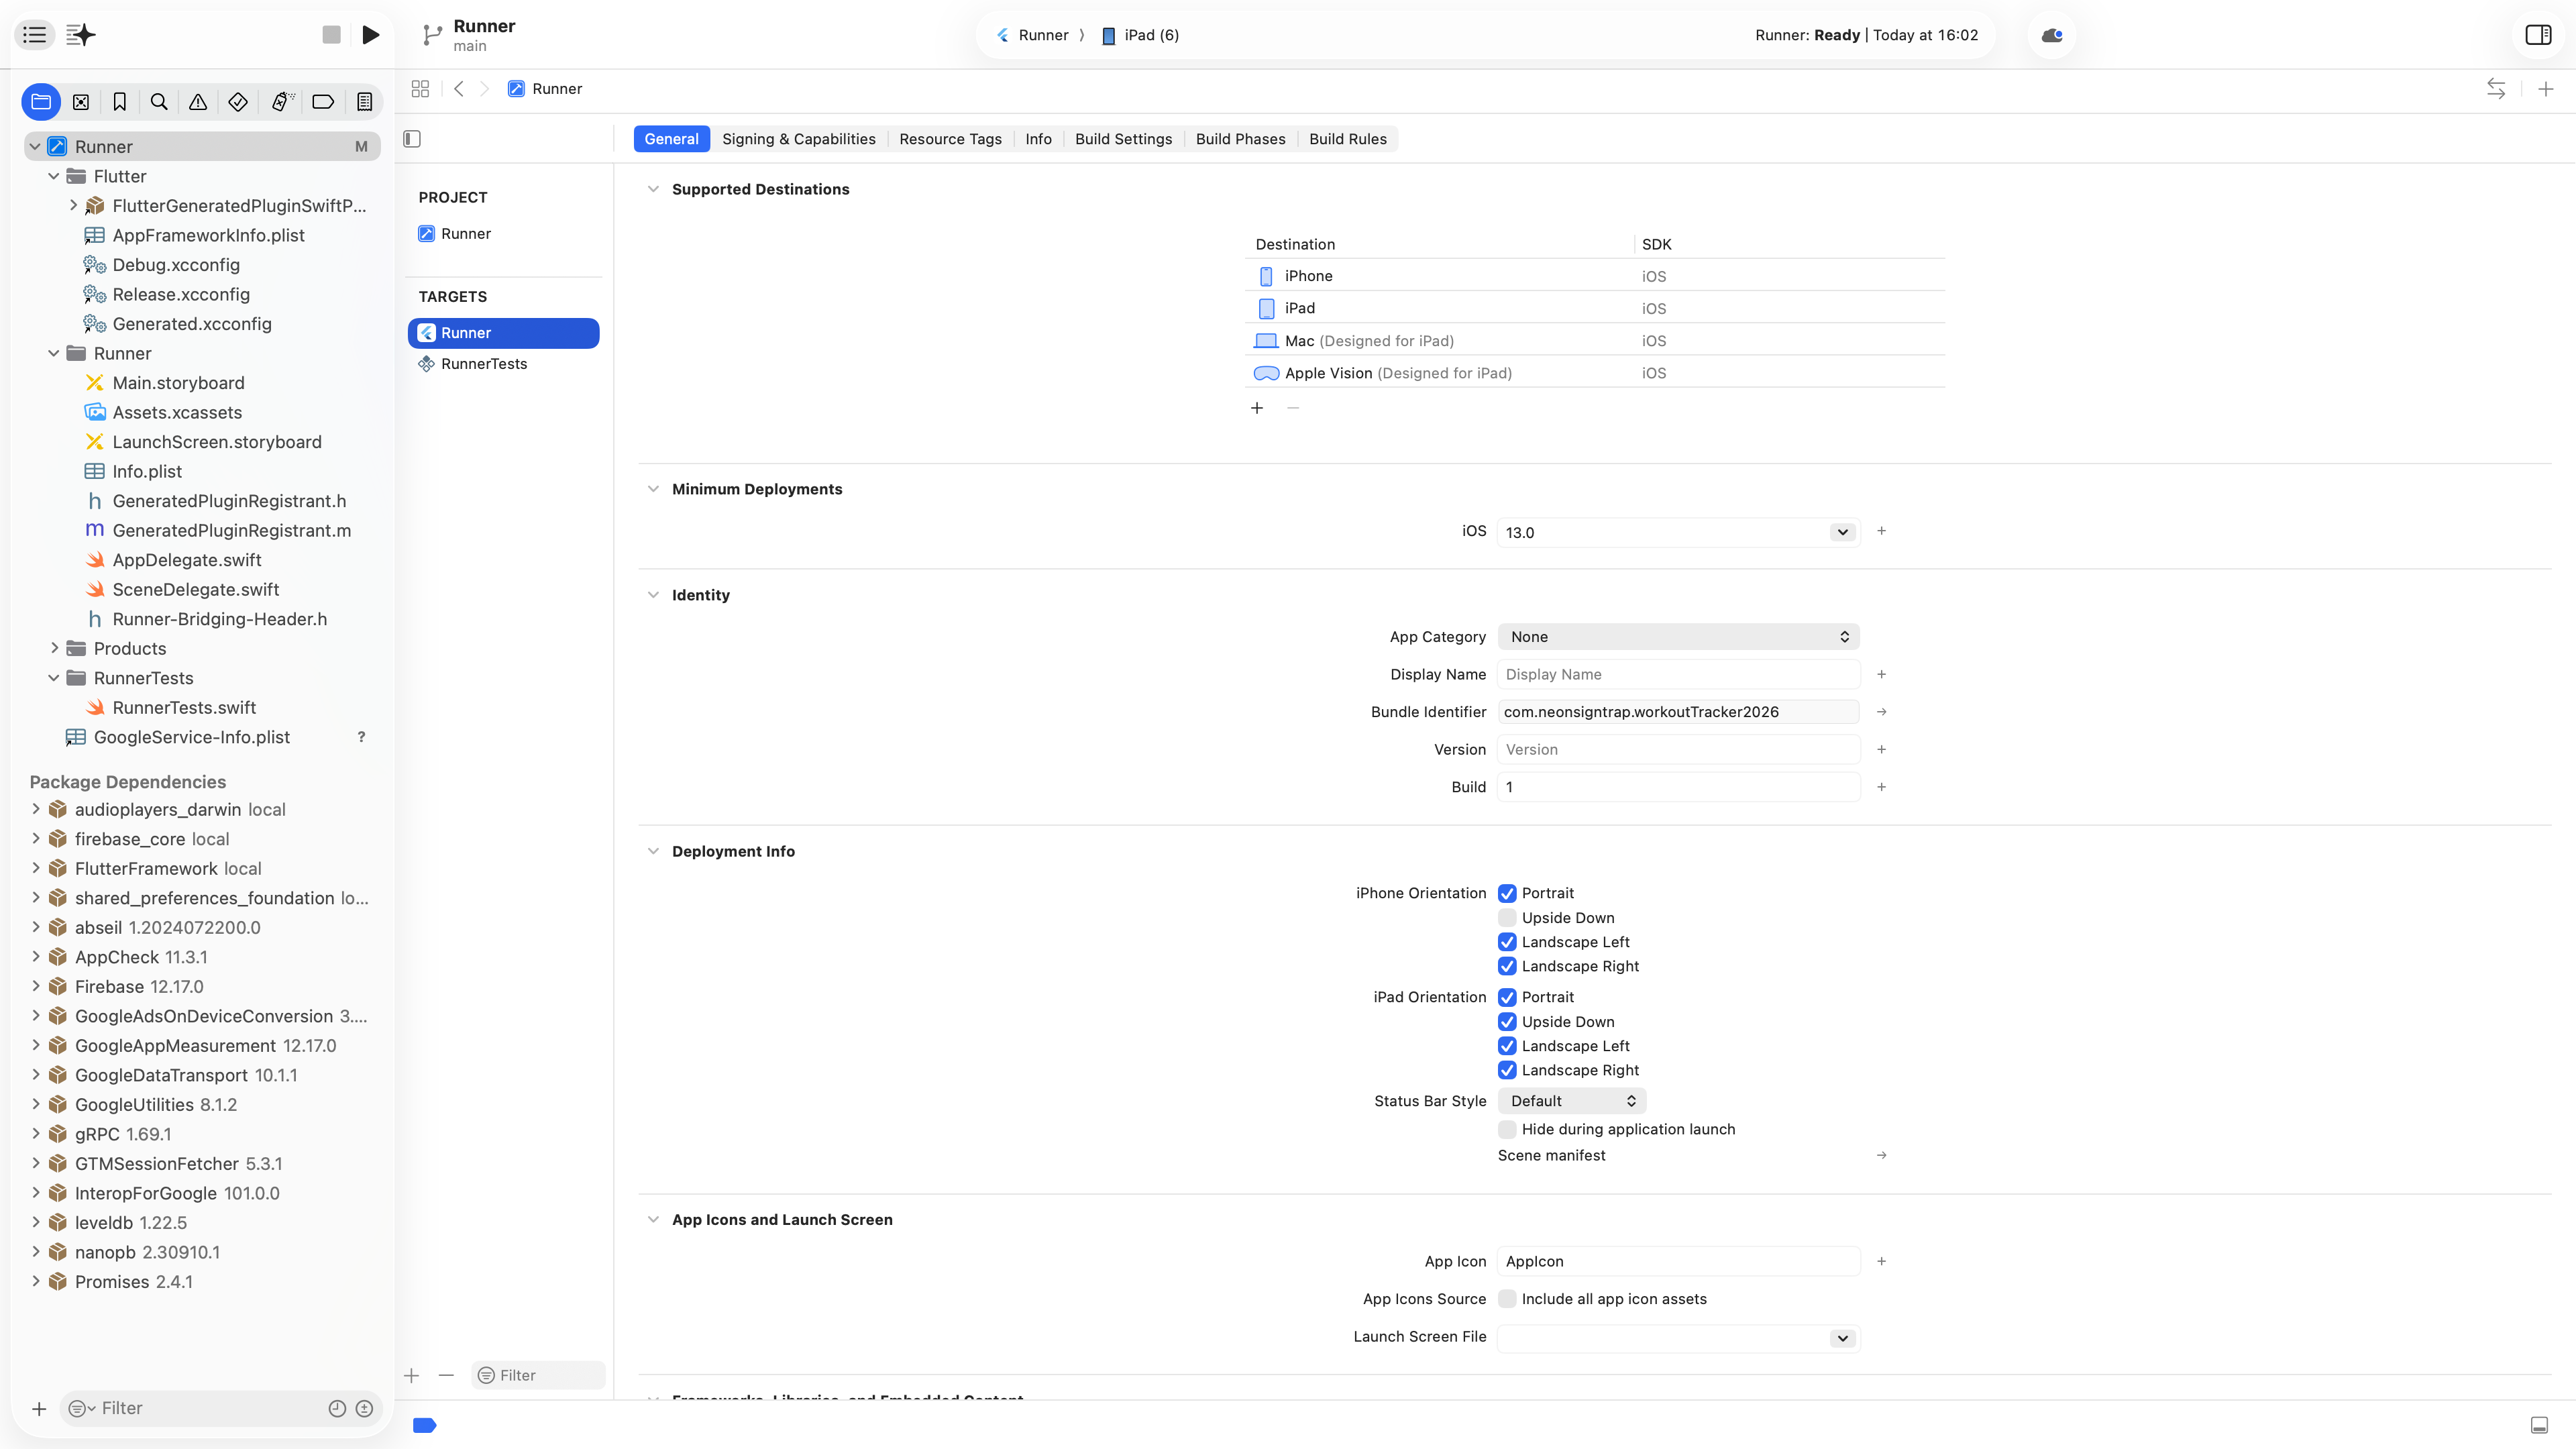
수정 후 다시 시도하면 잘 실행된다.
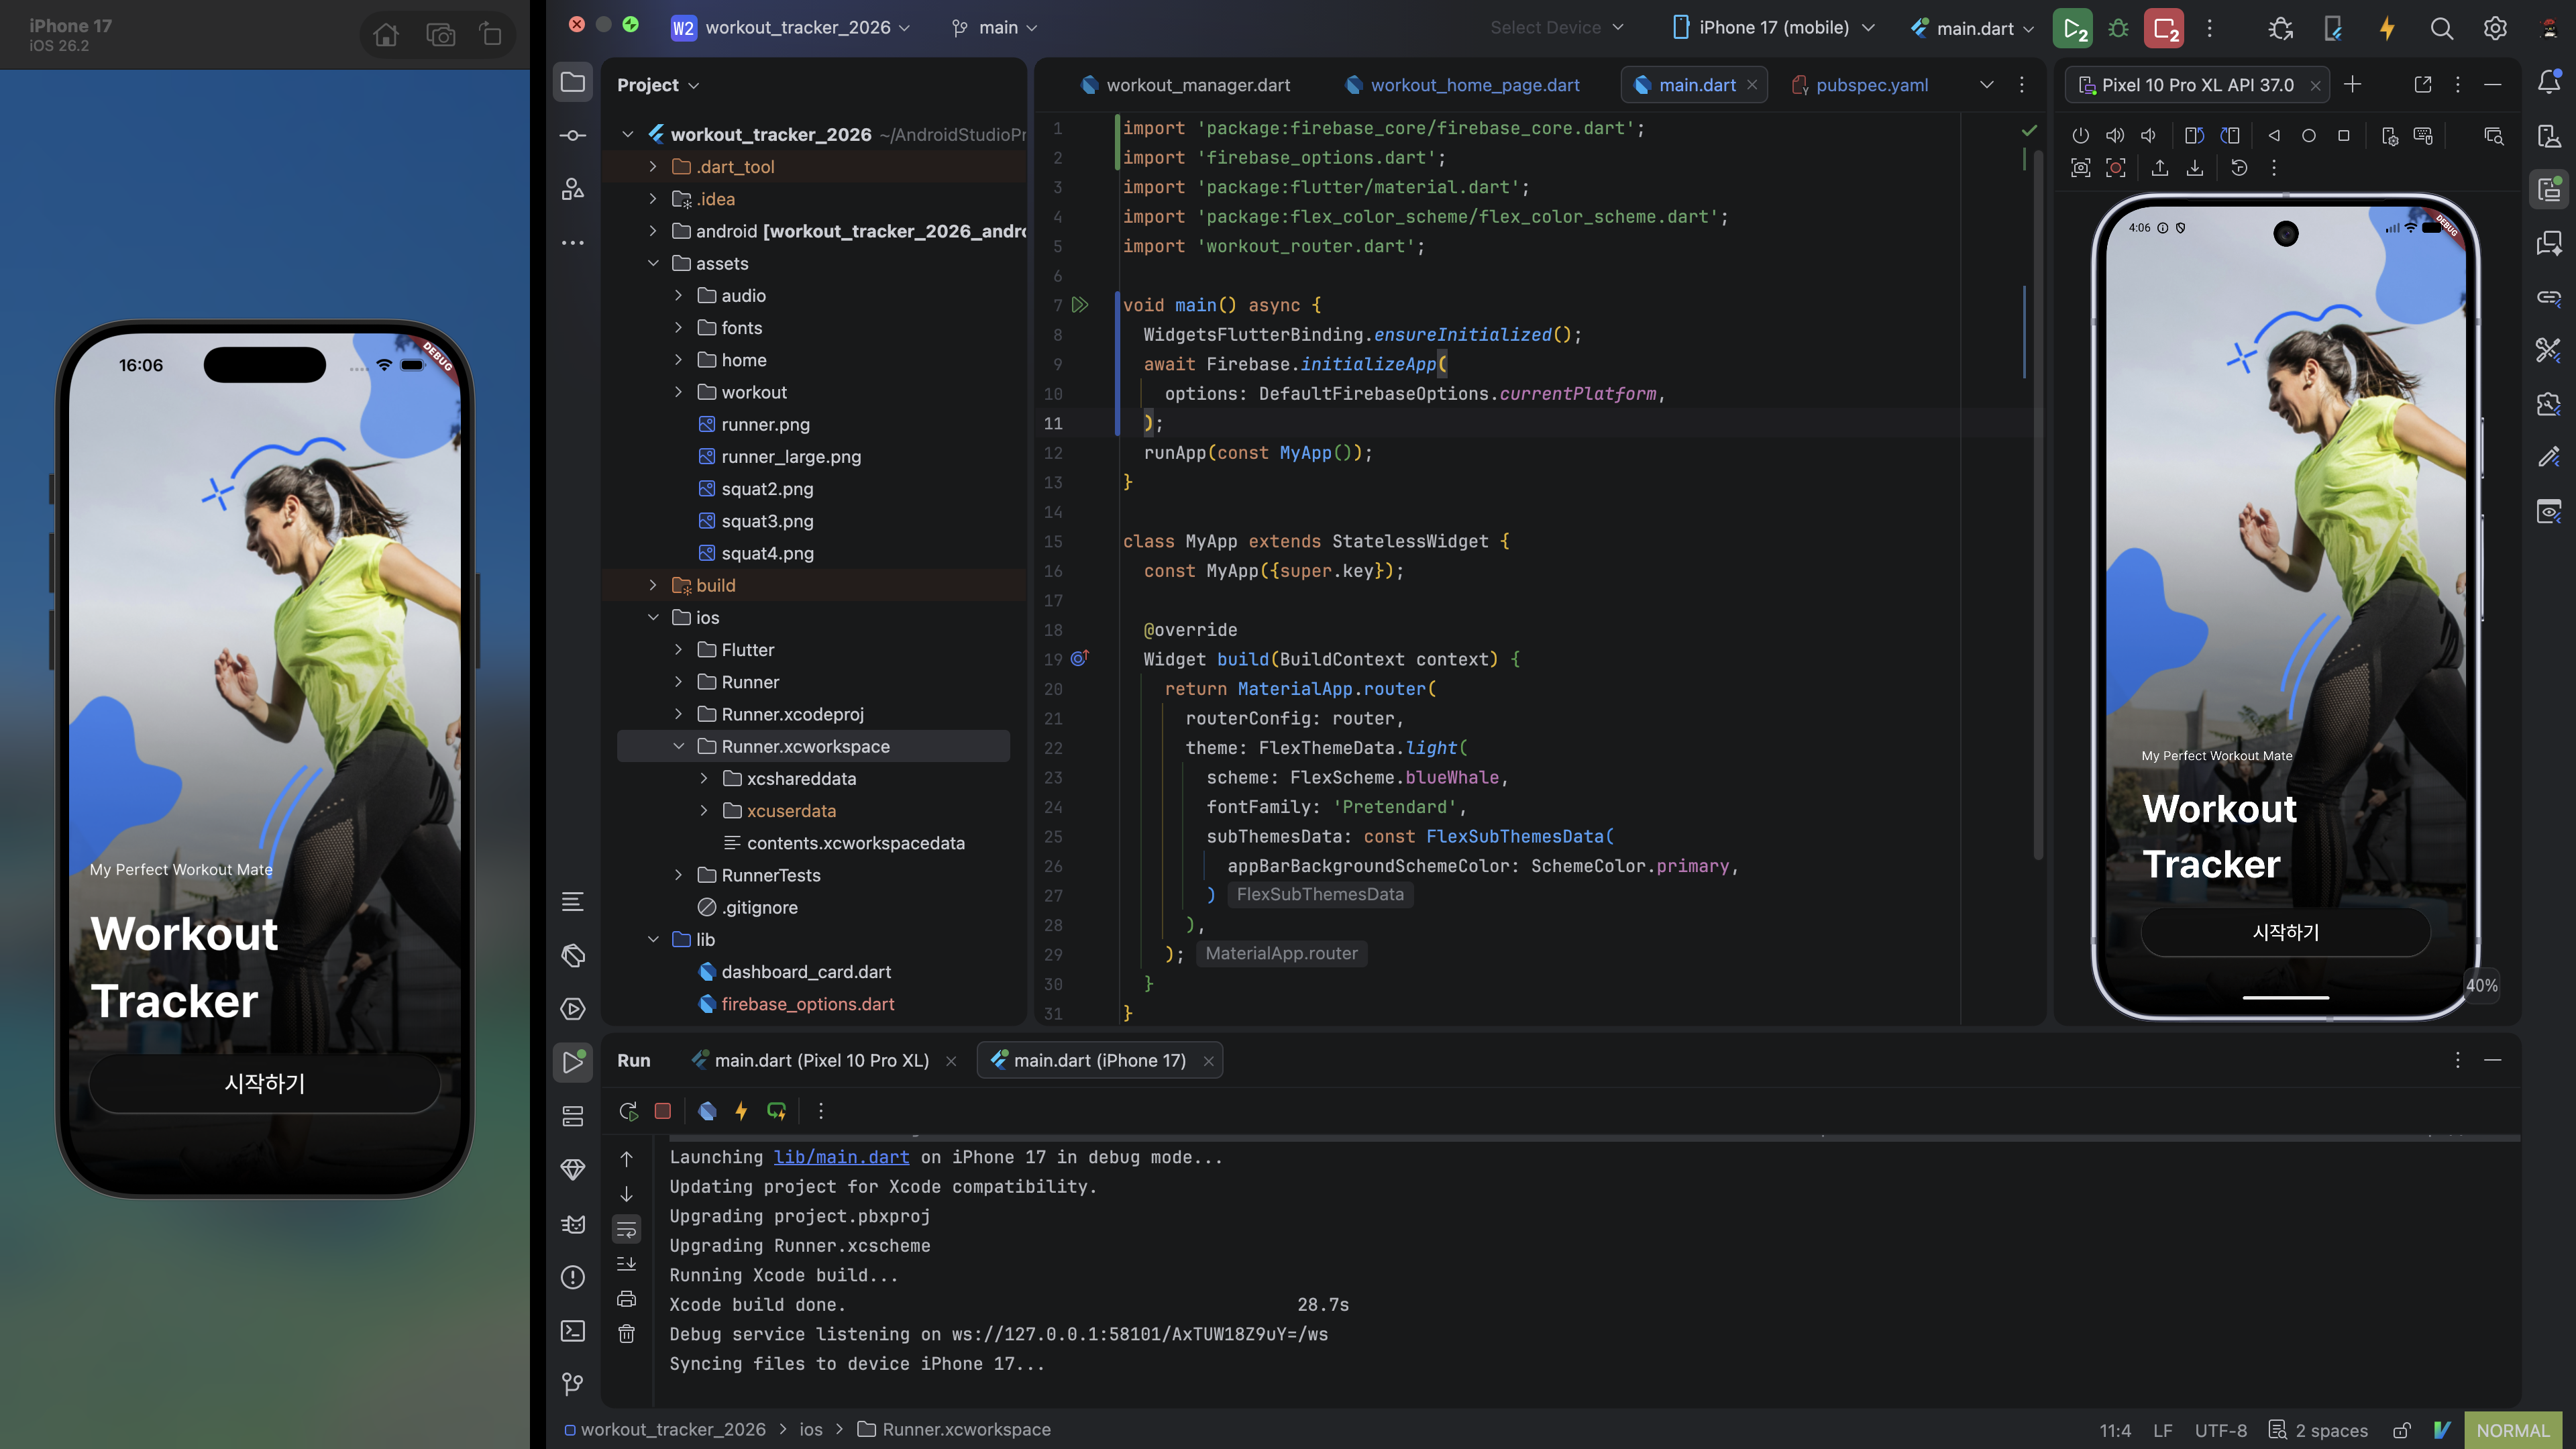
만약 안드로이드에서도 비슷한 오류가 발생한다면 android/app/build.gradle.kts 에서 android.defaultConfig.minSdk 를 적절한 값으로 수정하면 된다.