할 일
Controller에 작성한 API를 한 눈에 볼 수 있도록 Swagger API를 작성해보고자 한다.
개발 환경
- spring boot: '3.2.6'
- java: 17
- dependency-management: '1.1.5'
개발 환경의 자세한 내용은 build.gradle에서 확인할 수 있다.
build.gradle
plugins {
	id 'java'
	id 'org.springframework.boot' version '3.2.6'
	id 'io.spring.dependency-management' version '1.1.5'
}

group = 'com.jungle'
version = '0.0.1-SNAPSHOT'

java {
	toolchain {
		languageVersion = JavaLanguageVersion.of(17)
	}
}

configurations {
	compileOnly {
		extendsFrom annotationProcessor
	}
}

repositories {
	mavenCentral()
}

dependencies {
	implementation 'org.springframework.boot:spring-boot-starter-web'
	implementation 'org.springframework.boot:spring-boot-starter-data-jpa'
	implementation 'mysql:mysql-connector-java:8.0.33'
	implementation 'org.springdoc:springdoc-openapi-starter-webmvc-ui:2.0.4'
	compileOnly 'org.projectlombok:lombok'
	developmentOnly 'org.springframework.boot:spring-boot-devtools'
	annotationProcessor 'org.projectlombok:lombok'
	testImplementation 'org.springframework.boot:spring-boot-starter-test'
	testRuntimeOnly 'org.junit.platform:junit-platform-launcher'
}

tasks.named('test') {
	useJUnitPlatform()
}
1. 의존성 추가
build.gradle파일 의존성 부분에
implementation 'org.springdoc:springdoc-openapi-starter-webmvc-ui:2.0.4'
추가해주자.
dependencies {
	implementation 'org.springdoc:springdoc-openapi-starter-webmvc-ui:2.0.4'
}
2. Configuration 파일 생성
../src/main/java/프로젝트명/Config 디렉토리 아래에 SwaggerConfig.java파일을 생성해주자.
SwaggerConfig.java
package com.jungle.week13.Config;

import io.swagger.v3.oas.models.OpenAPI;
import io.swagger.v3.oas.models.info.Info;
import org.springframework.context.annotation.Bean;
import org.springframework.context.annotation.Configuration;

@Configuration
public class SwaggerConfig {

    @Bean
    public OpenAPI openAPI() {
        // API 문서의 메타데이터를 가진 Info객체 생성 + (버전, 제목, 설명) 설정
        Info info = new Info()
                .version("1.0")
                .title("CRUD API")
                .description("CRUD API 명세서");
        return new OpenAPI().info(info);
    }
}
API 문서의 메타데이터를 저장하는 객체 Info를 생성하는데
이때 API 문서를 메타데이터 일부값을 설정해줬다.
3. application.properties 설정
application.properties
## Swagger Configuration
# Swagger Connect Path (http://localhost:8080/swagger-ui.html)
springdoc.swagger-ui.path=/swagger-ui.html
# API Document Path (http://localhost:8080/api-docs)
springdoc.api-docs.path=/api-docs
# Content-Type Configuration
springdoc.default-consumes-media-type=application/json
springdoc.default-produces-media-type=application/json
# UI sort by alphabet
springdoc.swagger-ui.operations-sorter=alpha
springdoc.swagger-ui.tags-sorter=alpha
# Disable default URL
springdoc.swagger-ui.disable-swagger-default-url=true
springdoc.swagger-ui.doc-expansion=none
이제 각 설정들이 어떤 의미를 가지는지 알아보자.
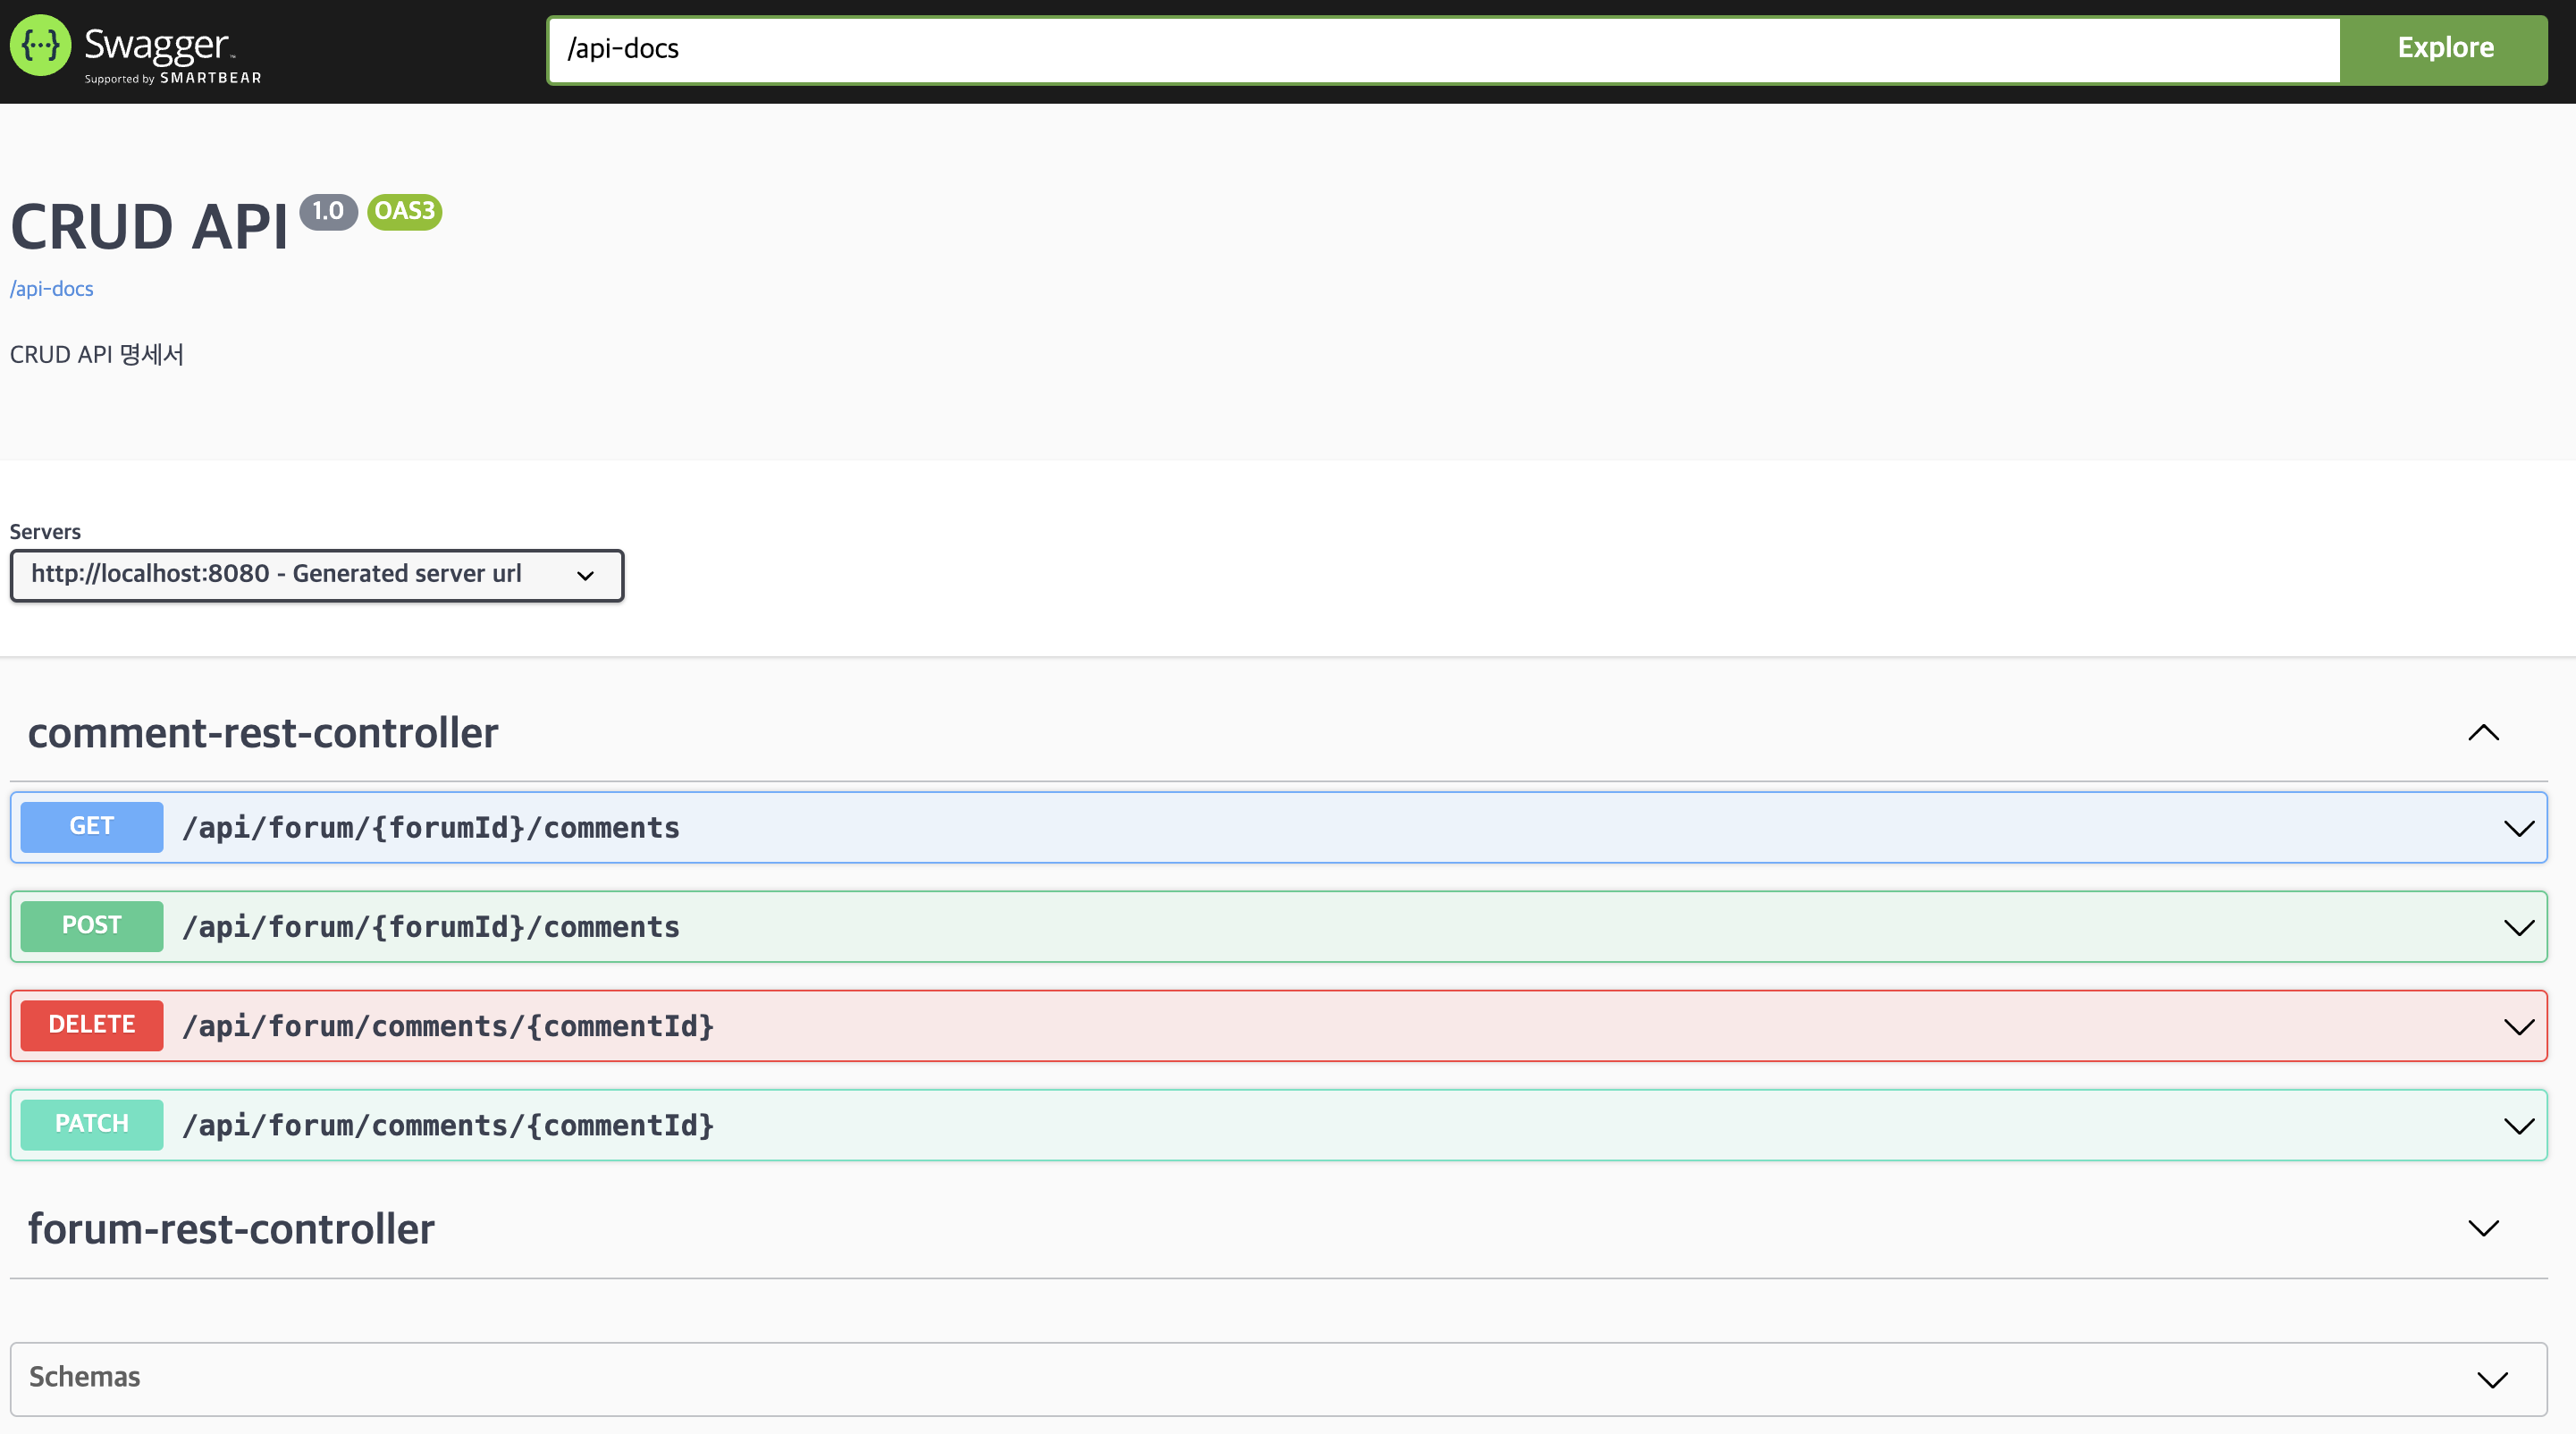
Swagger 접속 경로설정
Swagger 문서와 UI로 된 페이지를 접근하는 경로를 설정한다.
# Swagger Connect Path (http://localhost:8080/swagger-ui.html)
springdoc.swagger-ui.path=/swagger-ui.html
# API Document Path (http://localhost:8080/api-docs)
springdoc.api-docs.path=/api-docshttp://localhost:8080/swagger-ui.html: Swagger UI페이지에 접속 경로
http://localhost:8080/api-docs: api문서를 확인하는 경로
주고 받는 데이터타입 설정
# Content-Type Configuration
springdoc.default-consumes-media-type=application/json
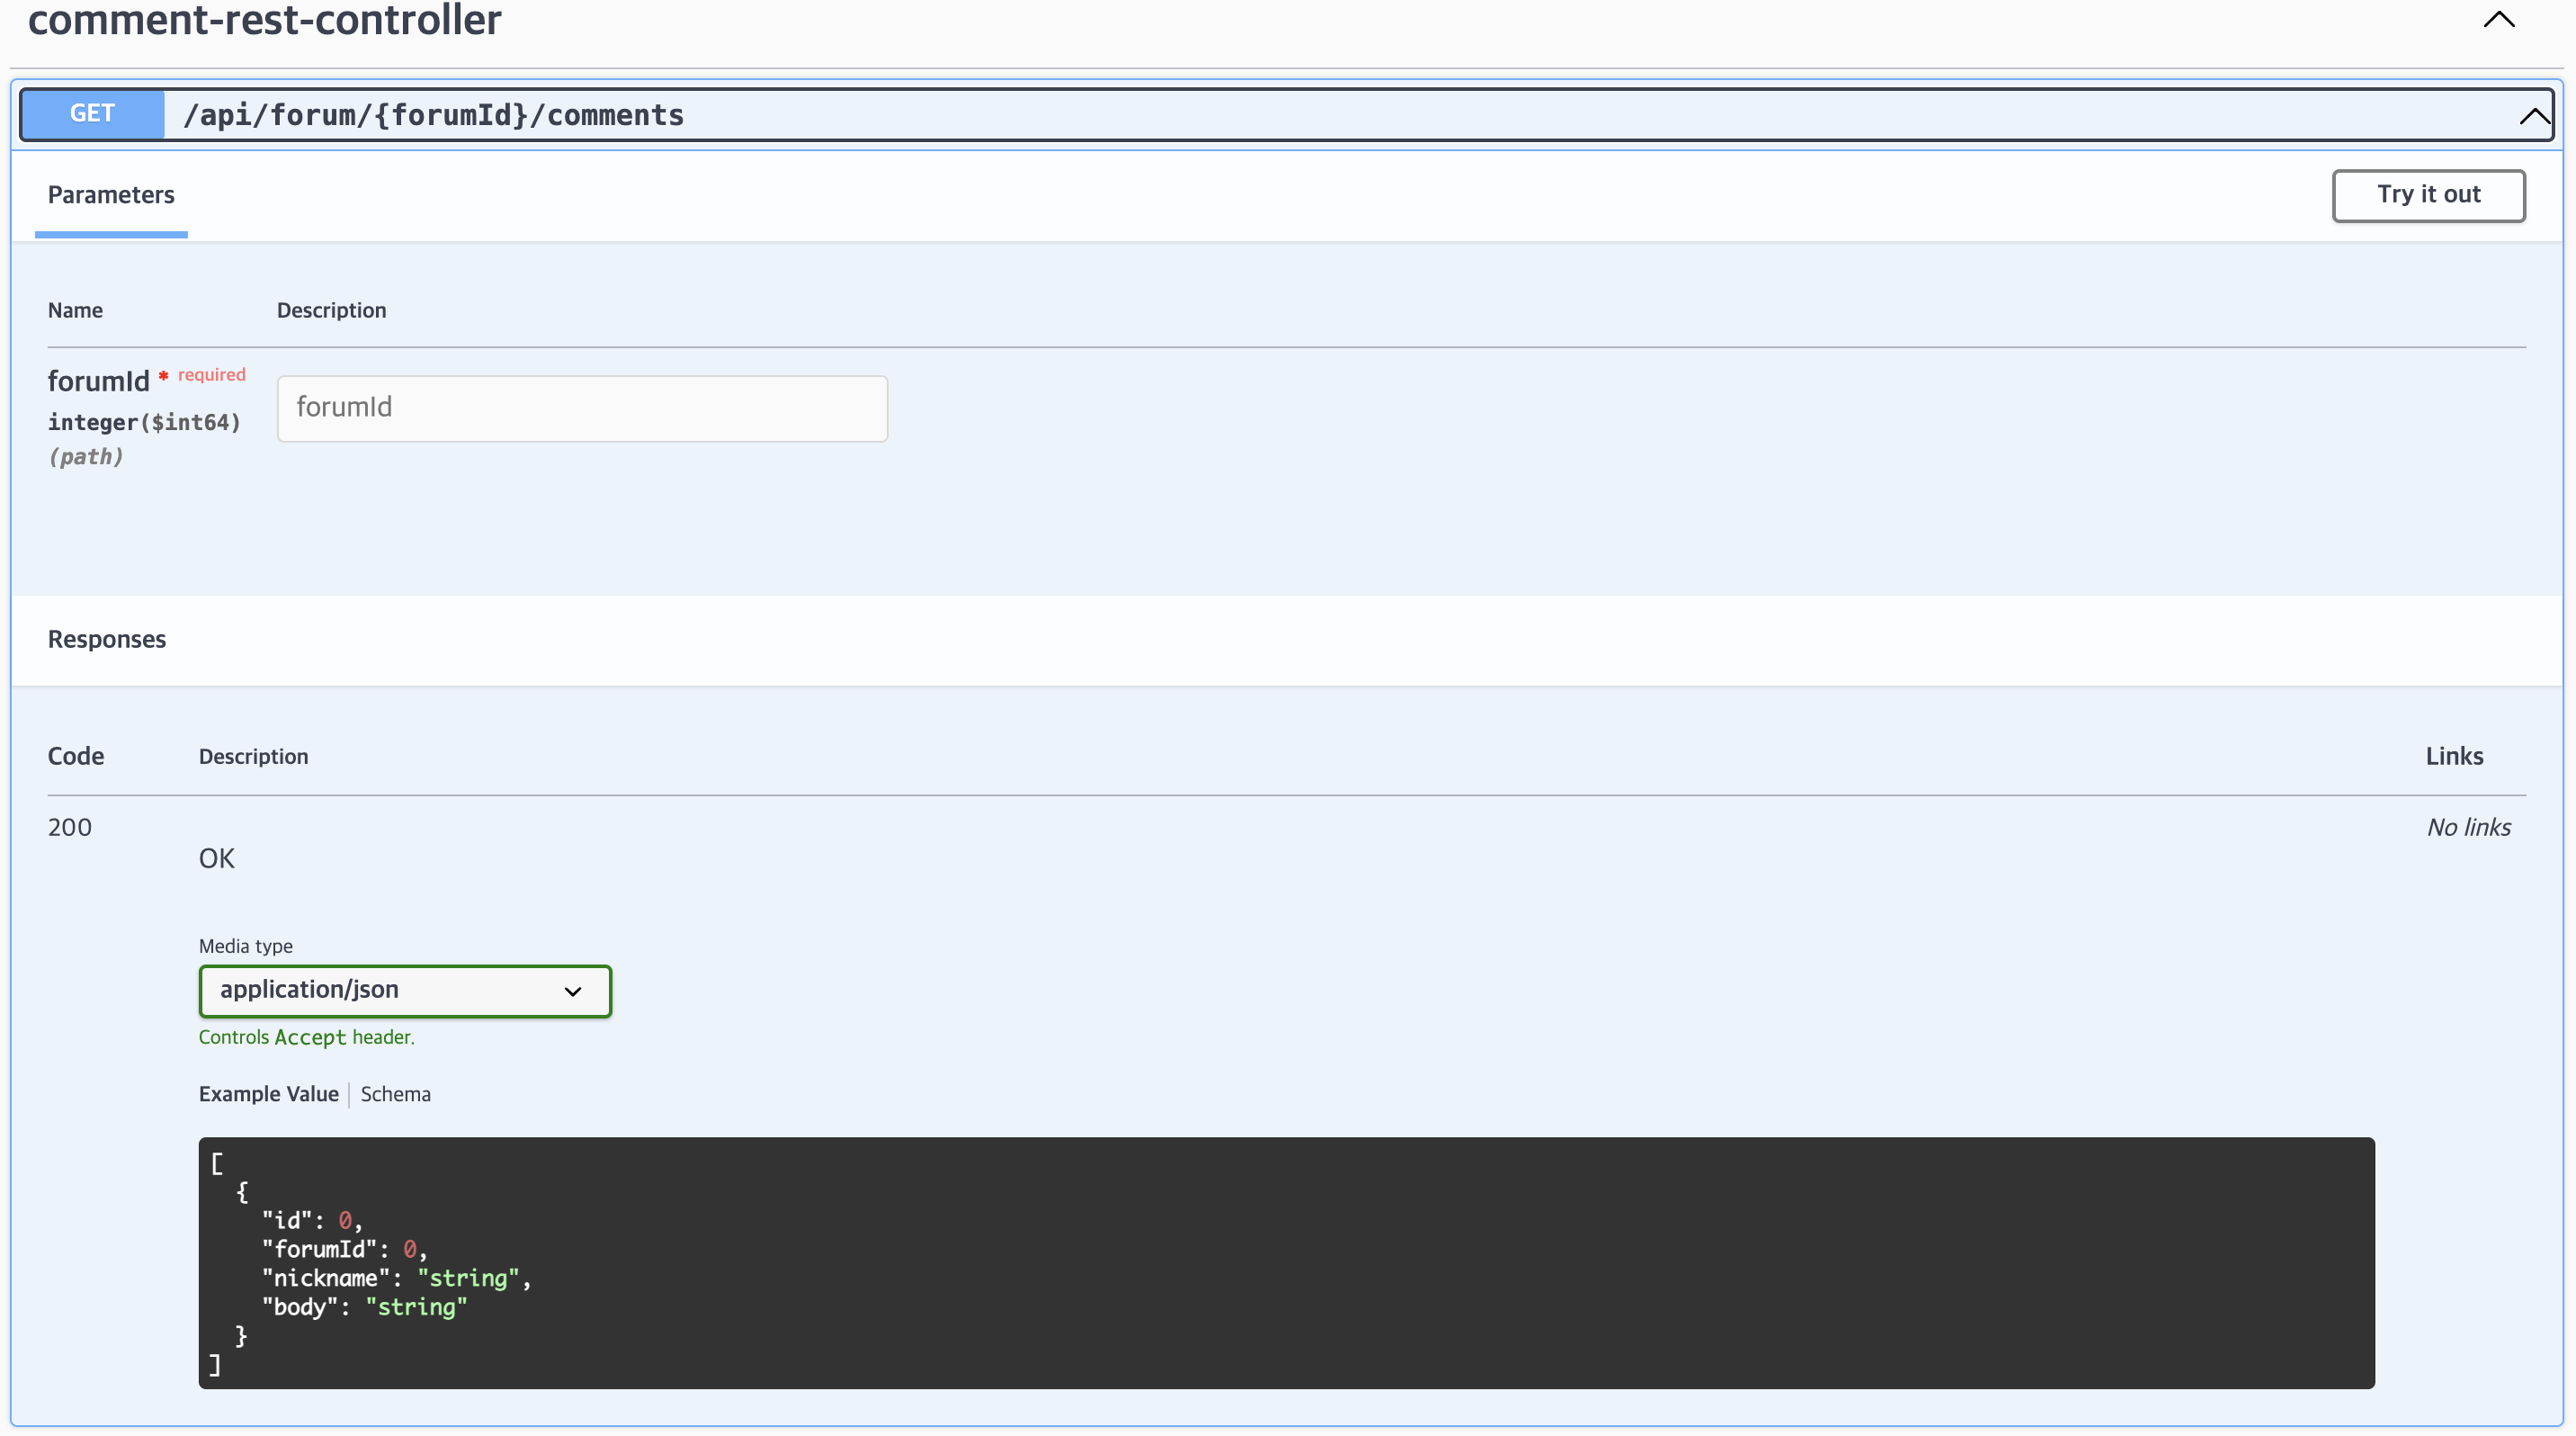
springdoc.default-produces-media-type=application/json컨텐츠를 주고 받는 것을 json으로 하겠다는 뜻이다.
UI 정렬 설정
# UI sort by alphabet
springdoc.swagger-ui.operations-sorter=alpha
springdoc.swagger-ui.tags-sorter=alpha
Swagger UI를 알파벳 사전순으로 정렬하겠다는 뜻이다.
기타 설정
# Disable default URL
springdoc.swagger-ui.disable-swagger-default-url=true
springdoc.swagger-ui.doc-expansion=none
springdoc.swagger-ui.disable-swagger-default-url=true
: 기본 설정 Swagger URL를 사용하지 않겠다.
springdoc.swagger-ui.doc-expansion=none
: Swagger UI로 접속한 페이지에서 문서 수정을 허용하지 않겠다는 뜻이다.
4. Controller에서 API 작성
Controller에 의도한 API를 작성해놓으면 완성이다.