Flutter Study W4
Flutter_W4
오늘의 목표
1. Constraints
- 위젯은 부모로부터 constaints를 가져온다.
- constraints는 최소최대 너비, 최소최대 높이 이다.
- 위젯은 자신의 하위 위젯들에게 constraints를 각각 알려주고 하위 위젯들이 필요로 하는 크기를 확인합니다(아직 미확정)
- 위젯이 하위 위젯들에 대하여 x축에 수평으로, y축에 수직으로 배치합니다.
- 마지막으로 위젯은 Parents에게 자신의 크기에 대해 알려줍니다(constraints 조건내에서)
예를 들어, 구성된 위젯에 패딩이 있는 열이 포함되어 있고 다음과 같이 두 개의 하위 항목을 배치하려는 경우

- 부모가 자식 위젯들에게 제약조건을 어떻게 부여하는지 재미있는 예시입니다 :) 위젯: "부모님, 제 제약 조건은 무엇입니까?" 부모: "너비는 80에서 300픽셀, 키는 30에서 85픽셀이어야 합니다." 위젯: "흠, 저는 5픽셀의 패딩을 갖고 싶기 때문에, 제 아이들은 최대 290픽셀의 폭과 75픽셀의 높이를 가질 수 있습니다." 위젯: "이봐 첫째, 너비는 0에서 290픽셀, 키는 0에서 75 사이여야 해." 첫째 아이: "좋아요, 그러면 저는 가로 290픽셀, 세로 20픽셀이 되고 싶어요." 위젯: "흠, 저는 둘째 아이를 첫째 아이보다 아래에 두고 싶기 때문에, 이것은 둘째 아이에게 55픽셀의 키만 남습니다." 위젯: "둘째 아이야, 너비가 0에서 290 사이고 키가 0에서 55 사이여야 해." 둘째 아이: "좋아요, 저는 가로 140픽셀, 세로 30픽셀이 되고 싶어요." 위젯: "좋아요. 첫째 아이는 x:5, y:5, 둘째 아이는 x:80, y:25입니다." 위젯: "부모님, 제 사이즈는 가로 300픽셀, 세로 60픽셀로 결정했어요."
-
Flutter layout engine에는 몇가지 중요한 제한 사항이 있다(예시로 둔 레이아웃 규칙에 의해)
- 위젯은 부모가 지정한 제약 조건 내에서만 자체 크기를 결정할 수 있다.
- 위젯은 보통 원하는 크기를 가질 수 없다.
- 위젯은 스크린상 자신의 position을 결정할 수 없습니다.
- child가 parent가 고려하는 크기와 다른 크기를 원하고, parent가 child를 정렬할 정보가 불충분할 경우 child의 화면상 보여지는 크기는 무시될 수 있습니다.
- 위젯은 부모가 지정한 제약 조건 내에서만 자체 크기를 결정할 수 있다.
-
예제 코드를 통해 각각의 경우를 살펴본다.
||
|:--:|
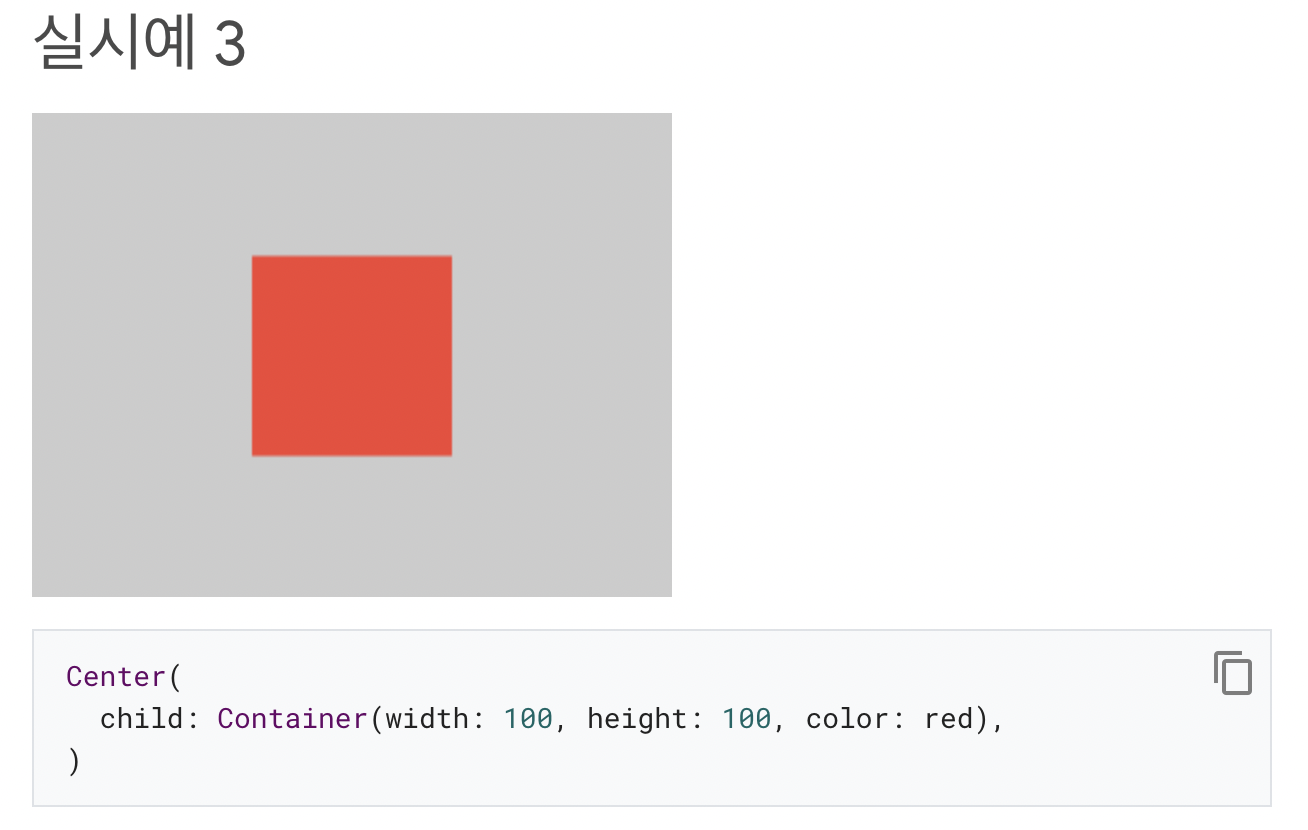
|<b>Screen은 Center 위젯에게 Screen과 같은 사이즈가 되도록 강제합니다. 따라서 Center 위젯은 Screen을 가득 채웁니다.
Center 위젯은 Container 위젯에게 Screen보다 큰 사이즈일수는 없더라도 원하는 사이즈를 가질 수 있게 허용합니다. 따라서 Container는 100 x 100 사이즈를 갖습니다.</b>|
|:--:|
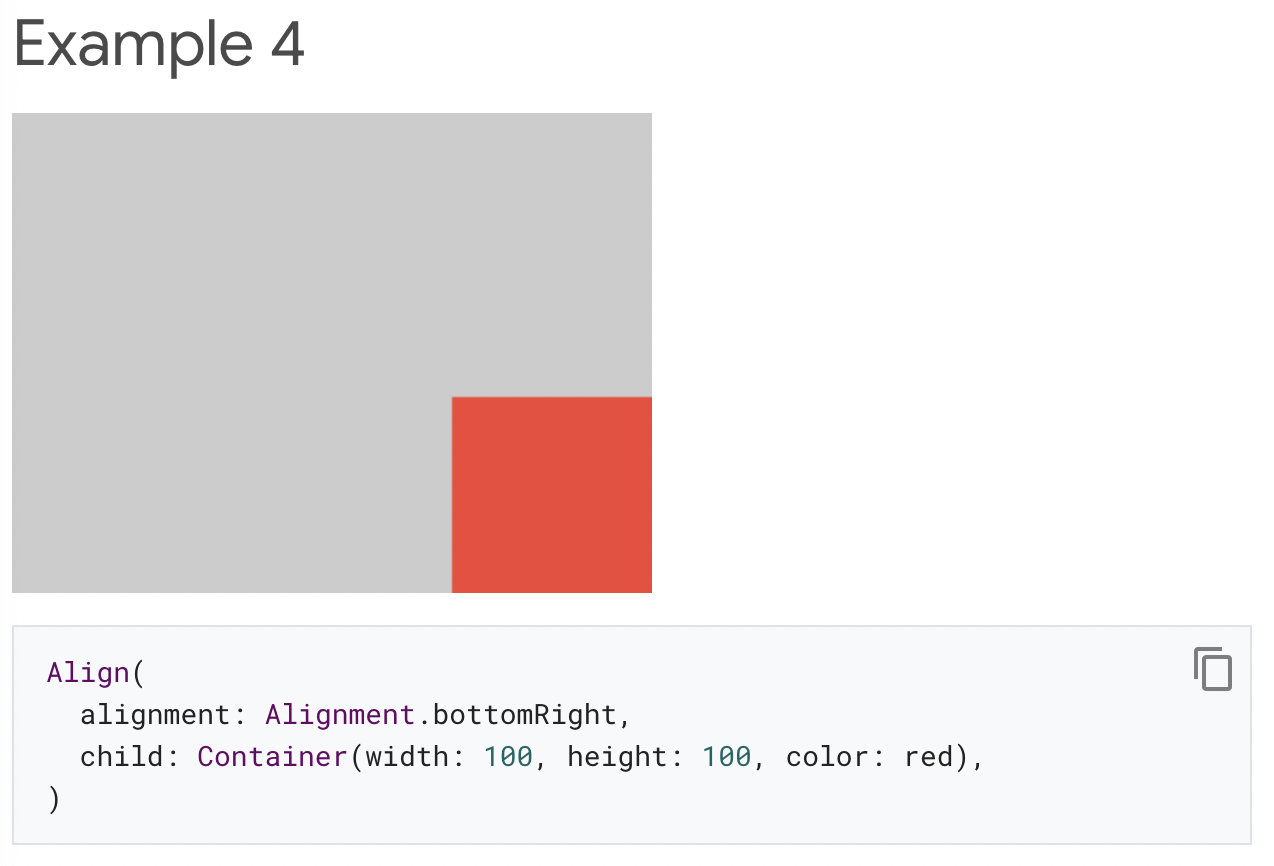
|<b>Align 위젯을 사용하고 있습니다.
- alignment 속성 : 하단 오른쪽
Align 위젯은 Container에게 원하는 사이즈를 부여할 수 있습니다. 다만, 회색영역과 같이 빈공간이 있는 경우, Container는 중앙에 배치될 수 없습니다.</b>|
|:--:|
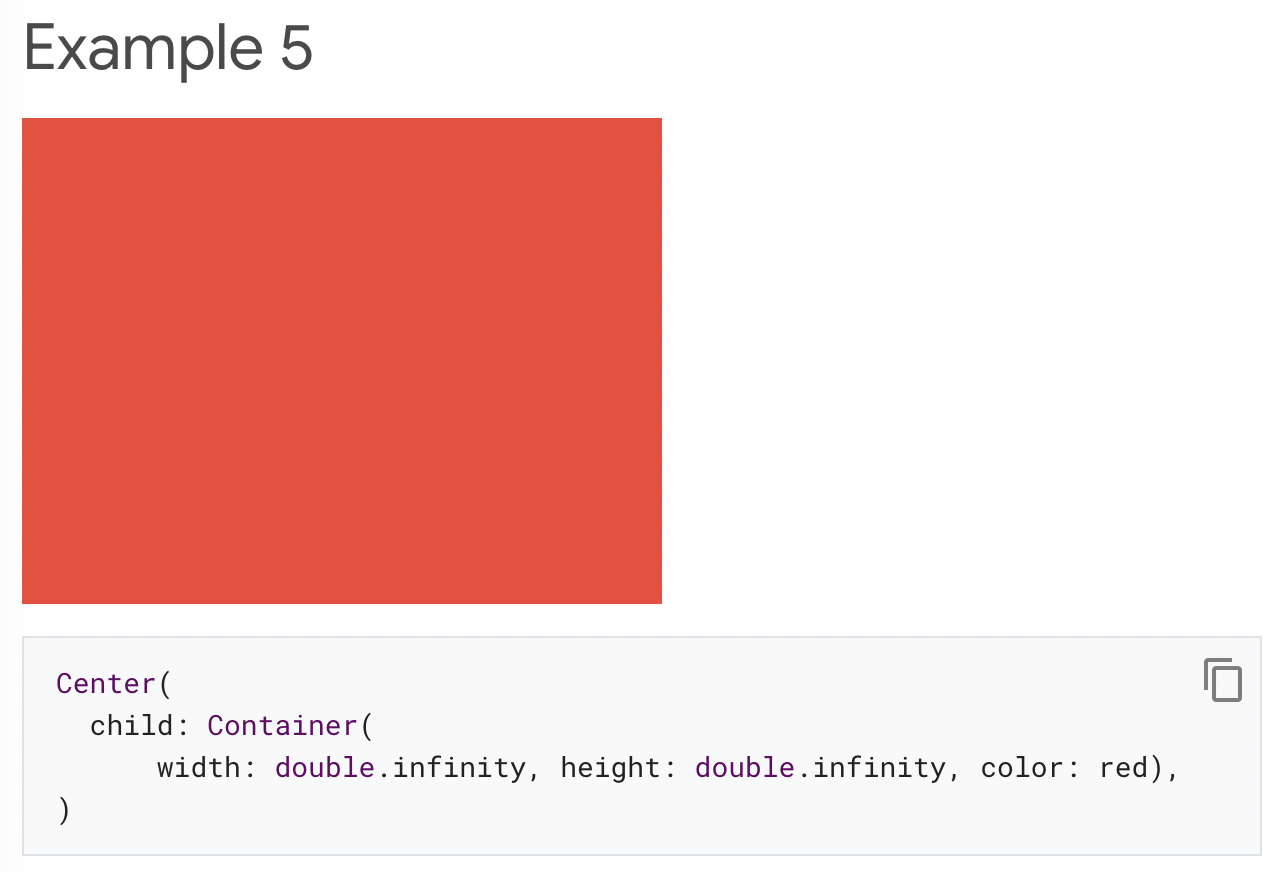
|<b>Container는 infinite size로 width를 명시했습니다. 하지만, Screen(Parent)보다 커질 수 없기에 Screen을 가득채울뿐입니다.</b>|
|:--:|
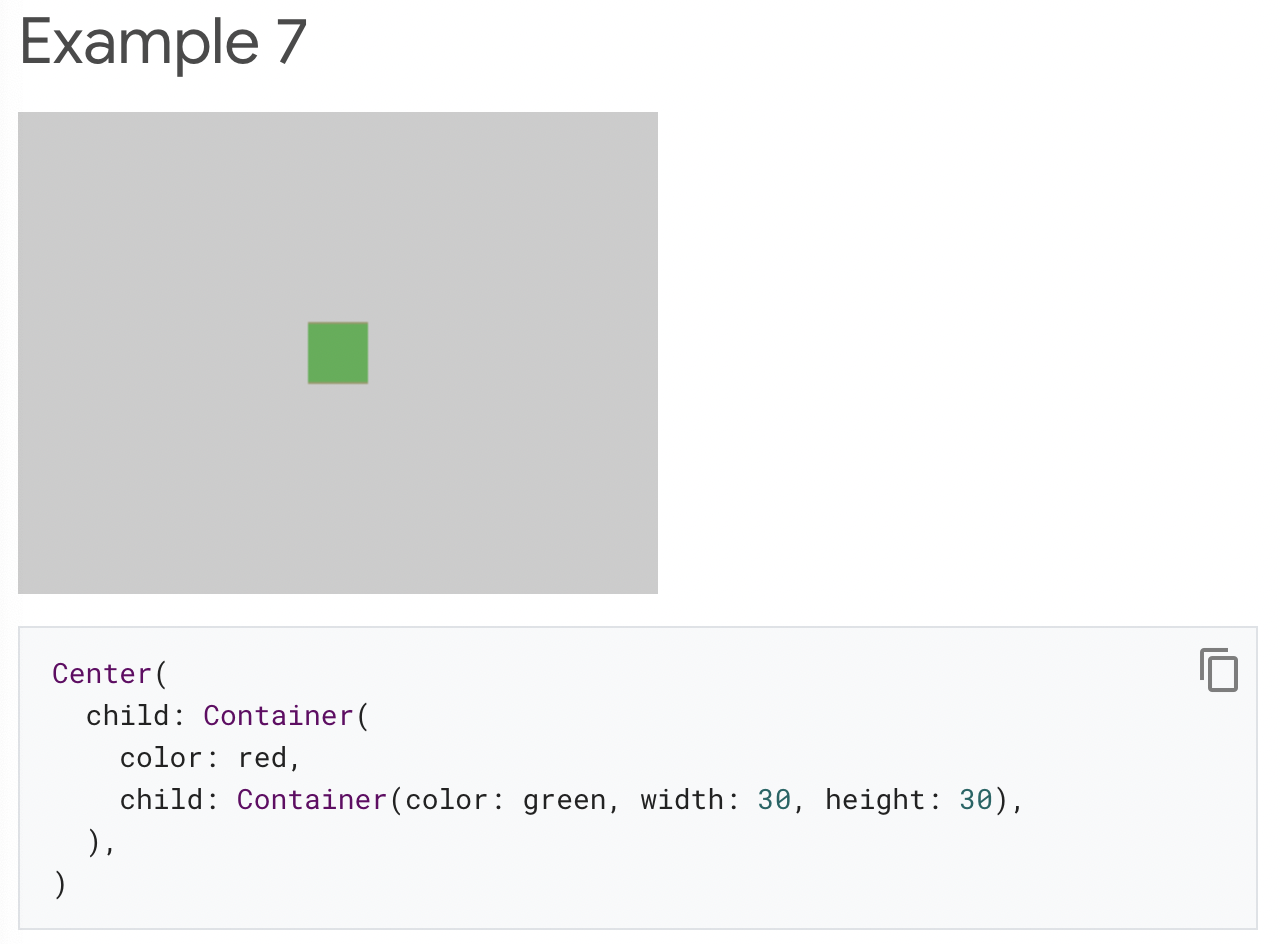
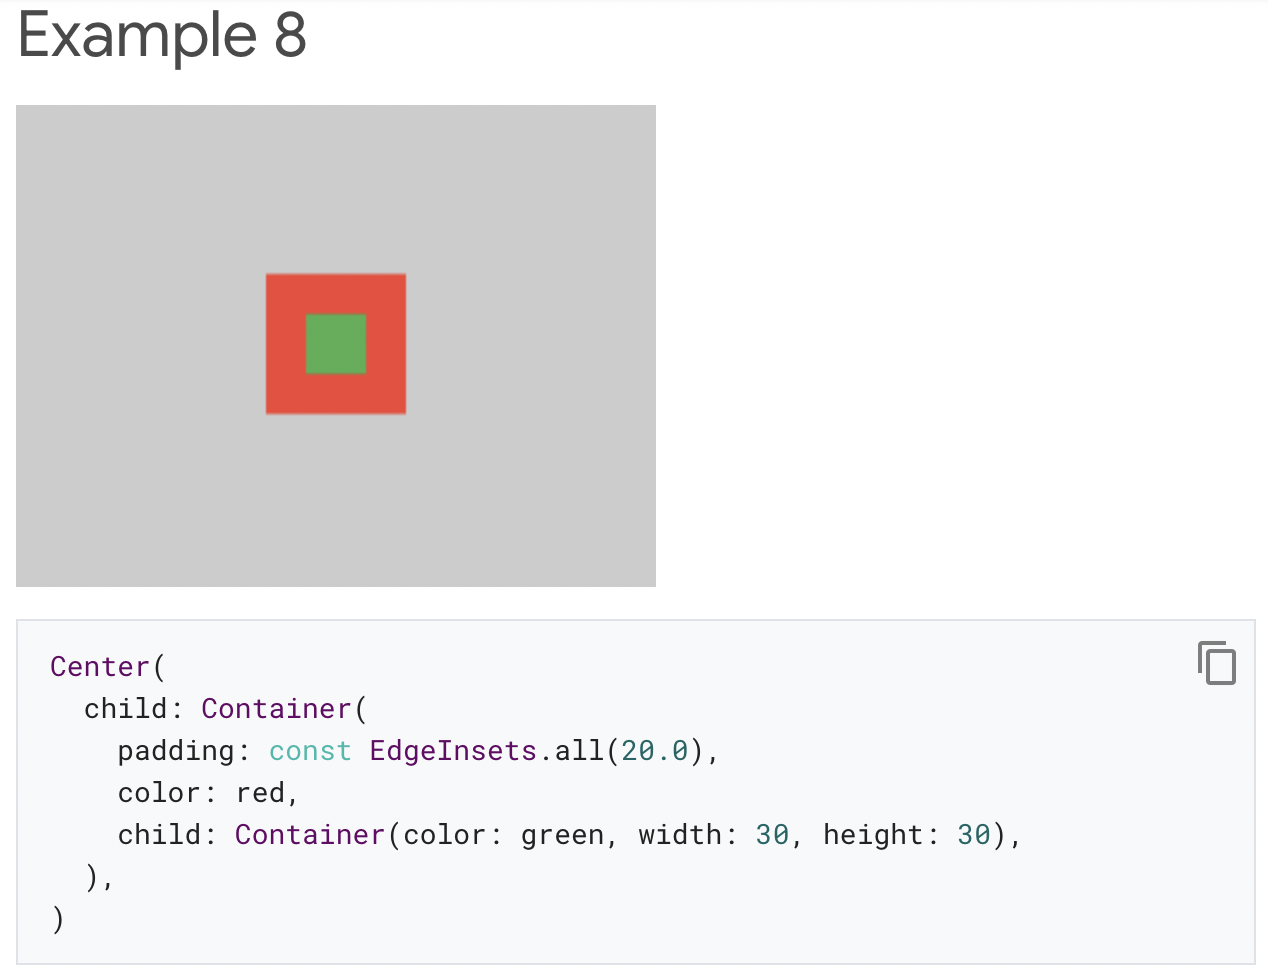
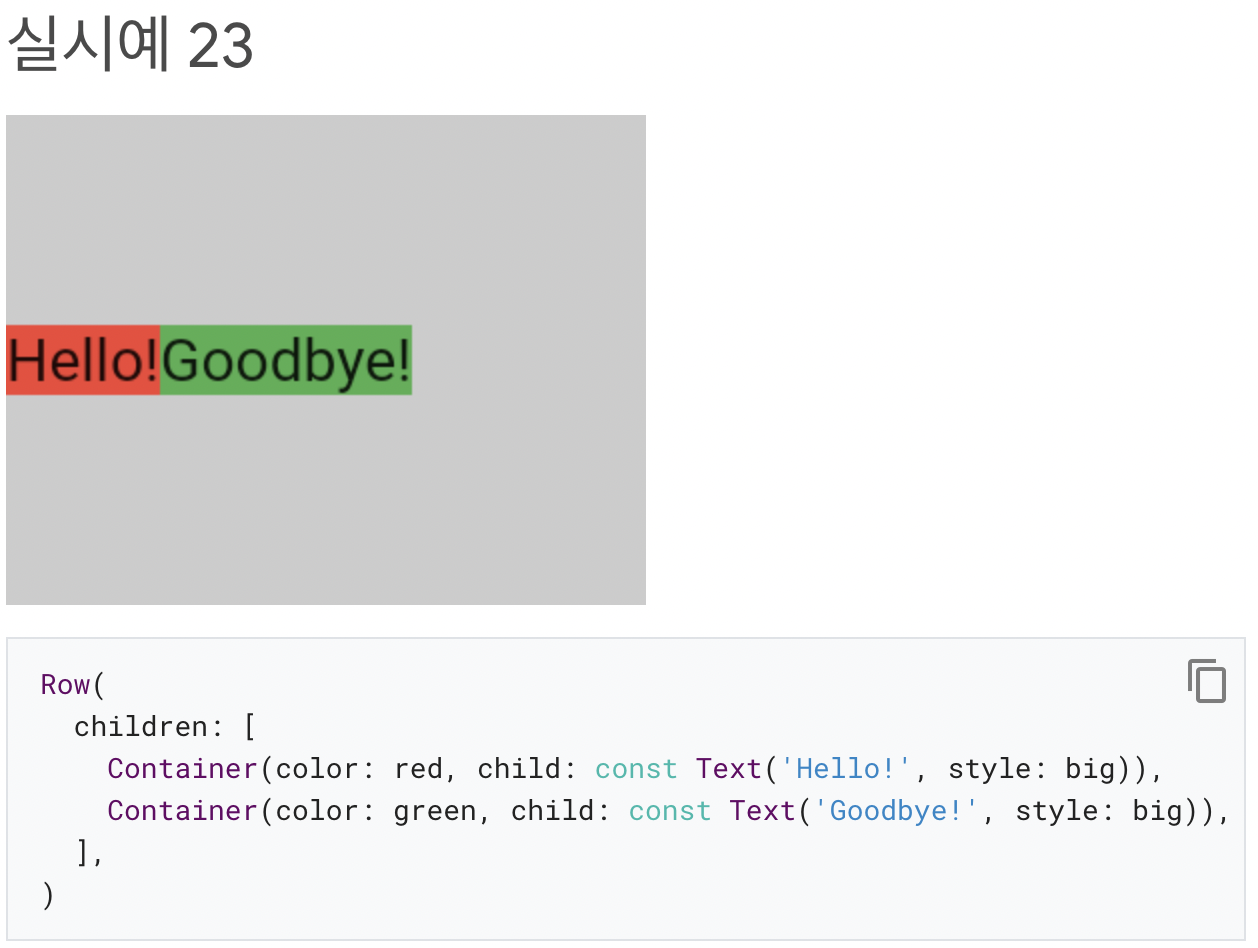
|<b>- Center는 red Container에게 Screen보다 더 큰 사이즈를 가질수 없다는 제약조건하에 원하는 사이즈를 가질 수 있도록 합니다.
- 하지만, red Container는 어떤 사이즈를 갖겠다고 명시되어 있지 않습니다.
- red Container의 child는 green Container인데, 30 x 30 사이즈를 갖고 있습니다.
- red Container는 역시 자식의 크기에 맞게 크기가 조정되어 30 x 30 입니다. 따라서 child에게 덮혀 보이지 않습니다.</b>|
|:--:|
|<b>padding 속성이 없다면, red Container는 child와 같은 사이즈이지만, 30 x 30에 모든 방향으로의 20 padding이 더해집니다.</b>|
|:--:|
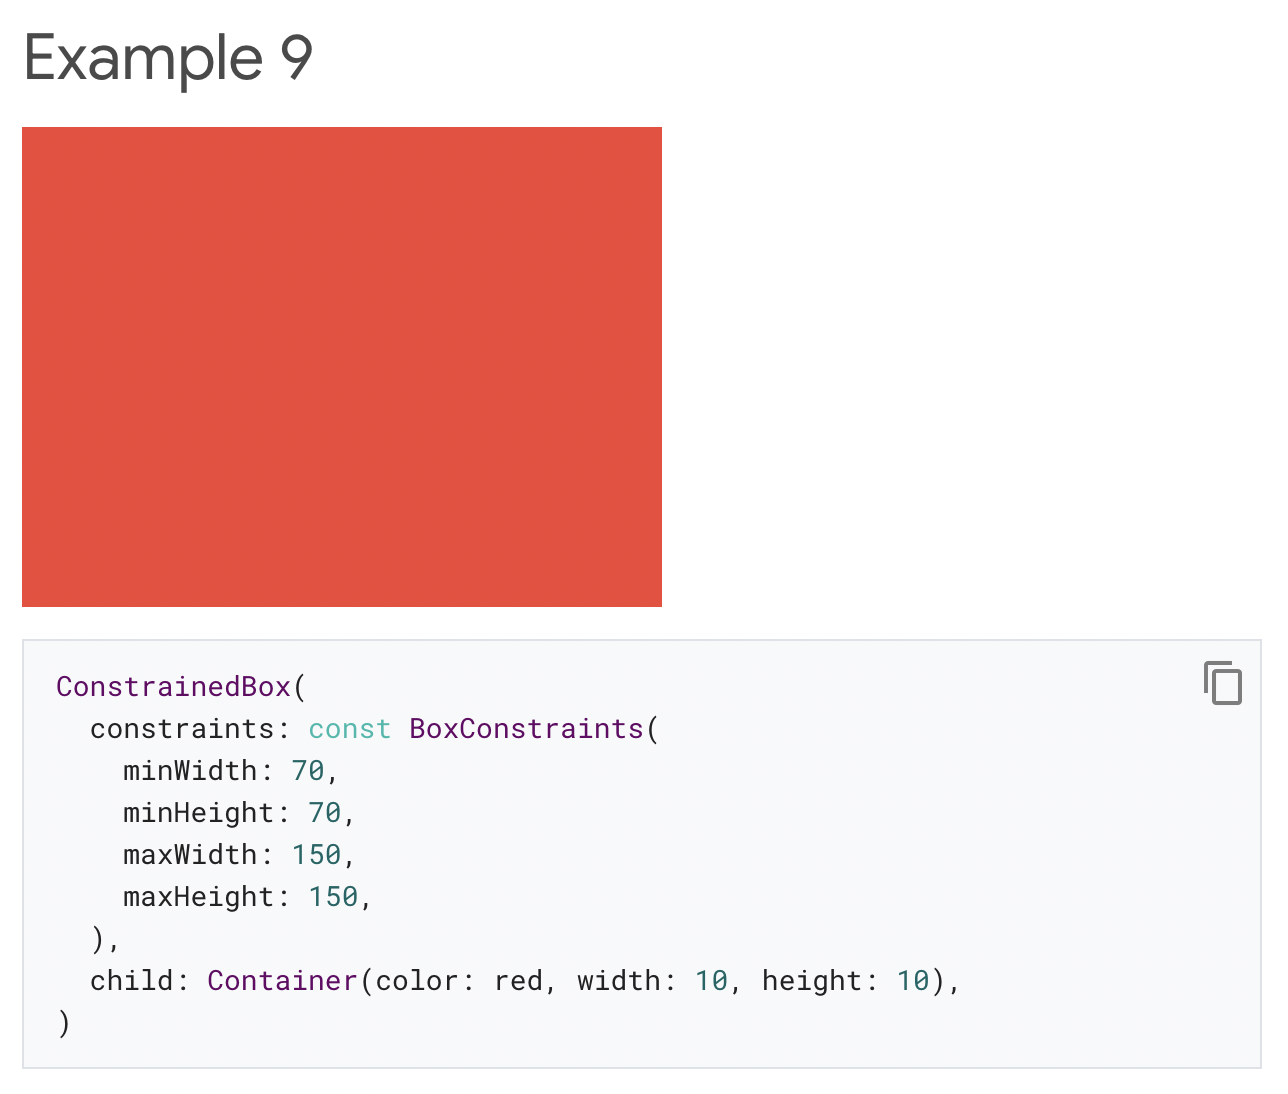
|<b>Costraints의 사이즈 속성들은 전부 무시됩니다. Screen은 ConstrainedBox에게 자신과 같은 사이즈를 갖도록 강제합니다.</b>|
|:--:|
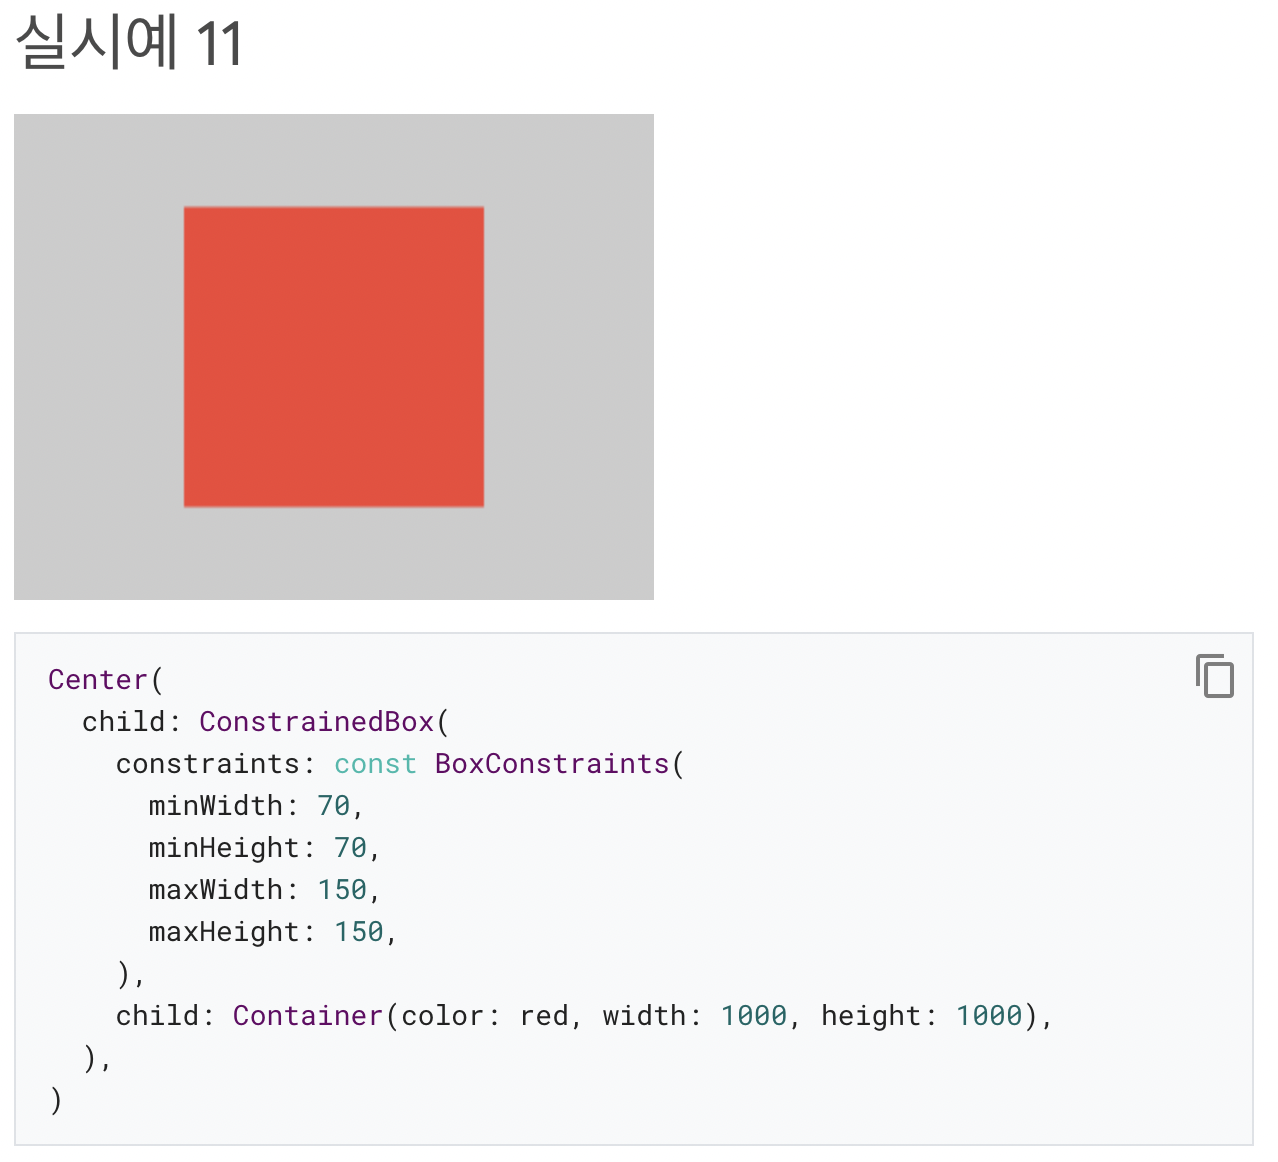
|<b>child Container는 1000 x 1000 사이즈를 원하지만, parent ConstrainedBox가 150 x 150이므로, 150 x 150 사이즈만을 갖습니다.</b>|
|:--:|
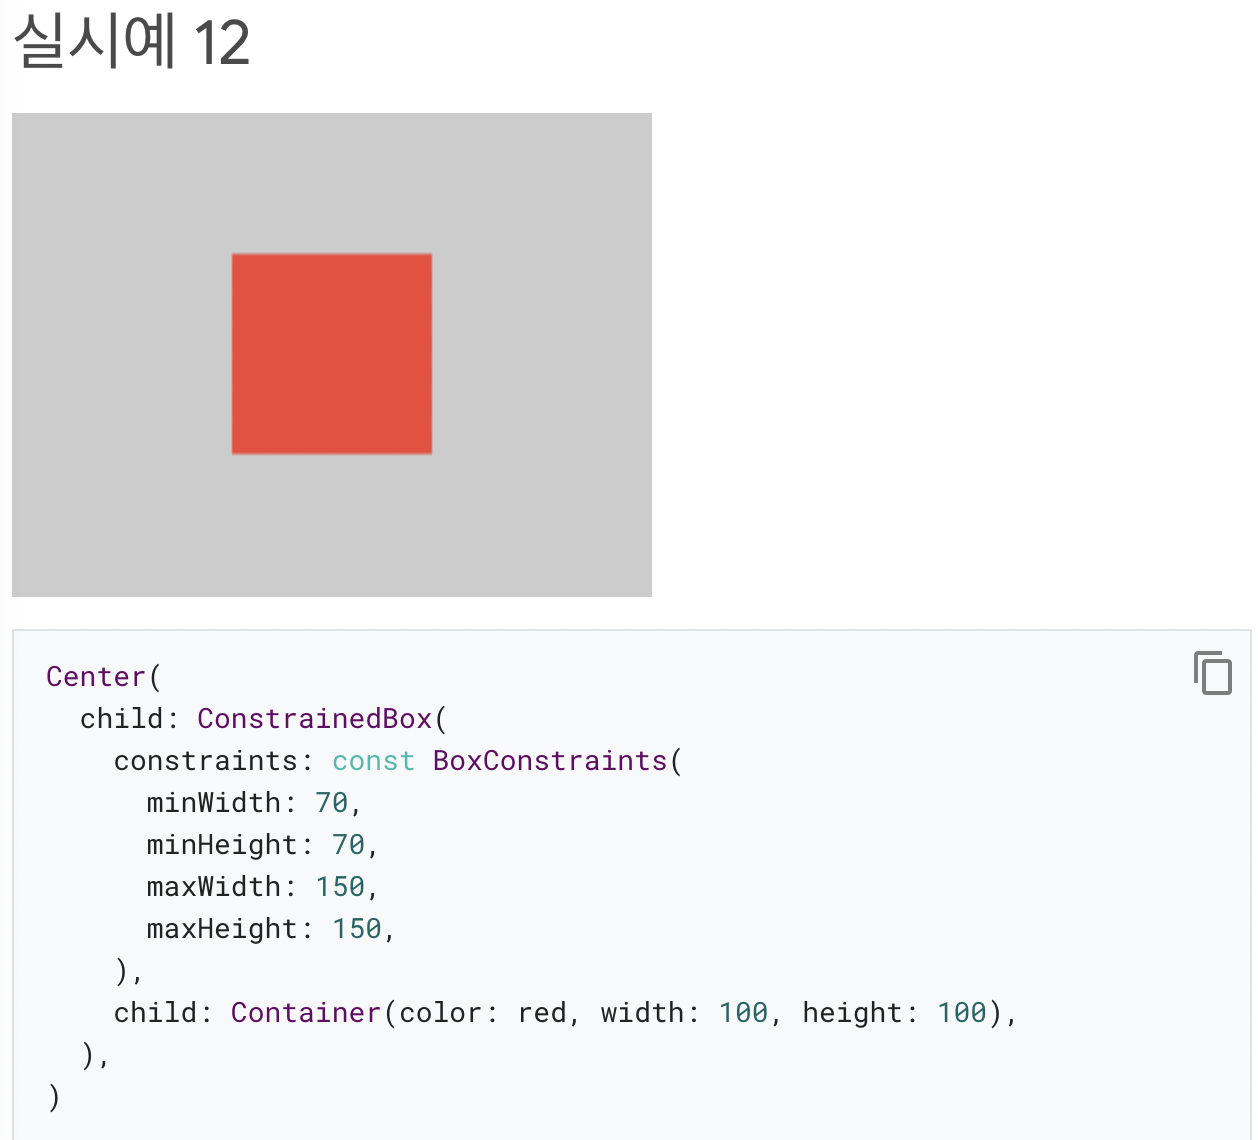
|<b>child Container는 parent ConstrainedBox minSize, maxSize에 포함되는 100 x 100 사이즈를 차지하게 됩니다.</b>|
|:--:|
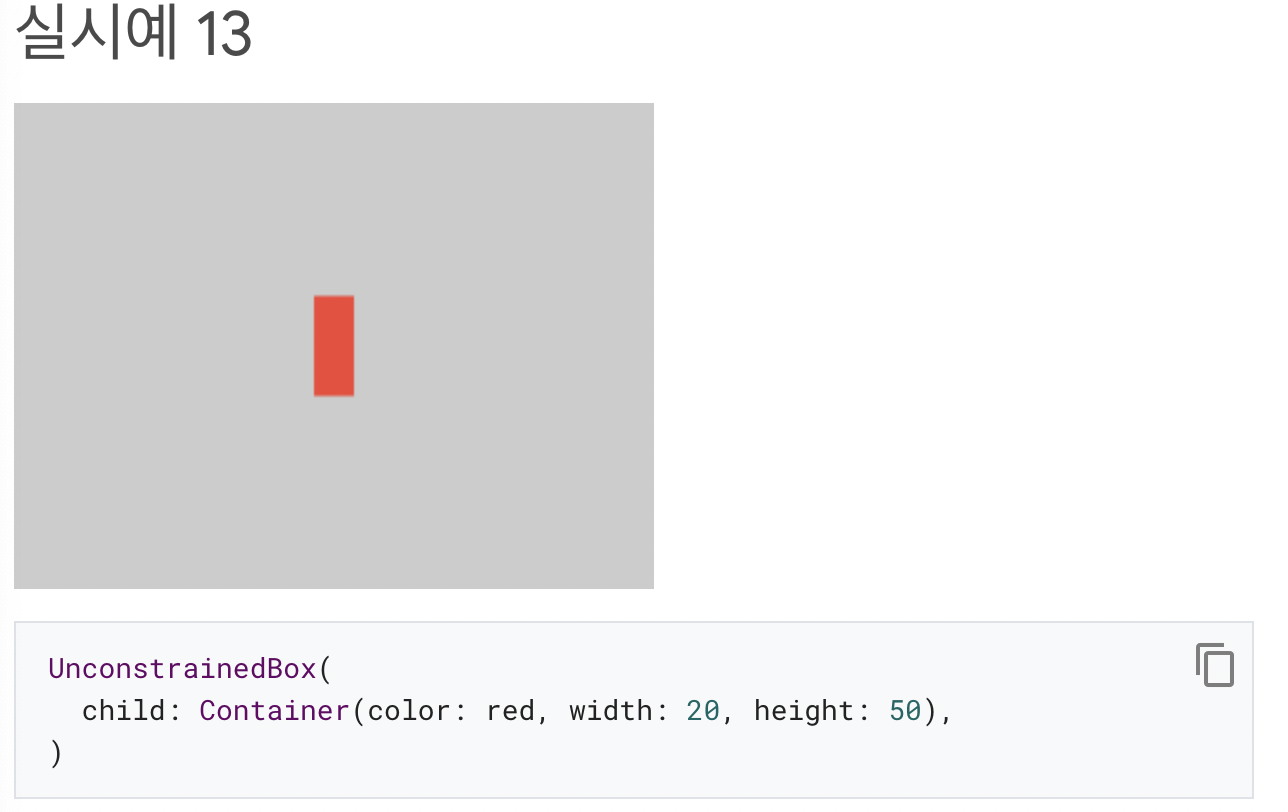
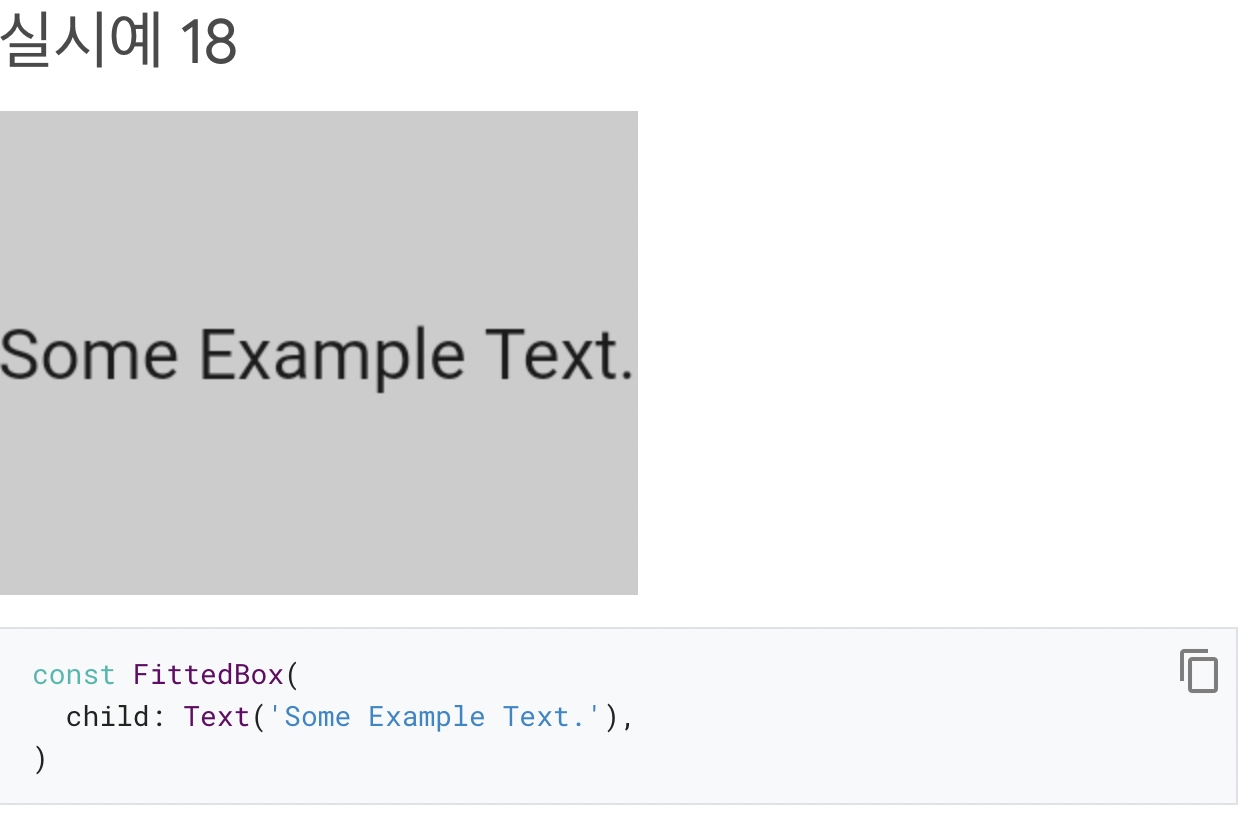
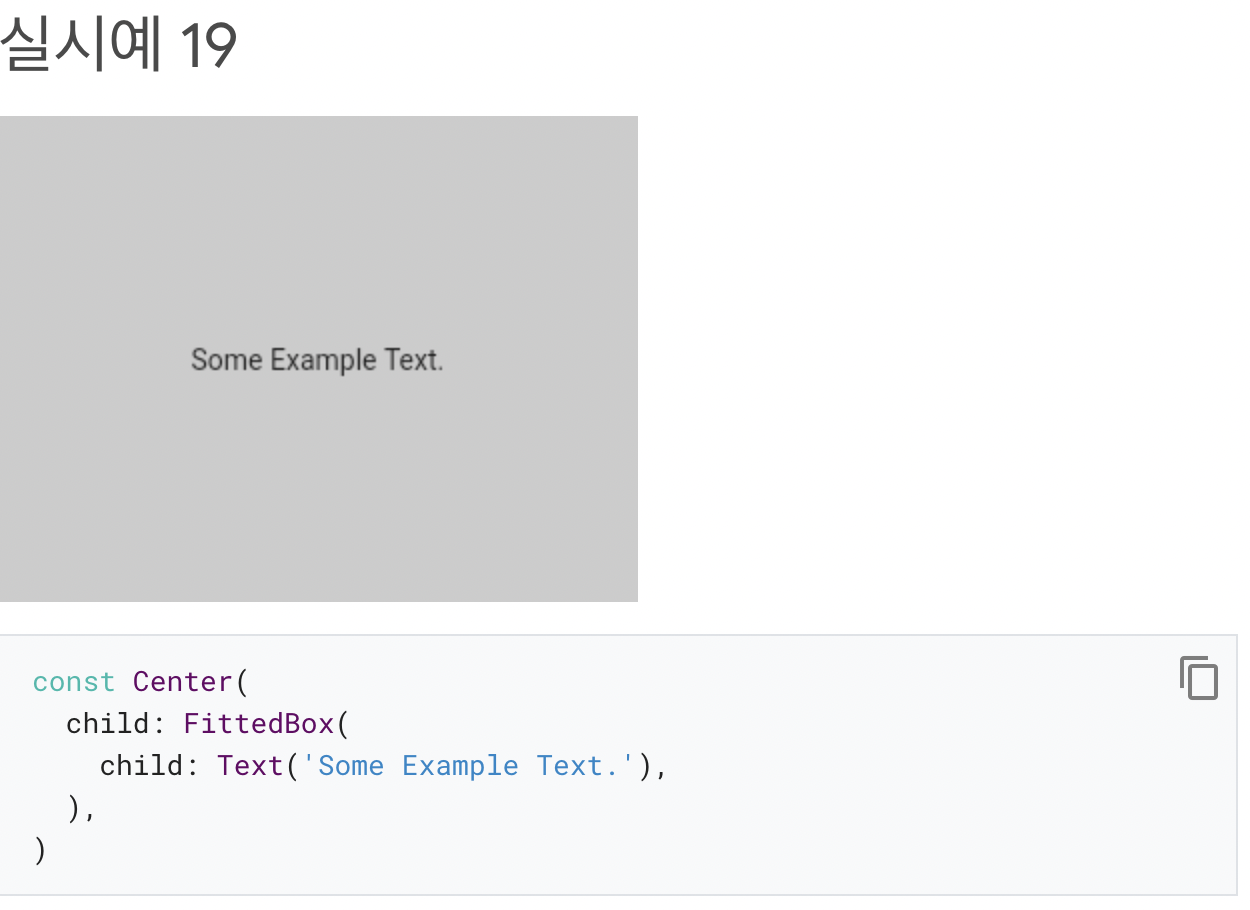
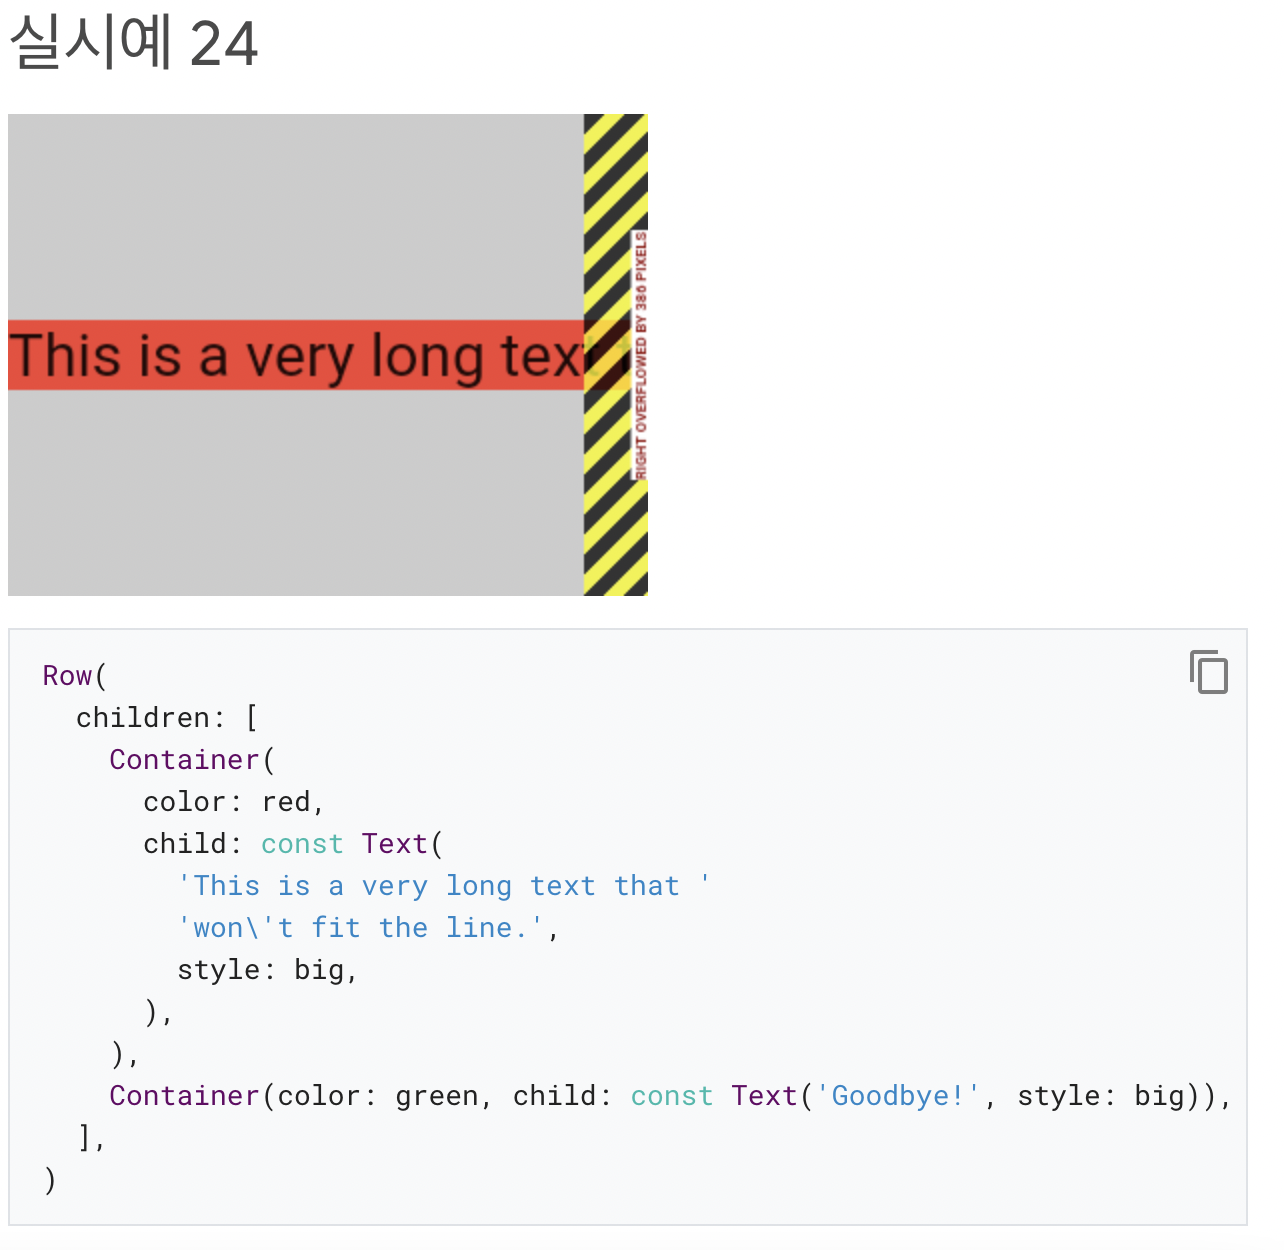
|<b>`UnconstrainedBox` lets its child `Container` be any size it wants.</b>|

|:--:|
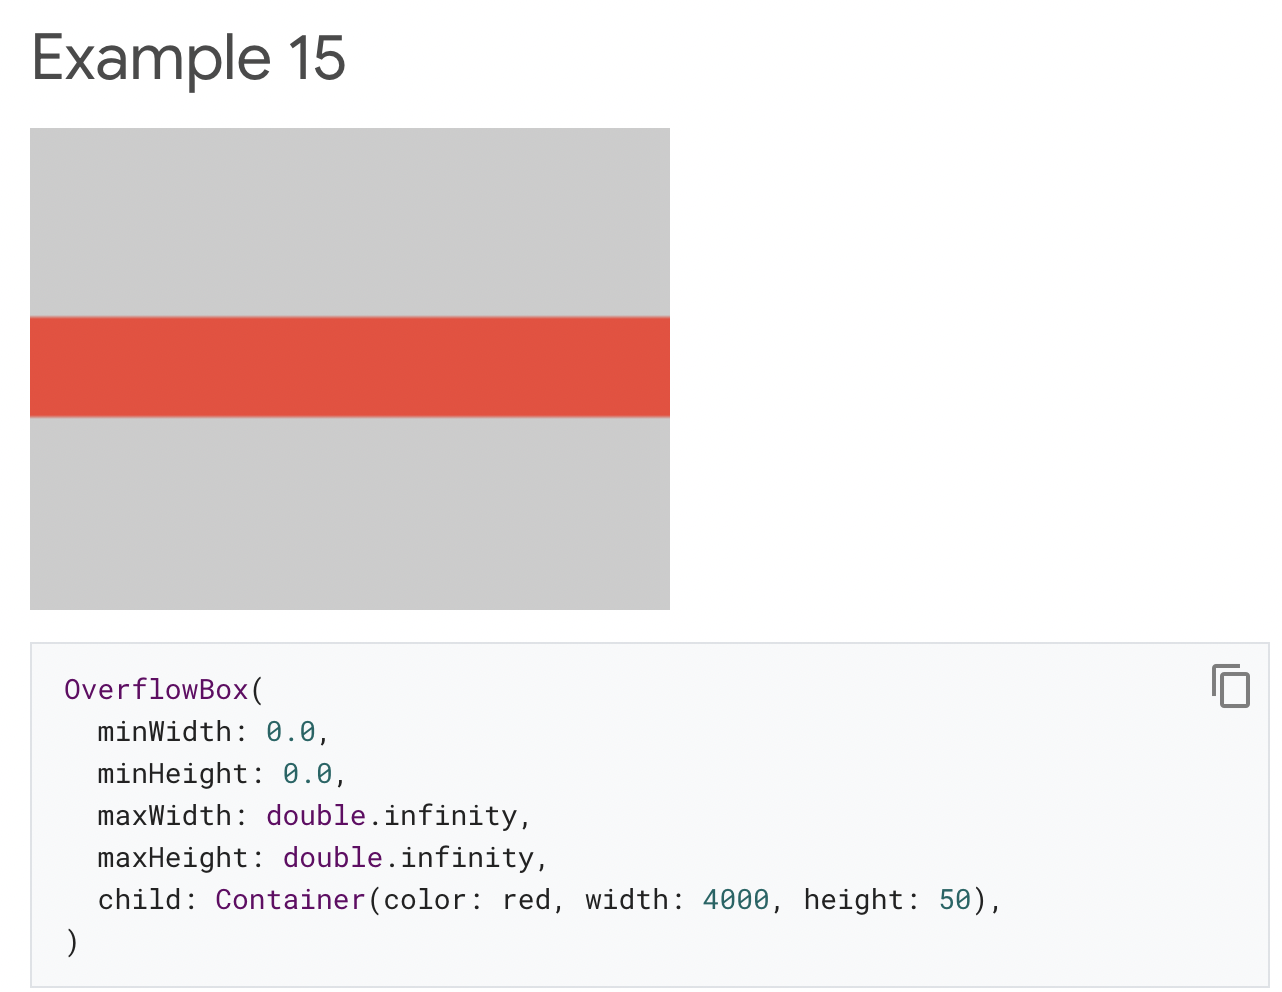
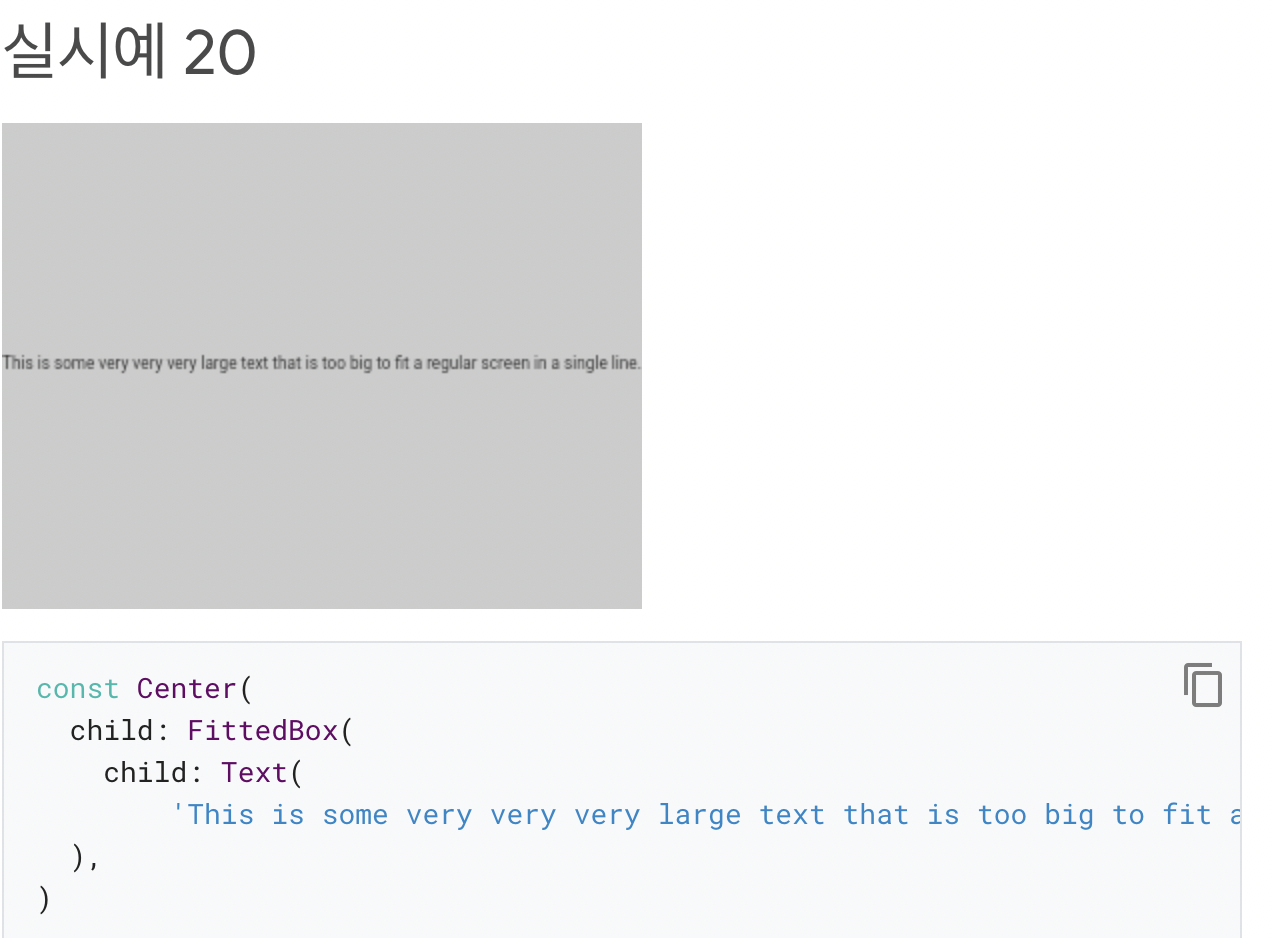
|<b>Unfortunately, in this case the `Container` is 4000 pixels wide and is too big to fit in the `UnconstrainedBox`, so the `UnconstrainedBox` displays the much dreaded “overflow warning”.</b>|
|:--:|
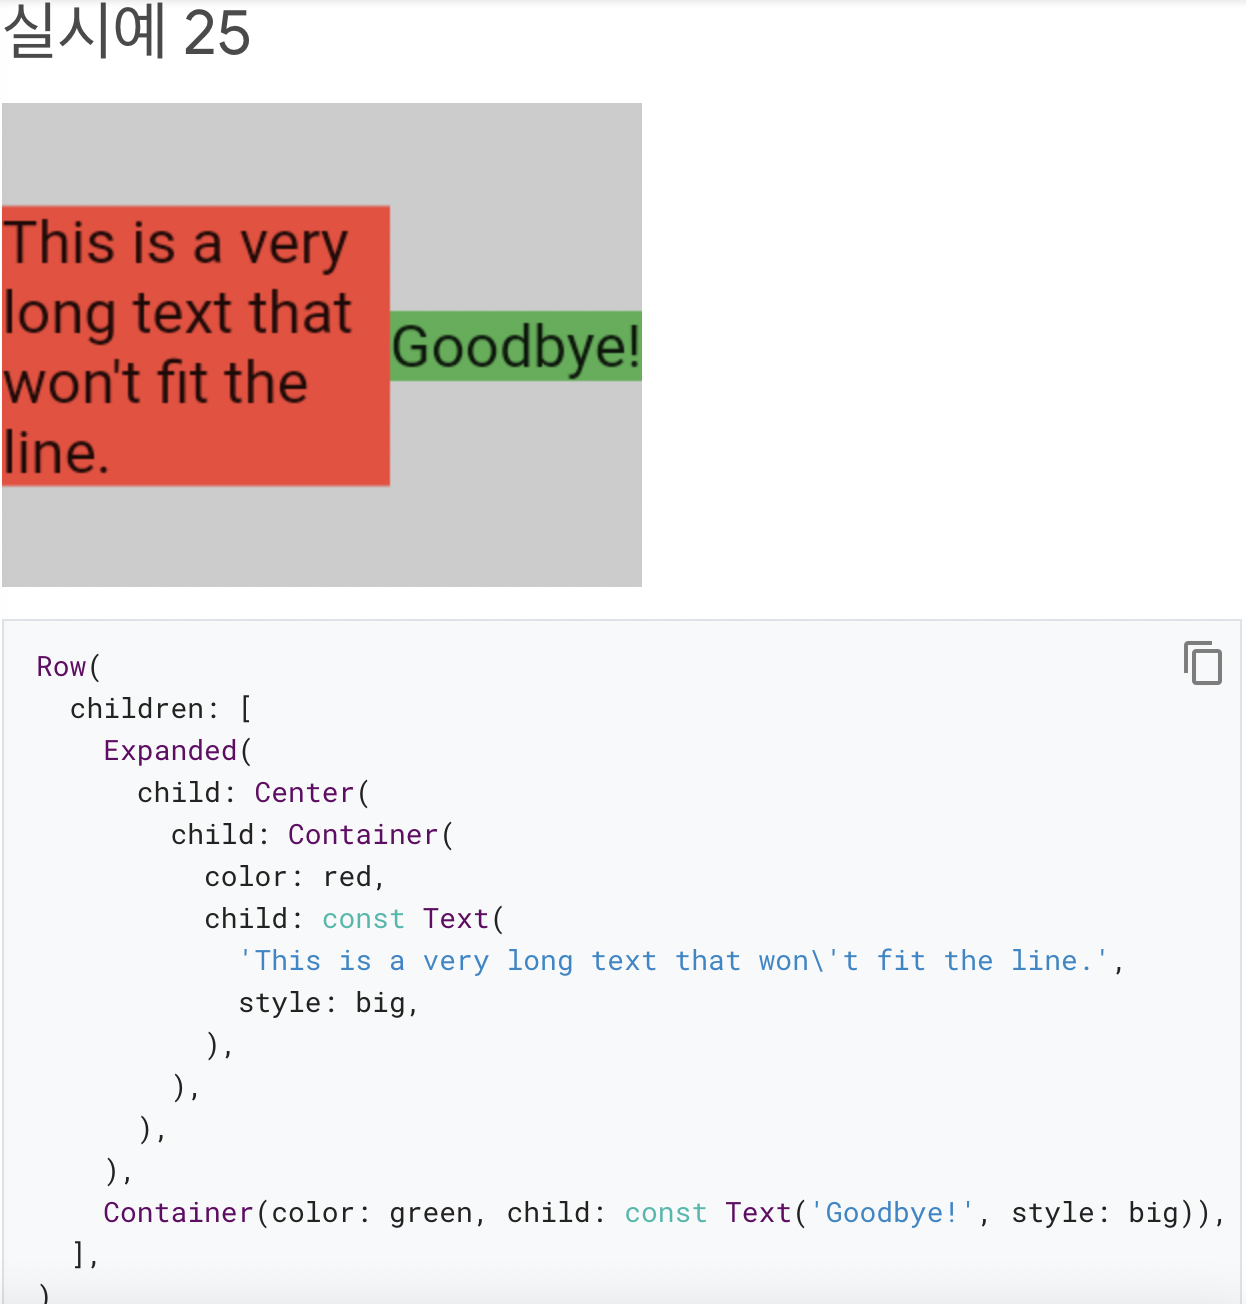
|<b>- The screen forces the `OverflowBox` to be exactly the same size as the screen, and `OverflowBox` lets its child `Container` be any size it wants.
- `OverflowBox` is similar to `UnconstrainedBox` ; the difference is that it won’t display any warnings if the child doesn’t fit the space.</b>|
|:--:|
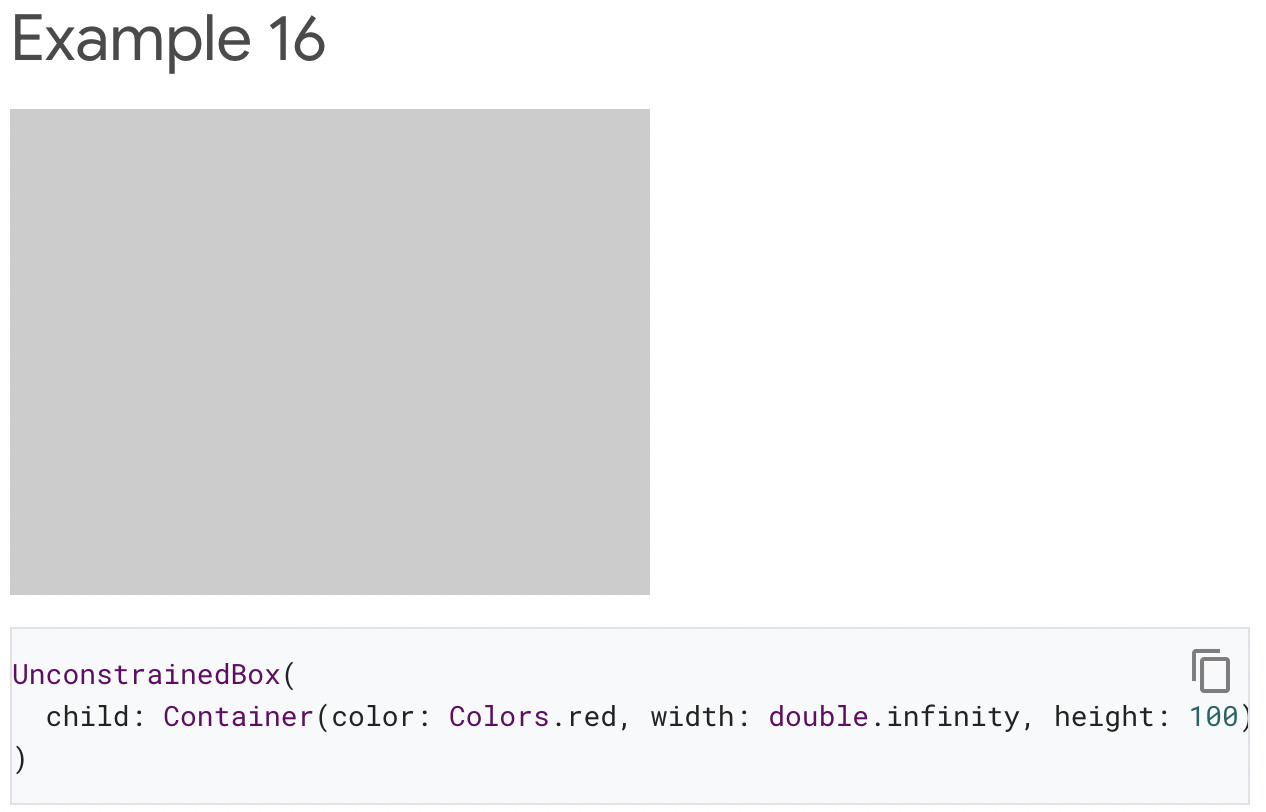
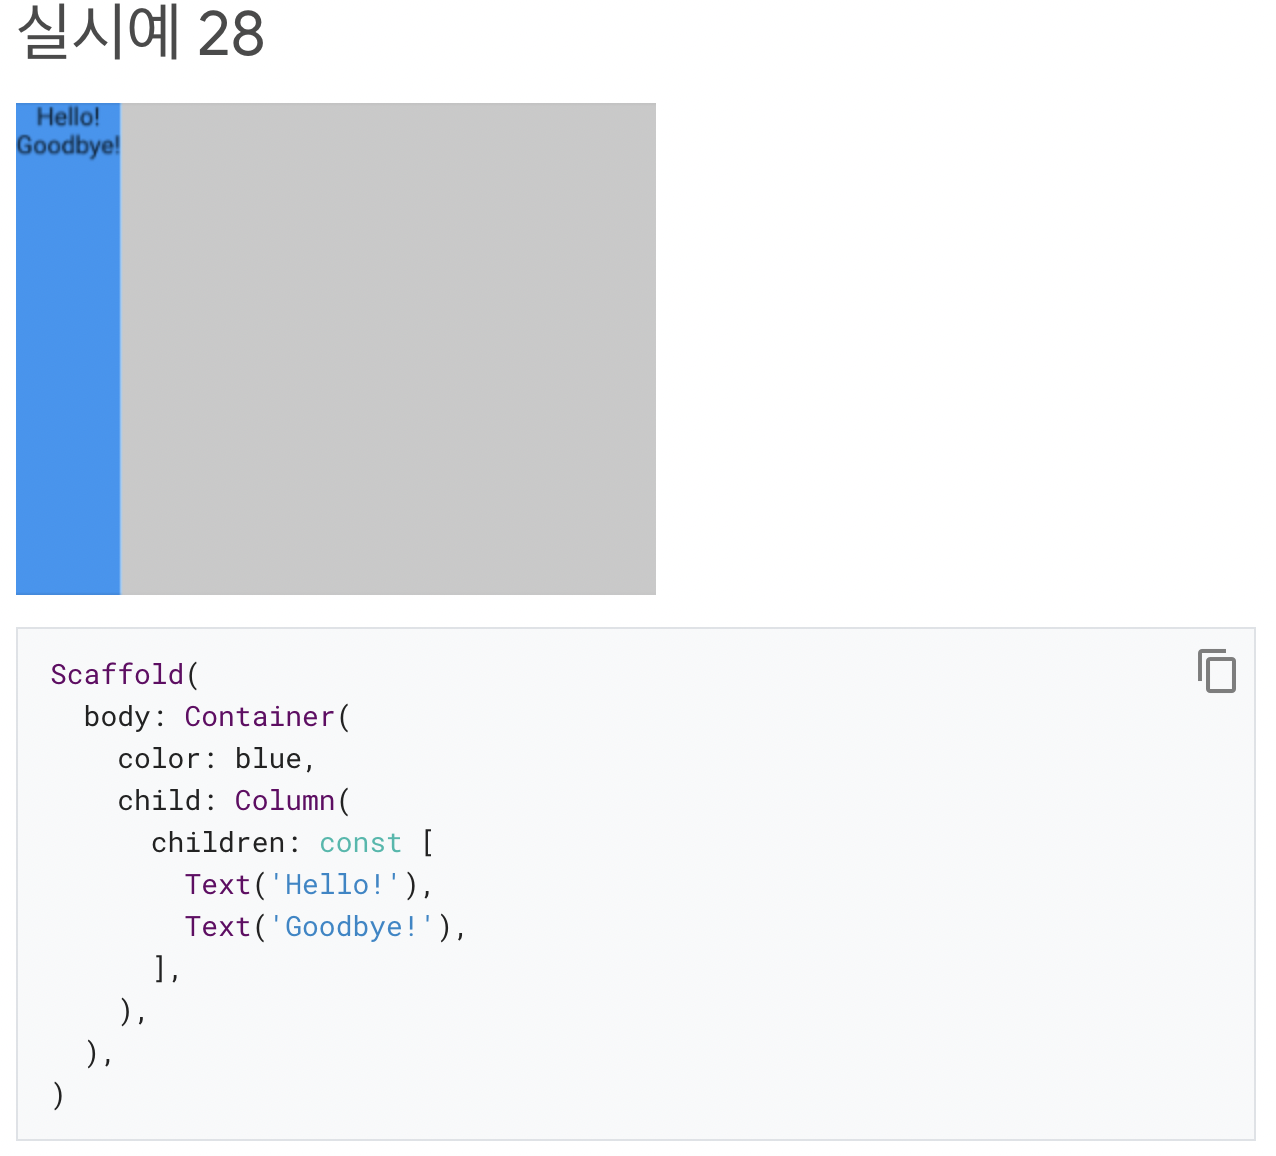
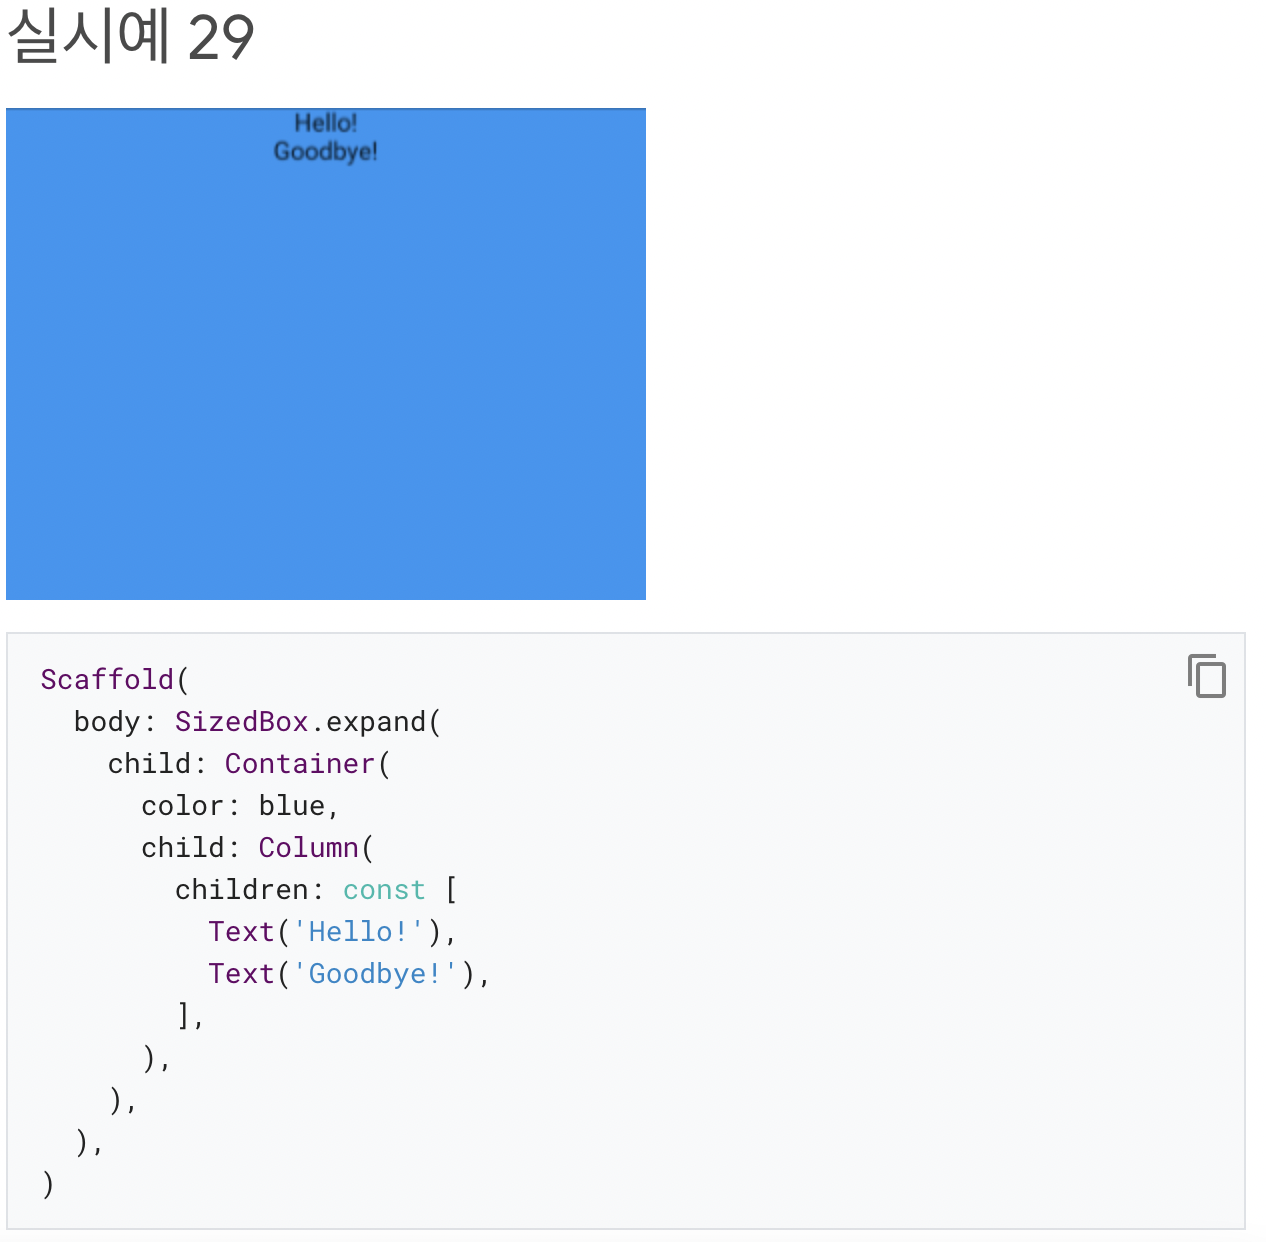
|<b>- 아무 것도 렌더링되지 않으며 콘솔에 오류가 표시됩니다.
- `UnconstrainedBox`자식을 원하는 크기로 만들 수 있지만 child의 width 속성은 부적절합니다.
- Flutter는 무한한 크기를 렌더링할 수 없으므로 다음 메시지와 함께 오류가 발생합니다.`BoxConstraints forces an infinite width.`</b>|

※ 학습해야 할것
- 아래 내용 읽어보기


2. Adding interactivity to your Flutter app
**Contents 보기 [Flutter앱에 interactivity 추가하기]**
- Stateful 및 상태 Stateless 위젯
- Stateless 위젯은 변경되지 않는다.
- Icon, IconButton, Text 등이 있다.
- Stateless widgets subclass
[StatelessWidget](https://api.flutter.dev/flutter/widgets/StatelessWidget-class.html)
- Stateful은 사용자 상호 작용에 의해 모양이 변경될 수 있다.
- Checkbox, Radio, Slider, InkWell, Form, TextField 등이 있다.
- Stateful widgets subclass
[StatefulWidget](https://api.flutter.dev/flutter/widgets/StatefulWidget-class.html)
- 위젯의 상태는
[State](https://api.flutter.dev/flutter/widgets/State-class.html)객체에 저장되어 위젯의 상태를 모양과 분리합니다. 상태는 슬라이더의 현재 값이나 체크박스 선택 여부와 같이 변경할 수 있는 값으로 구성됩니다. 위젯의 상태가 변경되면 상태 객체는setState()를 호출하여 프레임워크에 위젯을 다시 그리도록 지시합니다.****
- Stateless 위젯은 변경되지 않는다.

개발 포지션은 Native Android 입니다.