flutter_w10
Flutter w10
-
Cookbook - Images
- Display images from the internet
- Work with cached images
CatchedNetworkImage( imageUrl: "https://my-image.jpeg" )- CatchedNetworkImage 위젯은 다양한 맞춤 설정이 가능하다.
- placeholder 파라미터를 사용해서 이미지가 다운로드되는 동안 나타낼 대상을 관리할 수 있다.
CachedNetworkImage (
	imageUr1: "https://my-image. jpg",
	placeholder: (context, ur1) => Text('Loading Surl'),
)
- placeholder 파라미터를 사용해서 이미지가 다운로드되는 동안 나타낼 대상을 관리할 수 있다.
- progressIndicator Burilder 파라미터로 업데이트를 할 수 있다.
CachedNetworkImage ( imageUrl: "https://my-image. jpg", progressIndicatorBuilder: (_, url, download) { if (download.progress != null) { final percent = download.progress! * 100; return Text ('$percent% done loading'); } return Text ('Loaded $url!'); }, ) - BoxDecorations 이미지 속성을 이용한 캐시 작업
- NetworkImage 객체는 위젯이 아니라 이미지 제공자이기 때문에 CatchedNetworkImage를 제자리에 넣을 수 없다.
- 이때 CachedNetworkImageProvider를 사용하면 된다.
Container(
	decoration: BoxDecoration(
		image: CachedNetworkImageProvider(
			'https://my-image.jpg',
			),
		),
	)
- 이때 CachedNetworkImageProvider를 사용하면 된다.
- NetworkImage 객체는 위젯이 아니라 이미지 제공자이기 때문에 CatchedNetworkImage를 제자리에 넣을 수 없다.
- CatchedNetworkImage 위젯은 다양한 맞춤 설정이 가능하다.
-
Cookbook - Design
-
Add a Drawer to a screen
-
Display a snackbar
- Scaffold Messenger > 기존 SnackBar는 새 페이지로 이동하지 않는다. 이때 Scaffold Messenger를 사용한다. Scaffold Messenger는 모든 스캐폴드의 상위에서 작동하게 된다. 새로운 스캐폴드가 실행될 때마다 상위 Scaffold Messenger를 탐색하게 되고, looks up the tree for an ancestor scaffold and subscribes to snack bar events 한다. > > > 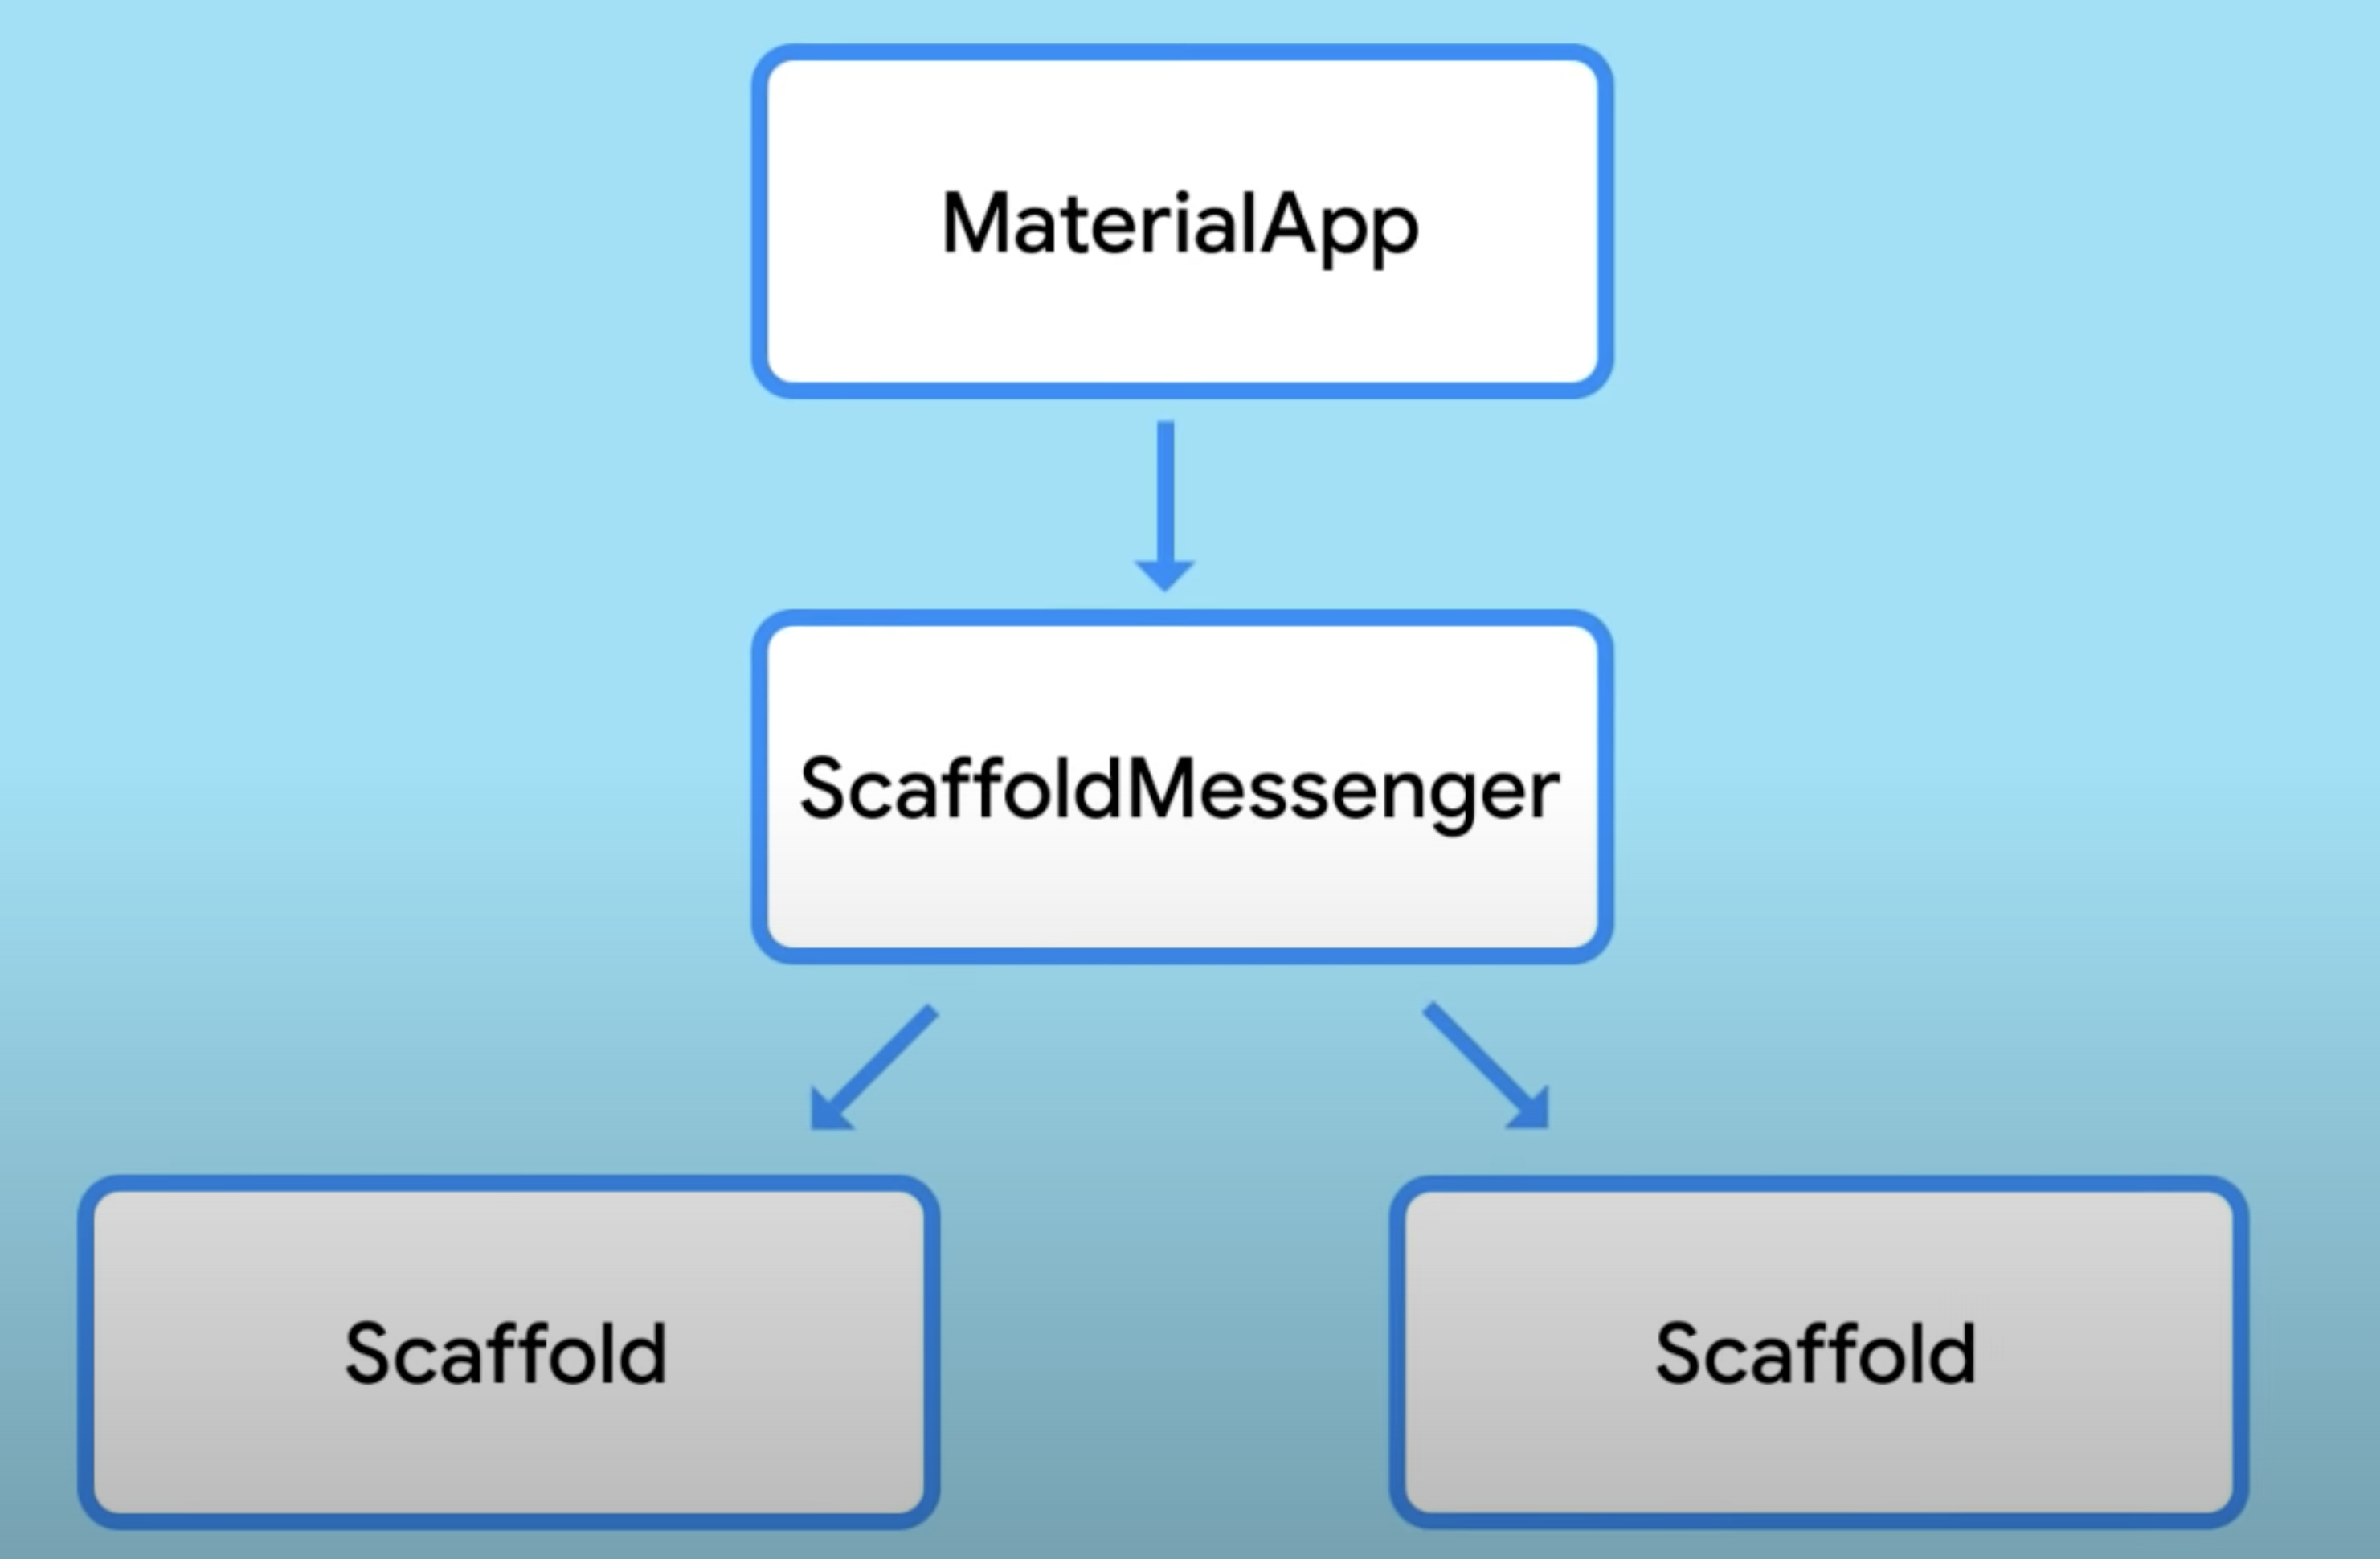>  > ```dart ScaffoldMessenger.of(Context) final _scaffoldKey = GlobalKey<ScaffoldMessengerState>(); MatreialApp( scaffoldMessengerKey: _scaffoldKey, ) final ScaffoldMessengerState _scaffold = _scaffoldkey.currentState; scaffoldMessengerState.showSnackBar( SnackBar(...), ) ``` -
Update the UI based on orientation
-
Use themes to share colors and font styles
```dart MaterialApp( theme: ThemeData(), darkTheme: ThemeData.dark(), ) ``` ```dart MaterialApp( colorScheme: ColorScheme.fromSwatch( primarySwatch: Color.orange, ), textTheme: GoogleFonts.emilysCandyTextTheme(), scaffoldBackgroundColor: Colors.orange[100], ) ``` Theme 위젯으로 완전히 새로운 데이터를 제공하거나 ```dart Theme( data: ThemeData(...), child: MyWidget(), ) ``` 기존 테마를 복사하여 원하는 대로 활용할 수 있다. ```dart Theme( data: Theme.of(context).copyWith(...), child: MyWidget(), ) ``` -
Work with tabs
-
-
Cookbook - Lists
- Create a grid list
- 30a50c81896359583b78d522f7706afa
- Create a horizontal list
- e81f132058986c629ef128e1ddf592f7
- Create lists with different types of items
- d5d84d2ab579b2a77a9f24528aff3ab8
- Place a floating app bar above a list
- 7c3f3ebac38c189b20b3e51060bfc79a
- Use lists
- 970fcfa28a3fdbfd17f49432f7f35b17
- Work with long lists
- 674016f1f6cde1982bcb510a21096501
- Create a grid list
-
Cookbook - Navigation
In Android, a route is equivalent to an Activity. In iOS, a route is equivalent to a ViewController. In Flutter, a route is just a widget. This recipe uses the Navigator to navigate to a new route.
To switch to a new route, use the
[Navigator.push()](https://api.flutter.dev/flutter/widgets/Navigator/push.html)method. Thepush()method adds aRouteto the stack of routes managed by theNavigator.By using the
[Navigator.pop()](https://api.flutter.dev/flutter/widgets/Navigator/pop.html)method. Thepop()method removes the currentRoutefrom the stack of routes managed by theNavigator.- Animate a widget across screens
- c618b76fc6cd821971a2565dd3705a5e
- Navigate to a new screen and back
- 733813794a9a6717615b0bb2f5292f2c
- Navigate with named routes
To work with named routes, use the
[Navigator.pushNamed()](https://api.flutter.dev/flutter/widgets/Navigator/pushNamed.html)function. This example replicates the functionality from the original recipe, demonstrating how to use named routes using the following steps:- Create two screens.
- Define the routes.
- Navigate to the second screen using
Navigator.pushNamed(). - Return to the first screen using
Navigator.pop().
Show a snackbar on the home screen with the selection. Now that you’re Launching a selection screen and awaiting the result, you’ll want to do something with the information that’s returned. In this case, show a snackbar displaying the result by using the
_navigateAndDisplaySelection()method inSelectionButton:content_copy
// A method that launches the SelectionScreen and awaits the result from // Navigator.pop. Future<void> _navigateAndDisplaySelection(BuildContext context) async { // Navigator.push returns a Future that completes after calling // Navigator.pop on the Selection Screen. final result = await Navigator.push( context, MaterialPageRoute(builder: (context) => const SelectionScreen()), ); // When a BuildContext is used from a StatefulWidget, the mounted property // must be checked after an asynchronous gap. if (!mounted) return; // After the Selection Screen returns a result, hide any previous snackbars // and show the new result. ScaffoldMessenger.of(context) ..removeCurrentSnackBar() ..showSnackBar(SnackBar(content: Text('$result'))); }- Pass arguments to a named route
- 07da451651abfca52c7246bab3aa9924
- Return data from a screen
- eca8be9da060895d4e03daf299a6d764
- Send data to a new screen
- a160eaa4f86d97585438ad6f25d26430
- Animate a widget across screens
-
Cookbook - Forms
- Build a form with validation
- Create and style a text field
- Focus and text fields
- Retrieve the value of a text field
- Handle changes to a text field
