
이번에는 유저의 프로필 사진을 저장하기 위한
UserFile엔티티 관련 로직을 알아보도록 하자.
UserFile
파일업로드
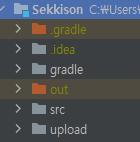
먼저, 유저의 프로필사진을 저장하기 위한 폴더를 Sekkison 폴더 바로 밑에 만들어 주었다.
이후application.properties세팅을 해 준다. ( 게시글의 처음부터 따라왔다면 되어 있을 것이다.)application.properties
spring.servlet.multipart.max-file-size=5MB
spring.servlet.multipart.max-request-size=20MB
file.upload-dir=upload
app.upload.path=upload
업로드 파일의 경로를
upload로 하고, 파일의 최대 크기를5MB로 지정하였다.UserFileController
@RestController
@RequestMapping("/userFiles")
@RequiredArgsConstructor
public class UserFileController {
    private final UserFileService userFileService;

    // 파일저장 경로
    @Value("${file.upload-dir}")
    private String uploadDir;

    // 프로필 업로드
    @ResponseBody
    @PostMapping("/upload")
    public ResponseForm uploadFile(
    		@RequestParam("file") MultipartFile file,
       		@RequestParam("userId") Long userId) {
        try {
            return userFileService.uploadFile(userId, file);
        } catch (IOException e) {
            return null;
        }
    }
}
컨트롤러에서는
userFiles/upload라는 요청에 프로필 업로드 함수를 실행시킨다.
userId와MultipartFile을 받아 해당 유저의 프로필 사진을 설정하는 것이다.
@Value를 통해application.properties에서 설정한 파일 업로드 경로를 가져올 수 있다.UserFileService
@Service
@Transactional
@RequiredArgsConstructor
public class UserFileService {

    // 파일 경로
    @Value("${file.upload-dir}")
    private String uploadDir;

    // 이미지 파일은 최대 5MB
    private static final long MAX_IMAGE_SIZE = 5242880;

    private final UserFileRepository userFileRepository;

    // 프로필 올리기
    public ResponseForm uploadFile(Long userId, MultipartFile file) throws IOException {
        ResponseForm responseForm = new ResponseForm();

        // 파일이 없거나 빈파일이면 레파지토리에서 userId 기준으로 탐색
        if (file.isEmpty() || "".equals(file.getName())) {
            UserFile userFile = userFileRepository.findByUserId(userId).orElse(null);

            // 파일이 없고 기본 파일이 아니면 파일 삭제 후 기본 파일로 저장
            if (userFile != null && !userFile.getFile().equals("default.jpg"))
                new File(uploadDir + "/" + userFile.getFile()).delete();
            userFile.setFile("default.jpg");
            userFileRepository.save(userFile);
            return responseForm.setSuccess(null);
        }

        // 이미지 크기 제한 체크
        if (file.getSize() > MAX_IMAGE_SIZE) {
            throw new RuntimeException("이미지 크기가 너무 큽니다.");
        }

        // 이미지 저장
        String fileName = writeFile(file);
        UserFile userFile = userFileRepository.findByUserId(userId).orElse(null);

        // 파일이 없고 기본 파일이 아니면 저장
        if (userFile != null && !userFile.getFile().equals("default.jpg"))
            new File(uploadDir + "/" + userFile.getFile()).delete();

        userFile.setFile(fileName);
        userFileRepository.save(userFile);

        return responseForm.setSuccess(null);
    }

    private String writeFile(MultipartFile file) throws IOException {
        String extension = com.google.common.io.Files.getFileExtension(file.getOriginalFilename());
        String fileName = UUID.randomUUID().toString() + "." + extension;
        byte[] fileContent = file.getBytes();

        String filePath = uploadDir + "/" + fileName;

        Path path = Paths.get(filePath);
        Files.write(path, fileContent);
        return fileName;
    }
}
자바에서 자체적으로 제공하는
UUID클래스를 사용하여 이미지의 이름을 변경하고 적용시킨 후 로컬 파일 시스템에 저장하였다.
( 같은 이름의 이미지 파일을 한 폴더 안에 넣지 못하기 때문 )
조금 더 자세한 설명을 위해 추가 설명하겠다.
- 먼저, 업로드된 파일의 확장자를 가져와서 변수
extension에 저장한다. 이를 위해Google Guava라이브러리의Files클래스의getFileExtension메서드를 사용하였다.
- 사용자가 업로드한 파일이 이름이 기본 프로필 파일과 이름이 같거나 다른 유저의 파일과 같을 경우 문제가 생기기 때문에
UUID를 사용하여 랜덤한 파일 이름을 생성하였다.
- 업로드된 파일의 내용을
byte배열로 가져와fileContent변수에 저장한다.
- 로컬 파일 시스템에 파일을 저장하기 위해, 저장할 파일의 경로를
filePath변수에 저장한다. 이는uploadDir변수에 파일 이름을 더해 경로를 만들어주게 된다.
Path path = Paths.get(filePath);이후
Files.write(path, fileContent);를 통해 파일을 저장한다.
Sekkison에서 유저가 파일을 올리지 않으면 기본 이미지로 표현되기 때문에upload폴더에 기본 이미지를 넣어주고,userfile객체가null일 경우 이미지를 넣어주었다.따라서
userfile이null이 아니면서 기본이미지가 아닌 경우 유저가 원하는 사진을 넣으면 프로필 사진이 변경된다.
코드를 거의 그대로 작성하였으니, 이 게시글을 따라
Controller,Service를 만든다면 파일 업로드를 간단하게 구현할 수 있을 것이다.

만재 개발자