RxDataSource
RxSwift에서 TableView 및 CollectionView를 더 Rx답게 사용하는 라이브러리를 살펴보자. 만약 테이블뷰에 데이터를 바인딩 할 때 하나의 섹션만 사용하는 거라면 RxCocoa가 제공하는 extension으로 충분하다. 하지만 두 개 이상의 section을 구현해야 한다면, 또 테이블과 컬렉션의 row를 추가 • 삭제 • 수정 기능(적절한 애니메이션 효과까지)을 예정 중이라면 RxDataSources 사용을 고려하면 좋다. 좀 긴 글이 될 것 같지만, 차근차근 풀어가보자.
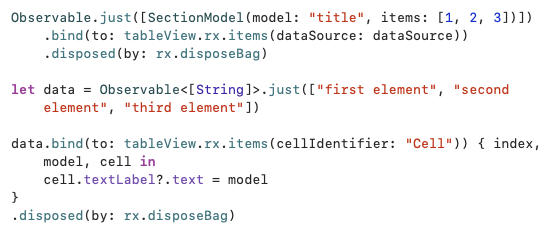
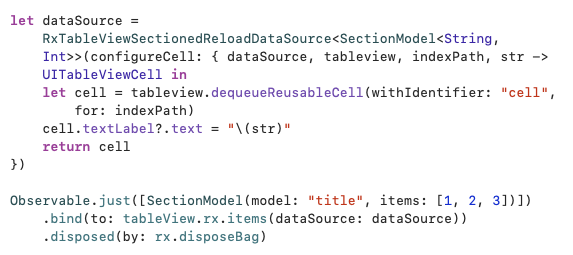
RxCocoa와 RxDataSources 비교
| RxCocoa | RxDataSources |
|---|---|
 |  |
RxDataSource 구현
SectionModel 구현
struct Student {
    let name: String
    var age: Int
}

struct StudentSection {
    var header: String
    var items: [Student]

    init(header: String, items: [Student]) {
        self.header = header
        self.items = items
    }
}

extension StudentSection: SectionModelType {

    init(original: StudentSection, items: [Student]) {
        self = original
        self.items = items
    }
}
tableView에 뿌려줄 데이터를 위해서 Student 구조체를 선언하고, StudentSection을 만들어서 Section 안에서 데이터(item)가 관리되도록 한다. 여기서 header는 실제로 section header title에 들어가는 프로퍼티다.
public protocol SectionModelType {
    associatedtype Item

    var items: [Item] { get }

    init(original: Self, items: [Item])
}
그리고 extension을 통해 SectionModelType protocol을 채택하는데, 보시다시피 init()을 구현해서 프로토콜을 준수하도록 한다. 이렇게 SectionModel을 만는게 첫 번째 과정이다. 이렇게 SectionModelType을 준수한 구조체는 SectionModel로서 활동할 준비가 완료되었다.
DataSource 구현
다음 작업은 가장 중요한 dataSource 객체를 생성하는 것이다.
typealias StudentSectionDataSource = RxTableViewSectionedReloadDataSource<StudentSection>
    let dataSource: StudentSectionDataSource = {
        let ds = StudentSectionDataSource(
            configureCell: { (dataSource, tableView, indexPath, student) -> UITableViewCell in
            let cell = tableView.dequeueReusableCell(withIdentifier: "basicCell", for: indexPath)
            cell.textLabel?.text = student.name
            cell.detailTextLabel?.text = "\(student.age)"
            return cell
        })
        return ds
    }()
위의 코드처럼 dataSource 객체를 생성하는 것은 RxTableViewSectionedReloadDataSource 클래스이다. 이 클래스는 SectionModelType을 타입으로 받는다. SectionModel이 이 타입을 준수하고 있으므로 우리가 이전에 만든 StudentSection을 쏙 집어 넣어주면 된다.
open class RxTableViewSectionedReloadDataSource<Section: SectionModelType>
    : TableViewSectionedDataSource<Section>
    , RxTableViewDataSourceType {
    //...
}
이 클래스는 TableViewSectionedDataSource라는 클래스를 상속 받고 있는데, 때문에 아래의 파라미터를 사용해 초기화할 수 있다. 하지만 이번에는 Basic이니 configurationCell만 이용해보자.
public init(
                configureCell: @escaping ConfigureCell,
                titleForHeaderInSection: @escaping  TitleForHeaderInSection = { _, _ in nil },
                titleForFooterInSection: @escaping TitleForFooterInSection = { _, _ in nil },
                canEditRowAtIndexPath: @escaping CanEditRowAtIndexPath = { _, _ in true },
                canMoveRowAtIndexPath: @escaping CanMoveRowAtIndexPath = { _, _ in true },
                sectionIndexTitles: @escaping SectionIndexTitles = { _ in nil },
                sectionForSectionIndexTitle: @escaping SectionForSectionIndexTitle = { _, _, index in index }
            )
public typealias ConfigureCell = (TableViewSectionedDataSource<Section>, UITableView, IndexPath, Item) -> UITableViewCellconfigureCell은 dataSource, tableView, indexPath, item(Student)를 파라미터로 받아 Cell을 리턴하는 클로저다. 우리는 위처럼, 저 네 파라미터를 통해 우리가 원하는 Cell을 구성해서 리턴하면 된다.
뷰 바인딩
 let sections = [
            StudentSection(header: "first", items: [
                Student(name: "John", age: 30),
                Student(name: "Paul", age: 34),
                Student(name: "Rosa", age: 21)
            ]),
            StudentSection(header: "second", items: [
                Student(name: "Marry", age: 30),
                Student(name: "Yaso", age: 34),
                Student(name: "Jin", age: 21)
            ]),
            StudentSection(header: "second", items: [
                Student(name: "Leesin", age: 30),
                Student(name: "MasterLee", age: 34),
                Student(name: "Bose", age: 21)
            ])
        ]

Observable.just(sections)
     .bind(to: listTableView.rx.items(dataSource: viewModel.dataSource))
     .disposed(by: rx.disposeBag)
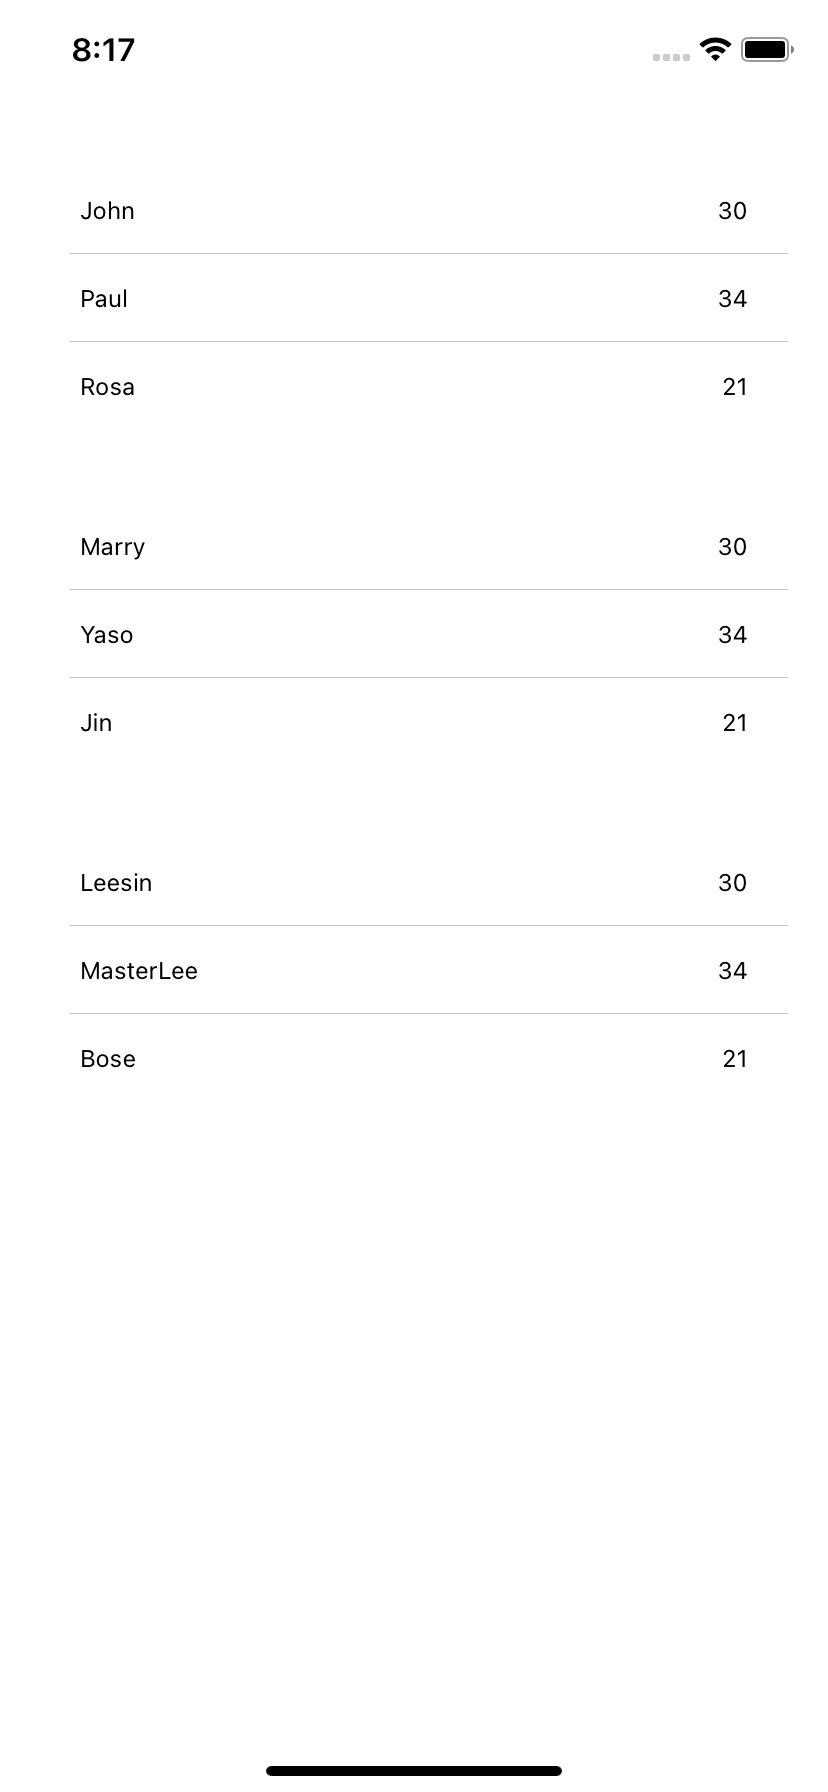
더미데이터를 만들고 해당 데이터를 방출하는 observable과 테이블뷰를 바인딩 한 뒤, 마지막 dataSource 파라미터에 우리가 구성한 dataSource(RxTableViewSectionedReloadDataSource의 객체)를 넣어주면 섹션과 셀이 있는 테이블뷰를 구성할 수 있다.

장단점
위에서 언급한 장점에 더해 DataSource를 ViewModel에 구현해놓고 사용해도 된다. 즉, 관련 로직을 분리할 수 있다는 것도 장점이다. 하지만 header나 footer의 경우 title 외에 view를 따로 제공하지 않는다는 점이 매번 사용하면서 아쉬운 점이다. 하지만 간편하게 사용할 수 있으니 90점!

