AnimatedDataSource
RxDataSources는 두 가지 특별한 타입의 data source를 제공한다. 바로 자동으로 셀 애니메이션 관리를 해주는 Animated DataSources인 RxTableViewSectionedAnimatedDataSource, RxCollectionViewSectionedAnimatedDataSource 다. 두 가지라고 하지만 사실 tableView와 collectionView 차이일 뿐이다. 아무튼 이 애니메이션이 포함된 data source를 사용하기 위해서는 몇 가지 과정이 추가로 더 필요하다. 이번 포스팅에서는 Custom Cell, header, footer까지 넣어서 충분히 활용 가능하도록 만들어보자.
AnimatedDataSource 구현
Model 구현
struct Teacher: Equatable, IdentifiableType {
    let name: String
    var age: Int
    let identity: String

    init(name: String, age: Int) {
        self.name = name
        self.age = age
        self.identity = name + "\(age)"
    }
}
오늘은 선생님 데이터를 만들어보자. 지난 기본편과 달라진 점이 눈에 보이는가? RxTableViewSectionedAnimatedDataSource를 이용하기 위한 첫 번째 작업은 우리가 사용할 데이터들이 각자 고유의 identity를 가지도록 하는 것이다. 이건 추가, 수정, 삭제는 물론 animation(canEditRowIndexPath와 같은)을 이용하기 위해서 반드시 각 데이터를 명확하게 구분지어야 하기 때문이다. 그래서 다음과 같이 Teacher 구조체에서 Equatable과 IdentifiableType 프로토콜을 채택했다.
public protocol IdentifiableType {
    associatedtype Identity: Hashable

    var identity : Identity { get }
}
Equatable은 익숙하니, IdentifiableType 설명만 하자면, associatedtype으로 Hashable 프로토콜을 채용하는 identity 프로퍼티가 있다. 그리고 이걸 우리의 모델에서 준수해줘야 한다. 위의 예제에서는 String이 Hashable, Equatable 모두를 준수하고 있으므로 다른 추가 구현필요 없이 IdentifiableType의 모든 요구사항을 준수할 수 있다.
SectionModel 구현
public protocol AnimatableSectionModelType
    : SectionModelType
    , IdentifiableType where Item: IdentifiableType, Item: Equatable {
}
다음으로 TeacherSection을 구성해보자. 먼저 섹션에서 AnimatableSectionModelType 프로토콜을 채택하자. 이 프로토콜은 일전에 보았던 SectionModelType에 추가로 위에서 준수했던 IdentifiableType을 채용하고 있다. 그리고 Item(Teacher)이 IdentifiableType과 Equatable을 준수하도록 제한한다. 이미 이건 우리가 위에서 구현했으니, TeacherSection에서만 IdentifiableType을 준수해주면 된다.
struct TeacherSection {
    var header: String
    var items: [Item]
    var identity: String

    init(header: String, items: [Item]) {
        self.header = header
        self.items = items
        self.identity = UUID().uuidString
    }
}

extension TeacherSection: AnimatableSectionModelType {
    typealias Item = Teacher

    init(original: TeacherSection, items: [Teacher]) {
        self = original
        self.items = items
    }
}
위와 같이 Section에도 identity를 초기화한다. 이렇게 AnimatableSectionModelType을 준수했다면 SectionModel작업은 끝이다.
DataSource 구현
open class RxTableViewSectionedAnimatedDataSource<Section: AnimatableSectionModelType>
    : TableViewSectionedDataSource<Section>
    , RxTableViewDataSourceType
RxTableViewSectionedAnimatedDataSource 클래스를 보면, AnimatableSectionModelType을 제네릭 타입으로 받고 있다. 아까 우리가 만들어줬던 AnimatableSectionModel을 쏙 넣어주면 된다. 이후에는 기본편과 같이 셀을 구성해주면 되는데, 이번엔 셀을 커스텀해 보았다.
class AnimatableTableViewCell: UITableViewCell {

    @IBOutlet weak var nameLabel: UILabel!
    @IBOutlet weak var ageLabel: UILabel!

    override func awakeFromNib() {
        super.awakeFromNib()

    }

    func updateUI(teacher: Teacher) {
        self.nameLabel.text = teacher.name
        self.ageLabel.text = "\(teacher.age)"
    }
}
간단하게 커스텀 셀을 만들고 주입식으로 UI가 업데이트 되도록 구성해서, dataSource의 configureCell 클로저 안에서 구성되도록 구현했다. 마지막으로 헤더와 푸터, Edit과 Move가 가능한 animation도 추가해보자.
    typealias TeacherSectionDataSource = RxTableViewSectionedAnimatedDataSource<TeacherSection>

    let dataSource : TeacherSectionDataSource = {
        let ds = TeacherSectionDataSource(
            configureCell: { dataSource, tableView, indexPath, teacher -> UITableViewCell in
            guard let cell = tableView.dequeueReusableCell(withIdentifier: "animatableCell", for: indexPath) as? AnimatableTableViewCell else { return UITableViewCell() }
            cell.updateUI(teacher: teacher)
            return cell
        })

        ds.titleForHeaderInSection = { dataSource, index in
          return dataSource.sectionModels[index].header
        }

//        ds.titleForFooterInSection = { dataSource, index in
//          return dataSource.sectionModels[index].footer
//        }

        ds.canEditRowAtIndexPath = { dataSource, indexPath in
          return true
        }

        ds.canMoveRowAtIndexPath = { dataSource, indexPath in
          return true
        }

        return ds
    }()
이렇게 우리가 만든 데이터소스를 이용해서 각각의 기능들을 구현할 수 있다.
    private var _sectionModels: [SectionModelSnapshot] = []
    open var sectionModels: [Section] {
        return _sectionModels.map { Section(original: $0.model, items: $0.items) }
    }
참고로 dataSource에 딸려나오는 sectionModels는 위에서 우리가 만들었던 TeacherSection을 반환하는 연산 프로퍼티다. RxTableViewSectionedAnimatedDataSource가 TableViewSectionedDataSource라는 클래스를 상속받고 있는데, 덕분에 제네릭에 넣어준 Section이 SectionModel로, 그리고 다시 Section(sectionModels)로 접근 할 수 있는 것이다.
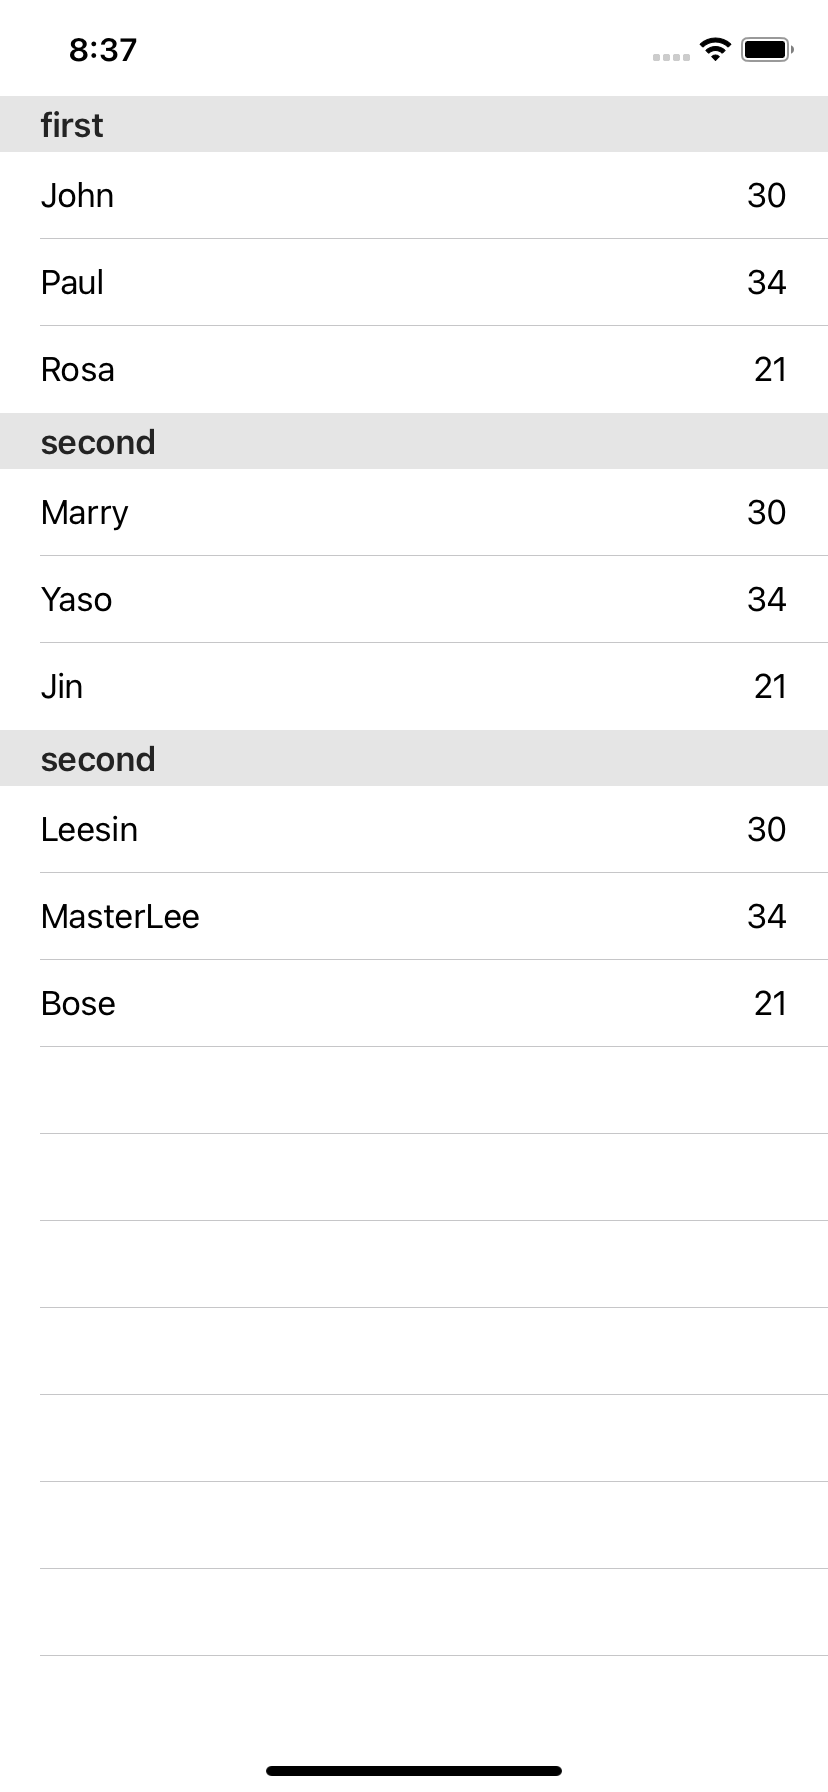
 let sections = [
            TeacherSection(header: "first", items: [
                Teacher(name: "John", age: 30),
                Teacher(name: "Paul", age: 34),
                Teacher(name: "Rosa", age: 21)
            ]),
            TeacherSection(header: "second", items: [
                Teacher(name: "Marry", age: 30),
                Teacher(name: "Yaso", age: 34),
                Teacher(name: "Jin", age: 21)
            ]),
            TeacherSection(header: "second", items: [
                Teacher(name: "Leesin", age: 30),
                Teacher(name: "MasterLee", age: 34),
                Teacher(name: "Bose", age: 21)
            ])
        ]

        Observable.just(sections)
            .bind(to: tableView.rx.items(dataSource: viewModel.dataSource))
            .disposed(by: rx.disposeBag)
마지막으로 더미데이터를 만들고 테이블뷰와 바인딩해주면 원하는 결과가 완성된다.

정리하기
테이블뷰에서 쓸 수 있었던 row를 옮기거나 수정, 삭제하기 또 섹션관리에 헤더와 푸터, 커스텀 셀을 넣는 것까지 해보았다. 쉬운 작업이기에 몇몇 준수해야 하는 프로토콜만 잘 신경쓴다면 무리없이 사용할 수 있다. 다음 번에는 Cookid에서 사용했던 Section별로 다른 데이터를 넣는 걸 해보자! 언제인지는 모르겠지만...

