🚀 Start
이제 커뮤니티, 게시글, 댓글, 투표 기능 모두 구현하였고, UI도 잘 동작한다. 그럼 이제 데이터를 delete, update하는 기능도 추가해보자.
⚙️ Delete
⭐️ Community
생성된 커뮤니티를 삭제하는 기능을 추가해보자. 단, 자신이 만든 커뮤니티만 삭제할 수 있는 권한을 갖도록 해주자.
👉 api 요청 (client)
커뮤니티 페이지([sub].tsx)에 들어가면 보이는 사이드바(sideBar.tsx)에 삭제 버튼을 생성하자.
1️⃣ context로 공유된 authenticated, user을 가져온다.
2️⃣ authenticated가 true(= 로그인이 되어있다면) 그리고 유저정보에 저장된 유저이름과 커뮤니티에 저장된 유저이름이 같다면(= 로그인한 유저와 커뮤니티를 작성한 유저가 같다면) 삭제 버튼이 보이게 한다.
3️⃣ 삭제 버튼 클릭시 deleteSub가 호출되고 인자로 커뮤니티이름(sub.name)이 전달된다.
4️⃣ 데이터 삭제 api 요청
5️⃣ 커뮤니티 데이터에 대한 업로드가 필요할 경우 갱신. (데이터가 삭제됨으로 데이터 업데이트)
6️⃣ 삭제 후 메인페이지로 이동
// navBar.tsx
const SideBar = ({ sub, mutate }: Props) => {
  const { authenticated, user } = useAuthState(); // 1️⃣ 번
  const router = useRouter();

  const deleteSub = async (name: string | undefined) => {
    try {
      await Axios.delete(`/subs/${name}`); // 4️⃣ 번
      if (mutate) mutate(); // 5️⃣ 번
      router.push('/'); // 6️⃣ 번
    } catch (error) {
      console.log(error);
    }
  };

  return (
  		...
     {authenticated && user?.username === sub.username ? ( // 2️⃣  번
                  <button
                    onClick={() => {
                      deleteSub(sub.name); // 3️⃣ 번
                    }}
                  >
                    삭제
                  </button>
                ) : null})

  	 ...
  }
👉 api 생성 (server)
1️⃣ req.params: 라우터의 매개변수로 name을 받는다. 즉, /:name 경로가 있으면 ":name"속성을 req.params.name으로 사용할 수 있다.
2️⃣ Sub Entity에서 client에서 전달한 name과 일치하는 데이터를 찾는다.
3️⃣ 데이터베이스 수정
createQueryBuilder를 사용해서Query문을 사용.delete(): 데이터를 삭제한다.from(): Sub 데이터베이스에 있는.where(): client에서 보낸 name속성인 데이터를.execute(): 준비된 SQL문을 실행
4️⃣ 수정된 데이터를 client에 전달.
// subs.ts
const deleteSub = async (req: Request, res: Response) => {
  const { name } = req.params; // 1️⃣ 번
  try {
    const community = await Sub.findOneByOrFail({ name }); // 2️⃣ 번
    const sub = await Sub.createQueryBuilder() // 3️⃣ 번
      .delete()
      .from(Sub)
      .where({ name: community.name })
      .execute();

    if (!sub) return;

    return res.json(sub); // 4️⃣ 번
  } catch (error) {
    console.log(error);
    return res.status(404).json({ error: '문제가 발생하였습니다.' });
  }
};

...
router.delete('/:name', userMiddleware, deleteSub);
⭐️ Post
생성된 게시글을 삭제하는 기능을 추가해보자. 단, 자신이 만든 게시글만 삭제할 수 있는 권한을 갖도록 해주자.
👉 api 요청 (client)
메인 페이지(index.tsx)에 들어가면 보이는 게시글카드(postCard.tsx)에 삭제 버튼을 생성하자.
// postcard.tsx
const PostCard = ({ sub, mutate }: Props) => {
  const { authenticated, user } = useAuthState();
  const router = useRouter();

 const deletePost = async (identifier: string | undefined) => {
    try {
      await Axios.delete(`/posts/${identifier}/${slug}`);
      if (mutate) mutate();
      if (subMutate) subMutate();
    } catch (error) {
      console.log(error);
    }
  };

  return (
  		...
     {authenticated && user?.username === username ? (
            <button
              onClick={() => {
                deletePost(identifier);
              }}
            >
              삭제
            </button>
          ) : null}

  	 ...
  }
👉 api 생성 (server)
// posts.ts
const deletePost = async (req: Request, res: Response) => {
  const { identifier, slug } = req.params;
  try {
    const post = await Post.findOneByOrFail({ identifier, slug });
    const postDelete = await Post.createQueryBuilder()
      .delete()
      .from(Post)
      .where({ identifier: post.identifier })
      .execute();

    if (!postDelete) return;

    return res.json(postDelete);
  } catch (error) {
    console.log(error);
    return res.status(404).json({ error: '문제가 발생하였습니다.' });
  }
};

...
router.delete('/:identifier/:slug', userMiddleware, deletePost);
⭐️ Comment
생성된 댓글을 삭제하는 기능을 추가해보자. 단, 자신이 만든 댓글만 삭제할 수 있는 권한을 갖도록 해주자.
👉 api 요청 (client)
게시글페이지([slug].tsx)에 들어가면 보이는 댓글 UI에 버튼을 생성하자.
// navBar.tsx
const PostPage = ({ sub, mutate }: Props) => {
  const { authenticated, user } = useAuthState(); // 1️⃣ 번
  const router = useRouter();

    const deleteComment = async (identifier: string | undefined) => {
    try {
      await Axios.delete(`/posts/${identifier}/${slug}/comments`);
      commentMutate();
    } catch (error) {
      console.log(error);
    }
  };

  return (
  		...
     {authenticated && user?.username === comment.username ? (
                      <button
                        onClick={() => {
                          deleteComment(comment.identifier);
                        }}
                      >
                        삭제
                      </button>
                    ) : null}

  	 ...
  }
👉 api 생성 (server)
1️⃣ req.params: 라우터의 매개변수로 identifier을 받는다.
Ex) /:name 경로가 있으면 ":name"속성을 req.params.name으로 사용할 수 있다.
2️⃣ Sub Entity에서 client에서 전달한 name과 일치하는 데이터를 찾는다.
3️⃣ 데이터베이스 수정
createQueryBuilder를 사용해서Query문을 사용.delete(): 데이터를 삭제한다.from(): Sub 데이터베이스에 있는.where():identifier이 일치하는 데이터를.execute(): 준비된 SQL문을 실행
4️⃣ 수정된 데이터를 client에 전달.
// posts.ts
const deletePostComment = async (req: Request, res: Response) => {
  const { identifier } = req.params;
  try {
    const post = await Comment.findOneByOrFail({ identifier });
    const comments = await Comment.createQueryBuilder()
      .delete()
      .from(Comment)
      .where({ identifier: post.identifier })
      .execute();

    if (!comments) return;

    return res.json(comments);
  } catch (error) {
    console.log('x');

    console.log(error);
    return res.status(404).json({ error: '문제가 발생하였습니다.' });
  }
};

...
router.delete('/:identifier/:slug/comments', userMiddleware, deletePostComment);
⚠️ Foreign key constraint
👉 커뮤니티, 게시글, 댓글을 삭제를 test하는 과정에서 다음과 같은 에러가 발생하였다.
Error Code: 1452. Cannot add or update a child row: a foreign key constraint fails✅ 원인
이러한 오류가 발생하는 원인은 다른 테이블과 KEY로 엮여 있기 때문이다.
테이블은 Foreign Key 하나로 두 테이블이 연관관계를 맺을 수 있다. 따라서, 외래키가 설정된 테이블에 레코드를 입력하면 기준이 되는 테이블의 내용을 참조해서 레코드가 입력된다. 이와 같이 Foreign Key 제약조건은 하나의 테이블을 다른 테이블에 의존하게 만든다.
나 같은 경우에도 테이블 간의 N:1 연관관계가 나타나는 경우가 많다.
예를 들어, 하나의 게시글에 여러 댓글이, 하나의 커뮤니티에 여러 게시글이 존재할 수 있는 것처럼 말이다.
따라서, 내가 하나의 커뮤니티를 삭제하게 되면 그 안에 작성된 게시글, 댓글 모두 연관성을 갖게 되어 Error가 발생했던 것이다.
✅ 해결
CASCASDE문을 사용해주자!
CASCADE는 참조되는 테이블에서 데이터를 삭제하거나 수정하면, 참조하는 테이블에서도 삭제와 수정이 같이 이루어진다.
따라서, 다음과 같이 사용하면 된다.
- Example
// Entity/ Comments/ts
@ManyToOne(() => Post, post => post.comments, {
    nullable: false,
    onDelete: 'CASCADE',
  })
⚙️ Update
수정 기능은 댓글 기능과 커뮤니티 주제에 추가해주도록하자.
⭐️ Comment
생성된 커뮤니티를 삭제하는 기능을 추가해보자. 단, 자신이 만든 커뮤니티만 삭제할 수 있는 권한을 갖도록 해주자.
👉 api 요청 (client)
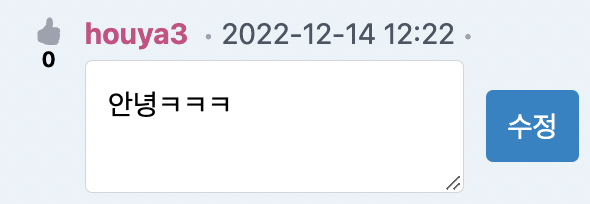
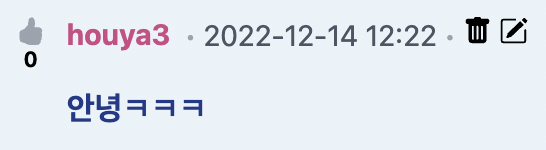
✅ 게시글페이지([slug].tsx)에 들어가면 보이는 댓글 UI에 수정 버튼을 생성하자.
1️⃣ 삭제 버튼과 같이 수정 버튼 역시 로그인이 되어있고, 로그인한 유저와 댓글을 작성한 유저가 같을 경우 수정 기능이 동작한다.
2️⃣ 수정 버튼 클릭
updateId에 해당 댓글의id값을 저장.update에 해당 댓글의내용을 저장.
3️⃣ updateId와 댓글의 Id가 같을 경우 수정UI가 출력된다. 즉, Comment List 중 수정버튼을 누른 댓글에 대해서만 수정기능이 동작.
4️⃣ 기존의 댓글 내용에서 수정이 이루어져야하므로 update를 value값으로 지정.
5️⃣ 수정 후 버튼 클릭시 updateComment 실행
6️⃣ 값 미입력시 return. 즉, 값 제출 작동 X
7️⃣ 새롭게 작성된 update를 body로 하여 api 요청
8️⃣ 요청완료 후 동작
commentMutate(): 댓글 데이터 갱신setUpdate(''): update값 빈값으로 초기화setUpdateId(''): updateId값 빈값으로 초기화
const PostPage = () => {
  const [updateId, setUpdateId] = useState('');
  const [update, setUpdate] = useState('');
	...
   const updateComment = async (e: FormEvent) => { // 5️⃣ 번
    e.preventDefault();
    if (update.trim() === '') return; // 6️⃣ 번

    try {
      await Axios.put(`/posts/${updateId}/${slug}/comments`, { // 7️⃣ 번
        body: update,
      });
      commentMutate();  // 8️⃣ 번
      setUpdate('');
      setUpdateId('');
    } catch (error) {
      console.log(error);
    }
  };

  return (

    {updateId === comment.identifier ? ( // 3️⃣ 번
                      <>

                        <form onSubmit={updateComment}>
                          <textarea
                            onChange={e => setUpdate(e.target.value)}
                            value={update} // 4️⃣ 번
                          ></textarea>
                          <div>
                            <button
                              disabled={update.trim() === ''}
                            >
                              댓글 작성
                            </button>
                          </div>
                        </form>
                      </>
                    ) : (
                      <p>{comment.body}</p>
                    )}
  		...
     {authenticated && user?.username === comment.username ? ( // 1️⃣ 번
                      <>
                       ...
                        <button
                          onClick={() => {
                            setUpdateId(comment.identifier); // 2️⃣ 번
                            setUpdate(comment.body); // 2️⃣ 번
                          }}
                        >수정</button>
                      </>
                    ) : null}

  	 ...
  }
👉 api 생성 (server)
1️⃣ req.params: 라우터의 매개변수로 identifier을 받는다.
Ex) /:name 경로가 있으면 ":name"속성을 req.params.name으로 사용할 수 있다.
2️⃣ req.body.body: 요청값으로 받은 body의 body속성을 저장한다.
3️⃣ 데이터베이스 수정
createQueryBuilder를 사용해서Query문을 사용update(): 데이터를 수정한다.set(): 수정사항 설정where():identifier이 일치하는 데이터를.execute(): 준비된 SQL문을 실행
4️⃣ 수정된 데이터를 client에 전달.
// posts.ts
const updatePostComment = async (req: Request, res: Response) => {
  const { identifier } = req.params; // 1️⃣ 번
  const body = req.body.body; // 2️⃣ 번

  try {
    const post = await Comment.findOneByOrFail({ identifier });
    const comments = await Comment.createQueryBuilder() // 3️⃣ 번
      .update()
      .set({ body: body })
      .where({ identifier: post.identifier })
      .execute();

    if (!comments) return;

    return res.json(comments); // 4️⃣ 번
  } catch (error) {
    console.log(error);
    return res.status(404).json({ error: '문제가 발생하였습니다.' });
  }
};

...
router.put('/:identifier/:slug/comments', userMiddleware, updatePostComment);
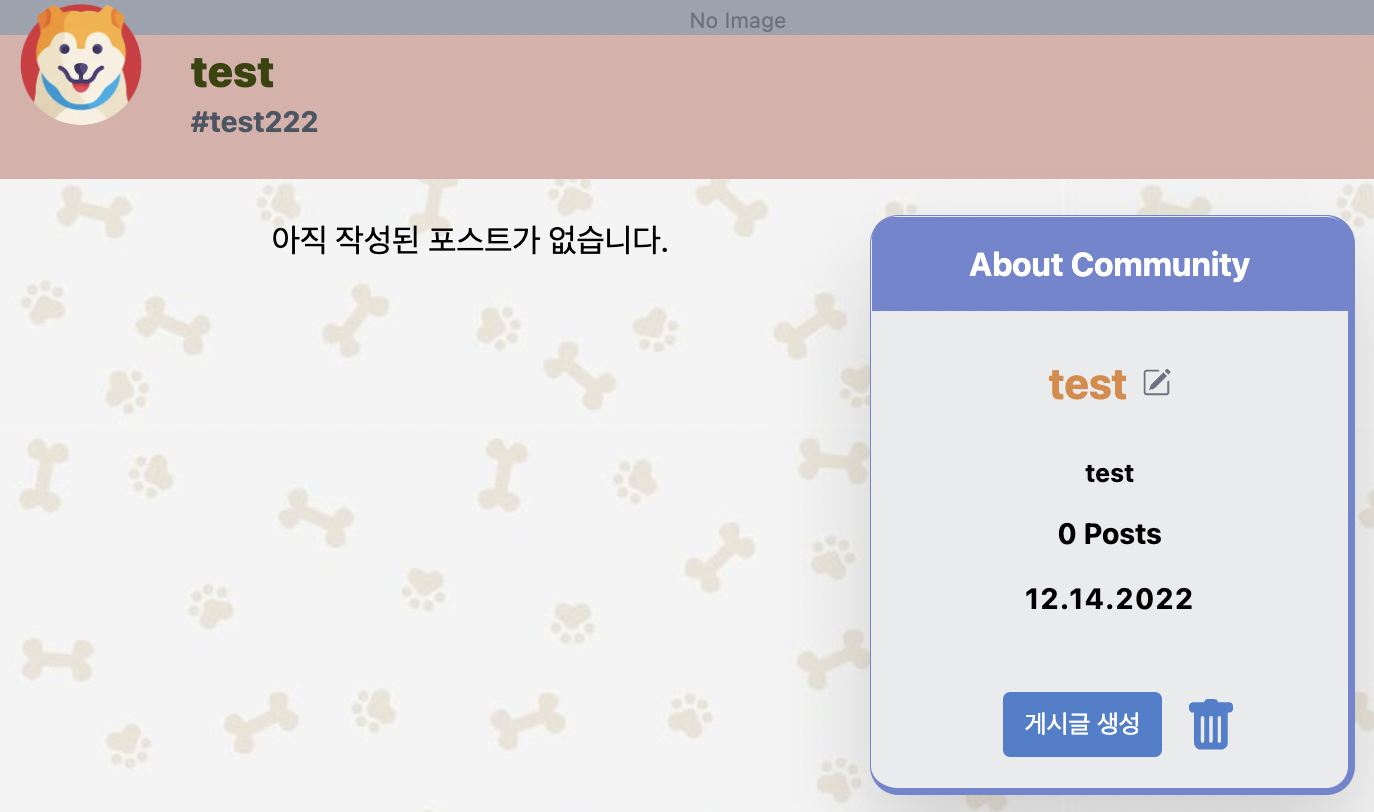
⭐️ Commnunity
👉 api 요청 (client)
✅ 커뮤니티페이지([sub].tsx)에 들어가면 보이는 SubBar의 커뮤니티 주제 옆에 수정 버튼을 생성하자.
1️⃣ 삭제 버튼과 같이 수정 버튼 역시 로그인이 되어있고, 로그인한 유저와 커뮤니티를 작성한 유저가 같을 경우 수정 기능이 동작한다.
2️⃣ 수정 버튼 클릭
updateTitle에 해당 댓글의주제(제목)을 저장.updateName에 해당 커뮤니티의이름을 저장.
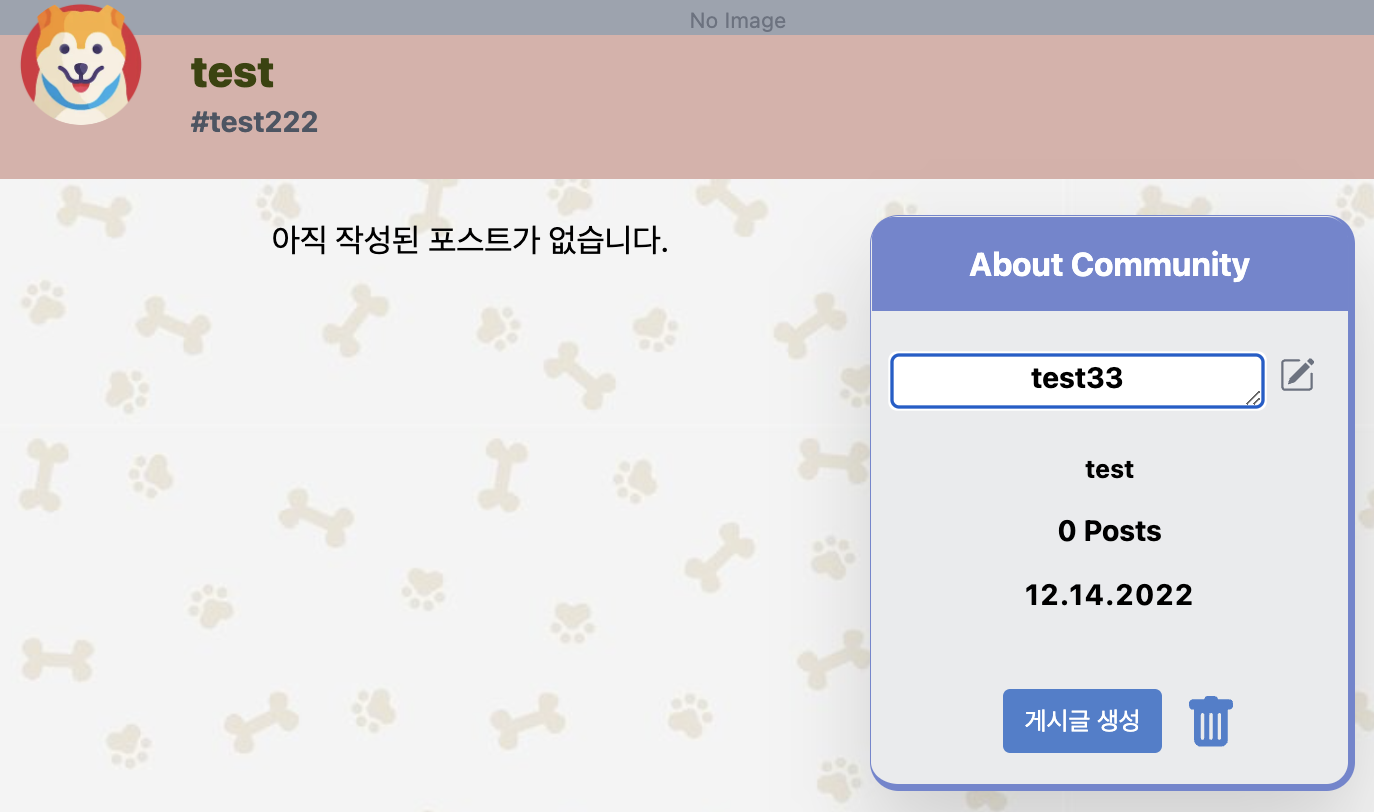
3️⃣ updateName와 커뮤니티의 이름가 같을 경우 수정UI가 출력된다.
4️⃣ 기존의 커뮤니티 주제에서 수정이 이루어져야하므로 updateTitle를 value값으로 지정.
5️⃣ 수정 후 버튼 클릭시 updateSub 실행
6️⃣ 값 미입력시 return. 즉, 값 제출 작동 X
7️⃣ 새롭게 작성된 updateName를 body로 하여 api 요청
8️⃣ 요청완료 후 동작
mutate(): 커뮤니티 갱신setUpdateTitle(''): updateTitle값 빈값으로 초기화setUpdateName(''): updateName값 빈값으로 초기화
// client/src/components/subPage/SubBar.tsx
const deleteSub = () => {
   const [updateName, setUpdateName] = useState('');
   const [updateTitle, setUpdateTitle] = useState('');
	...
   const updateSub = async (e: FormEvent) => { // 5️⃣ 번
    e.preventDefault();
    if (update.trim() === '') return; // 6️⃣ 번

    try {
      await Axios.put(`/subs/${updateName}`, { // 7️⃣ 번
        body: updateTitle,
      });
     if (mutate) mutate(); // 8️⃣ 번
      setUpdateTitle('');
      setUpdateName('');
    } catch (error) {
      console.log(error);
    }
  };

  return (

    {authenticated && user?.username === comment.username ? ( // 1️⃣ 번
    <>
    {updateName === sub.name ? ( // 3️⃣ 번
                      <>

                        <form onSubmit={updateSub}>
                          <textarea
                            onChange={e => setUpdateTitle(e.target.value)}
                            value={updateTitle} // 4️⃣ 번
                          ></textarea>
                          <div>
                            <button
                              disabled={update.trim() === ''}
                            >
                              <BsPencilSquare /> // 5️⃣ 번
                            </button>
                          </div>
                        </form>
                      </>
                    ) : (
                      <p>{sub.title}</p>
                      <button
                      onClick={() => {
                        setUpdateTitle(sub.title); // 2️⃣ 번
                        setUpdateName(sub.name); // 2️⃣ 번
                      }}
                    >
                    )}
  		...
     {authenticated && user?.username === comment.username ? ( // 1️⃣ 번
                      <>
                       ...


  	 ...
  }
👉 api 생성 (server)
1️⃣ req.params: 라우터의 매개변수로 name을 받는다.
Ex) /:name 경로가 있으면 ":name"속성을 req.params.name으로 사용할 수 있다.
2️⃣ req.body.body: 요청값으로 받은 body의 body속성을 저장한다.
3️⃣ 데이터베이스 수정
createQueryBuilder를 사용해서Query문을 사용update(): 데이터를 수정한다.set(): 수정사항 설정where():name이 일치하는 데이터를.execute(): 준비된 SQL문을 실행
4️⃣ 수정된 데이터를 client에 전달.
// posts.ts
const updateSub = async (req: Request, res: Response) => {
  const { name } = req.params; // 1️⃣ 번
  const body = req.body.body; // 2️⃣ 번

  try {
    const commnunity = await Comment.findOneByOrFail({ identifier });
    const sub = await Comment.createQueryBuilder() // 3️⃣ 번
      .update()
      .set({ title: body })
      .where({ name: community.name })
      .execute();

    if (!sub) return;

    return res.json(sub); // 4️⃣ 번
  } catch (error) {
    console.log(error);
    return res.status(404).json({ error: '문제가 발생하였습니다.' });
  }
};

...
router.put('/:identifier/:slug/comments', userMiddleware, updatePostComment);
📷 Photos