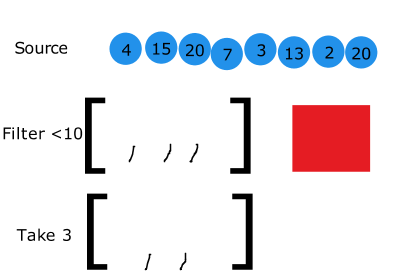
지우는 것은 filter라는 내장함수를 쓰면 됨.
특정 조건에 맞는 값만 추출하여 새로운 배열을 생성하는 기능임.
const array = [1, 2, 3, 4, 5, 6, 7, 8, 9, 10];
const biggerThanFive = array.filter(number => number > 5);

// 결과: [6, 7, 8, 9, 10]
filter 함수에는 조건을 확인하는 함수를 파라미터로 입력해줘야함.
parameter로 입력되는 함수는 true, false값을 반환해야하고, true인 경우에만 새로운 배열에 생성됨.
위의 filter내장함수를 사용해서 App.js에서 onRemove라는 함수를 만들고 설정하겠음.
App.js
import React, { useState, useRef, useCallback } from 'react';
import TodoInsert from './components/TodoInsert';
import TodoList from './components/TodoList';
import TodoTemplate from './components/TodoTemplate';

const App = () => {
  const [todos, setTodos] = useState([
    {
      id: 1,
      text: '리액트의 기초 알아보기기',
      checked: true,
    },
    {
      id: 2,
      text: '컴포넌트 스타일링 해보기',
      checked: true,
    },
    {
      id: 3,
      text: '일정 관리 앱 만들어 보기',
      checked: false,
    }
  ]);

  const nextId = useRef(4);

  const onInsert = useCallback(       // onInsert함수 만들어주고 TodoInsert컴포넌트의 props로 설정해줘야함.
    text => {
      const todo = {
        id: nextId.current,
        text,
        checked: false,
      };
      setTodos(todos.concat(todo));   // concat으로 todos배열에 todo를 추가해서 새로운 배열을 생성되는거임.
      nextId.current +=1;
    },
    [todos],      // todos가 바뀌었을 때만 함수 생성
  );

  const onRemove = useCallback(
    id => {
      setTodos(todos.filter(todo => todo.id !==id));
    },
    [todos],
  );

  return (
    <TodoTemplate>
      <TodoInsert onInsert={onInsert} />
      <TodoList todos={todos} onRemove={onRemove} />
    </TodoTemplate>
  );
};

export default App;
onRemove라는 함수를 만들어줬음.
최적화를 위해 useCallback()안에 생성했다.
onRemove함수가 실행되면 setTodos로 todos배열에서 filter 함수로 조건에 맞는 배열을 생성하게 된다.
parameter로 입력된 id와 일치하지 않는 경우 filter로 새로운 배열을 생성하게 된다.
return에 입력된 에도 props로 설정을 했다.
이제 위에 App.js에서 만들었던 onRemove함수를 TodoListItem.js에서 사용할 수 있게 해줘야하는데,
그러기 위해서는 TodoList.js를 거치게 해줘야한다.
TodoList.js
import React from 'react';
import TodoListItem from './TodoListItem';
import './TodoList.scss';

const TodoList = ({ todos, onRemove }) => {
    return (
        <div className="TodoList">
            {todos.map(todo => (
                <TodoListItem todo={todo} key={todo.id} onRemove={onRemove} />
            ))}
        </div>
    );
};

export default TodoList;
props로 onRemove를 받아오게 하고, 안에다가 그대로 전달할 수 있게 입력해주면 됨.
TodoListItem.js
import React from 'react';
import {
    MdCheckBoxOutlineBlank,
    MdCheckBox,
    MdRemoveCircleOutline
} from 'react-icons/md';
import cn from 'classnames';
import './TodoListItem.scss';

const TodoListItem = ({ todo, onRemove }) => {
    const { id, text, checked } = todo;

    return (
        <div className="TodoListItem">
            <div className={cn('checkbox', { checked })}>
                {checked ? <MdCheckBox /> : <MdCheckBoxOutlineBlank />}
                <div className="text">{text}</div>
            </div>
            <div className="remove" onClick={() => onRemove(id)}>
                <MdRemoveCircleOutline />
            </div>
        </div>
    );
};

export default TodoListItem;
onRemove함수가 App.js → TodoList.js 이렇게 props로 전달되도록 했다.
TodoListItem.js에서도 props로 받아오게 해주면 된다. {todo } 처럼 onRemove추가해줬음.
삭제버튼이 있는 <div className="remove">에 onClick 이벤트로 onRemove를 설정해줬다.
onRemove함수에 parameter로 해당 항목(todo)의 id를 넣어줬다.
onRemove가 trigger 되면 id가 전달되서 그 id값을 제외한 나머지로 새로운 배열을 구성하게 되는 과정을 만들었다.