개요
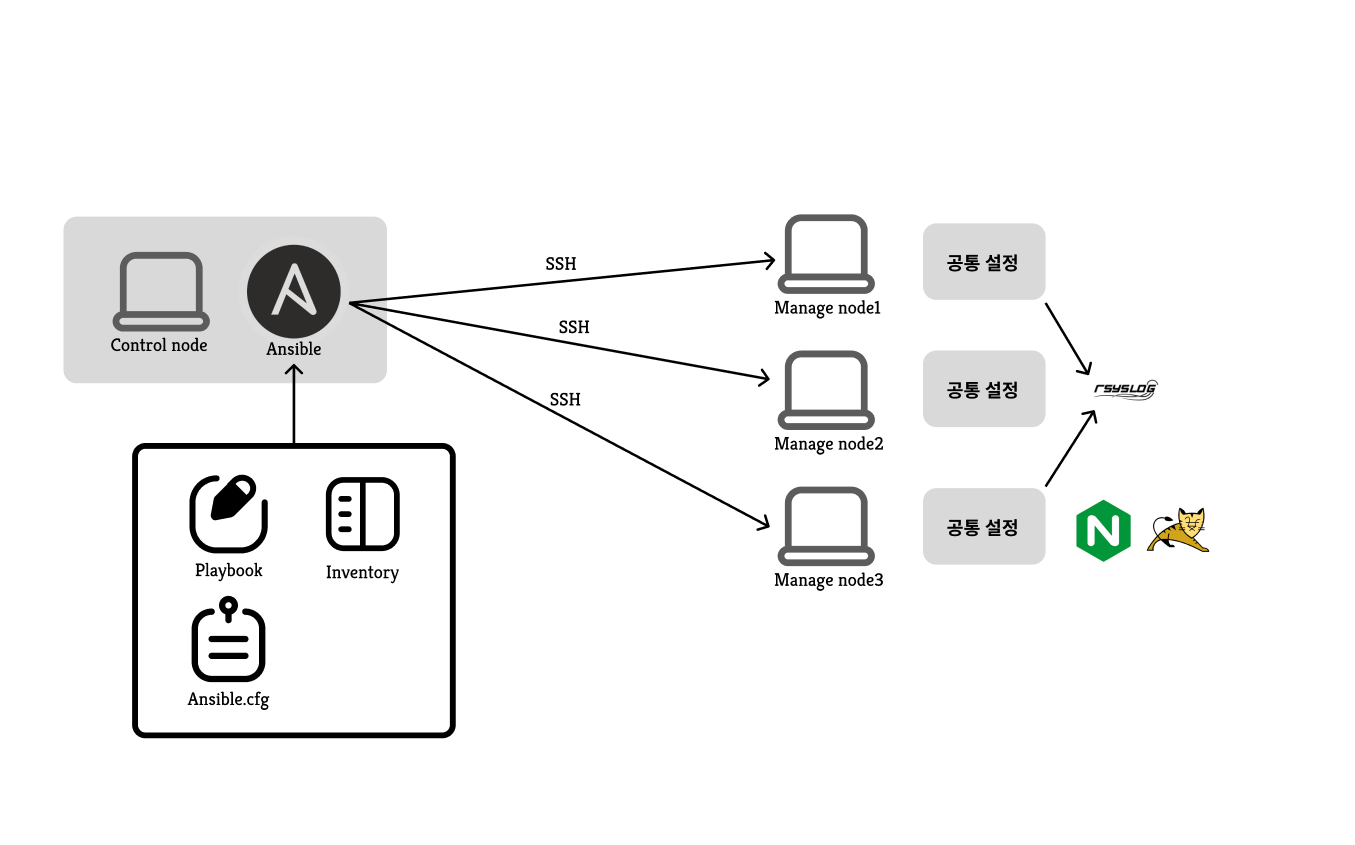
ansible을 활용하여 인프라를 구축합니다.
4개의 노드를 준비합니다.
Control node를 준비합니다.
Manage node 3개는 새롭게 최소 설치합니다.
os는 linux rocky 9.4입니다.
- 공통 노드 : ansible에서 사용하는 공통설정 노드 (hosts: all 진행)
- 모니터링 노드 : 모니터링을 위한 노드이며 rsyslog로 구축
- 애플리케이션 노드 : web/was 노드이며 nginx / tomcat으로 연결 확인
📌구성 환경
Control node
- ip : 172.30.1.14/24
Manage node1 : manage
- ip : 172.30.1.11/24
- 공통 설정을 진행할 노드
Manage node2 : monitor
- ip : 172.30.1.22/24
- 모니터링을 위한 노드
Manage node3 : app
- ip : 172.30.1.33/24
- 애플리케이션 노드
✅Control node ansible 설정
- ansible을 설치
- ansible.cfg 설정
- inventory 설정
ansible 설치 및 기타
$ sudo dnf install ansible -y
자신의 홈 디렉토리에서 ansible 디렉토리 생성 후 이동
디렉토리 playbook, roles 생성
ansible.cfg 설정
[defaults]
inventory=/home/student/ansible/inventory
log_path=/home/student/ansible/ansible.log
roles_path= "/home/student/ansible/roles:/usr/share/ansible/roles:/etc/ansible/roles"
remote_user=student


[privilege_escalation]
become=True
become_ask_pass=False
become_method=sudo
become_user=root
- 인벤토리 경로 설정
- log 파일 경로 설정
- roles 경로 설정
- remote 유저 설정

--------
- become true # 권한 상승을 기본적으로 활성화
- become_ask_pass # 권한 상승 시 비밀번호 묻지 않음
- become_method # 권한 상승 방식으로 sudo 사용
- become_user # 권한 상승 시 사용할 계정을 root로 설정
인벤토리 설정
[manage]
node1 ansible_host=172.30.1.11 ansible_user=ansible

[monitor]
node2 ansible_host=172.30.1.22 ansible_user=ansible

[app]
node3 ansible_host=172.30.1.33 ansible_user=ansible
✅ 공통 노드(1) 설정
우선 ansible을 사용하려면 ssh키를 배포해야 합니다.
ssh 키를 배포하여 패스워드 없이 안전하게 manage node에 접근할 수 있도록 설정합니다.
nopasswd 설정을 통해 ansible 플레이북 실행 시 추가적인 비밀번호 입력 없이 권한 상승을 수행합니다.
SSH키 생성 및 배포
컨트롤 노드에서
$ ssh-keygen
ssh 키 생성하고 각 manage node 에 공개키를 배포합니다.
playbook을 작성합니다.
---
- name: ssh-key
  hosts: all
  tasks:
    - name: deploy
      ansible.builtin.authorized_key:
        user: ansible
        state: present
        key: "{{ lookup('file', '~/.ssh/id_rsa.pub') }}"
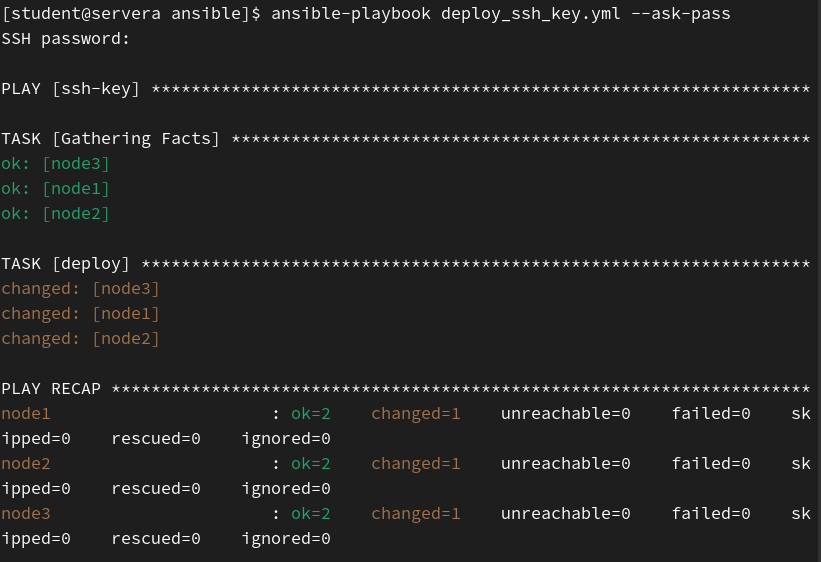
ansible-playbook ansible-playbook deploy_ssh_key.yml --ask-pass
SSH password: 1234 입력
ssh-copy-id 의 결과와 동일하게 manage node 에 공개키가 배포.
SSH 키가 배포 되지 않은 상태에서 ansible 명령어을 실행하려면 --ask-pass를 사용해야 합니다.
NOPASSWD 설정
플레이북을 원활하게 사용하기 위해서
manage node에 NOPASSWD를 적용해줍니다.
---
- hosts: all
  tasks:
    - name: Nopasswd in /etc/sudoers.d
      copy:
        content: 'ansible ALL=(ALL) NOPASSWD: ALL'
        dest: /etc/sudoers.d/ansible
        mode: '0440'
$ ansible-playbook set-nopasswd.yml -K

-K 옵션을 사용하여 권한을 상승하기 위해서 비밀번호를 입력합니다.
nopasswd 설정이 완료되면 비밀번호 입력 없이 권한 상승이 가능합니다.
공통 패키지 설치
모든 노드에 공통적으로 사용하는 패키지를 설치하고 업데이트를 진행합니다.
---
- name: Install package
  hosts: all
  tasks:
    - name: EPEL repository
      dnf:
        name: epel-release
        state: present

    - name: packages
      dnf:
        name:
          - vim
          - iproute
          - rsync
          - chrony
          - firewalld
          - bind-utils
          - sysstat
          - htop
          - bash-completion
          - tcpdump
          - nmap
          - telnet
          - unzip
          - tar
          - gzip
          - tree
          - lsof
        state: present

    - name: update
      dnf:
        name: "*"
        state: latest
$ ansible-playbook install-package.yml

시간 동기화 (rhel-system-roles)
시간 동기화로 rhel-system-roles.timesync 를 사용합니다.
Control node에서 rhel-system-roles 설치
$ dnf install -y rhel-system-roles
설치 후
cd /usr/share/ansible/roles/rhel-system-roles.timesync

여기에 들어가서

vim READ.md 이후 :yaml 을 검색하면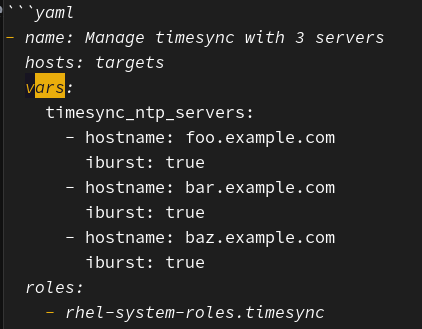
사용법이 나와있습니다.그대로 플레이북을 작성합니다.
---
- name: rhel-system-roles timesync
  hosts: all
  vars:
    timesync_ntp_servers:
    - hostname: 0.centos.pool.ntp.org
      iburst: true
    - hostname: 1.centos.pool.ntp.org
      iburst: true
  roles:
    - rhel-system-roles.timesync
$ ansible-playbook chrony.yml
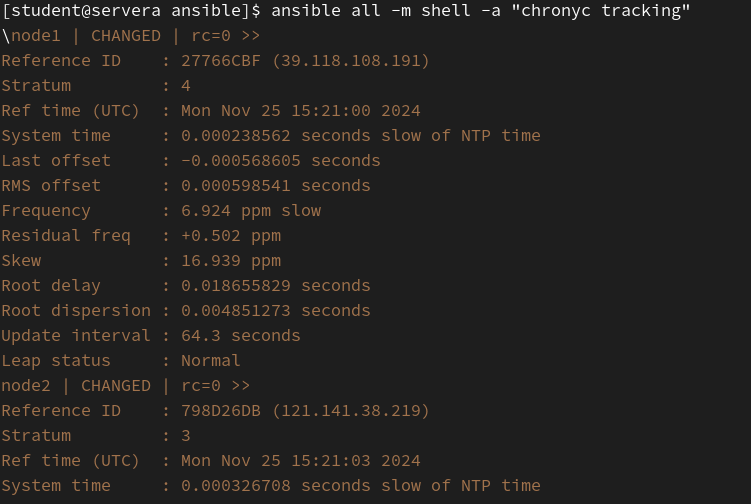
적용 확인
패키지 보안 업데이트 후 재부팅
패키지 보안 업데이트 플레이북을 하기 이전에
우선 각 노드의 dnf repolist를 확인하는 플레이북을 작성합니다.
---
- name: dnf test
  hosts: all
  tasks:
   - name: repositories
     command: dnf repolist
     register: repo_list

   - name: repositories stdout
     debug:
	msg: "{{ repo_list.stdout.split('\n') }}"
$ ansible-playbook dnf_update_check.yml
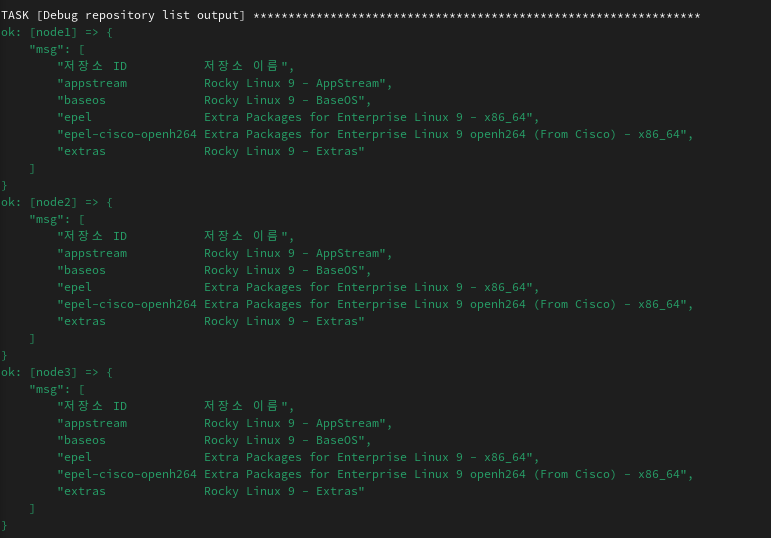
각 노드의 repolist를 확인할 수가 있습니다.
이제 수동으로 보안 업데이트를 진행하고 재부팅하는 플레이북을 작성합니다.
---
- name: install update & log
  hosts: all
  vars:
    timestamp: "{{ ansible_date_time.date }}"

  tasks:
    - name: before check
      command: dnf updateinfo list security
      register: before

    - name: before log
      lineinfile:
        path: "/var/log/security_update_status_{{ timestamp }}.log"
        create: yes
        line: |
          [Before Security Update]
          Security Updates:
          {{ before.stdout }}

    - name: dnf update security
      command: dnf update --security -y

    - name: reboot system
      reboot:
        msg: "reboot"
        connect_timeout: 30
        reboot_timeout: 600

    - name:
      command: dnf updateinfo list security
      register: after

    - name: after log
      lineinfile:
        path: "/var/log/security_update_status_{{ timestamp }}.log"
        line: |
          [After Security Update]
          Remaining Security Updates:
{{ after.stdout }}-
이 과정은 업데이트 이전에 dnf updateinfo list secuirty 명령어를 입력하고 그 출력 결과를 log 파일에 우선 작성합니다.
-
파일 생성 이름은 ansible_date_time.date 를 사용해서 현재 날짜의 이름을 사용합니다.
-
dnf update security 를 진행 후 재부팅을 시도합니다.
-
connect_timeout: 30 // 재부팅이 완료되고 ssh 연결을 시도합니다. 30초가 지나도록 ssh 연결이 되지 않으면 실패
-
reboot_timeout: 600 // 재부팅이 되기까지 기다리는 시간을 600초로 설정합니다.
-
그 후 해당 log 파일에 접근해서 dnf updateinfo list security를 시행해서 결과를 log에 남깁니다.
//이전 플레이북에서 패키지를 설치하고 모두 update를 완료하였기에, 해당 결과 log가 잘 진행되었는지 확인할 수가 없습니다.

//스냅샷을 사용하여 이전에 node3에서 패키지 설치만 진행하고 update를 진행하지 않는 환경으로 돌아가서 테스트를 진행합니다.
$ ansible-playbook security_update.yml -l node3
node3만 업데이트 진행합니다.
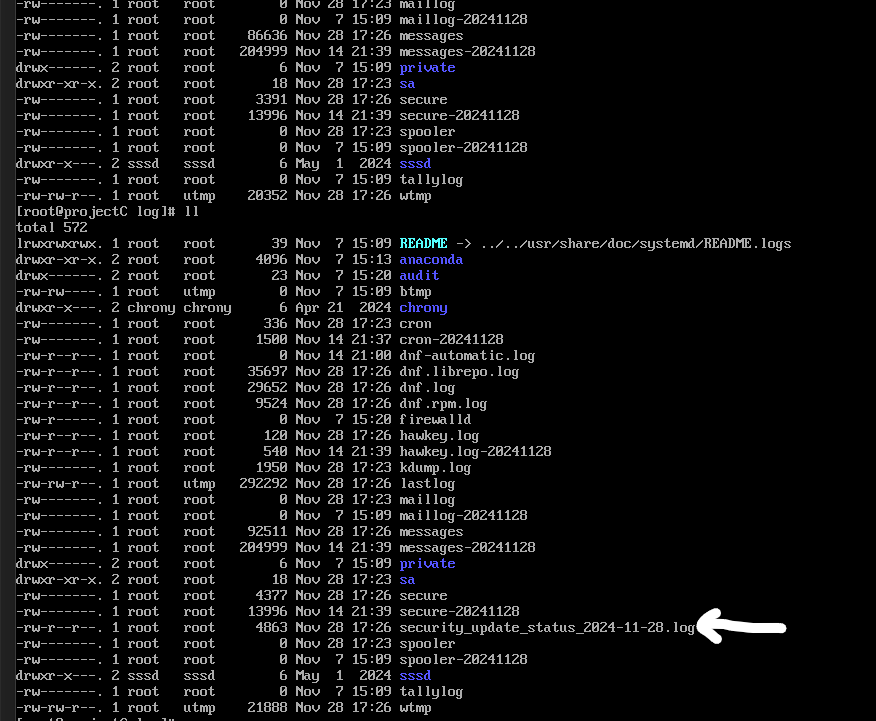
log 파일 생성.
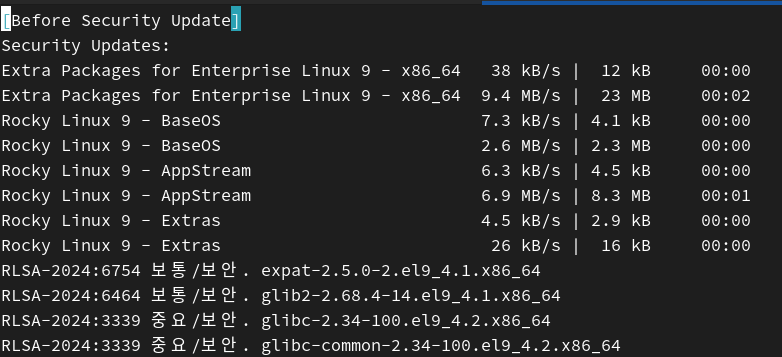
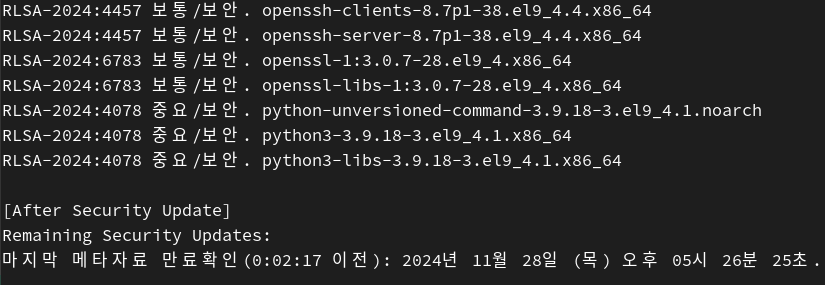
해당 log 파일 내용.
log 파일을 남기는 것을 성공했습니다.
호스트 네임 설정
각 노드들의 호스트 네임을 설정합니다.
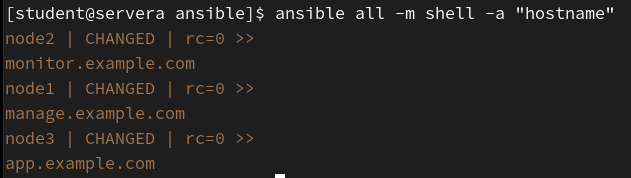
$ ansible-playbook hostnamectl
---
- name: hostname set
  hosts: all
  tasks:
   - hostname:
      name: "manage.example.com"
     when: inventory_hostname in groups['manage']

   - hostname:
      name: "monitor.example.com"
     when: inventory_hostname in groups['monitor']

   - hostname:
      name: "app.example.com"
     when: inventory_hostname in groups['app']
결과
✅모니터링 노드(2) 설정
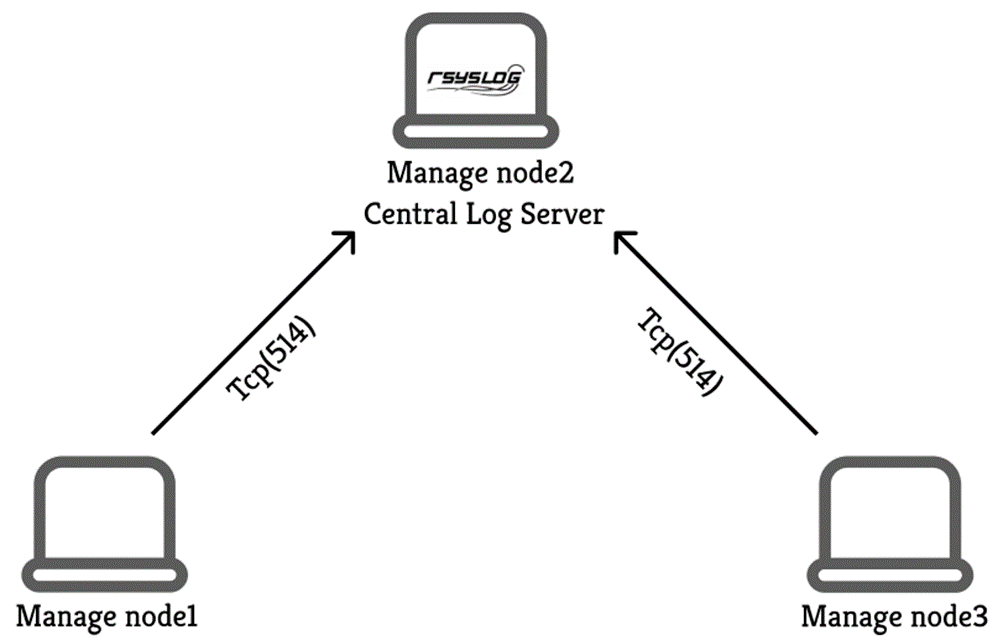
rsyslog 설정 및 logrotate를 통한 로그 관리를 설정합니다.
rsyslog 는 로그를 수집하고 저장하며, logrotate는 로그 파일의 크기를 관리하여 시스템 리소스를 효율적으로 사용합니다.
모니터링에 필요한 패키지 설치
추후에 사용할 수 있는 모니터링 패키지들을 설치합니다.
---
- name: install monitoring package
  hosts: node2
  tasks:
   - name: install package
     dnf:
        name:
         - sysstat
         - nagios
         - zabbix-agent
         - tcpdump
         - prometheus-podman-exporter
        state: present
$ ansible-playbook install_monitor_package.yml
rsyslog
rsyslog를 사용하여 모니터링을 위한 노드를 설정합니다.
- 모니터링 노드에 rsyslog.conf 설정
- 노드 클라이언트 설정 (log 파일을 모니터링 노드에 전송)
- logrotate 설정
rsyslog 서버 설정
모니터링 노드에 rsyslog.conf 파일부터 설정합니다.
- 패키지는 기본적으로 설치되어있으나 안 깔려있을 경우 설치합니다.
- rsyslog.conf 를 수정합니다. (blockinfile)
- template을 사용하여 각 노드별 디렉토리 생성 - 방화벽 tcp 514 포트를 엽니다.
- rsyslog를 재시작합니다.
---
- name: set rsyslog.conf
  hosts: monitor
  tasks:
    - name: install package
      package:
        name: rsyslog
        state: present

    - name: .conf set
      blockinfile:
        path: /etc/rsyslog.conf
        block: |


          module(load="imtcp")
          input(type="imtcp" port="514")


          template(name="ansible_rsys" type="string" string="/var/log/ansible_manage/%HOSTNAME%/messages")

          *.info;mail.none;authpriv.none;cron.none action(type="omfile" DynaFile="ansible_rsys")


    - name: open tcp 514
      firewalld:
        port: 514/tcp
        permanent: yes
        state: enabled
        immediate: yes


    - name: restart rsyslog
      service:
        name: rsyslog
        state: restarted
$ ansible-playbook rsyslog_conf_node.yml
rsyslog 클라이언트 설정
- log를 모니터링 노드에 전송합니다.
---
- name: set rsyslog client
  hosts: app, manage
  tasks:
    - name: set rsyslog.conf
      lineinfile:
        path: /etc/rsyslog.conf
        line: "*.info;mail.none;authpriv.none;cron.none @@172.30.1.22:514"
        state: present

    - name: restart rsyslog
      service:
        name: rsyslog
        state: restarted
$ ansible-playbook rsyslog_client_node.yml
각 클라이언트 노드에서 생성된 로그가 모니터링 노드로 전송되며,
모니터링 노드는 수신한 로그 중 *.info;mail.none;authpriv.none;cron.none 수준의 로그만 필터링하여, 각 호스트 네임별로 정리해 저장합니다.
rsyslog logrotate 설정
- logrotate 설정
정보 기술에서 로그 회전은 너무 오래되거나 너무 크면 로그 파일이 압축, 이동, 이름 변경 또는 삭제되는 시스템 관리에 사용되는 자동화된 프로세스입니다.
출처 : https://en.wikipedia.org/wiki/Log_rotation
- 모니터링 노드에 logrotate 설정을 합니다.

---
- name: logrotate
  hosts: monitor
  tasks:
   - name: logrotate - ansible_manage
     copy:
      dest: /etc/logrotate.d/ansible_manage
      content: |
        /var/log/ansible_manage/*/messages {
              daily
              rotate 7
              compress
              missingok
          }
$ ansible-playbook rsyslog_logrotate.yml
결과
$ ansible monitor -m shell -a "logrotate -f /etc/logrotate.d/ansible_manage"
모니터링 노드에 logrotate -f명령어를 입력하여 강제로 logroate 를 진행

각 노드들의 로그들이 압축되어 잘 저장되었고 logrotate도 확인했습니다.
✅애플리케이션 노드(3) 설정
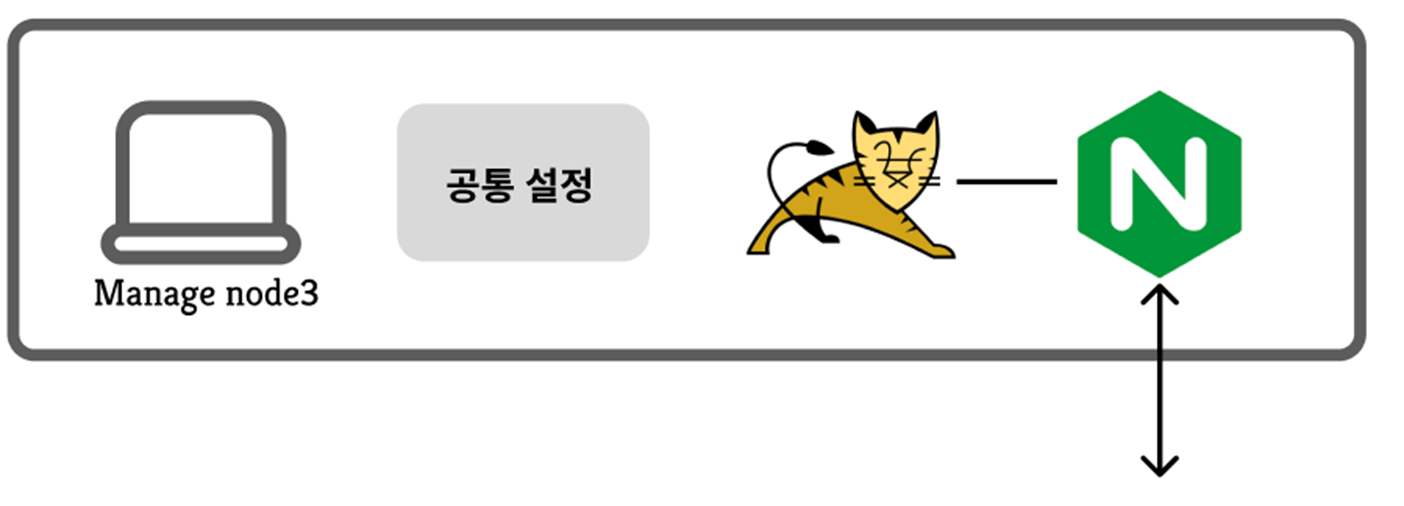
nginx 와 tomcat을 사용합니다.
nginx는 웹 서버, 리버스 프록시 서버로 정적 콘텐츠를 제공, 로드밸런싱, ssl/tls 등에 사용됩니다.
tomcat은 java 기반 애플리케이션 서버이며 동적 컨텐츠 처리를 담당합니다.
web/was 패키지를 설치
- nginx, tomcat을 설치합니다.
- 서비스를 활성화 합니다.
---
- name: install web/was
  hosts: app
  tasks:
    - dnf:
        name:
          - nginx
          - tomcat
        state: present

    - service:
        name: "{{ item }}"
        state: started
        enabled: yes
      loop:
        - nginx
        - tomcat
$ ansible-playbook install_app.yml
sample.war, nginx.conf 파일 준비
- sample.war 파일을 다운받습니다.
$ wget https://tomcat.apache.org/tomcat-7.0-doc/appdev/sample/sample.war
- nginx.conf 파일을 미리 준비합니다.
# For more information on configuration, see:
#   * Official English Documentation: http://nginx.org/en/docs/
#   * Official Russian Documentation: http://nginx.org/ru/docs/

user nginx;
worker_processes auto;
error_log /var/log/nginx/error.log;
pid /run/nginx.pid;

# Load dynamic modules. See /usr/share/doc/nginx/README.dynamic.
include /usr/share/nginx/modules/*.conf;

events {
    worker_connections 1024;
}

http {
    log_format  main  '$remote_addr - $remote_user [$time_local] "$request" '
                      '$status $body_bytes_sent "$http_referer" '
                      '"$http_user_agent" "$http_x_forwarded_for"';

    access_log  /var/log/nginx/access.log  main;

    sendfile            on;
    tcp_nopush          on;
    tcp_nodelay         on;
    keepalive_timeout   65;
    types_hash_max_size 4096;

    include             /etc/nginx/mime.types;
    default_type        application/octet-stream;

    # Load modular configuration files from the /etc/nginx/conf.d directory.
    # See http://nginx.org/en/docs/ngx_core_module.html#include
    # for more information.

#    include /etc/nginx/conf.d/*.conf;

server {
    listen       80;
    listen       [::]:80;
    server_name  localhost;

    location / {
        proxy_pass http://localhost:8080/sample/;

    }

    error_page 404 /404.html;
    location = /404.html {
    }

    error_page 500 502 503 504 /50x.html;
    location = /50x.html {
    }
}


#    server {
#        listen       80;
#        listen       [::]:80;
#        server_name  _;
#        root         /usr/share/nginx/html;

        # Load configuration files for the default server block.
#        include /etc/nginx/default.d/*.conf;

#        error_page 404 /404.html;
#       location = /404.html {
#        }
#        error_page 500 502 503 504 /50x.html;
#        location = /50x.html {
#        }
#    }

# Settings for a TLS enabled server.
#
#    server {
#        listen       443 ssl http2;
#        listen       [::]:443 ssl http2;
#        server_name  _;
#        root         /usr/share/nginx/html;
#
#        ssl_certificate "/etc/pki/nginx/server.crt";
#        ssl_certificate_key "/etc/pki/nginx/private/server.key";
#        ssl_session_cache shared:SSL:1m;
#        ssl_session_timeout  10m;
#        ssl_ciphers PROFILE=SYSTEM;
#        ssl_prefer_server_ciphers on;
#
#        # Load configuration files for the default server block.
#        include /etc/nginx/default.d/*.conf;
#
#        error_page 404 /404.html;
#            location = /40x.html {
#        }
#
#        error_page 500 502 503 504 /50x.html;
#            location = /50x.html {
#        }
#    }

}
- 기존 설정에서 제공되는 서버 블록을 주석 처리
- 서버 블록 작성
proxy_pass http://localhost:8080/sample/;
- localhost:80 요청을 보내면, nginx가 localhost:8080/sample/ 를 전달합니다.
// 기존 서버 블록만 주석처리하고 include를 사용해서 /etc/nginx/conf.d/이름.conf 파일을 저장하는 방법도 있습니다.
tomcat 설정
- 준비한 sample.war 을 app node
usr/share/tomcat/webapps/sample.war에 복사합니다. - 8080 포트를 엽니다.
- tomcat 재시작
---
- name: tomcat
  hosts: app
  tasks:
    - name: copy sample.war
      copy:
        src: /home/student/ansible/sample.war
        dest: /usr/share/tomcat/webapps/sample.war

    - name: oepn tcp 8080
      firewalld:
        port: 8080/tcp
        permanent: yes
        state: enabled
        immediate: yes

    - name: restart tomcat
      service:
        name: tomcat
        state: restarted
플레이북 실행
$ ansible-playbook tomcat.yml
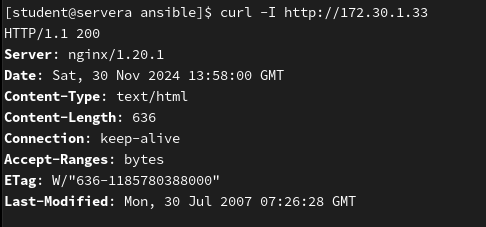
잘 연결됐는지 확인합니다.
$ ansible app -m shell -a "curl -I localhost:8080/sample/"

200응답
content-Length: 636
적용 완료.
nginx 설정
- 준비한 nginx.conf 파일을 app node
/etc/nginx/nginx.conf에 복사합니다. - 80 포트를 엽니다.
- 재시작합니다.
- setsebool 설정
setsebool -P httpd_can_network_connect 1
---
- name: nginx
  hosts: app
  tasks:
    - name: copy nginx.conf
      copy:
        src: /home/student/ansible/nginx.conf
        dest: /etc/nginx/nginx.conf


    - name: oepn tcp 80
      firewalld:
        port: 80/tcp
        permanent: yes
        state: enabled
        immediate: yes

    - name: setsebool
      command: "setsebool -P httpd_can_network_connect 1"

    - name: restart nginx
      service:
        name: nginx
        state: restarted
플레이북 실행
$ ansible-playbook nginx.yml
연결 확인
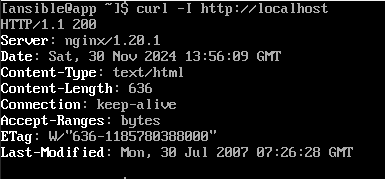
다른 노드에서 연결 확인
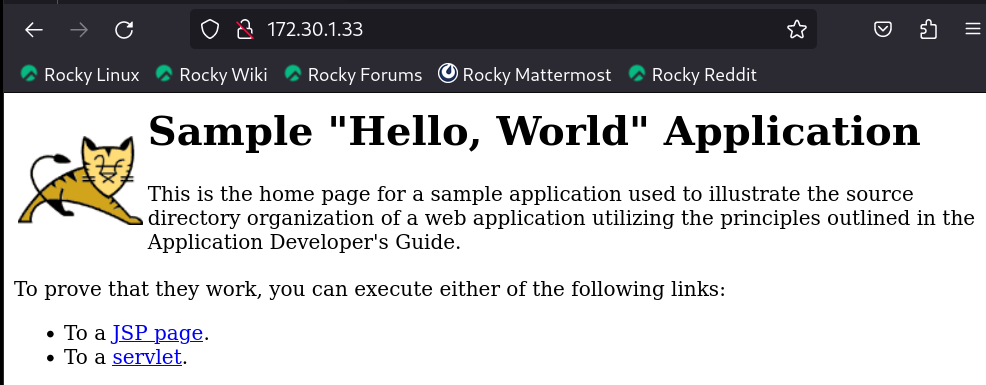
연결이 잘 되었습니다!
✅후기
처음 프로젝트를 구상하면서 금방 끝날 것이라 생각했었는데, 생각보다 지체되었습니다.
프로젝트를 진행하면서 메인이 되는 ansible(rhce)과 linux 활용(rhcsa)에 대해 초점을 두어야 하는데, 다른 세부적인 부분에 깊게 빠져서, 프로젝트의 중심이 흔들려 다른 길로 많이 빠지다가 돌아오고를 반복했습니다.
이미 만들어놓은 구성을 폐기시키고 목차부터 다시 수정하기도 했습니다.
프로젝트의 큰 그림을 유지하며 작업하는 것이 얼마나 중요한지 알 수 있었습니다.
또한 현업에서는 어떻게 작업하고 처리할지, 자신이 진행하는 방식은 옳은지 등등을 많이 고민하게 되었던 것 같습니다.
kickstart 사용 고민
이 프로젝트는 사실 노트 3개를 수동으로 설치가 되게끔만 하고, 그 이후 설정은 ansible-playbook을 사용하여 기본 설정을 하는 방식입니다.
이것은 완전한 자동화가 아닙니다.
그래서 kickstart를 사용해야 고민을 많이 했습니다. 만약 그럴 경우 HTTP/NFS, DHCP, TFTP 서버, PXE 서버, ISO 이미지 등 고려해야 할 게 많아집니다.
이 프로젝트의 목표는 rhcsa, rhce에서 배운 내용을 토대로 프로젝트를 수행하는 것이여서 사용하지 않았습니다.
다음에 소규모 인프라 구축 프로젝트를 진행한다면 kickstart 사용하여 완전 자동화 구축을 시도 해보려 합니다.
보안 업데이트 자동화 관련
플레이북을 작성할 때 고민을 많이했습니다.
crontab에 등록해서 자동으로 실행 할 지,
보안 업데이트만 자동으로 실행 할 지,
critical, important, moderate, low 레벨 중에서 어떤 것을 택할 지,
현업에서 dnf automatic을 사용한다면 slack을 통해서 알람을 받을지, gamil을 사용할 지...
결론적으로 보안 업데이트를 수행할 수 있게끔하고
crontab에 등록하지 않으며 필요할 때마다 플레이북을 실행하는 방식으로 작성하였습니다.
