[따라하며 배우는 리액트 네이티브 기초] 섹션 4 - FireBase / 로그인 / 로그아웃 / 네비게이션 / Alert / Toast
[인프런] 따라하며 배우는 리액트 네이티브 기초
1. FireBase를 이용한 인증 기능 더하기
라이브러리 설치
expo랑 cli랑 다르니 반드시 공식문서를 확인한다
공식문서
expo는 아래 두가지 라이브러리를 설치한다
npm install @react-navigation/native @react-navigation/native-stack
npx expo install react-native-screens react-native-safe-area-context
리액트 네비게이션 적용 (app.js 수정)

import MainScreen from "./screens/MainScreen";
import { Provider } from "react-redux";
import { store } from "./redux/store";
import { createNativeStackNavigator } from "@react-navigation/native-stack"; //import
import { NavigationContainer } from "@react-navigation/native";//import

const Stack = createNativeStackNavigator();

export default function App() {
  return (
    <Provider store={store}>
      <NavigationContainer>
        <Stack.Navigator>
          <Stack.Screen name="Main" component={MainScreen} /> //원래 임포트했던 메인 스크린을 여기에 넣어준다. 네비게이션 컨테이너와 스택 네비게이터로 감싸줌. 추가할 페이지 있으면 아래 넣어주면 됌.
        </Stack.Navigator>
      </NavigationContainer>
    </Provider>
  );
}
로그인 페이지 추가
import LoginScreen from "./screens/LoginScreen"; //페이지 임포트

<NavigationContainer>
        <Stack.Navigator>
          <Stack.Screen name="Main" component={MainScreen} />
          <Stack.Screen name="Login" component={LoginScreen} /> //아래 똑같이 페이지를 추가해준다
        </Stack.Navigator>
      </NavigationContainer>
안드로이드에서 구동해서 보면 위에 main이라고 표시되어 있다.
위의 제목 없애기
<Stack.Screen
            name="Main"
            component={MainScreen}
            options={{ headerShown: false }} //이 부분을 추가한다
/>
2. 로그인 스크린 생성하기
만들기 전 app.js에서 로그인페이지를 앞에 놔두고 시작하자.
보면서 ui를 만들기 위함
<Stack.Navigator>
          <Stack.Screen
            name="Login"
            component={LoginScreen}
            options={{ headerShown: false }}
          />
          <Stack.Screen
            name="Main"
            component={MainScreen}
            options={{ headerShown: false }}
          />
</Stack.Navigator>
state 생성하기
LoginScreen.js 에 useState를 import해주고 이메일과 패스워드 값을 넣을 state를 만든다
import { useState } from "react";

const [email, setEmail] = useState("");
const [password, setPassword] = useState("");
ui 구성하기
쓴 컴포넌트들은 위에 반드시 import를 해야한다.
하지 않으면 오류가 생김!
import {
  StyleSheet,
  TextInput,
  View,
  TouchableOpacity,
  Text,
} from "react-native";

...

return (
    <View style={styles.container}>
      <View style={styles.inputContainer}>
        <TextInput
          placeholder="이메일"
          value={email}
          onChangeText={(text) => setEmail(text)}
          style={styles.input}
        />
        <TextInput
          placeholder="비밀번호"
          value={password}
          onChangeText={(text) => setPassword(text)}
          style={styles.input}
          secureTextEntry
        />
      </View>
      <View style={styles.buttonContainer}>
        <TouchableOpacity style={styles.button}>
          <Text style={styles.buttonText}>로그인</Text>
        </TouchableOpacity>
        <TouchableOpacity style={[styles.button, styles.buttonOutline]}>
          <Text style={styles.buttonOutlineText}>회원가입</Text>
        </TouchableOpacity>
      </View>
    </View>
);- onChangeText에는 그냥 setEmail을 써도 되고 (text) => setEmail(text) 이런식으로 써도 된다
- secureTextEntry : 쓴 텍스트를 암호화시키는 것
- TouchableOpacity : 누르면 깜박 하는 인터렉션 효과를 볼 수 있음. 뷰가 터치에 적절하게 반응하도록 만드는 래퍼임.
TouchableOpacity 공식문서 참고
스타일링
const styles = StyleSheet.create({
  container: {
    flex: 1,
    justifyContent: "center",
    alignItems: "center",
  },
  inputContainer: {
    width: "80%",
    marginTop: 15,
  },
  input: {
    backgroundColor: "white",
    paddingHorizontal: 15,
    paddingVertical: 10,
    borderRadius: 10,
    marginTop: 5,
  },
  buttonContainer: {
    width: "50%",
    justifyContent: "center",
    alignItems: "center",
    marginTop: 30,
  },
  button: {
    backgroundColor: "black",
    width: "100%",
    padding: 15,
    borderRadius: 10,
    alignItems: "center",
  },
  buttonOutline: {
    backgroundColor: "white",
    marginTop: 5,
    borderColor: "black",
    borderWidth: 1,
  },
  buttonText: {
    color: "white",
    fontWeight: "500",
    fontSize: 16,
  },
  buttonOutlineText: {
    color: "black",
    fontWeight: "500",
    fontSize: 16,
  },
});
3. firebase와 앱을 연결하기
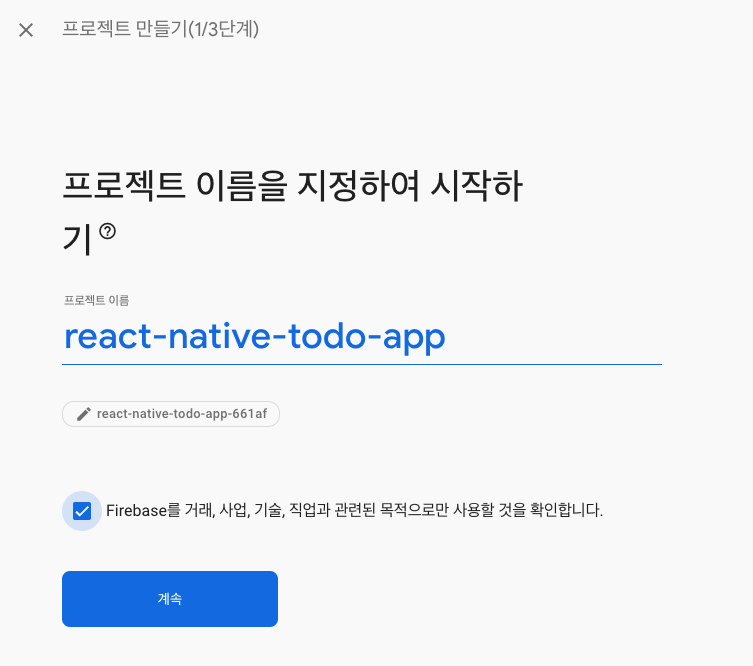
firebase 프로젝트 만들기
공식 홈페이지 이동
시작하기를 눌러 프로젝트를 만들어준다
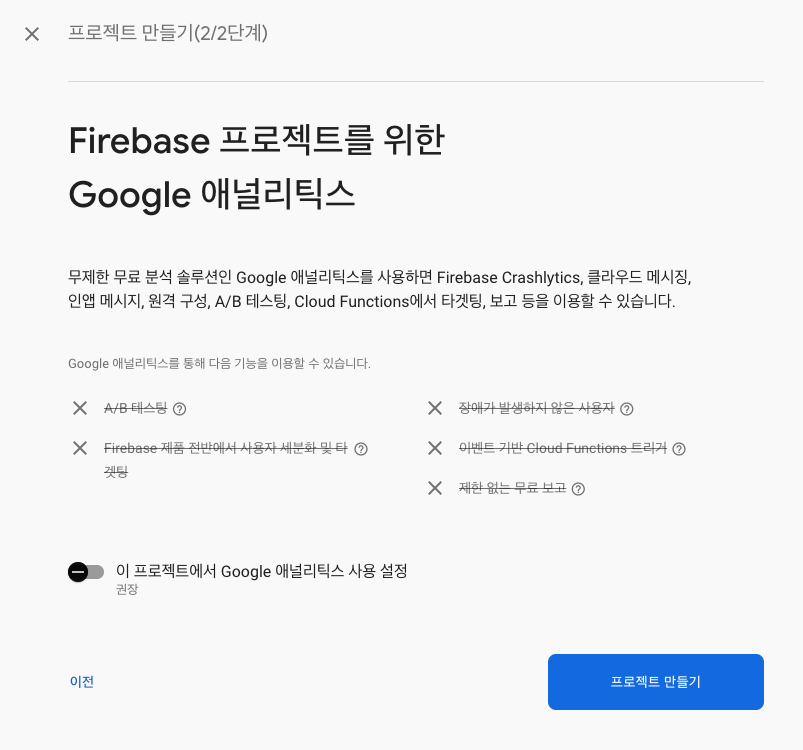
강의에서 애널리틱스는 꺼줬기에 나도 꺼주고 시작했다
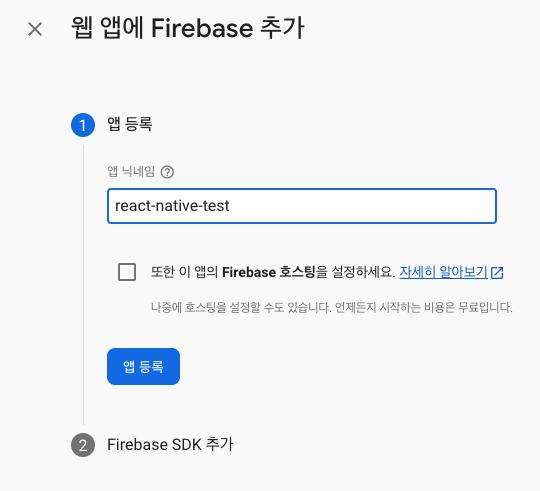
호버할때 웹이라고 표시되는 세번째 버튼을 눌러준다
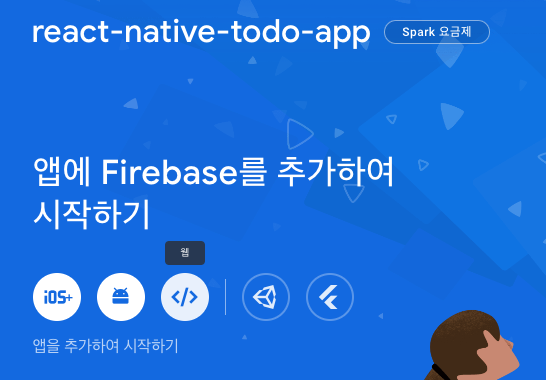
닉네임 만들고 앱 등록 클릭
firebase sdk 추가
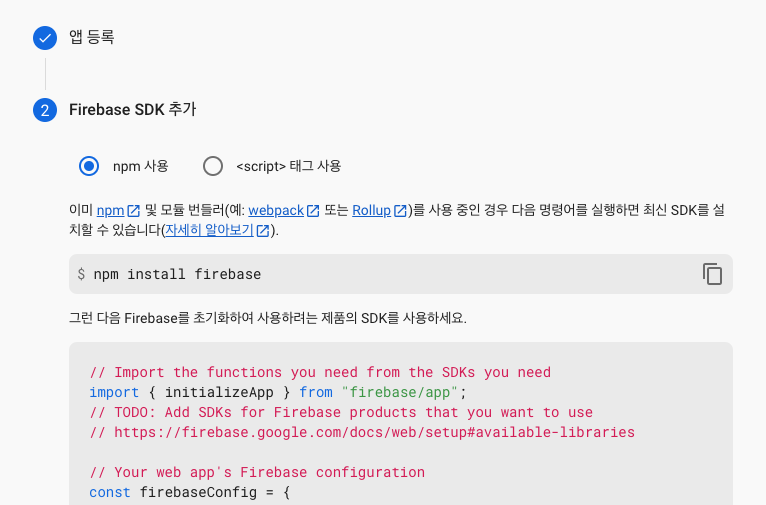
터미널에 위의 npm install firebase를 쳐준다.
설치 후, 루트폴더에 'firebase.js'라는 파일을 만든 후, 위에 나와있는 소스코드를 복사해서 붙혀넣는다.
소스코드에
import { initializeApp } from "firebase/app"
export default app;
위 코드를 넣어준다
// Import the functions you need from the SDKs you need
import { initializeApp } from "firebase/app"; //이부분 추가
// TODO: Add SDKs for Firebase products that you want to use
// https://firebase.google.com/docs/web/setup#available-libraries
import "firebase/auth";
// Your web app's Firebase configuration
const firebaseConfig = {
  apiKey: ....
};

// Initialize Firebase
const app = initializeApp(firebaseConfig);

export default app; //이부분 추가
app.js에 위에 만든 app을 임포트해준다
상단에 아래 코드 추가
import app from "./firebase";다 끝난 후 npm run android 해서 에러 없는지 확인하기
4. Firebase를 이용한 인증 기능 더하기
회원가입 함수를 작성해준다
상단에 임포트하기
import { getAuth, createUserWithEmailAndPassword } from "firebase/auth";
로그인과 회원가입을 누를 때 작동할 함수를 작성한다
<TouchableOpacity style={styles.button} onPress={handleLogin}>
          <Text style={styles.buttonText}>로그인</Text>
        </TouchableOpacity>
        <TouchableOpacity
          style={[styles.button, styles.buttonOutline]}
          onPress={handleSignUp}
        >
          <Text style={styles.buttonOutlineText}>회원가입</Text>
</TouchableOpacity>
const auth = getAuth();
const handleLogin = async () => {};
const handleSignUp = async () => {
try {
const user = await createUserWithEmailAndPassword(auth, email, password);
console.log("user", user);
} catch (error) {
console.log(error.message);
}
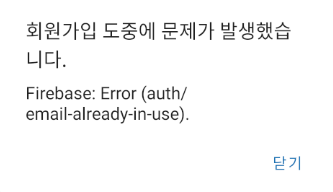
};화면에서 회원가입을 누르면 아래와 같은 에러가 뜬다.

firebase에서 인증 기능을 사용할 수 있게 설정한다
홈페이지에서 authentication에서 시작하기를 누른다

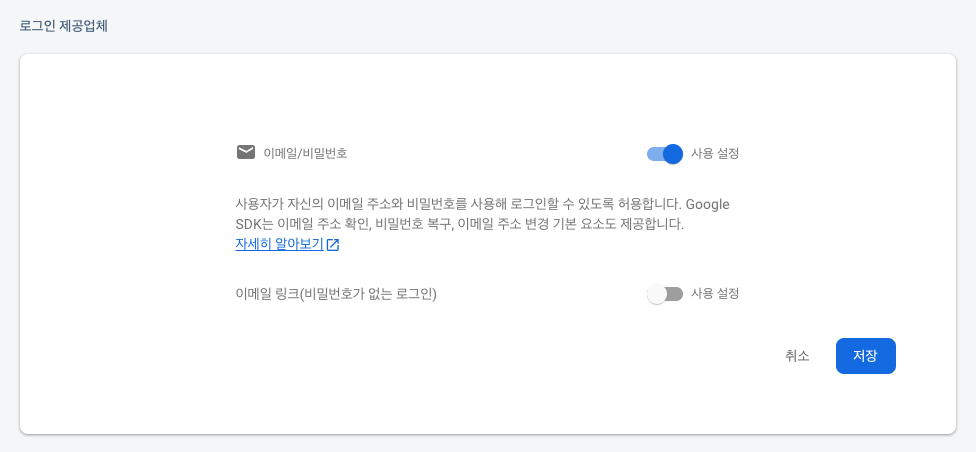
이메일/비밀번호를 선택한다
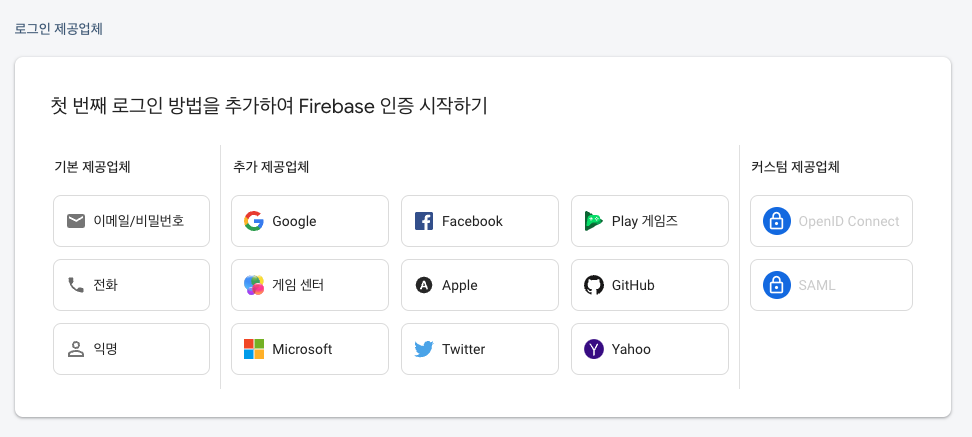
사용 설정 클릭 후 저장을 누른다
그 후에 회원가입하면 아래와 같은 로그가 뜬다.
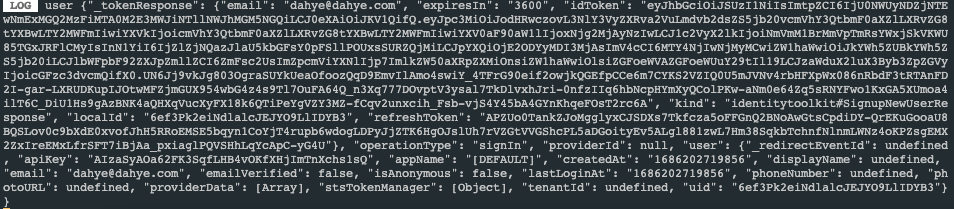
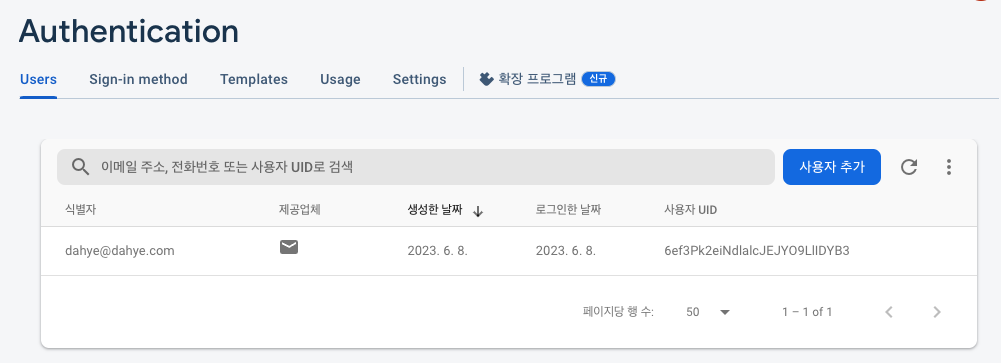
firebase 사이트에서 user탭을 클릭한다
방금 가입한 아이디가 표시됌
5. Alert, Toast
회원가입 실패했을 때 알림창을 띄운다.
const handleSignUp = async () => {
    try {
      const user = await createUserWithEmailAndPassword(auth, email, password);
      console.log("user", user);
    } catch (error) {
      console.log(error.message);
      Alert.alert(
        "회원가입 도중에 문제가 발생했습니다.", // 제목
        error.message, // 내용
        [{ text: "닫기", onPress: () => console.log("닫기") }], // 버튼 이름과 클릭하면 실행되는 함수
        { cancelable: true } // 안드에서 알럿창 밖 영역을 클릭하면 닫게 해주는 속성
      );
    }
  };
안드로이드에서 알럿 화면
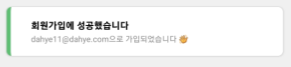
회원가입을 성공했을 때 Toast화면을 보여준다.
기본 코어 toast는 안드로이드에서만 작동한다
ios와 안드 모두 통용되는 것을 새로 깔아야 함
라이브러리 설치
react-native-toast-message 라이브러리 깃허브
npm install --save react-native-toast-message
toast 함수 적어주기
상단에 임포트 후
import Toast from "react-native-toast-message";가입이 성공했을 때 넣는 함수에 넣어준다.
const handleSignUp = async () => {
    try {
      const user = await createUserWithEmailAndPassword(auth, email, password);
      console.log("user", user);
      Toast.show({
        type: "success",
        text1: "회원가입에 성공했습니다",
        text2: `${email}으로 가입되었습니다 👋`,
      });
    } catch (error) {
    ...
    }}}
app.js에 Toast를 import한다
import Toast from "react-native-toast-message";

...

export default function App() {
  return (
    <>
      <Provider store={store}>
        <NavigationContainer>
          <Stack.Navigator>
            <Stack.Screen
              name="Login"
              component={LoginScreen}
              options={{ headerShown: false }}
            />
            <Stack.Screen
              name="Main"
              component={MainScreen}
              options={{ headerShown: false }}
            />
          </Stack.Navigator>
        </NavigationContainer>
      </Provider>
      <Toast /> // Toast추가
    </>
  );
}
Toast 화면 확인
6. firebase를 이용한 로그인
로그인 함수 만들기
import {
  getAuth,
  createUserWithEmailAndPassword,
  signInWithEmailAndPassword,
} from "firebase/auth";

...

const handleLogin = async () => {
    try {
      const user = await signInWithEmailAndPassword(auth, email, password);
      console.log(user);
    } catch (error) {
      Alert.alert(
        "로그인 중 문제가 발생했습니다.",
        error.message,
        [
          {
            text: "닫기",
            onPress: () => console.log("닫기"),
          },
        ],
        { cancelable: true }
      );
    }
  };
로그인 완료 시

로그인 실패 시
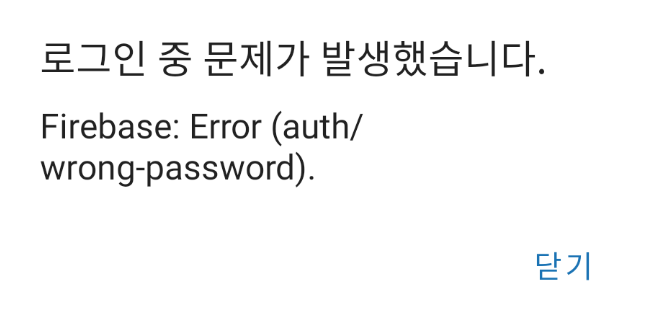
로그인 후 main페이지로 이동하게 하기
//상단 임포트
import {
getAuth,
createUserWithEmailAndPassword,
signInWithEmailAndPassword,
onAuthStateChanged,
} from "firebase/auth";
import { useNavigation } from "@react-navigation/native";
...
const navigation = useNavigation() //네비게이션 변수 지정
useEffect(() => {
onAuthStateChanged(auth, (user) => { //user가 있음을 감지하고
if (user) { //user가 있다면
navigation.replace("Main"); //main으로 이동하기
}
});
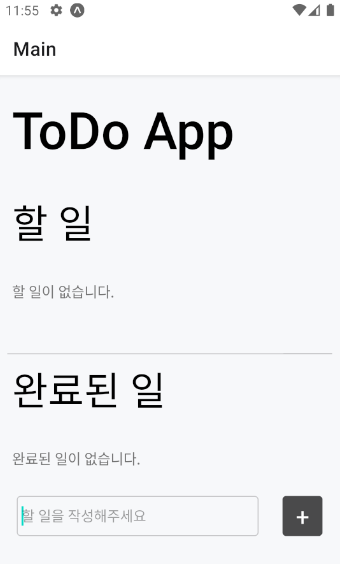
});7. 로그아웃 기능 구현하기
UI 만들기
//MainScreen.js

<View style={styles.headerContainer}>
        <Text style={styles.pageTitle}>ToDo App</Text>
        <TouchableOpacity
          style={styles.logOutButton}>
          <Text style={styles.logOutText}>-</Text>
        </TouchableOpacity>
</View>

...

logOutText: {
    color: "white",
    fontSize: 25,
  },
  headerContainer: {
    flexDirection: "row",
    alignItems: "center",
    justifyContent: "space-between",
  },
  logOutButton: {
    marginBottom: 25,
    marginRight: 20,
    justifyContent: "center",
    alignItems: "center",
    width: 42,
    height: 42,
    borderRadius: 4,
    backgroundColor: "rgba(0,0,0,0.7)",
    shadowColor: "#000000",
    shadowOpacity: 0.14,
    shadowRadius: 8,
    shadowOffset: {
      width: 0,
      height: 4,
    },
  },
로그아웃 함수 만들기
<TouchableOpacity
  style={styles.logOutButton}
  onPress={handleLogout}> // handleLogout 함수 지정
          <Text style={styles.logOutText}>-</Text>
        </TouchableOpacity>
함수 만들기
//상단 inport
import { signOut, getAuth } from "firebase/auth";
import { useNavigation } from "@react-navigation/native";

...

const auth = getAuth();
const navigation = useNavigation();

...

const handleLogout = async () => {
    try {
      await signOut(auth);
      navigation.replace("Login"); //로그아웃하면 login 화면으로 이동
    } catch (error) {
      console.log(error);
    }
  };
+) Pressable vs TouchableOpacity
Pressable은 새롭게 나온 것. 다양한 props를 사용할 수 있다.
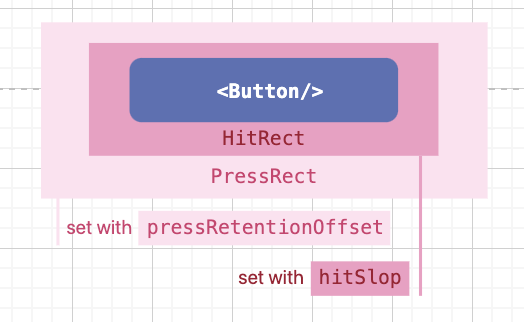
TouchableOpacity는 버튼 클릭 시 애니메이션을 구현할 수 있다.