드디어 구현 시작!
tailwind가 진짜 편했다는 것을 느끼고 있다,,,
오늘 한 일😼


router 설정
옛날에 벨로그에 작성한 글을 보면서 했는데 생략 된 부분이 있어 에러가 났다. 벨로그에 코드 쓰는 법도 몰라서 캡쳐하던 시절,,
npm install react-router-dom
로 설치해준 뒤에 router 설정을 해야한다!
App.js
import { BrowserRouter as Router, Route, Routes } from "react-router-dom";
import "./App.css";
import Main from "../src/page/Main/Main.js";
import Profile from "../src/page/Profile/Profile.js";

function App() {
  return (
    <Router>
      <Routes>
        <Route path="/" element={<Main />} />
        <Route path="/profile" element={<Profile />} />
      </Routes>
    </Router>
  );
}

export default App;
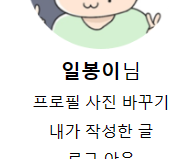
프로필 사진 바꾸기
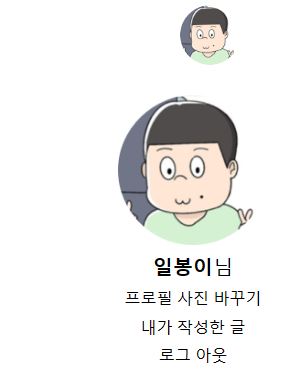
우선 기본 프로필 사진을 일봉이 사진으로 했다. 헤더의 작은 이봉이를 클릭하면 메뉴가 나타나고 메뉴에서 프로필 사진을 변경할 수 있게 만들 것 이다!

import basicProfile from "../image/profilephoto.png";const [profileImage, setprofileImage] = React.useState(basicProfile); <Stack>
<img
alt="profileImage"
src={profileImage}
width="60px"
height="60px"
style={{ cursor: "pointer", borderRadius: "50%" }}
onClick={menuOpen}
/>
</Stack>헤더 오른쪽의 기본 프로필을 일봉이 사진으로 설정했다. 이미지 태그에서 borderRadius를 조정해주면 사진을 모두 동그랗게 만들 수 있다.
<input
type="file"
style={{ display: "none" }}
accept="image/*,.jpg,.png,.jpeg"
name="profile_img"
onChange={onChange}
ref={fileInput}
/>다음은 '프로필 사진 바꾸기'를 클릭하면 파일을 불러오게 할 것이다. input 태그를 만들고 display를 none으로 해주면 화면에 input 태그가 보이지 않는다. 그래서 input 태그는 아무데나 써도 상관이 없으며 다른 요소를 클릭했을 때 파일 선택 창이 나타난다. name은 서버로 전송할 때 해당 파일 데이터를 식별하는 데 사용된다.
ref는 React의 참조 객체로 컴포넌트에서 DOM 요소나 클래스 컴포넌트의 인스턴스에 직접 접근할 수 있다.
const fileInput = React.useRef(null);요런 코드를 작성해서 useRef 훅을 사용하여 변수 fileInput을 생성하고, 초기값을 null로 설정했다. 사실 gpt한테 물어본거라 완전히 이해가 되지는 않는데 pm님이 대충 input의 이름이 fileInput이 된거라고 생각하면 된다고 했다!!
<Stack
style={{ cursor: "pointer" }}
onClick={() => {
fileInput.current.click();
}}
>
프로필 사진 바꾸기
</Stack>즉, '클릭 시 input을 클릭한다'라는 의미의 코드가 되어 프로필 사진 바꾸기를 클릭했을 때 파일을 불러올 수 있다.
const onChange = (e) => {
if (e.target.files[0]) {
const reader = new FileReader();
reader.onload = () => {
setprofileImage(reader.result);
};
reader.readAsDataURL(e.target.files[0]);
}
};사진 파일을 불러와서 profileImage 상태에 저장하는 코드다.
한 줄씩 해석해보면
if (e.target.files[0]) {
사용자가 파일을 선택한 경우를 확인하는 조건문이다. 파일을 선택하면 e.target.files에 선택한 파일들의 배열이 저장되고, 배열의 첫 번째 요소([0])가 선택한 파일을 가리킨다. 파일을 선택하지 않았을 경우 조건문이 거짓이 된다.
const reader = new FileReader();파일의 내용을 읽게 해주는 FileReader 객체 생성.
reader.onload = () => {
setprofileImage(reader.result);
};FileReader의 onload 이벤트를 처리, setprofileImage상태 함수를 호출하여 파일의 내용을 profileImage 상태에 저장한다.
reader.readAsDataURL(e.target.files[0]);이 부분에서 파일 내용을 읽는다고 한다.
어려워ㅠㅠ
이렇게 해서 프로필 사진 바꾸는 기능 구현 완료!!
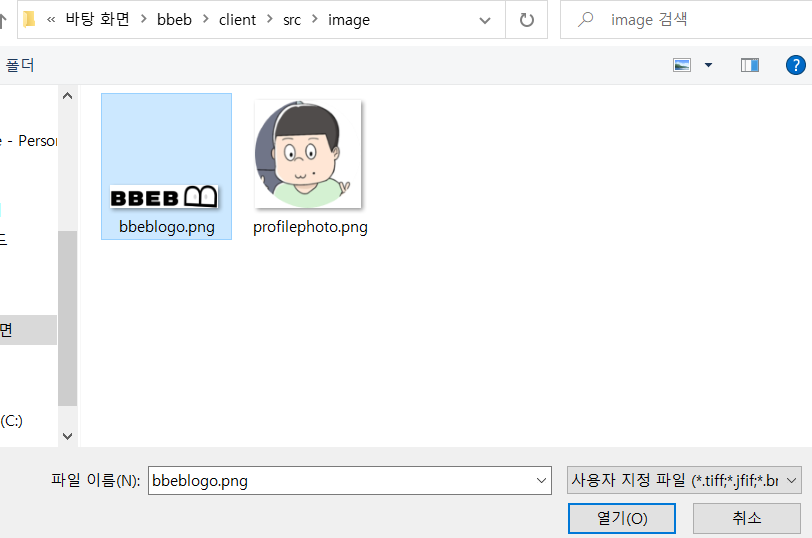

BBEB 로고로 프로필 사진을 바꿔봤다. 그런데 새로고침을 하면 다시 기본 이미지로 바뀐다. 이 부분은 백엔드와 작업을 해야한다!
헤더 전체 코드
import React from "react";
import { Stack } from "@mui/material";
import bbeblogo from "../image/bbeblogo.png";
import basicProfile from "../image/profilephoto.png";
import { useNavigate } from "react-router-dom";
function Header() {
const navigate = useNavigate();
const [isOpen, setIsOpen] = React.useState(false);
const menuOpen = () => {
setIsOpen(!isOpen);
};
const [profileImage, setprofileImage] = React.useState(basicProfile);
const fileInput = React.useRef(null);
const onChange = (e) => {
if (e.target.files[0]) {
const reader = new FileReader();
reader.onload = () => {
setprofileImage(reader.result);
};
reader.readAsDataURL(e.target.files[0]);
}
};
return (
<>
<Stack
bgcolor="white"
width="100%"
height="80px"
direction="row"
justifyContent="space-between"
alignItems="center"
position="fixed"
>
<img
src={bbeblogo}
alt="logo"
width="150px"
height="40px"
style={{ cursor: "pointer", marginLeft: "60px" }}
onClick={() => {
navigate("/");
}}
/>
<Stack style={{ marginRight: "60px" }}>
{/* <Stack //로그인X일 때
width="150px"
height="30px"
direction="row"
justifyContent="space-between"
>
<Stack style={{ cursor: "pointer" }}>로그인</Stack>
<Stack>|</Stack>
<Stack style={{ cursor: "pointer" }}>회원 가입</Stack>
</Stack> */}
          <Stack>
            <img
              alt="profileImage"
              src={profileImage}
              width="60px"
              height="60px"
              style={{ cursor: "pointer", borderRadius: "50%" }}
              onClick={menuOpen}
            />
          </Stack>
</Stack>
</Stack>
{isOpen && (
<Stack padding="80px 0px 0px 1635px">
<Stack
bgcolor="white"
width="220px"
height="270px"
direction="column"
justifyContent="space-between"
alignItems="center"
padding="20px 0px 20px 0px"
position="fixed"
>
<img
src={profileImage}
alt="profileImage"
width="150px"
height="150px"
/>
<Stack direction="row">
<Stack style={{ fontWeight: "bold", fontSize: "20px" }}>
일봉이
</Stack>
<Stack style={{ fontSize: "20px" }}>님</Stack>
</Stack>
<Stack
style={{ cursor: "pointer" }}
onClick={() => {
fileInput.current.click();
}}
>
프로필 사진 바꾸기
</Stack>
            <input
              type="file"
              style={{ display: "none" }}
              accept="image/*,.jpg,.png,.jpeg"
              name="profile_img"
              onChange={onChange}
              ref={fileInput}
            />
<Stack style={{ cursor: "pointer" }}>내가 작성한 글</Stack>
<Stack style={{ cursor: "pointer" }}>로그 아웃</Stack>
</Stack>
</Stack>
)}
</>
);
}
export default Header;

pr 올리기까지 완료!

하루종일 다같이 디코키고 일했다,,, 넷이 힘을 합치면 뭐든 할 수 있어,,
마지막은 롤체! 우리 다 짱못함ㅋㅋㅋㅋㅋㅋ
오늘도 열일했따
