[SeSAC X 코딩온] 웹개발자 풀스택 과정 6주차 회고 (3)-2 | 간단한 blog 만들기 실습 - 구현 내용(get, post, delete)
0
[SeSAC X 코딩온 도봉 1기] 웹개발자 풀스택 과정 회고
목록 보기
7/19
💡 2/2 blog 만들기 실습 (express, ejs, multer 총 정리)
📍 간단한 blog 만들기 실습 - 구현
5. 구현 시작!
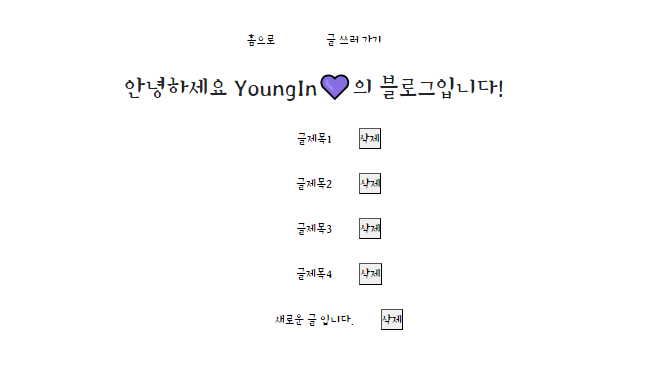
✅ index.ejs
( GET: /, DELETE: '/blog/delete' )
- Home 페이지
<> index.ejs 코드
<!DOCTYPE html>
<html lang="ko">
  <head>
    <meta charset="UTF-8" />
    <meta name="viewport" content="width=device-width, initial-scale=1.0" />
    <title>메인페이지</title>
    <!-- head include -->     // head.ejs 코드 맨 아래에 전체 적용할 CSS or JS 첨부
    <%- include('./include/head')%>
  </head>
  <body>
    <!-- header는 (ejs) include 해줄 것임 -->
    <!-- <header>홈으로 글쓰러가기</header> -->
    <%- include('./include/header')%>

    <!-- {
        user: userID,
        contentData: tempDB, //[{}, {}]
      } -->

    <h2>안녕하세요 <%=user%>의 블로그입니다!</h2>
    <ul>
      <!-- 서버로부터 받아온 contentData를 for문으로 글 목록(<li></li> <button>) 자동 생성되게 함 -->
      <%for(let content of contentData) {%>
      <li>
        <a href="/content/<%=content.contentID%>"><%= content.title%></a>
        <button onclick="deleteContent('<%=content.contentID%>', this)">삭제</button>
          <!-- deleteContent() 함수 두 번째 인자로 button(this) 태그 넘겨줌-->
      </li>
      <%}%>
    </ul>

    <script>

      function deleteContent(contentID, btn) {
      /* 삭제 기능 : 버튼 눌렀을 때 글의 ID 번호를 매개변수로 해당 글 삭제 */

        // console.log(contentID); // 글 ID 번호
        // console.log(btn); // this로 전달된 button 태그

        if (confirm("정말 삭제하실건가요?😫")) {
          // 삭제 로직
          axios({
            method: "delete",
            url: "/blog/delete?contentID=" + contentID,
          })
            .then((res) => {
              console.log(res);
              console.log(res.data);
            })
            .catch((err) => console.error(err));

      //   console.log(btn.parentNode);  // <li> ⋯ </li>
          btn.parentNode.remove();
        }
      }
    </script>
  </body>
</html>
<> app.js 코드
// GET 요청
app.get("/", (req, res) => {
  // res.render("렌더할 view 파일명"[, { 렌더 페이지에 뿌려줄 data가 담긴 객체 }])
  res.render("index", {
    user: userId,
    contentData: tempDB, //[{}, {}] - 임시 DB
  });
});
// DELETE 요청 (axios) app.delete("/blog/delete", (req, res) => { console.log(req.query); const { contentID } = req.query; // 객체 구조분해할당 tempDB = tempDB.filter((obj) => obj.contentID !== Number(contentID)); // req.query에 담겨온 contentID와 일치하지 않는 객체만 배열로 다시 return console.log(tempDB); // res.send("ddddd"); res.end(); // send() 랑 동시 사용 X, send()로 데이터 넘겨줄 필요 없어서 end() 사용 });
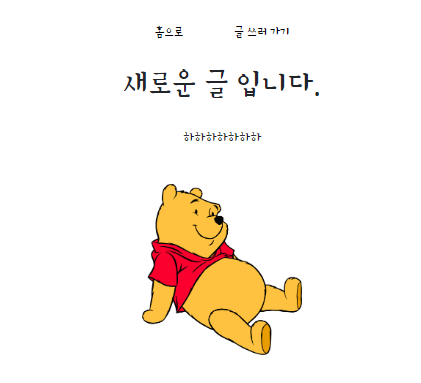
✅ content.ejs
( /content/:contentID )
- home에서 "[ 글 제목 ]"을 클릭했을 때 보여줄 페이지
<> content.ejs 코드
<!DOCTYPE html>
<html lang="ko">
  <head>
    <meta charset="UTF-8" />
    <meta name="viewport" content="width=device-width, initial-scale=1.0" />
    <title>Document</title>
    <%- include('./include/head')%>
    <style>
      h1,
      div {
        text-align: center;
      }

      p {
        white-space: pre-line;
      }
    </style>
  </head>
  <body>
    <%- include('./include/header')%>

    <!-- {
        contentID: 1,
        title: "글제목1",
        content: "글 내용1",
        img: null, // null or path(string)
      } -->

    <h1><%= title%></h1>
    <div>
      <p><%= content%></p>
      <%if(img){%>
      <img src="/<%= img%>" alt="<%= contentID%>번 글 이미지" width="200" />
        <!-- src="/~~" 지정할 때 slash 꼭!! 쓰기 -->
      <%}%>
    </div>
  </body>
</html>
<> app.js 코드
app.get("/content/:contentID", (req, res) => {
  // ':' params 명시 키워드
  console.log(req.params); // {contentID:'1'};
  const { contentID } = req.params;
  const isContent = tempDB.filter((obj) => obj.contentID === Number(contentID))[0];
  // req.params로 넘어온 contentID와 일치하는 객체만 배열에 담아 return

  console.log(isContent); // 객체({}) or undefined
  /* {
    contentID: 1,
    title: "글제목1",
    content: "글 내용1",
    img: null, // null or path(string)
  } */

  if (isContent) res.render("content", isContent); // isContent가 true면 content.ejs 렌더링
  else res.render("404"); // 아니면 404 페이지 렌더링

  //   res.send("hi~~");
});
< params vs. query >
- params
- 서버에서 url 표기 시
/:params로 작성- 클라이언트에서 요청 시
/123로 나타남- req.params 에서 정보 확인 가능 -> {params: '123'}
- 네이버 블로그 처럼 여러 계정의 글을 "조회"할 때 ==> params 사용
- query
- 서버에서 url 표기 시
/sesac- 클라이언트에서 url 표기 시
/sesac?id=123&content=123...- req.query에서 정보 확인 가능 -> {id: '123', content: '123'}
- 검색, 필터링 기능 ==> query 사용
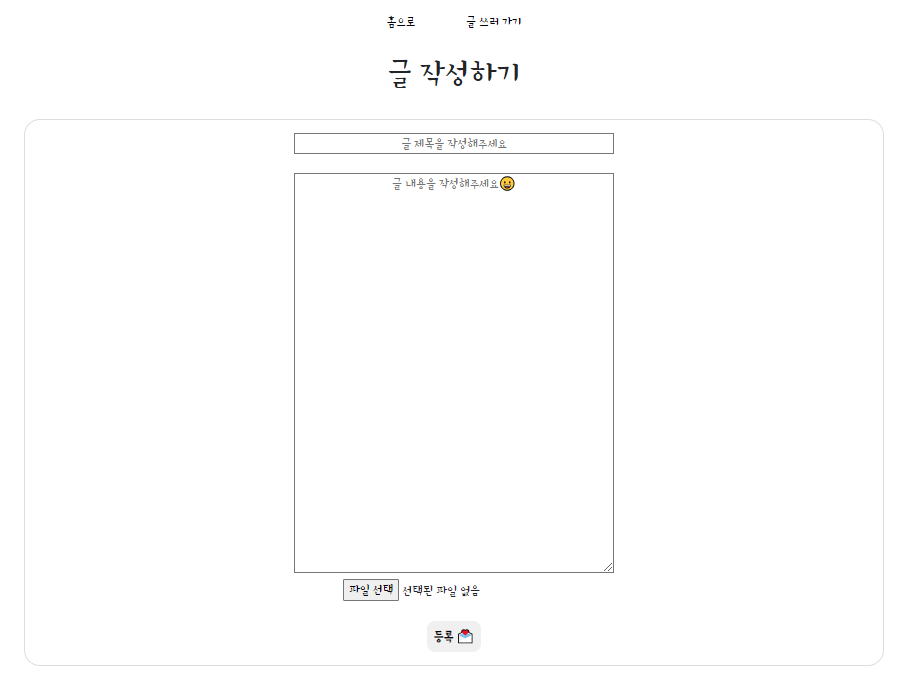
✅ writeContent.ejs
( GET: /write, POST: /blog/post )
- header의 "글 쓰러 가기"를 클릭했을 때 보여줄 페이지
<> wirteContent.ejs 코드
<!DOCTYPE html>
<html lang="ko">
  <head>
    <meta charset="UTF-8" />
    <meta name="viewport" content="width=device-width, initial-scale=1.0" />
    <title>글 작성하기(폼 태그 제출)</title>
    <%- include('./include/head')%>
    <style>
      h1 {
        text-align: center;
      }

      form {
        text-align: center;
        border: 1px solid #ddd;
        border-radius: 20px;
        padding: 1rem 0;
        margin: 2rem;
      }

      form textarea {
        width: 400px;
        height: 500px;
      }

      form input[type="text"] {
        width: 400px;
      }

      button {
        border: none;
        border-radius: 10px;
        font-weight: 700;
        padding: 8px;
      }
    </style>
  </head>
  <body>
    <%- include('./include/header')%>
    <h1>글 작성하기</h1>
    <form action="/blog/post" method="post" enctype="multipart/form-data">
      <!--
			<form> 태그와 axios 중복 사용 ❌,
			multer 사용 시 enctype="multipart/form-data" 필수 작성!!
 	  -->
      <input type="text" name="title" placeholder="글 제목을 작성해주세요" />
      <br />
      <br />
      <textarea name="content" placeholder="글 내용을 작성해주세요😀"></textarea>
      <br />
      <input type="file" name="img" />
      <br />
      <br />
      <button type="submit">등록 💌</button>
    </form>
  </body>
</html>
<> app.js 코드
// 새 글 작성 form 페이지 렌더링
// 이 때, `/content/write`로 경로 지정할 경우 `write`를 params로 착각할 수 있어서 그렇게 하면 안됨!
app.get("/write", (req, res) => {
  res.render("writeContent");
});


// 새 글 작성 form에 입력한 내용 DB에 추가 (POST)
app.post("/blog/post", uploadDetail.single("img"), (req, res) => {
  // multer 사용 시 두 번째 인자로 미들웨어 호출 해줘야 함
  // uploadDetail.single("img") 에서 img는 <input type="file" name="img" />의 name이다

  // console.log(req.body);
  // console.log(req.file);

  // DB에 추가 : tempDB에 객체 형태로 push (keyName 똑같이 쓰기)
  tempDB.push({
    contentID: tempDB.length !== 0 ? tempDB[tempDB.length - 1].contentID + 1 : 1,
    // ⬆⬆ tempDB가 비워져있지 않으면 ? tempDB의 마지막 객체의 contentID에 +1 : 그렇지 않으면 1번으로 push
    title: req.body.title,
    content: req.body.content,
    img: req.file ? req.file.path : null, // null or path(string)
    // ⬆⬆ 파일을 업로드하면 ? 파일 경로 넘겨줌 : 그렇지 않으면 null
  });
  //console.log(tempDB);

  res.redirect("/"); // DB에 추가 후(= POST 요청이 끝나면) Home('/')으로 리다이렉션
});
✅ 404.ejs
잘못된 url로 들어왔을 때 보여줄 페이지로, app.js의 라우팅 코드 맨 아래 위치해야 한다.
( == app.listen() 바로 위쪽에 위치)
그래야 모든 라우팅에 해당하지 않을 때 404 페이지를 렌더링 함
html 코드는 하고싶은데로 작성하면 되기 때문에 app.js 코드만 올림!
// 404 페이지 처리
app.get("*", (req, res) => {
  res.render("404");
});

틀리더라도 🌸🌈🌷예쁘게 지적해주세요💕❣️