
개요
아이콘 컴포넌트를 개발하고 관리하면서 있었던 문제를 해결하는 과정입니다.
아이콘 컴포넌트의 요구사항
- 컬러를 변경할 수 있어야 한다.
- 사이즈를 변경할 수 있어야 한다.
- 컴포넌트 사용자 입장에서는 icon 이름을 몰라도 자동 완성으로 접근 할 수 있어야 한다.
기존 컴포넌트 구현
//Icon.tsx
//Icon 컴포넌트

import * as Icons from '@/assets/icons'; //index.ts에서 export되는 SVG를 import 한다.
import { VariantProps, cva, cx } from 'class-variance-authority';
import { twMerge } from 'tailwind-merge';

type IconName = keyof typeof Icons; //아이콘 이름을 유니온 타입으로
interface IconProps extends VariantProps<typeof iconVariants> {
  className?: string;
  iconName: IconName;
}

export default function Icon({ className, iconName, color, size }: IconProps) {
	 //아이콘 이름으로 컴포넌트를 렌더링한다.
  const Icon = Icons[iconName];

  return <Icon className={twMerge(cx([iconVariants({ color, size }), className]))}></Icon>;
}

const iconVariants = cva([], {
  variants: {
    color: { //fill,stroke 속성을 이용해서 SVG 색상 적용
      default: ['fill-typo stroke-typo'],
      disabled: ['fill-typo-disable stroke-typo-disable'],
      display: ['fill-typo-display stroke-typo-display'],
      success: ['fill-success stroke-success'],
      primary: ['fill-primary stroke-primary'],
      error: ['fill-error stroke-error'],
      warning: ['fill-warning stroke-warning'],
    },
    size: {
      small: ['w-6 h-6'],
      big: ['w-8 h-8'],
    },
  },
  defaultVariants: { color: 'default', size: 'small' },
});
//index.ts
//barrel 파일로 한 곳 에서 export
//svg를 react 컴포넌트로 사용하기 위해서 SVGR로 변환 후 export , '?react' 추가
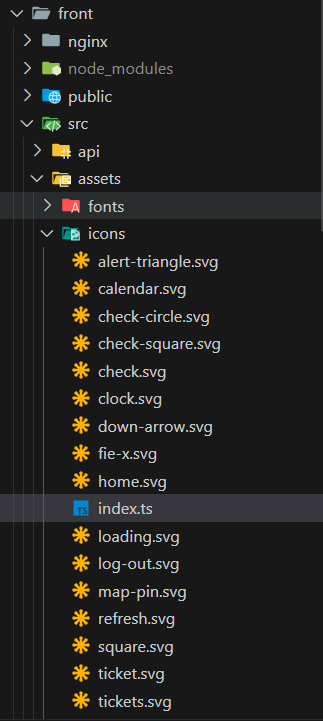
export { default as Check } from '@/assets/icons/check.svg?react';
export { default as FileX } from '@/assets/icons/fie-x.svg?react';
export { default as Home } from '@/assets/icons/home.svg?react';
export { default as LogOut } from '@/assets/icons/log-out.svg?react';
export { default as Trash } from '@/assets/icons/trash.svg?react';
...SVG를 모두 index 파일에서 import 후 svgr을 적용해서 export했습니다. 그리고
IconComponent에서는 이 아이콘들을 import하고 props로 렌더링을 원하는 아이콘 이름을 받아서 다형성 컴포넌트 방식으로 렌더링했습니다.
<!--down--arrow.svg -->
<!--SVG 내부 요소들은 storke="current"로 지정해서 svg태그 stroke 값에 따라서 색상이 변경되도록-->
<svg width="24" height="24" stroke='black' viewBox="0 0 24 24" fill="none" xmlns="http://www.w3.org/2000/svg">
<path d="M6 9L12 15L18 9" stroke="current" fill='none' stroke-width="2" stroke-linecap="round" stroke-linejoin="round"/>
</svg>
각 아이콘 svg는 색상 변경을 위해서 stroke = "current"를 적용했습니다.

iconName타입은 keyof typeof를 활용한 유니온 타입으로 정의되어 있습니다. icon이 추가 되도 index.ts에 추가한다면 따로 타입 관리 없이 사용할 수 있고, 아이콘 컴포넌트를 사용하는 개발자는 자동 완성 기능을 통해 아이콘 이름을 바로 확인하고 선택해서 사용할 수 있으며, 오타로 인한 오류를 방지할 수 있습니다.
문제
 icon도 디자인 요소로 Figma에서 관리되고 있다. 그렇기 때문에 icon에 추가, 수정이 있으면 많은 과정이 필요하고 직접 코드를 변경 해야 한다. 이 과정은 휴먼 에러 위험이 크고, 에러시 디버깅이 어렵습니다. 그리고 Figma와 디자인 코드가 불일치 문제가 생길 수 있다. 프로젝트를 진행하면서 icon을 수정, 추가하면서 경로를 잘못 넣는 경우, fill, stroke 속성 변경을 안하는 경우, 경로에 ‘?react’ 추가하지 않는 경우가 꽤 있었고 이런 에러들은 코드를 직접 사용해야지 인지할 수 있었습니다.
 아이콘 하나가 추가되면 svg 파일이 하나가 추가됩니다. 작은 규모는 괜찮은데 아이콘이 많아질수록 많은 양의 svg 파일을 관리해야합니다.
문제 해결
이전 글(디자인 토큰 관리 자동화 적용기)과 같이 아이콘도 Figma를 원천으로 하고 수정, 변경은 Figma에서 한다. 그리고 아이콘 관련 코드는 Figma 변경시 Figma에서 전달된 data를 바탕으로 자동으로 코드가 생성해서 휴먼 에러의 위험을 제거했습니다.
아이콘 하나를 svg 파일 하나로 관리하는 것이 아닌 json 파일에서 여러 svg를 한번에 관리하는 방식으로 파일이 많아지는 문제를 해결했습니다.

적용 과정
1. Figma Plugin
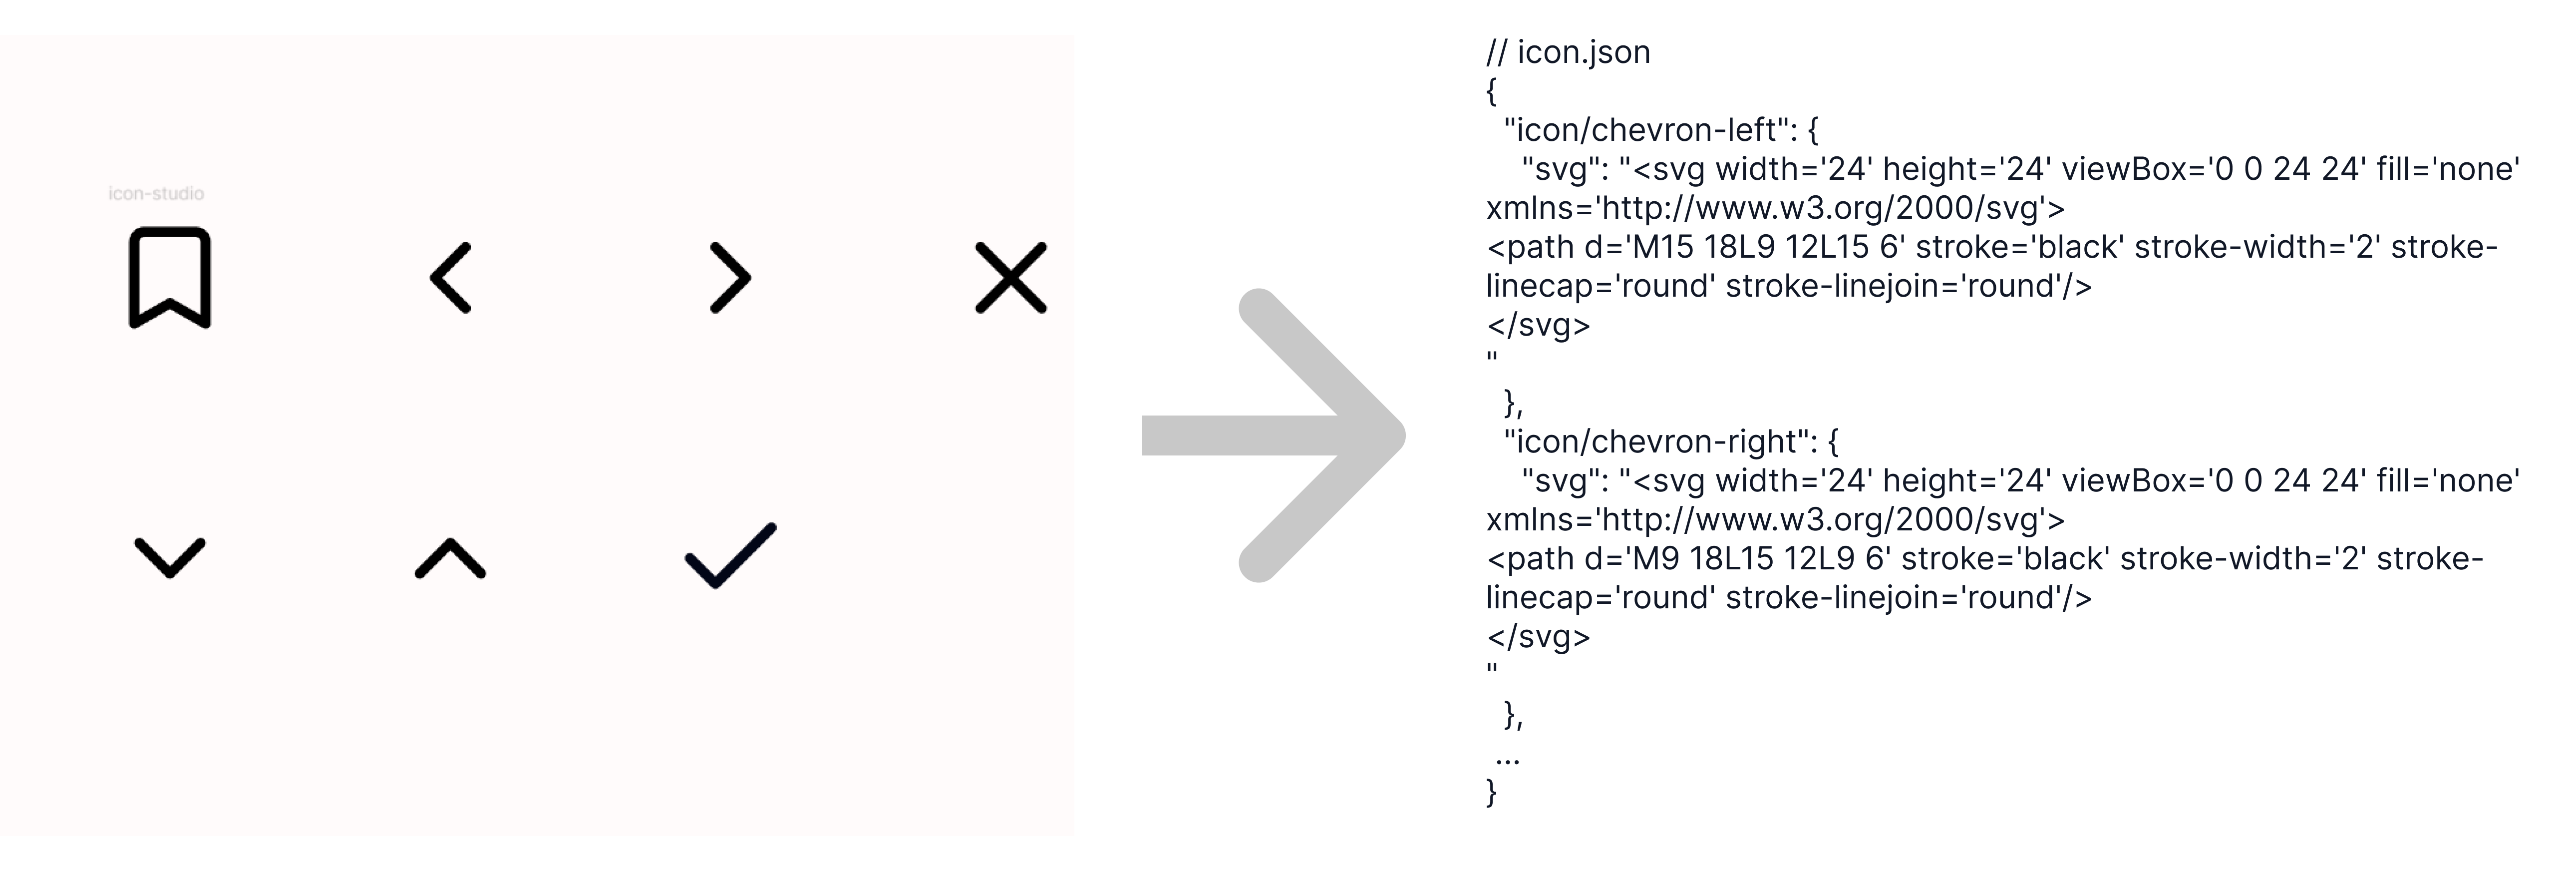 Figma 플러그인을 사용해서 icon을 SVG 형식으로 GitHub 저장소에 바로 올렸습니다. 저장소에 올라갈때는 JSON 파일에 모든 icon 요소를 넣어서 하나의 파일에서 관리하도록 했습니다.
해당 기능에 대한 플러그인이 없어서 간단한 플러그인을 개발해서 사용했습니다.
아이콘 SVG export 피그마 플러그인 개발기
2.SVGR, SVGO를 이용한 아이콘 컴포넌트 생성
플러그인을 통해서 GitHub 저장소에 변경된 아이콘 요소를 SVG 형태로 올릴 수 있게 되었다. 이렇게 올라간 아이콘들은 react에서 컴포넌트 형태로 사용할 수 있게 만들어줘야 한다. 이 과정에서는 SVGR, SVGO를 이용했다.
SVGO 최적화
리액트에서는 SVG를 컴포넌트처럼 사용할 수 있습니다. 아이콘을 SVG로 사용하면 좋은 점이 color같은 속성을 변경할 수 있는 점이 좋습니다. 이렇게 color를 변경하기 위해서는 svg내부 요소의 속성을 currentColor로 적용해서 상위 요소에서 적용된 속성을 적용할 수 있습니다. 현재 사용하고 있는 아이콘들은 storke 속성으로 color가 변경되고 있어서 SVG의 모든 요소에 stroke=’current’ 속성을 적용해야 합니다. 이런 요소에 대한 속성 변경은 SVGR로는 부족해서 SVGO를 이용해서 변경했습니다.
SVGO는 SVG 최적화 용도의 라이브러리로 요소의 속성을 변경하거나 복잡한 요소는 간단하게 만드는 등 다양한 최적화를 지원합니다. 하지만 SVGO 에서는 stroke=’current’ 를 적용해주는 기본 플러그인이 없어서 간단하게 커스텀해서 적용했습니다.
//svgo.config.js

//svgo 라이브러리 설정 파일
//원하는 plugin이 없다면 이렇게 커스텀 할 수 있다.
//이 설정값을 SVGR 전에 svg에 적용해주면 된다.
export const svgoConfig = {
  plugins: [
    {
      name: 'convertFillAndStroke',
      description: 'convert fill and stroke to none and currentColor',
      fn: () => {
        return {
          element: {
            enter: (node) => {
	            //SVG의 모든 요소의 fill 손성은 'none'으로, stroke는 'current'변경
	            //상위 stroke 색상에 따라서 stroke 색상이 적용된다.
              node.attributes.fill = 'none';
              node.attributes.stroke = 'current';
            },
          },
        };
      },
    },
  ],
};
이렇게 설정한 SVGO설정을 컴포넌트 생성시 적용해주면 됩니다.
SVGR을 이용한 아이콘 컴포넌트 생성
svgr를 적용시키는 방법에는 svg import path에 ‘?react’ 를 추가해서 적용하는 방법이 있고 svgr/core 의 transform 함수를 사용해서 svg를 컴포넌트로 변환 시키는 방법도 있습니다. 이번에 사용할 방법은 transform 함수를 사용해서 SVG를 코드로 변환 시키는 방법입니다.
//svgr.config.js
//SVGR 라이브러리 설정 파일

//template은 각 아이콘에 적용되는 형식
const template = (variables, { tpl }) => {
  return tpl`
export function ${variables.componentName} ({color, size, className,...props} : IconProps){
  return ${variables.jsx}};
`;
};
//svgr 설정
export const svgrConfig = {
	//svg 컴포넌트 형식
  template,
	//svg태그에 props를 설정할 수 있다.
  svgProps: {
    className: '{twMerge(cx([iconVariants({ color, size }), className]))}',
  },
  plugins: ['@svgr/plugin-jsx'],
  jsxRuntime: 'automatic',
};
위에서 설정 파일과 아이콘들을 가져와서 아이콘 컴포넌트를 생성하면됩니다.
//convertorSVGR.js

//svg를 코드로 변환시키는 svgr의 transform함수
import { transform } from '@svgr/core';
import { pascalCase } from 'es-toolkit/compat';
import fs from 'node:fs/promises';
import path from 'node:path';
import { fileURLToPath } from 'node:url';
//svg 최적화시켜주는 svgo의 optimize함수
import { optimize } from 'svgo';
//위에서 설정했던 설정 파일들
import { svgoConfig } from './svgo.config.js';
import { svgrConfig } from './svgr.config.js';

const __filename = fileURLToPath(import.meta.url);
const __dirname = path.dirname(__filename);
//input 파일 위치, icon 데이터 위치
const JSON_FILE_PATH = path.resolve(__dirname, '../tokens/icon.json');

const iconData = await fs.readFile(JSON_FILE_PATH, 'utf-8');
const iconObj = JSON.parse(iconData);
const iconObjKeyList = Object.keys(iconObj);
//output 위치
const OUT_PUT_PATH = path.resolve(__dirname, '../src/components/icon/index.tsx');

//output 되는 파일 Template, svgr로 변환된 코드는 iconCode로 주입된다.
//icon컴포넌트의 props type을 추가
const SetFileTemplate = (iconCode) => `
/**
 * Do not edit directly, this file was auto-generated.
 */

import { VariantProps, cva, cx } from 'class-variance-authority';
import { twMerge } from 'tailwind-merge';

const iconVariants = cva([], {
  variants: {
    color: {
      default: ['fill-typo stroke-typo'],
      disabled: ['fill-typo-disable stroke-typo-disable'],
      display: ['fill-typo-display stroke-typo-display'],
      success: ['fill-success stroke-success'],
      primary: ['fill-primary stroke-primary'],
      error: ['fill-error stroke-error'],
      warning: ['fill-warning stroke-warning'],
    },
    size: {
      small: ['w-6 h-6'],
      big: ['w-8 h-8'],
    },
  },
  defaultVariants: { color: 'default', size: 'small' },
});


interface IconProps extends VariantProps<typeof iconVariants> {
  className?: string;

}

${iconCode}
`;

let code = '';

for (let i = 0; i < iconObjKeyList.length; i++) {
  const key = iconObjKeyList[i];
  const icon = iconObj[key];
  const svg = icon.svg;
  //svgo 최적화 적용
  const optimizedSVG = optimize(svg, svgoConfig);
  // svgr 코드 변경
  // icon이름이 케밥 케이스로 파스칼 케이스로 바꿔서 컴포넌트 네이밍을 맞춰준다
  code += await transform(optimizedSVG.data, svgrConfig, { componentName: `${pascalCase(key)}` });
}

const dirPath = path.dirname(OUT_PUT_PATH);
await fs.mkdir(dirPath, { recursive: true });
await fs.writeFile(OUT_PUT_PATH, SetFileTemplate(code));
console.log('done!!!!');
코드 변환을 좀 쉽게 하기위해서 script를 작성해서 명시적으로 표시하고 사용할 수 있습니다.
//package.json
{
	...,
	"scripts": {
	  ...,
    //convertorSVGR.js를 실행
  	//prettier로 생성된 파일의 컨벤션을 적용해준다.
    "build-icon": "node icon-convertor/convertorSVGR.js && prettier src/components/icon/* --write"
  },
📝 변환 결과
//intput svg 데이터
{
  "icon/bookmark": {
    "svg": "<svg width='24' height='24' viewBox='0 0 24 24' fill='none' xmlns='http://www.w3.org/2000/svg'><path d='M19 21L12 17L5 21V5C5 4.46957 5.21071 3.96086 5.58579 3.58579C5.96086 3.21071 6.46957 3 7 3H17C17.5304 3 18.0391 3.21071 18.4142 3.58579C18.7893 3.96086 19 4.46957 19 5V21Z' stroke='black' stroke-width='2' stroke-linecap='round' stroke-linejoin='round'/></svg>"
  }
}
플러그인에서 넣어주는 icon.json입니다.
//output 파일
/**
 * Do not edit directly, this file was auto-generated.
 */
import { VariantProps, cva, cx } from 'class-variance-authority';
import { twMerge } from 'tailwind-merge';

const iconVariants = cva([], {
  variants: {
    color: {
      default: ['fill-typo stroke-typo'],
      disabled: ['fill-typo-disable stroke-typo-disable'],
      display: ['fill-typo-display stroke-typo-display'],
      success: ['fill-success stroke-success'],
      primary: ['fill-primary stroke-primary'],
      error: ['fill-error stroke-error'],
      warning: ['fill-warning stroke-warning'],
    },
    size: {
      small: ['w-6 h-6'],
      big: ['w-8 h-8'],
    },
  },
  defaultVariants: { color: 'default', size: 'small' },
});

interface IconProps extends VariantProps<typeof iconVariants> {
  className?: string;
}
//아이콘svg로 만든 아이콘 컴포넌트
export function IconBookmark({ color, size, className, ...props }: IconProps) {
  return (
    <svg
      width="1em"
      height="1em"
      viewBox="0 0 24 24"
      fill="none"
      xmlns="http://www.w3.org/2000/svg"
      stroke="current"
      className={twMerge(
        cx([
          iconVariants({
            color,
            size,
          }),
          className,
        ]),
      )}
      {...props}>
      <path
        d="M19 21L12 17L5 21V5C5 4.46957 5.21071 3.96086 5.58579 3.58579C5.96086 3.21071 6.46957 3 7 3H17C17.5304 3 18.0391 3.21071 18.4142 3.58579C18.7893 3.96086 19 4.46957 19 5V21Z"
        stroke="current"
        strokeWidth={2}
        strokeLinecap="round"
        strokeLinejoin="round"
        fill="none"
      />
    </svg>
  );
}
3. GitHubActions를 이용한 변환 자동화
icon 변경 내용 commit이 push되면 변환 파일을 실행해서 icon데이터를 컴포넌트로 변환하고 PR을 작성하면 됩니다. 이 부분은 GitHubActions를 통해서 자동화를 했습니다.
이전에 적용했던 Action와 같습니다.(이전 블로그글 => 디자인 토큰 관리 자동화 적용기 )
name: Create PR from icon to dev

on:
  push:
	 # design 브랜치에서 paths의 파일 변경이 있을 때 작동
    branches:
      - design
    paths:
      - 'front/tokens/icon.json'
jobs:
  createPullRequest:
    runs-on: ubuntu-latest
    steps:
      - uses: actions/checkout@v3
      - uses: actions/setup-node@v3
        with:
          node-version: "18"
      #package.json에 작성해둔 script 실행, commit push
      - name: Run Token Transformer
        run: |
          cd front
          npm i
          npm run build-icon
          git config --global user.name "GitHub 디자인 계정 이름"
          git config --global user.email "GitHub 디자인 계정 이메일"
          git add .
          git commit -m 'icon 변경'
          git push
        env:
          GITHUB_TOKEN: ${{ secrets.ACCESS_TOKEN }}
       #PR 작성
      - name: Create Pull Request
        run: gh pr create -B dev -H design --title '💄 아이콘 업데이트' --body '아이콘 업데이트 후 변환작업을 수행했습니다.'
        env:
          GITHUB_TOKEN: ${{ secrets.ACCESS_TOKEN }}
결과 및 후기
 이제 아이콘 추가시 코드를 직접 타이핑할 필요가 없어서 오타나 변겨 사항을 누락하는 일이 없습니다.