⭐Javascript 예외 처리
📕예외 처리
예외 처리에는 두가지 방법이 있다
지금까지 배웠던 조건문 등으로 예외를 처리하는 것 - 기본 예외 처리
지금부터 배울 try, catch, finally 등을 사용해서 처리하는 것 - 고급 예외 처리
간단히 예외를 만들어 보고 처리하면서 알아보자
📗예시
body에 h1태그를 만들지 않고 h1태그를 읽어오는 코드를 작성했다
<!DOCTYPE html>
<html lang="en">
<head>
   <script>
      document.addEventListener('DOMContentLoaded',() => {
         const h1 = document.querySelector('h1')
         console.log(h1) //null 나옴
         h1.textContent = '변경'
      })
   </script>
</head>
<body>

</body>
</html>
//밑으로는 에러
hello.html:7

       Uncaught TypeError: Cannot set properties of null (setting 'textContent')
    at HTMLDocument.<anonymous> (hello.html:7:25)
h1태그가 존재하지 않으면 null값을 가져오는데 null의 textcontent를 조작하려고
하기때문에 오류가 발생한 것이다
간단하게는 body태그에 h1을 넣으면 해결될 것이다
하지만 그렇게 말고 오류가 발생했을 때 오류를 알려주도록 만들어 보자
이것 또한 간단하게 if 조건문을 활용하면 된다
<!DOCTYPE html>
<html lang="en">
<head>
   <script>
      document.addEventListener('DOMContentLoaded',() => {
         const h1 = document.querySelector('h1')
         if(h1 === null){
            alert('오류가 발생했습니다')
         } else {
            h1.textContent = '변경'
         }
      })
   </script>
</head>
<body>

</body>
</html>
이것이 기본 예외 처리이다
이 예를 고급 예외 처리로 바꾸어 보자
<!DOCTYPE html>
<html lang="en">
<head>
   <script>
      document.addEventListener('DOMContentLoaded',() => {
         const h1 = document.querySelector('h1')

         try{ // 예외가 발생할 가능성이 있는 코드
            h1.textContent = '변경'
         } catch (error){ // 예외가 발생했을 때 실행할 코드
            alert('오류가 발생했습니다')
         } finally { // 무조건적으로 실행되는 코드

         }
      })
   </script>
</head>
<body>

</body>
</html>
이것도 처음봐서 어색할 뿐 사용 방법은 간단하다
finally는 다음 강의에서 자세히 살펴보도록 하자
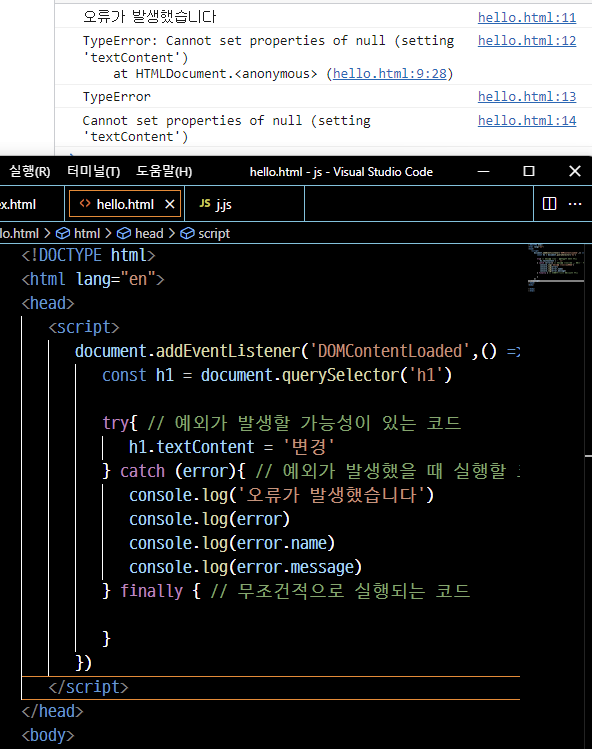
catch() 안에 있는 error은 예외 객체라고 부른다
예외와 관련된 정보를 담고있는 객체이다

예외 객체는 웹 브라우저에 따라서 가지고 있는 속성이 약간 다르다
모두 공통적으로 가지고 있는 속성으로는 name, message가 있다

이를 활용해 사용자에게 어떠한 에러가 발생했는지 알려줄 수 있고,
if를 활용해 에러에 따라 세분화 할 수도 있다

