Google Cloud 회원가입
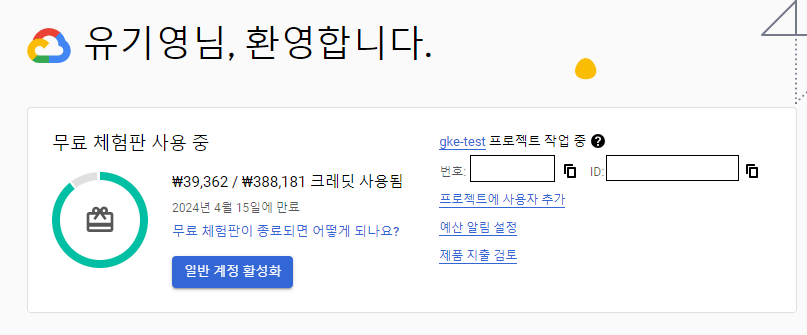
Google Cloud에서는 무료로 3개월간 300$의 크레딧을 이용하여 자원을 생성할 수 있습니다.
이를 활용하여 무료로 kubernetes 클러스터를 생성해 보도록 하겠습니다.
gcloud 설치/설정
google cloud의 cli도구인 gcloud를 설치합니다.
gcloud 설치 가이드
https://cloud.google.com/sdk/docs/install?hl=ko
설치가 되었다면 gcloud init 명령어를 실행하여 default configuration을 구성합니다.
gcloud 설치 이후 처음 실행하는 경우 아래와는 다른 질문이 나타날 수 있습니다.
gcloud init

...
Pick configuration to use:
 [1] Re-initialize this configuration [default] with new settings
 [2] Create a new configuration
Please enter your numeric choice: 1

...

Choose the account you would like to use to perform operations for this configuration:
 [1] xxxx@xxx.com
 [2] Log in with a new account
Please enter your numeric choice: 2
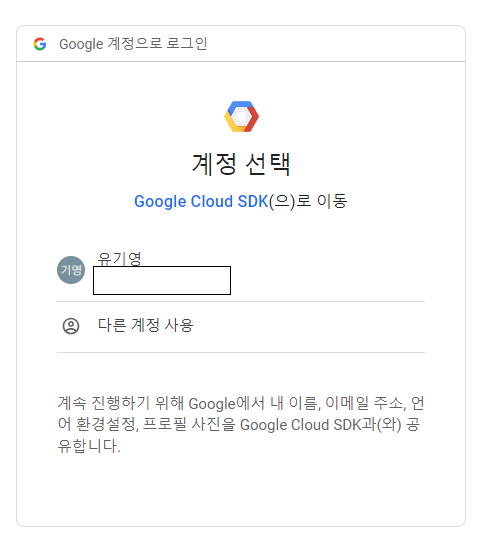
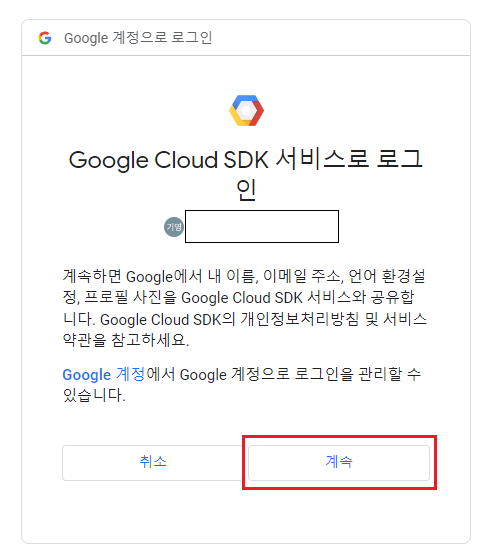
로그인을 하고 나서 Google cloud sdk에서의 권한은 허용해 줍니다.
project ID를 입력합니다.
Pick cloud project to use:
[1] xxx-xxx-xxxxx
[2] Enter a project ID
[3] Create a new project
Please enter numeric choice or text value (must exactly match list item): 2
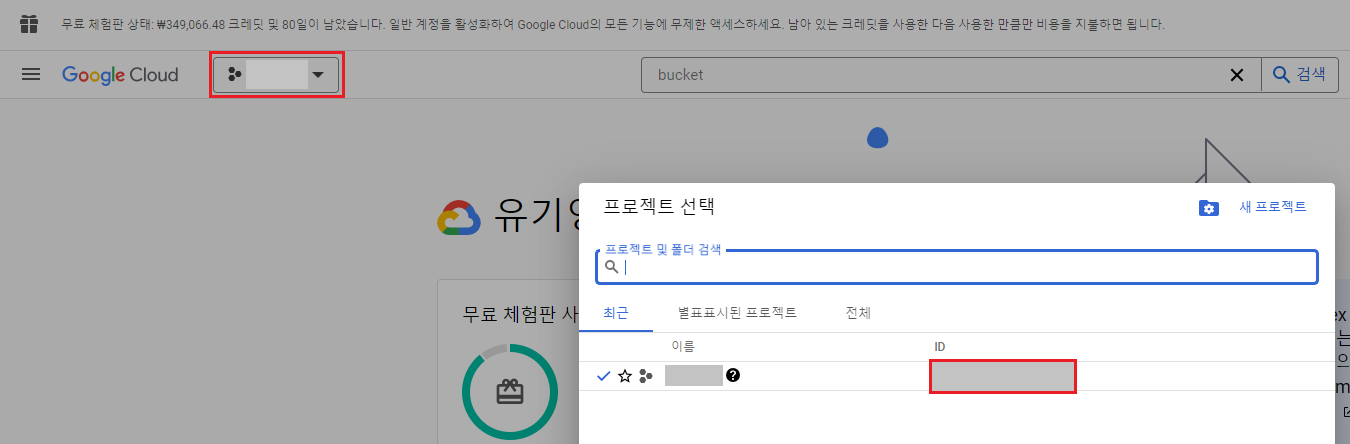
Enter project ID you would like to use: xxx-xxx-xxxxx프로젝트 아이디는 google cloud의 프로젝트 정보에서 확인할 수 있습니다.
기본 리전과 영역을 설정하는 곳에서는 적절한 영역을 선택합니다.
Do you want to configure a default Compute Region and Zone? (Y/n)? y

...

Which Google Compute Engine zone would you like to use as project default?
If you do not specify a zone via a command line flag while working with Compute Engine resources, the default is assumed.
 [1] us-east1-b
 ...
 [11] us-west1-b
 ...
 [50] asia-northeast2-a
Did not print [72] options.
Too many options [122]. Enter "list" at prompt to print choices fully.
Please enter numeric choice or text value (must exactly match list item): 11
terraform 설치
gcloud나 Google cloud 콘솔에서 자원을 생성할 수 있지만, 자원을 생성하고 삭제까지 깔끔하게 하고 싶다면 terraform을 이용하는 것이 좋습니다.
terraform은 Infrastructure of Code를 위해 사용되는 도구로, 클라우드 프로바이더에 따라 비슷한 형식으로 자원을 생성할 수 있기 때문에 편리하게 사용할 수 있습니다.
terraform은 Hashcorp사에서 만들어낸 HCL(Hashcorp Configuration Language)나 JSON 코드로 자원을 선언적으로 정의하여 생성 및 삭제와 같은 관리를 쉽게 해 줄 수 있도록 합니다.
SDK를 이용하면 javascript나 python으로도 코드 작성이 가능합니다.
terraform cli를 설치하기 위해 운영체제에 맞는 방식으로 설치합니다.
https://developer.hashicorp.com/terraform/install
Windows에 설치하기 위해서는 binary 파일을 적절한 위치에 저장한 다음 파일의 디렉토리를 환경 변수의 PATH에 추가합니다.
cloud bucket 생성
terraform은 자원의 상태를 tfstate 파일에 저장하여 이를 기반으로 자원을 관리합니다.
기본값으로는 로컬에 저장되지만 IaC 프로젝트는 여러 사람들이 함께 작업할 수도 있으므로 참조할 상태 파일이 각자의 로컬 파일보다는 공유되는 클라우드 스토리지에 저장되는 것이 충돌을 막을 수 있을 것입니다.
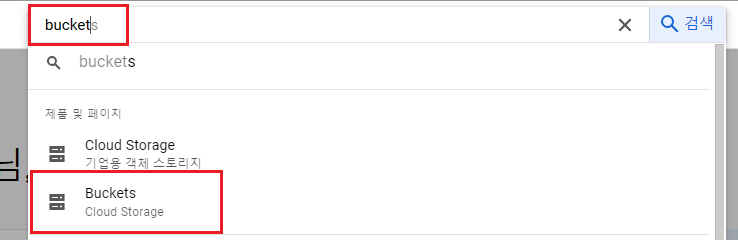
google cloud storage에 저장되도록 우선 버킷을 생성하도록 하겠습니다.
검색 input에 bucket을 입력한 다음 Cloud Storage의 Buckets를 선택합니다.
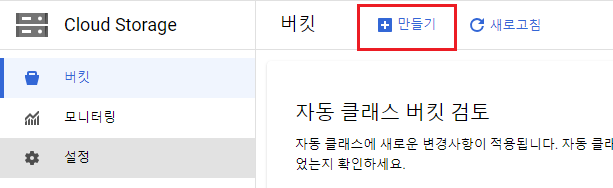
만들기를 클릭하여 새로운 버킷을 생성합니다.
| key | value |
|---|---|
| 버킷 이름 | 중복되지 않는 이름 설정 (예: sample-terraform-bucket-ypjtljfnq4) |
| 위치 유형 | region - 처음 gcloud 구성에 지정했던 리전 지정 |
이후 테라폼 프로젝트에서 버킷의 이름을 사용하도록 합니다.
terraform workspace 생성
테라폼 워크스페이스로 작업을 진행할 폴더를 생성한 다음 기본적인 tf 파일들을 생성합니다.
디렉토리 내부에 provider.tf 파일을 생성합니다.
provider.tf
provider "google" {
  project = "<<project_id>>"
  region  = "<<region>>"
}

terraform {
  backend "gcs" {
    bucket = "<<terraform_state_bucket_name>>"
    prefix = "terraform/state"
  }
}
provider 블록을 지정한 다음 클라우드 프로바이더의 설정을 입력합니다.
google cloud의 경우 google 프로바이더를 지정하고, 프로젝트와 리전을 입력합니다.
region은 "us-west1"과 같은 형식으로 뒤에 알파벳이 더 붙지 않습니다.
terraform 블록의 backend 블록에는 tfstate 파일이 저장될 위치를 지정할 수 있습니다.
gcs(google cloud storage)로 지정하여 google cloud storage를 사용할 것을 지정할 수 있고, bucket에는 앞서 생성했던 버킷의 이름을 등록하고, prefix에는 tfstate 파일이 저장될 오브젝트의 prefix를 지정합니다.
이렇게 작성하고 terraform init 명령어를 수행하여 테라폼 프로젝트를 초기화합니다.
초기화 과정에서 지정했던 backend 및 provider를 외부에서 가져옵니다.
terraform init

Initializing the backend...

Successfully configured the backend "gcs"! Terraform will automatically
use this backend unless the backend configuration changes.

Initializing provider plugins...
- Finding latest version of hashicorp/google...
- Installing hashicorp/google v5.13.0...
- Installed hashicorp/google v5.13.0 (signed by HashiCorp)

Terraform has created a lock file .terraform.lock.hcl to record the provider
selections it made above. Include this file in your version control repository
so that Terraform can guarantee to make the same selections by default when
you run "terraform init" in the future.

Terraform has been successfully initialized!

...
이후 프로젝트 파일을 보면 .terraform 디렉토리에 google provider가 다운로드 되어 있고, .terraform.lock.hcl로 다운로드 되어 있는 프로바이더의 hash값이 저장되어 있는 lock 파일이 추가되어 있는 것을 볼 수 있습니다.
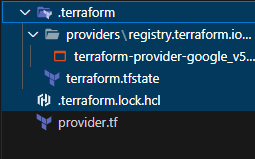
이런 파일들은 프로바이더를 다운로드받을 수 없는 환경이 아니라면 git으로 관리될 필요가 없기 때문에 gitignore 파일에 등록하여 제외하는 것이 좋습니다.
terraform 자원 정의
이제 google cloud의 kubernetes 클러스터를 포함한 자원들을 정의하도록 하겠습니다.
변수 정의
우선 변수를 정의하는 파일과 값을 할당하는 파일을 생성합니다.
vars.tf
variable "project_id" {
  type        = string
  description = "google cloud project id"
}
variable "region" {
  type        = string
  description = "The region for provisioning resources"
}
variable "gke_node_count" {
  type        = number
  description = "node count by zone"
  default     = 1
}
variable "gke_node_machine_type" {
  type        = string
  description = "machine type of nodes"
  default     = "e2-standard-2"
}
변수는 variable 블록에 생성하고, 그 다음 위치에 변수의 이름을 등록합니다.
블록 내부에는 여러 값들이 들어갈 수 있고, 일반적으로 변수의 데이터 타입, 설명, 기본값, secret 변수 여부 등이 들어갑니다.
변수의 기본값을 지정했다고 해도 다시 값을 할당할 수 있습니다.
변수를 선언하는 파일은 tf 파일이라면 이름은 별 상관이 없지만,
변수에 값을 할당하는 파일의 이름은 기본값으로 terraform.tfvars로 지정됩니다.
terraform.tfvars
region     = "<<region>>" # ex: us-west1
project_id = "<<project_id>>"
region 값을 등록합니다.
provider.tf의 provider 부분도 region과 project_id 변수를 참조할 수 있도록 변경합니다.
provider.tf
provider "google" {
  project = var.project_id
  region  = var.region
}

terraform {
  backend "gcs" {
    bucket = "<<terraform_state_bucket_name>>"
    prefix = "terraform/state"
  }
}
자원 정의
vpc와 subnet, kubernetes cluster와 node pool을 생성하는 main.tf 파일을 생성합니다.
main.tf
resource "google_compute_network" "vpc_network" {
  name                    = "gke-vpc"
  auto_create_subnetworks = false
}

resource "google_compute_subnetwork" "subnet" {
  name          = "gke-subnetwork"
  ip_cidr_range = "10.0.1.0/24"
  region        = var.region
  network       = google_compute_network.vpc_network.name
}

resource "google_container_cluster" "gke_cluster" {
  name     = "gke-cluster"
  location = var.region

  network    = google_compute_network.vpc_network.name
  subnetwork = google_compute_subnetwork.subnet.name

  remove_default_node_pool = true
  initial_node_count       = 1

  deletion_protection = false
}

resource "google_container_node_pool" "node_pool" {
  name       = "my-node-pool"
  location   = var.region
  cluster    = google_container_cluster.gke_cluster.name
  node_count = var.gke_node_count

  node_config {
    preemptible  = true
    machine_type = var.gke_node_machine_type
    disk_size_gb = 10
  }

  autoscaling {
    min_node_count  = 0
    max_node_count  = var.gke_node_count * 2
    location_policy = "BALANCED"
  }
}
변수는 var를 이용해서 참조하고, 자원들을 생성할 때 필요한 argument는 자원 블록 내부에 만들어 둡니다.
그리고 자원 간 속성 값을 참조해야 할 경우에는 자원 타입과 자원의 이름을 이용해서 참조할 수 있습니다.
자원 생성
자원 생성을 위하여 terraform plan 명령어를 실행하여 생성될 자원을 검토합니다.
terraform plan

Acquiring state lock. This may take a few moments...

Terraform used the selected providers to generate the following execution plan. Resource actions are indicated with the following symbols:
  + create

Terraform will perform the following actions:

  # google_compute_network.vpc_network will be created
  + resource "google_compute_network" "vpc_network" {
      + auto_create_subnetworks                   = false
      + delete_default_routes_on_create           = false
      + gateway_ipv4                              = (known after apply)
      + id                                        = (known after apply)
      + internal_ipv6_range                       = (known after apply)
      + mtu                                       = (known after apply)
      + name                                      = "gke-vpc"
      + network_firewall_policy_enforcement_order = "AFTER_CLASSIC_FIREWALL"
      + numeric_id                                = (known after apply)
      + project                                   = "sunny-lightning-411303"
      + routing_mode                              = (known after apply)
      + self_link                                 = (known after apply)
    }

  # google_compute_subnetwork.subnet will be created
  + resource "google_compute_subnetwork" "subnet" {
      ...
    }
    ...

Plan: 4 to add, 0 to change, 0 to destroy.

──────────────────────────────────────────────────────────────────────────────────────────────────────────────────────────────────────────

Note: You didn't use the -out option to save this plan, so Terraform can't guarantee to take exactly these actions if you run "terraform
apply" now.
자원을 검토한 다음 적절한 경우 terraform apply 명령어를 수행하여 자원을 생성합니다.
terraform apply

Acquiring state lock. This may take a few moments...

Terraform used the selected providers to generate the following execution plan. Resource actions are indicated with the following symbols:
  + create

Terraform will perform the following actions:
	...

Plan: 4 to add, 0 to change, 0 to destroy.

Do you want to perform these actions?
  Terraform will perform the actions described above.
  Only 'yes' will be accepted to approve.

  Enter a value: yes

google_compute_network.vpc_network: Creating...
google_compute_network.vpc_network: Still creating... [10s elapsed]
google_compute_network.vpc_network: Creation complete after 12s
google_compute_subnetwork.subnet: Creating...
google_compute_subnetwork.subnet: Still creating... [10s elapsed]
google_compute_subnetwork.subnet: Still creating... [20s elapsed]
google_compute_subnetwork.subnet: Creation complete after 27s
google_container_cluster.gke_cluster: Creating...
...
google_container_cluster.gke_cluster: Still creating... [10m11s elapsed]
google_container_cluster.gke_cluster: Creation complete after 10m14s
google_container_node_pool.node_pool: Creating...
...
google_container_node_pool.node_pool: Still creating... [1m0s elapsed]
google_container_node_pool.node_pool: Creation complete after 1m7s

Releasing state lock. This may take a few moments...

Apply complete! Resources: 4 added, 0 changed, 0 destroyed.
kubernetes 클러스터 접속하기
kubectl 설치하기
클러스터의 컨트롤 플레인에 접속하기 위해서 kubectl을 이용합니다.
운영체제에 맞는 방식으로 kuberctl을 설치합니다.
https://kubernetes.io/ko/docs/tasks/tools/
버전을 선택할 때 google cloud에 생성된 kubernetes cluster의 버전과 맞아야 합니다.
kubernetes cluster의 Minor 버전과 1이상 차이나면 kubectl로 컨트롤하기 어렵습니다.
예를 들어 kubernetes cluster가 1.27.3 버전이라면 kubectl은 1.26.x 버전에서 1.28.x 버전을 사용해야 합니다.
예를 들어 1.27.3 버전의 컨트롤 플레인과 호환되는 kubectl의 바이너리 파일을 리눅스에서 curl을 이용해서 다운로드 받을 경우
<<kubernetes version>> 부분에도 동일하게 v1.27.3으로 적는 것이 적절합니다.
curl -LO https://dl.k8s.io/release/<<kubernetes version>>/bin/linux/amd64/kubectl설치가 완료되었으면 kubectl version --client --output=yaml 명령어를 실행하여 설치가 잘 되었는지 확인합니다.
kubectl version --client --output=yaml
clientVersion:
  buildDate: "2023-06-14T09:53:42Z"
  compiler: gc
  gitCommit: 25b4e43193bcda6c7328a6d147b1fb73a33f1598
  gitTreeState: clean
  gitVersion: v1.27.3
  goVersion: go1.20.5
  major: "1"
  minor: "27"
  platform: windows/amd64
kustomizeVersion: v5.0.1
gcloud로 kubeconfig 업데이트하기
kubectl로 kubernetes 컨트롤 플레인에 접속하기 위해서는 kubeconfig를 업데이트해야 합니다.
kubeconfig는 컨트롤 플레인의 엔드포인트, 유저와 인증 방식을 정의한 컨텍스트로 구성되어 있습니다.
그 전에 kubernetes 버전 1.26 이상을 사용하고 있다면 gke-gcloud-auth-plugin kubectl 플러그인을 설치하도록 합니다.
https://cloud.google.com/blog/products/containers-kubernetes/kubectl-auth-changes-in-gke?hl=en
gcloud components install gke-gcloud-auth-pluginYour current Google Cloud CLI version is: 461.0.0
Installing components from version: 461.0.0
...
Do you want to continue (Y/n)?
...
Performing post processing steps...done.
Update done!이제 gcloud container clusters get-credentials 명령어를 수행하여 kubeconfig를 구성합니다.
<<cluster name>>은 자원 생성 시 하드코딩되어 있던 gke-cluster로 지정하고, <<region>>은 gloud 초기화 및 terraform 프로젝트의 region 변수에 할당했던 값으로 등록합니다.
gcloud container clusters get-credentials <<cluster name>> --region=<<region>>Fetching cluster endpoint and auth data.
...
kubeconfig entry generated for <<cluster name>>.홈 디렉토리의 .kube/config 파일에서 컨텍스트를 확인할 수 있습니다.
~/.kube/config
apiVersion: v1
clusters:
- cluster:
    certificate-authority-data: ...
    server: https://kubernetes_endpoint
  name: gke_<<project_id>>_<<region>>_<<cluster_name>>
contexts:
- context:
    cluster: gke_<<project_id>>_<<region>>_<<cluster_name>>
    user: gke_<<project_id>>_<<region>>_<<cluster_name>>
  name: gke_<<project_id>>_<<region>>_<<cluster_name>>
current-context: gke_<<project_id>>_<<region>>_<<cluster_name>>
kind: Config
preferences: {}
users:
- name: gke_<<project_id>>_<<region>>_<<cluster_name>>
  user:
    exec:
      apiVersion: client.authentication.k8s.io/v1beta1
      command: gke-gcloud-auth-plugin.exe
      installHint: Install gke-gcloud-auth-plugin for use with kubectl by following
        https://cloud.google.com/blog/products/containers-kubernetes/kubectl-auth-changes-in-gke
      provideClusterInfo: true
context 정보를 이용해서 kubectl은 kubernetes 컨트롤 플레인과 소통을 합니다.
context는 cluster와 user로 구성되어 있는데,
cluster에는 클러스터에 접속하기 위한 인증서의 퍼블릭 키가 등록되어 있고, 클러스터의 엔드포인트가 지정되어 있습니다.
user는 인증을 하기 위한 요소가 등록되어 있는데 이전에 kubectl 플러그인으로 설치했던 gke-gcloud-auth-plugin이 커맨드로 등록되어 있습니다.
현재 context의 이름이 꽤 복잡한 이름으로 되어 있는데 인식하기 어렵기 때문에 쉬운 이름으로 바꾸도록 하겠습니다.
현재 컨텍스트의 이름은 kubeconfig에 등록되어 있는 것처럼 gke_<<project_id>>_<<region>>_<<cluster_name>> 형식을 따르고 있습니다.
kubectl config get-contexts 명령어로도 확인할 수 있습니다.
kubectl config get-contexts
CURRENT   NAME                                             CLUSTER                                          AUTHINFO                                          NAMESPACE
*         gke_<<project_id>>_<<region>>_<<cluster_name>>   gke_<<project_id>>_<<region>>_<<cluster_name>>   gke_<<project_id>>_<<region>>_<<cluster_name>>
kubectl config rename-context 명령어로 컨텍스트의 이름을 변경할 수 있습니다.
kubectl config rename-context gke_<<project_id>>_<<region>>_<<cluster_name>> gke-cluster

Context "gke_<<project_id>>_<<region>>_<<cluster_name>>" renamed to "gke-cluster".
github actions로 terraform project 구성하기
github actions를 이용하면 terraform 프로젝트를 git을 이용해서 관리하면서 자원 생성 및 삭제를 스크립트로 구성하고 로컬 환경이 아닌 github의 머신에서 스크립트를 수행할 수 있습니다.
github repository 생성
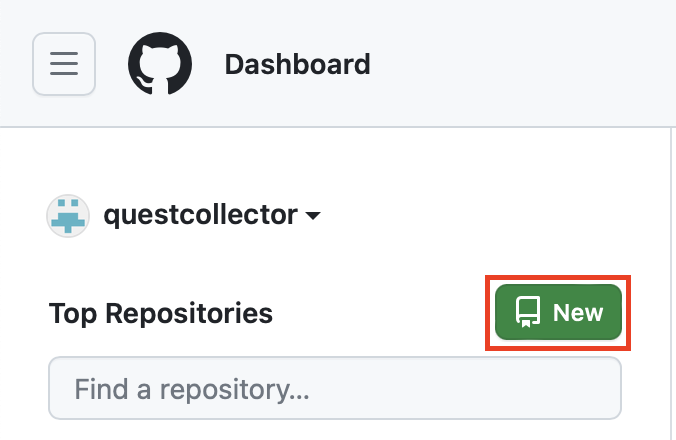
우선 github repository를 생성합니다.
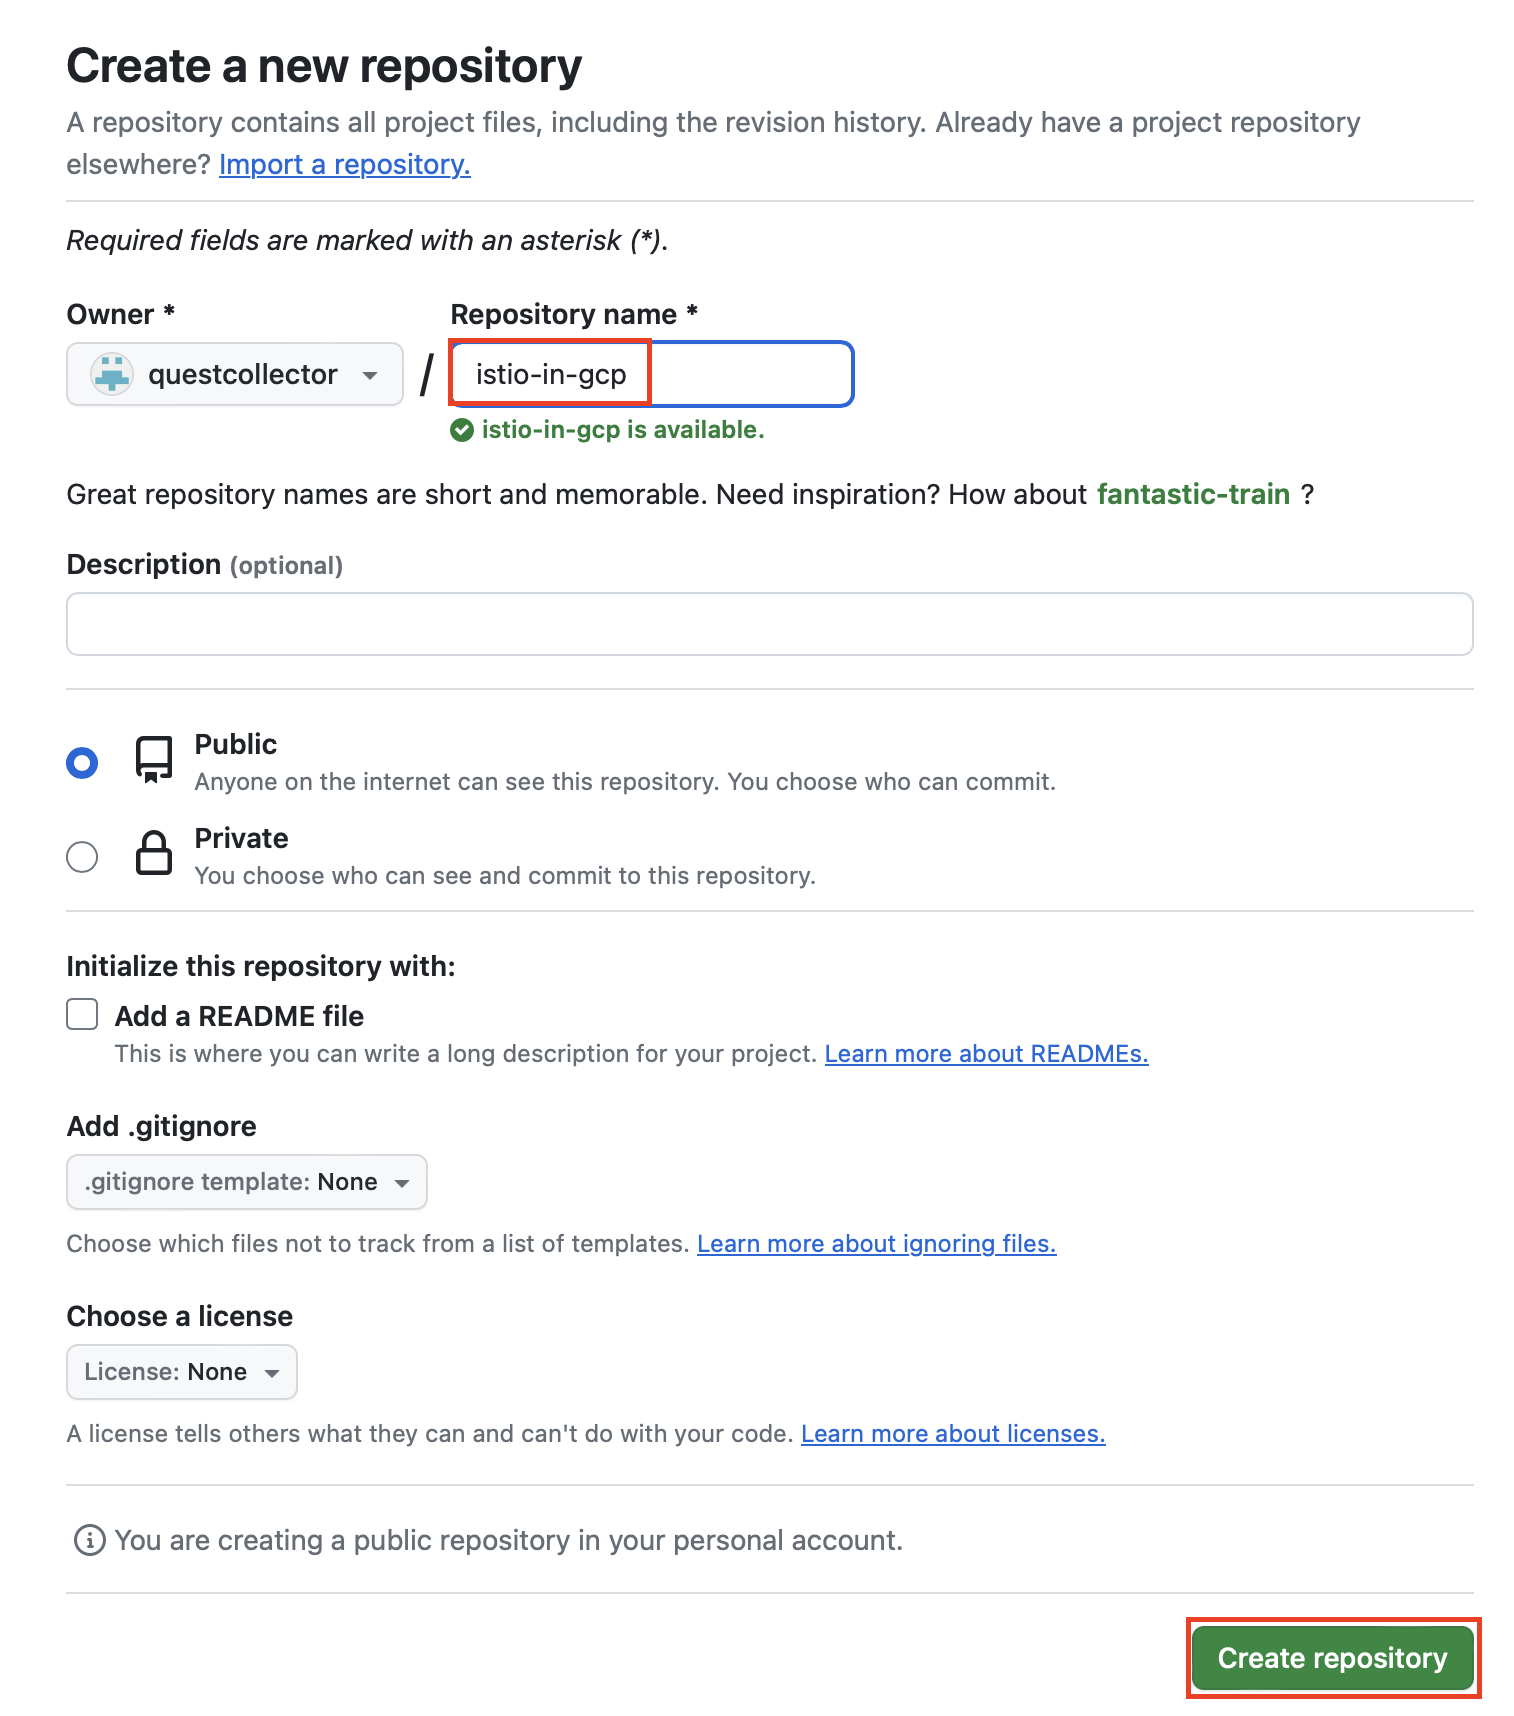
repository를 생성한 다음 나와 있는 명령어대로 terraform 프로젝트 디렉토리 내부에서 git 명령어를 실행합니다.
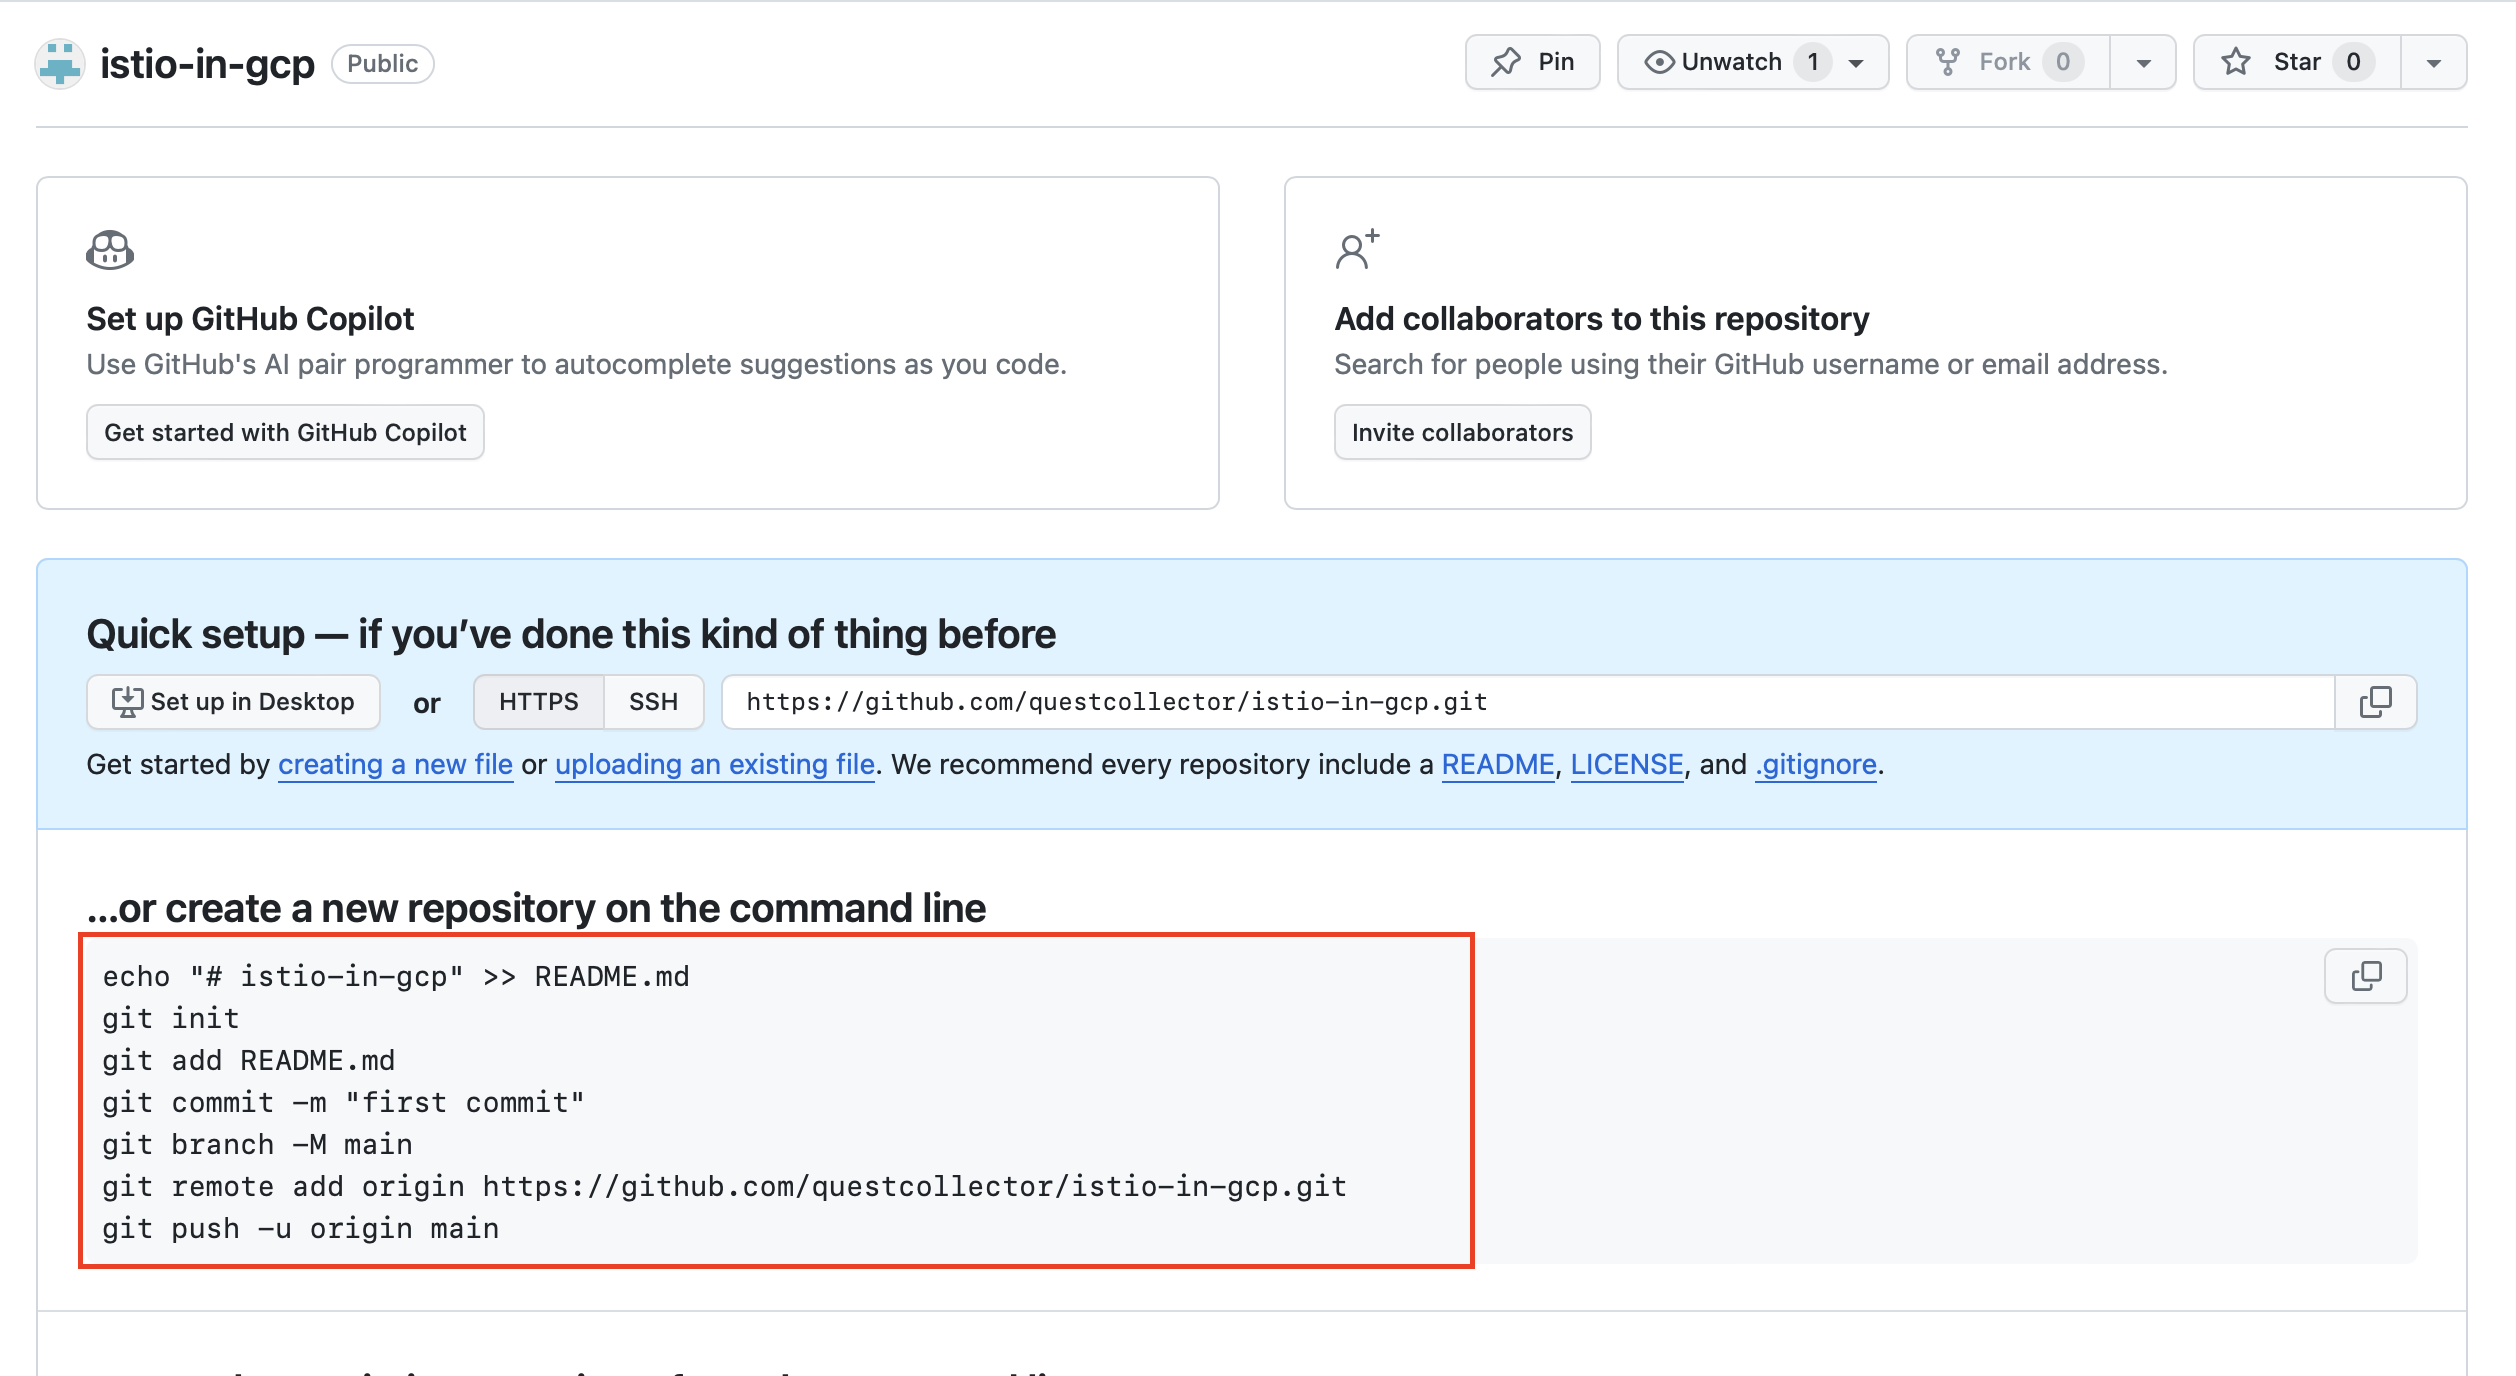
echo "# istio-in-gcp" >> README.md
git init
git add README.md
git commit -m "first commit"
git branch -M main
git remote add origin https://github.com/questcollector/istio-in-gcp.git
git push -u origin main
이후 기존에 있던 tf파일들을 커밋하도록 합니다.
git add .
git commit -m "init"
git push origin main
서비스 계정 만들기
github actions에서 Googld cloud의 인증에 사용된 서비스 계정을 생성합니다.
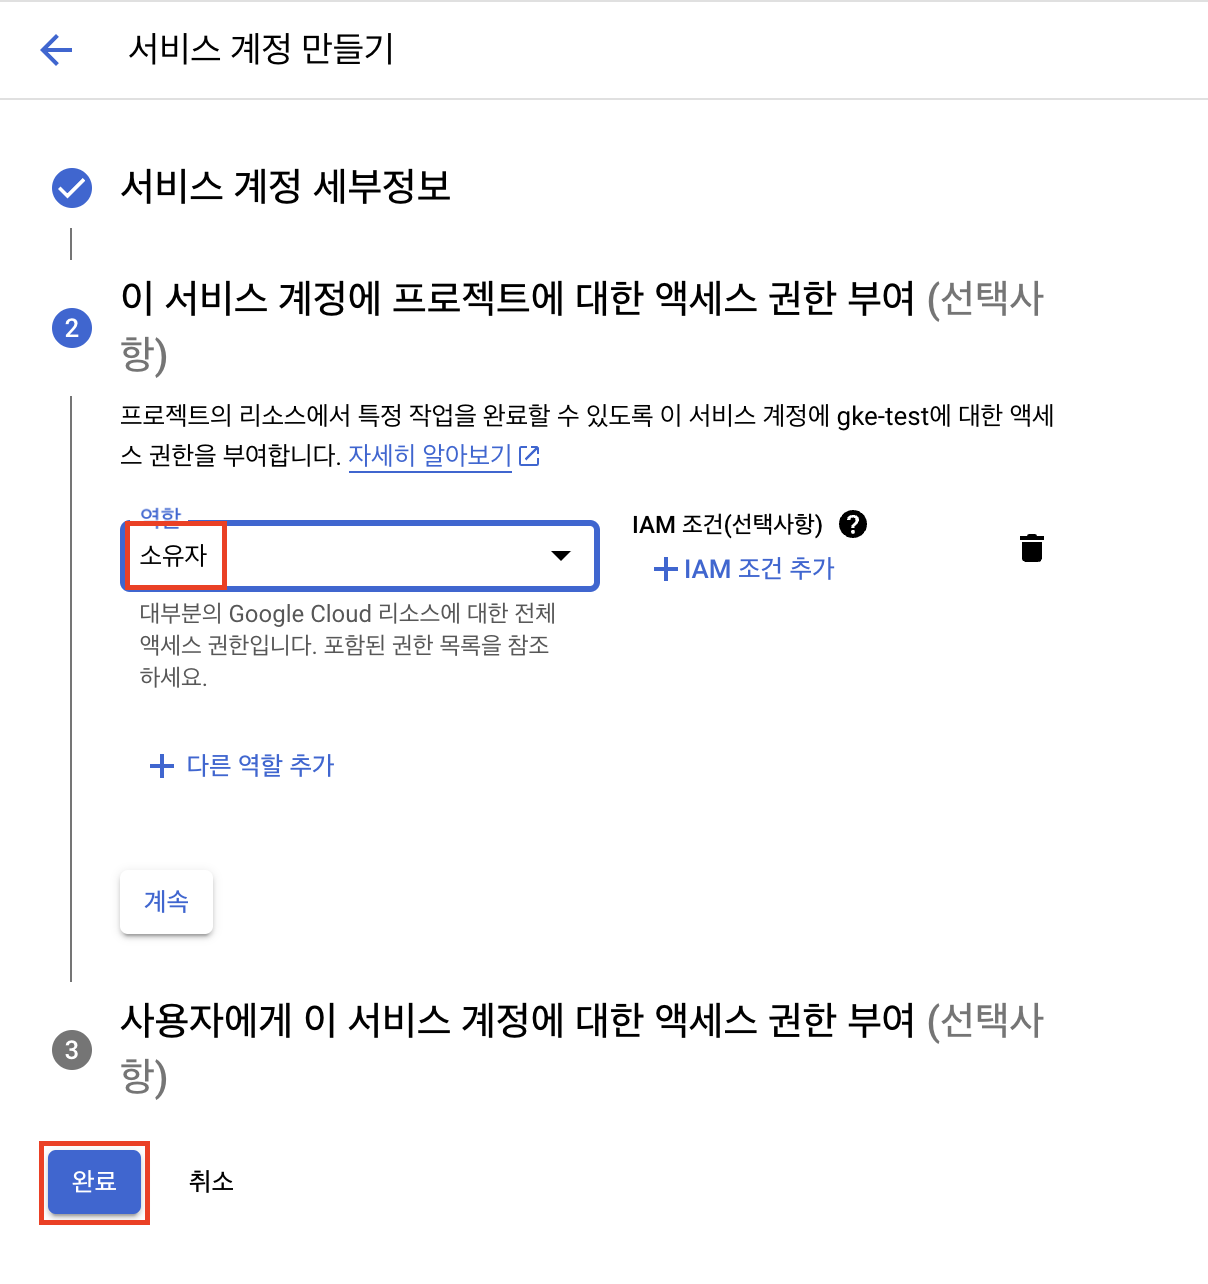
IAM 및 관리자 > 서비스 계정에서 서비스 계정 만들기를 클릭합니다.
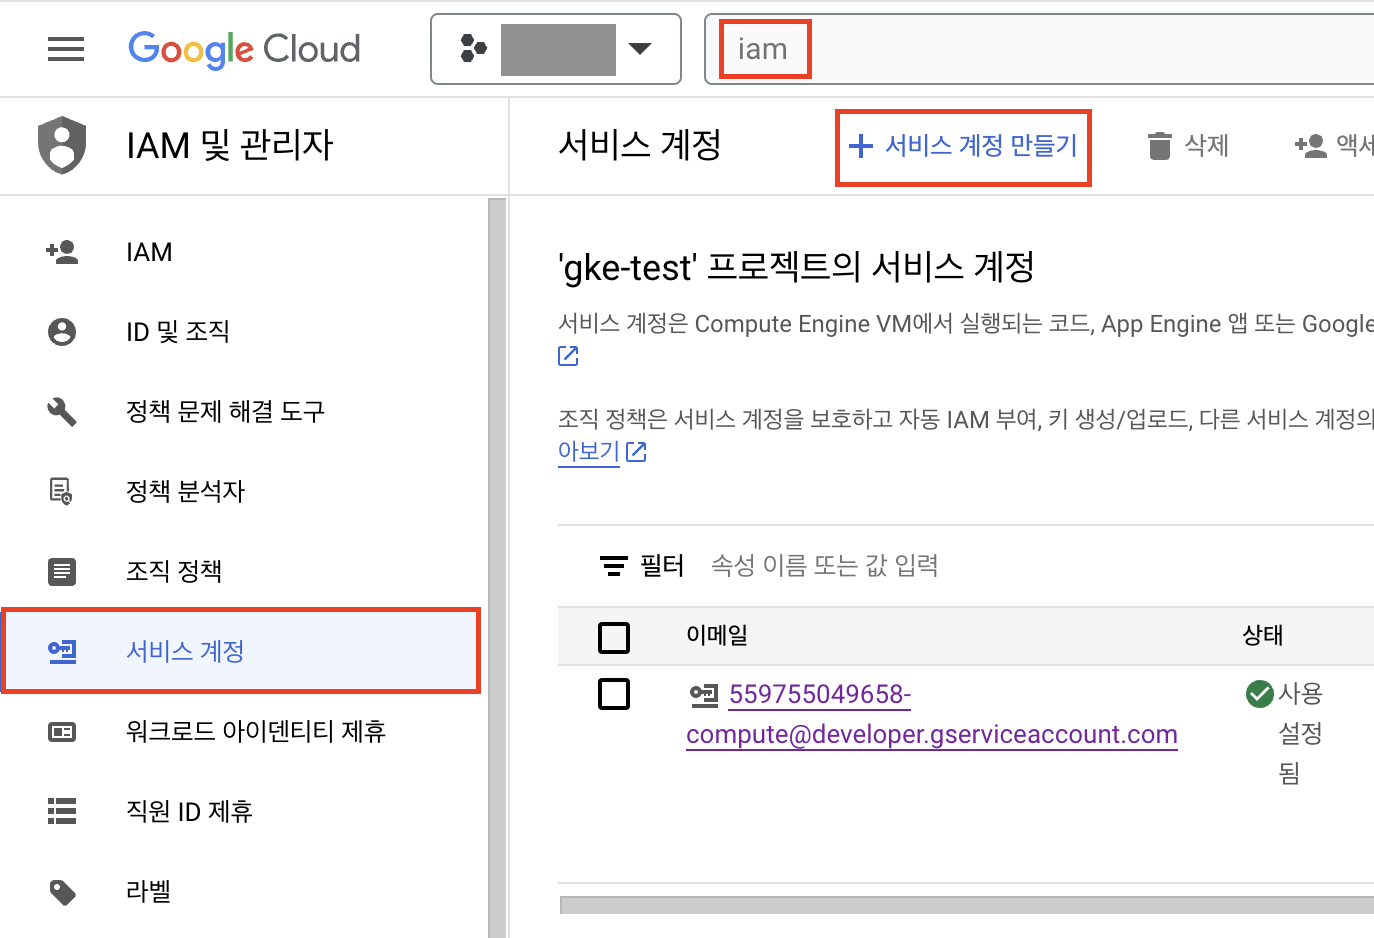
github-actions 이름으로 서비스 계정을 생성합니다.
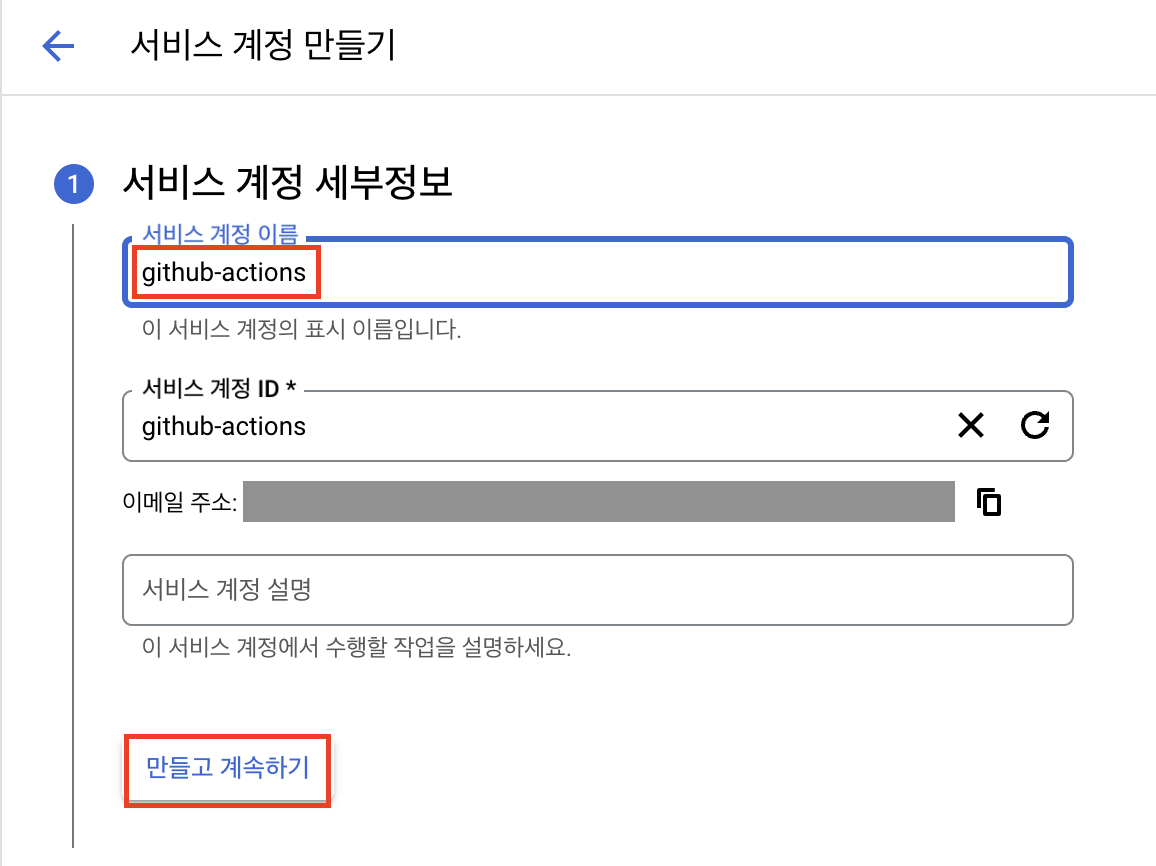
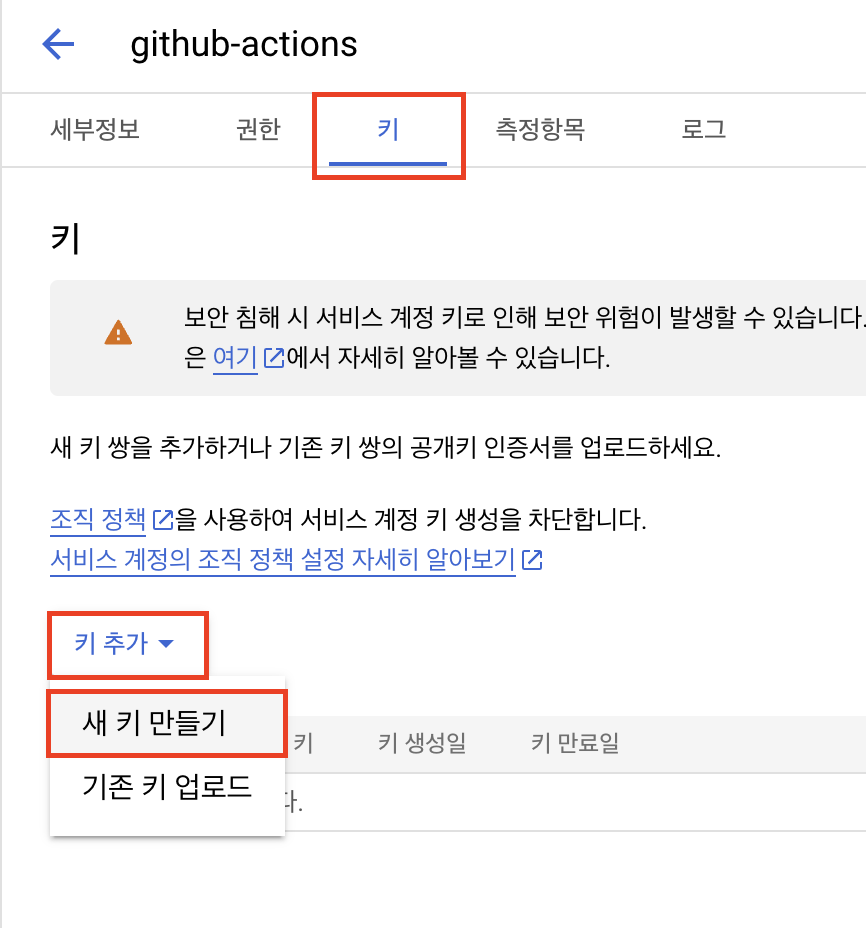
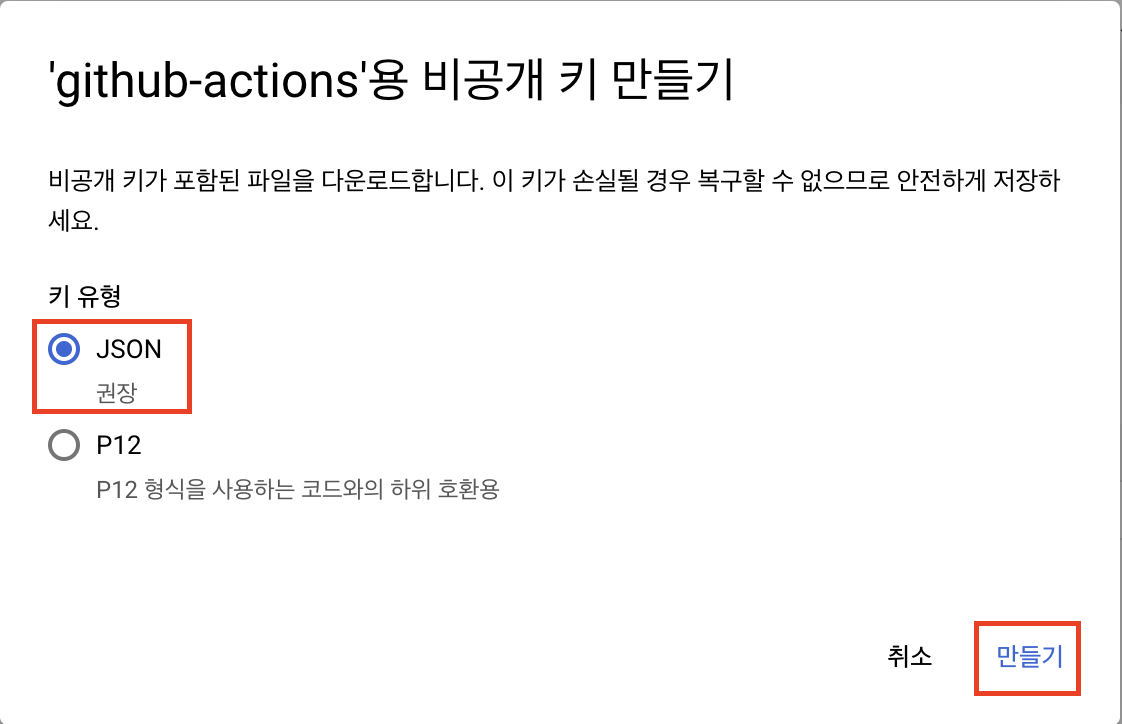
키 탭에서 새 키 만들기를 클릭하고 json 형식의 파일을 다운로드 받습니다.
github actions용 secret과 variable 등록하기
github actions의 workflow에서 사용할 secret과 variable을 등록합니다.
terraform에서 사용할 google cloud의 프로젝트 아이디, 리전, 이전에 생성했던 서비스 계정의 비공개 키 파일을 등록합니다.
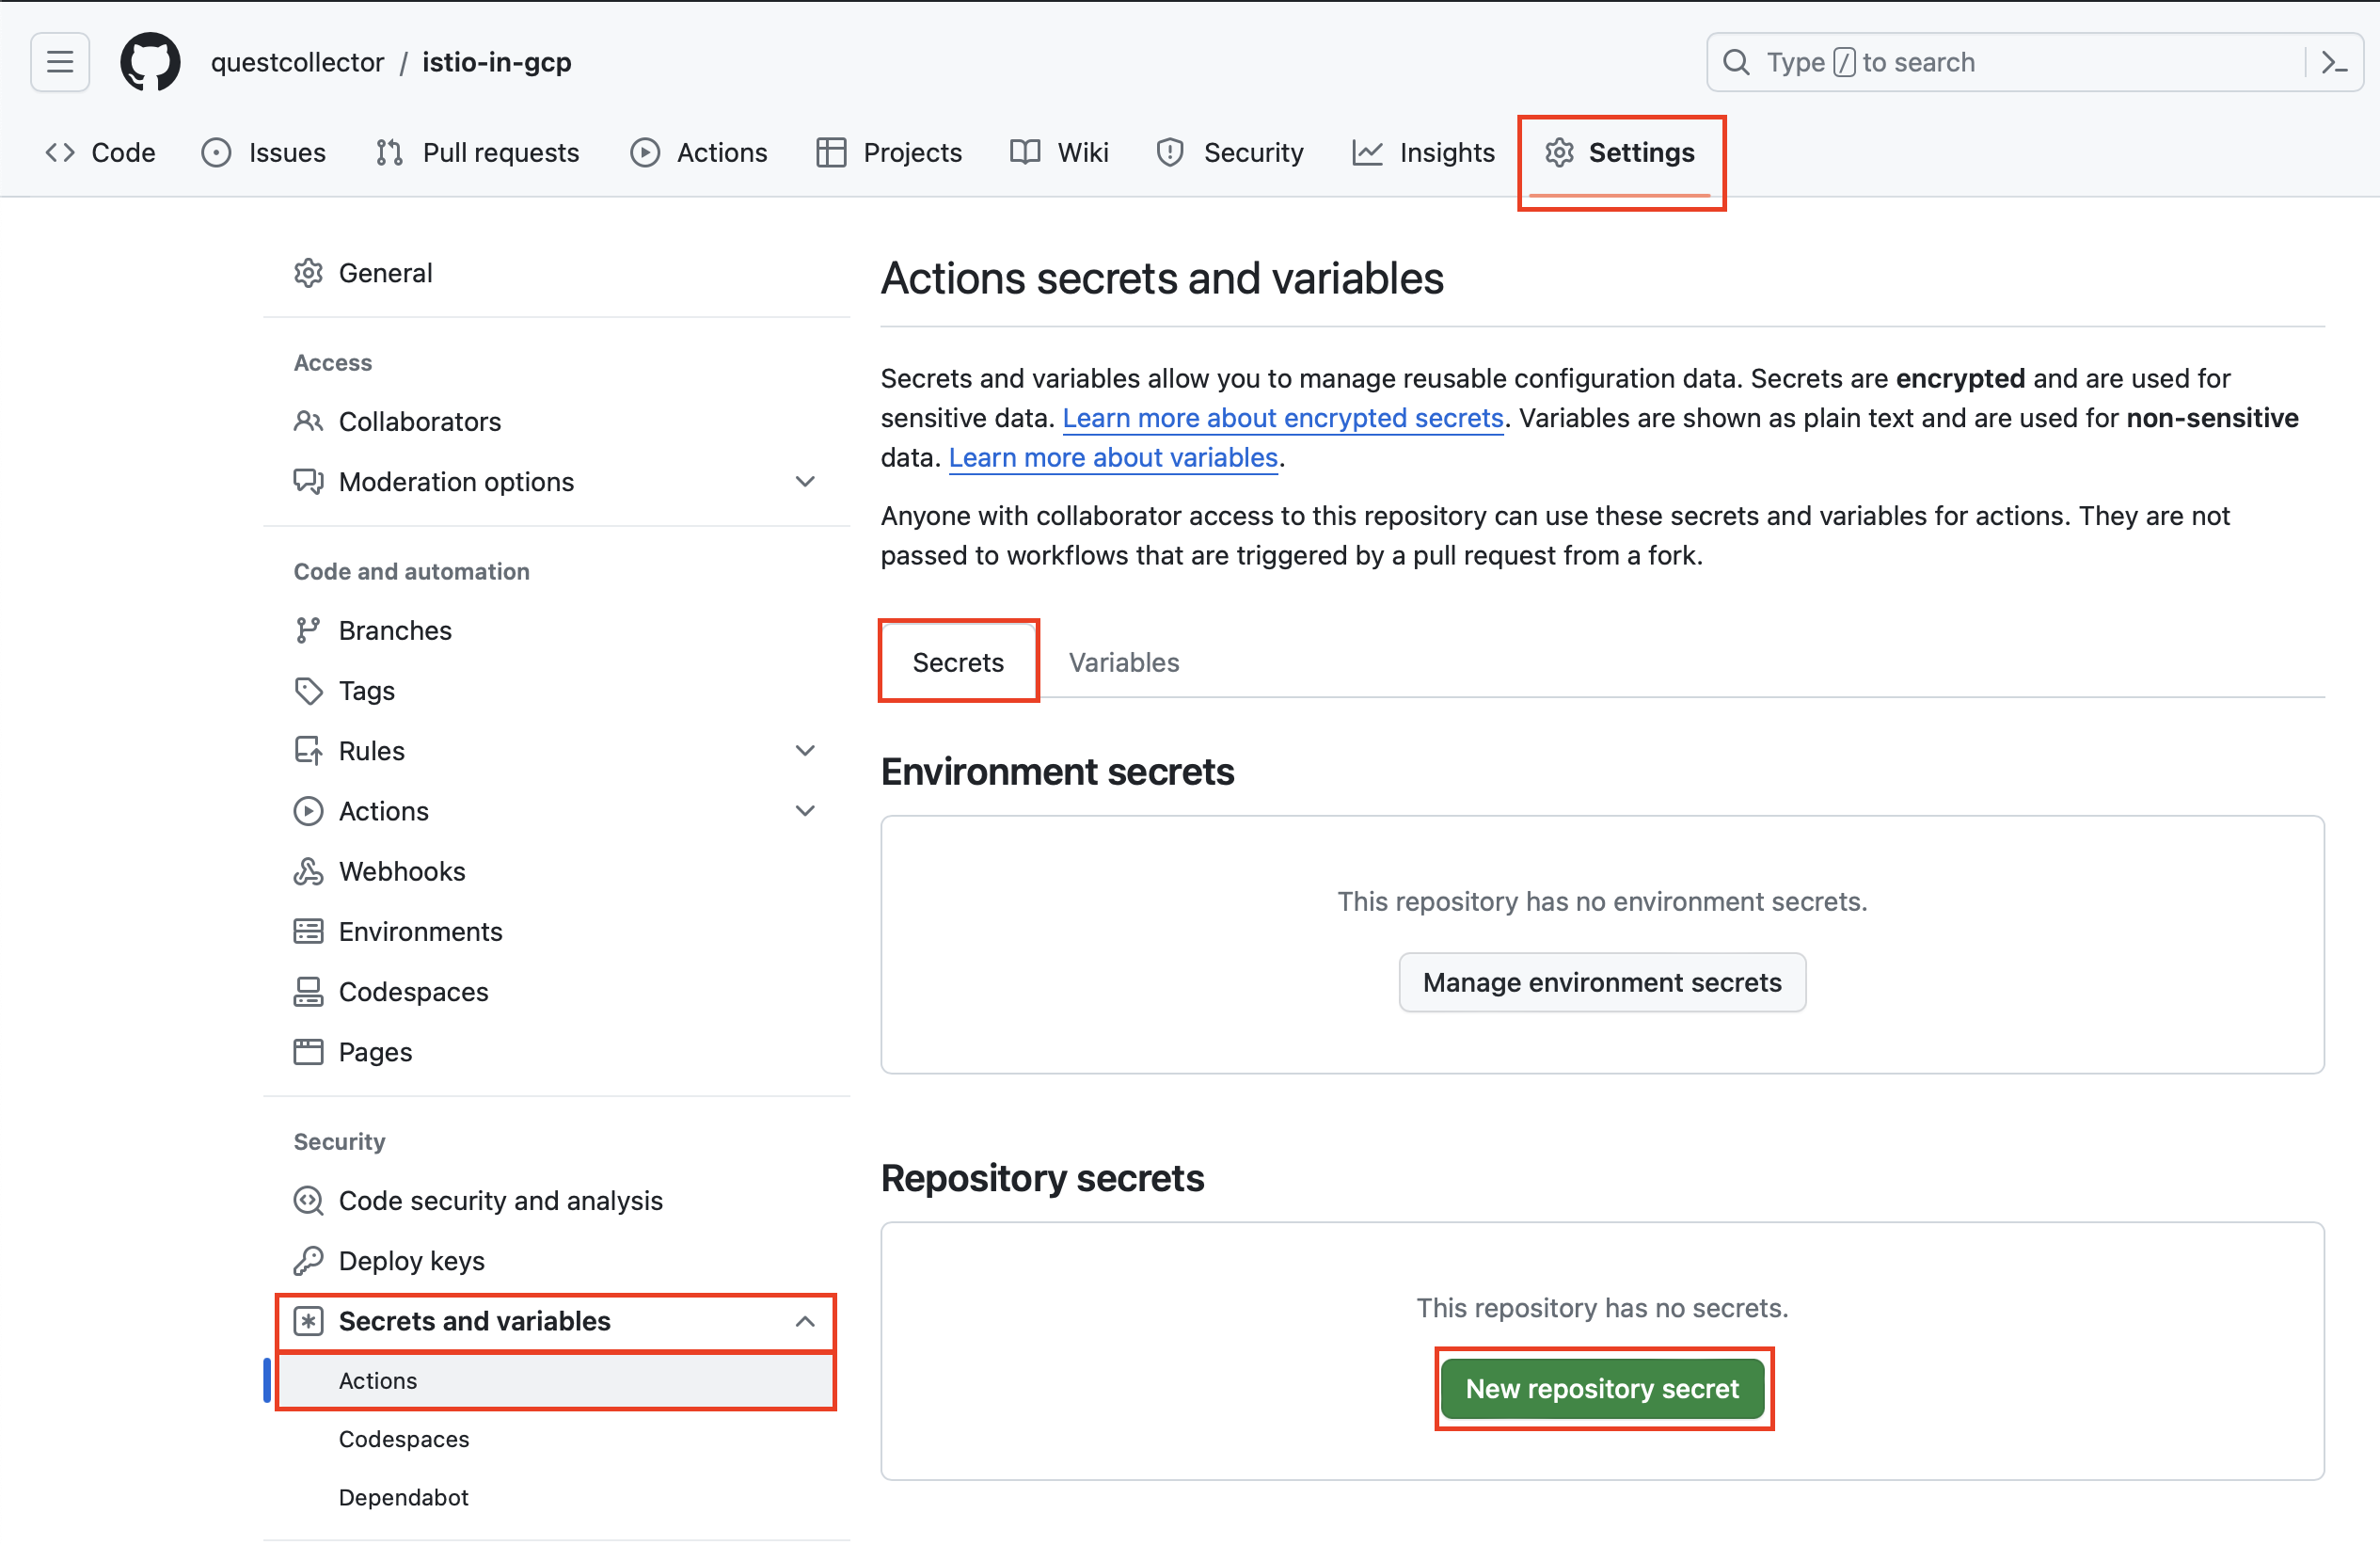
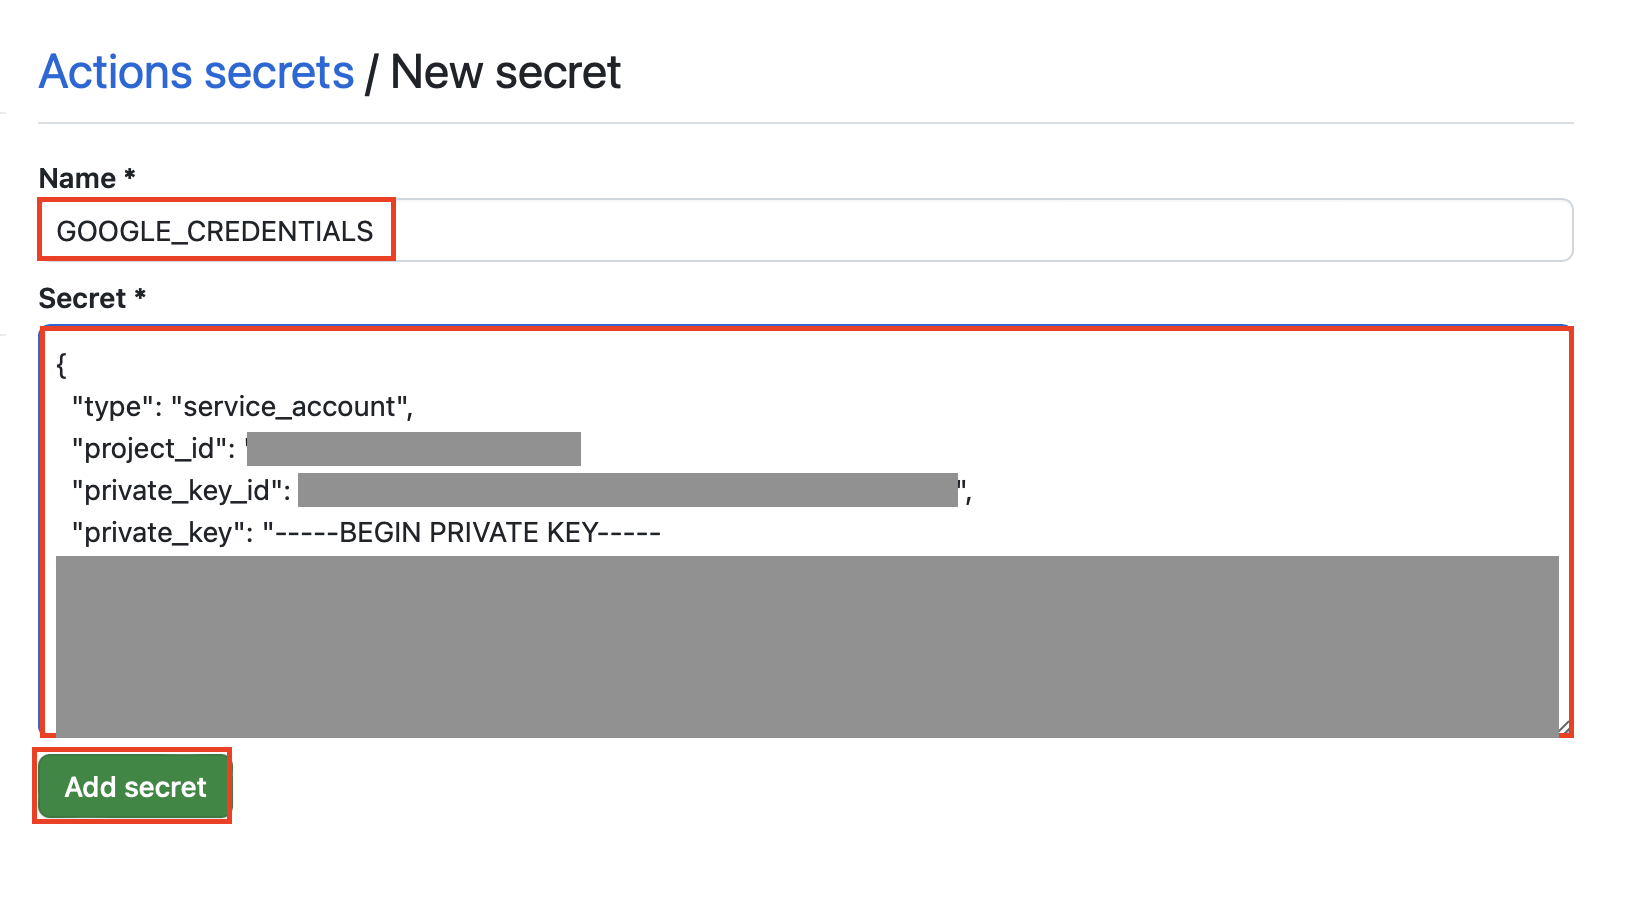
github repository의 Settings 탭 > Secrets and variables > Actions를 클릭합니다.
Secrets 탭에서 New repository secret을 클릭하여 GOOGLE_CREDENTIALS 이름으로 Google cloud의 서비스 계정 키 파일을 등록합니다.
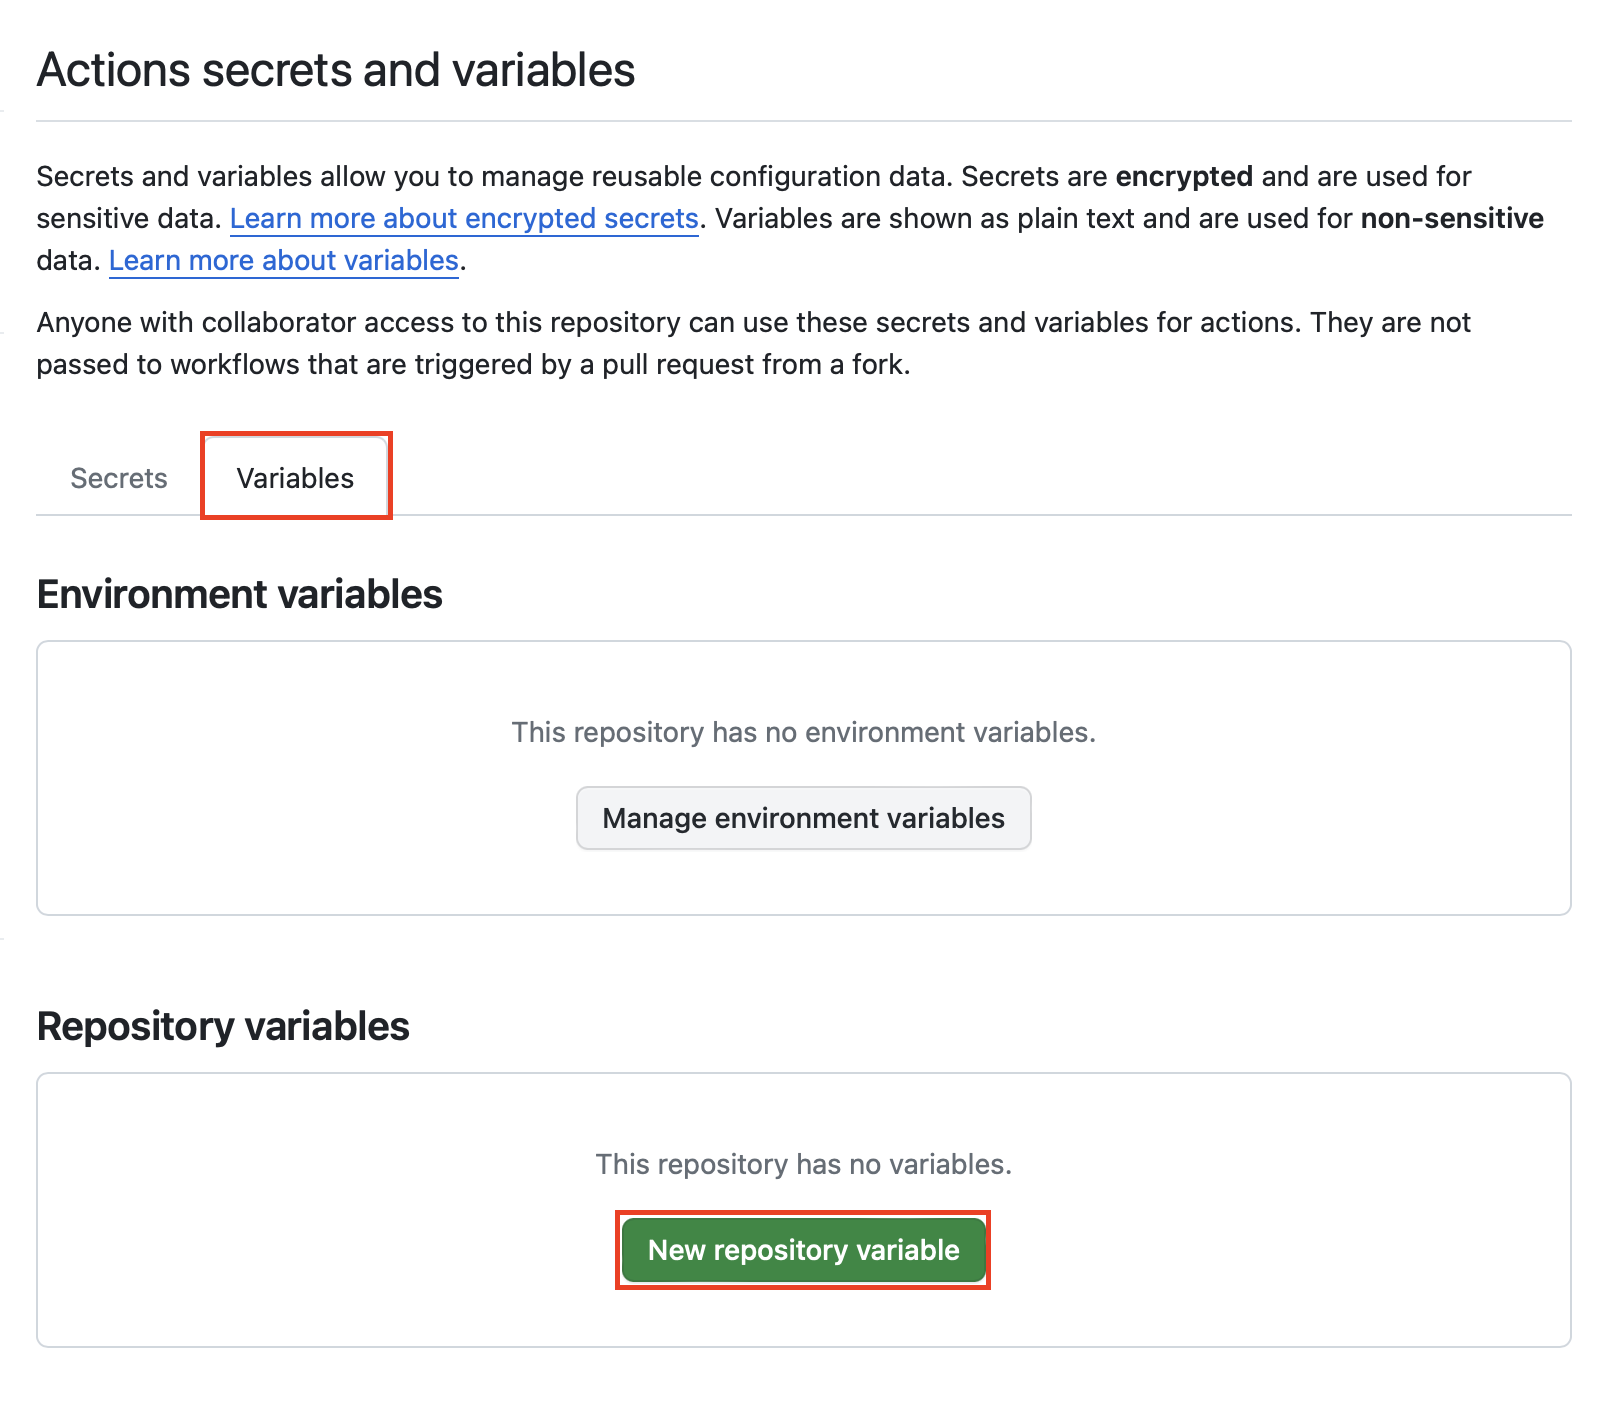
그리고 terraform에서 사용할 변수들을 variables에 등록합니다.
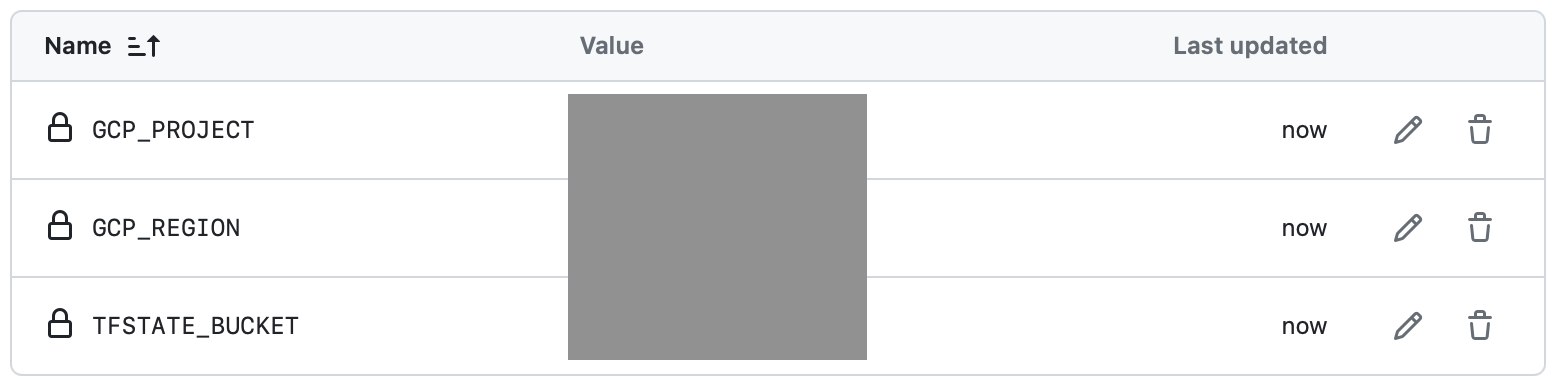
| key | value |
|---|---|
| GCP_PROJECT | <<project_id>> |
| GCP_REGION | <<region>> |
| TFSTATE_BUCKET | <<terraform_state_bucket_name>> |
github actions workflow 파일 생성하기
github actions workflow는 .github/workflows 디렉토리에 yaml 파일로 작성됩니다.
input으로 stage 변수를 받는데, apply, destroy, only plan 세 가지 값을 선택할 수 있습니다.
ubuntu-latest 환경에서 기본적으로 스텝에서의 run 항목은 bash 쉘로 실행합니다.
- 현재 레포지토리 check out
- sed 명령어로 terraform.tfvars, provider.tf 파일 수정
- google cloud 인증
- terraform 셋업
- terraform init
- terraform format check
- terraform plan
- terraform apply(메인 브랜치에서
stage값이apply인 경우) - terraform destroy(메인 브랜치에서
stage값이destroy인 경우)
.github/workflows/terraform.yml
name: 'Terraform'

on:
  workflow_dispatch:
    inputs:
      stage:
        type: choice
        description: choose terraform stage as apply, destroy or only plan
        required: true
        default: 'only plan'
        options:
        - apply
        - destroy
        - only plan

permissions:
  contents: read

jobs:
  terraform:
    name: 'Terraform'
    runs-on: ubuntu-latest

    # Use the Bash shell regardless whether the GitHub Actions runner is ubuntu-latest, macos-latest, or windows-latest
    defaults:
      run:
        shell: bash

    steps:
    # Checkout the repository to the GitHub Actions runner
    - name: Checkout
      uses: actions/checkout@v3

    # Setting tfstate bucket, variables
    - name: Setting backend, variables
      run : |-
        sed -i 's/<<terraform_state_bucket_name>>/'${{ vars.TFSTATE_BUCKET }}'/' provider.tf
        sed -i 's/<<region>>/'${{ vars.GCP_REGION }}'/' terraform.tfvars
        sed -i 's/<<project_id>>/'${{ vars.GCP_PROJECT }}'/' terraform.tfvars

    # Google Cloud Authentication
    - name : Setup Google Cloud
      uses: 'google-github-actions/auth@v2'
      with:
        project_id: ${{ vars.GCP_PROJECT }}
        credentials_json: ${{ secrets.GCP_CREDENTIALS }}

    # Install the latest version of Terraform CLI and configure the Terraform CLI configuration file with a Terraform Cloud user API token
    - name: Setup Terraform
      uses: hashicorp/setup-terraform@v3

    # Initialize a new or existing Terraform working directory by creating initial files, loading any remote state, downloading modules, etc.
    - name: Terraform Init
      run: terraform init

    # Checks that all Terraform configuration files adhere to a canonical format
    - name: Terraform Format
      run: terraform fmt -check

    # Generates an execution plan for Terraform
    - name: Terraform Plan
      run: terraform plan -input=false

      # Note: It is recommended to set up a required "strict" status check in your repository for "Terraform Cloud". See the documentation on "strict" required status checks for more information: https://help.github.com/en/github/administering-a-repository/types-of-required-status-checks
    - name: Terraform Apply
      if: github.ref == 'refs/heads/main' && github.event.inputs.stage == 'apply'
      run: terraform apply -auto-approve -input=false

    - name: Terraform Destroy
      if: github.ref == 'refs/heads/main' && github.event.inputs.stage == 'destroy'
      run: terraform destroy -auto-approve -input=false
github repository > Actions > Terraform > Run workflow 버튼을 클릭하여 workflow를 실행합니다.
