개요
GAS는 GASComponent를 중심으로 작동하는 프레임워크로, 게임에 필요한 여러 기능을 갖는 프레임워크입니다.
- GameplayAbility : ZoomIn / Fire / Roll 등의 Ability 정의
- AttributeSet : Health, Atk, Stamina 등 수치적인 정보 정의
- GameplayEffect : Attribute 를 바꾸는 역할
- GameplayCues : 효과/효과음 등을 실행하는 역할
우선 GASComponent 와 GA를 사용하여 줌인/줌아웃을 만들고, 줌인 상태에서만 총이 발사가 되도록 해보겠습니다.
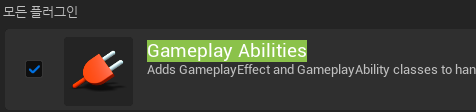
Plugin에서 GameplayAbilities 플러그인이 사용되고있는지 확인하고, Build 파일 모듈에 GameplayTasks 를 추가해야 합니다.
구현
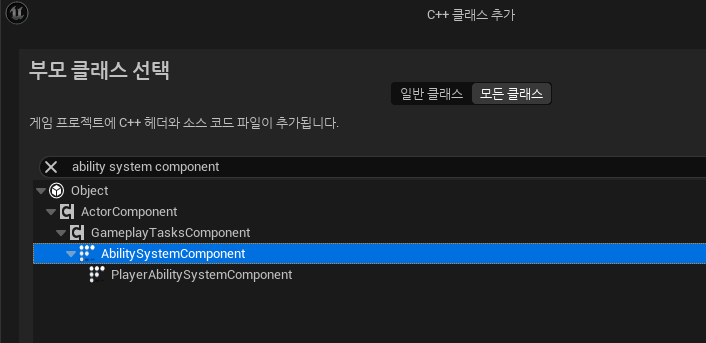
우선 GAS의 중심이 되는 GASComponent 스크립트부터 생성합니다.
GASComponent를 사용하기 위해 해야할 일은
- Character Script에서
CreateDefaultSubobject로 컴포넌트 생성 IAbilitySystemInterface를 상속받아 필요한 함수 구현
2번에 대한 내용은 이 링크 를 참고하시기 바랍니다.
UPlayerBaseCharacter
/** Header File **/
public:
	virtual UAbilitySystemComponent* GetAbilitySystemComponent() const;

protected:
	virtual void PossessedBy(AController* NewController) override;

	UPROPERTY(VisibleAnywhere, BlueprintReadOnly)
	UPlayerAbilitySystemComponent* PlayerAbilitySystemComponent;

public:
	FORCEINLINE UPlayerAbilitySystemComponent* GetPlayerAbilitySystemComponent() const {
		return PlayerAbilitySystemComponent
			;
	}

/** cpp File **/

UAbilitySystemComponent* APlayerBaseCharacter::GetAbilitySystemComponent() const
{
	return GetPlayerAbilitySystemComponent();
}


void APlayerBaseCharacter::PossessedBy(AController* NewController)
{
	Super::PossessedBy(NewController);

	if (PlayerAbilitySystemComponent) {
		PlayerAbilitySystemComponent->InitAbilityActorInfo(this, this);
	}
}
이렇게 하면 GAS의 기본적인 세팅을 마칠 수 있습니다.
그 다음은 GameAbility 를 정의하겠습니다.
UPlayerGameplayAbility : UGameplayAbility
/** Header File **/

protected:
	virtual void OnGiveAbility(const FGameplayAbilityActorInfo* ActorInfo, const FGameplayAbilitySpec& Spec) override;
	virtual void EndAbility(const FGameplayAbilitySpecHandle Handle, const FGameplayAbilityActorInfo* ActorInfo, const FGameplayAbilityActivationInfo ActivationInfo, bool bReplicateEndAbility, bool bWasCancelled) override;

	UFUNCTION(BlueprintPure)
	UPlayerAbilitySystemComponent* GetPlayerAbilitySystemComponentFromActorInfo() const;

/** cpp File **/

void UPlayerGameplayAbility::OnGiveAbility(const FGameplayAbilityActorInfo* ActorInfo, const FGameplayAbilitySpec& Spec)
{
	Super::OnGiveAbility(ActorInfo, Spec);
}

void UPlayerGameplayAbility::EndAbility(const FGameplayAbilitySpecHandle Handle, const FGameplayAbilityActorInfo* ActorInfo, const FGameplayAbilityActivationInfo ActivationInfo, bool bReplicateEndAbility, bool bWasCancelled)
{
	Super::EndAbility(Handle, ActorInfo, ActivationInfo, bReplicateEndAbility, bWasCancelled);
}

UPlayerAbilitySystemComponent* UPlayerGameplayAbility::GetPlayerAbilitySystemComponentFromActorInfo() const
{
	return Cast<UPlayerAbilitySystemComponent>(CurrentActorInfo->AbilitySystemComponent);
}
UPlayerGunnerGameplayAbility : UPlayerGameplayAbility
/** Header File **/

public:
	UFUNCTION(BlueprintPure, Category = "Warrior|Ability")
	APlayerGunnerCharacter* GetGunnerCharacterFromActorInfo();

	UFUNCTION(BlueprintPure, Category = "Warrior|Ability")
	APlayerCharacterController* GetGunnerControllerFromActorInfo();

private:
	TWeakObjectPtr<APlayerGunnerCharacter> CachedGunnerCharacter;
	TWeakObjectPtr<APlayerCharacterController> CachedGunnerController;

/** cpp File **/

APlayerGunnerCharacter* UPlayerGunnerGameplayAbility::GetGunnerCharacterFromActorInfo()
{
	if (!CachedGunnerCharacter.IsValid())
	{
		CachedGunnerCharacter = Cast<APlayerGunnerCharacter>(CurrentActorInfo->AvatarActor);
	}

	return CachedGunnerCharacter.IsValid() ? CachedGunnerCharacter.Get() : nullptr;
}

APlayerCharacterController* UPlayerGunnerGameplayAbility::GetGunnerControllerFromActorInfo()
{
	if (!CachedGunnerController.IsValid())
	{
		CachedGunnerController = Cast<APlayerCharacterController>(CurrentActorInfo->PlayerController);
	}

	return CachedGunnerController.IsValid() ? CachedGunnerController.Get() : nullptr;
}
이렇게 하면 GA BP를 만들 수 있습니다.
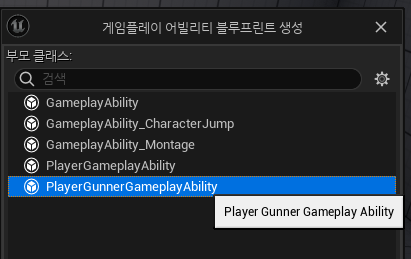
저는 총을 든 캐릭터가 조준하는 GA를 만들고싶기 때문에 GA_Aim 이라고 이름 짓겠습니다.
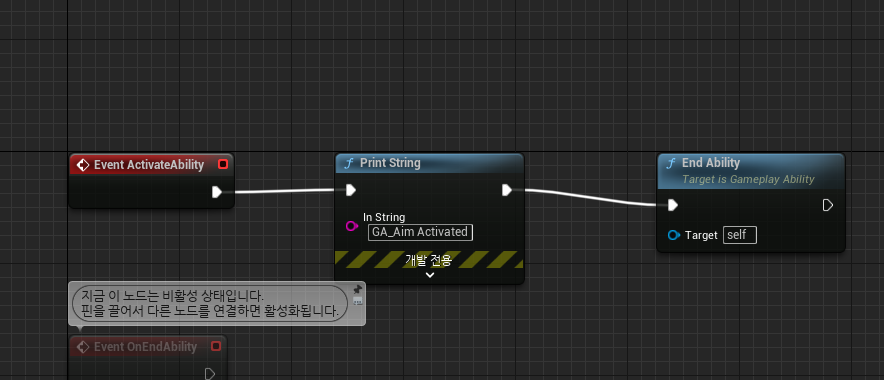
내용은 간단하게 해두고, 먼저 InputBind를 하여 해당 String을 출력하겠습니다.
저번에 작성한 글과 비슷하게 Bind 할 수 있습니다.
3번 MappingContext를 Add하는건 이미 되어있으므로 생략하고,
- ASC 에
GiveAbility를 호출하여 능력을 사용할 수 있도록 해야합니다. - 바인드할 함수를 만들어서 Ability를 Activate 하도록 해야합니다.
- InputComponent에서 Ability를 바인드할 함수를 추가해야합니다.
해당 부분은 UAbilitySystemComponent 의 GiveAbility 함수를 사용하여 ASC에 Ability를 추가하고, 입력을 받으면 GetActivatableAbilities 에서 InputTag가 일치하는 GA를 찾은 후에, TryActivate 함수를 사용하면 구현할 수 있습니다.
실행해보면 바인드한 키를 누를때마다 왼쪽 위에 활성화되었다고 로그가 뜹니다.
마무리
GAS를 사용하여 GA를 Activate 시켰습니다.
마지막 부분이 많이 생략됐지만, InputBind를 다룰 때 작성한 부분과 비슷하기도 하고 풀어쓰기엔 양이 너무 많아질것같아 생략했습니다.
다음에는 Aim한 상태에서 새로운 입력 (ex. GA_Fire) 을 받아보도록 하겠습니다.
참고자료
https://dev.epicgames.com/documentation/en-us/unreal-engine/gameplay-ability-system-component-and-gameplay-attributes-in-unreal-engine?application_version=5.0
https://velog.io/@qweasfjbv/UE5-Player-2-Enhanced-Input