1. 소개
GitHub Actions는 코드 리포지토리에서 자동화된 워크플로우를 설정할 수 있는 강력한 도구입니다. 이 튜토리얼에서는 OpenAI의 ChatGPT API를 이용하여 GitHub Issues와 Comments에 자동으로 응답하는 봇을 만드는 방법을 단계별로 설명합니다. 이를 통해 코드 리뷰, 질문에 대한 답변, 문서 자동 생성 등 다양한 용도로 활용할 수 있습니다.
2. 사전 준비 사항
봇을 설정하기 전에 필요한 몇 가지 준비 사항이 있습니다:
- GitHub 계정: GitHub에 로그인하고 리포지토리를 생성할 수 있어야 합니다.
- OpenAI API 키: ChatGPT API에 접근하기 위해 OpenAI 계정이 필요합니다.
- 기본적인 GitHub 사용 지식이 필요합니다.
3. GitHub 리포지토리 생성 및 설정
새 리포지토리 생성
GitHub에서 새 리포지토리를 생성합니다. 리포지토리 이름을 지정하고, "Public"으로 설정합니다.
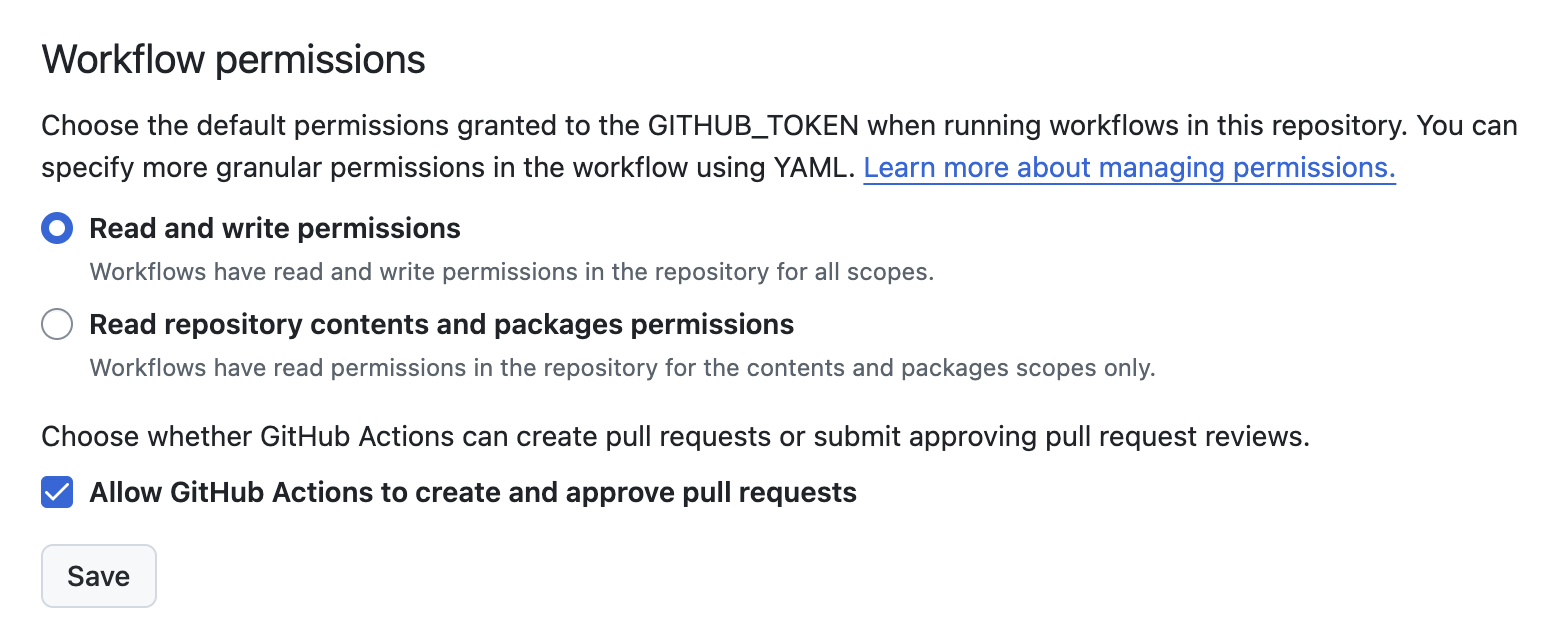
Settings 설정:
- 리포지토리의 "Settings" 탭으로 이동합니다.
- "Actions" > "General"에서 "Workflow permissions"를 "Read and write permissions"로 설정합니다.
- "Allow GitHub Actions to create and approve pull requests" 옵션도 활성화합니다.
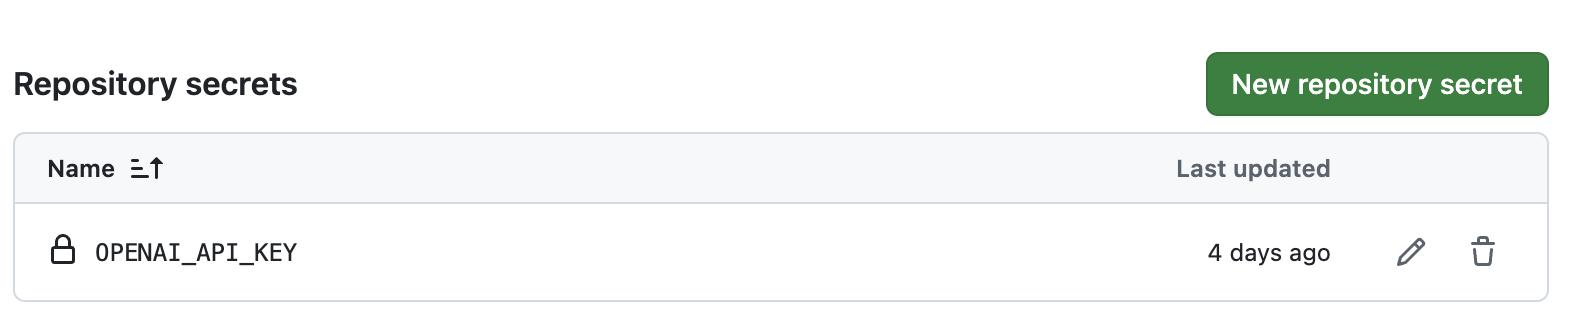
Secrets 설정:
- "Settings" > "Secrets and variables" > "Actions"로 이동하여, OpenAI API 키를 추가합니다.
- 단, API 키는 "4. OpenAI API 키 생성 및 설정"에서 복사-붙여넣기
4. OpenAI API 키 생성 및 설정
OpenAI 계정 생성 및 로그인
- OpenAI 홈페이지로 이동하여 계정을 생성하고 로그인합니다.
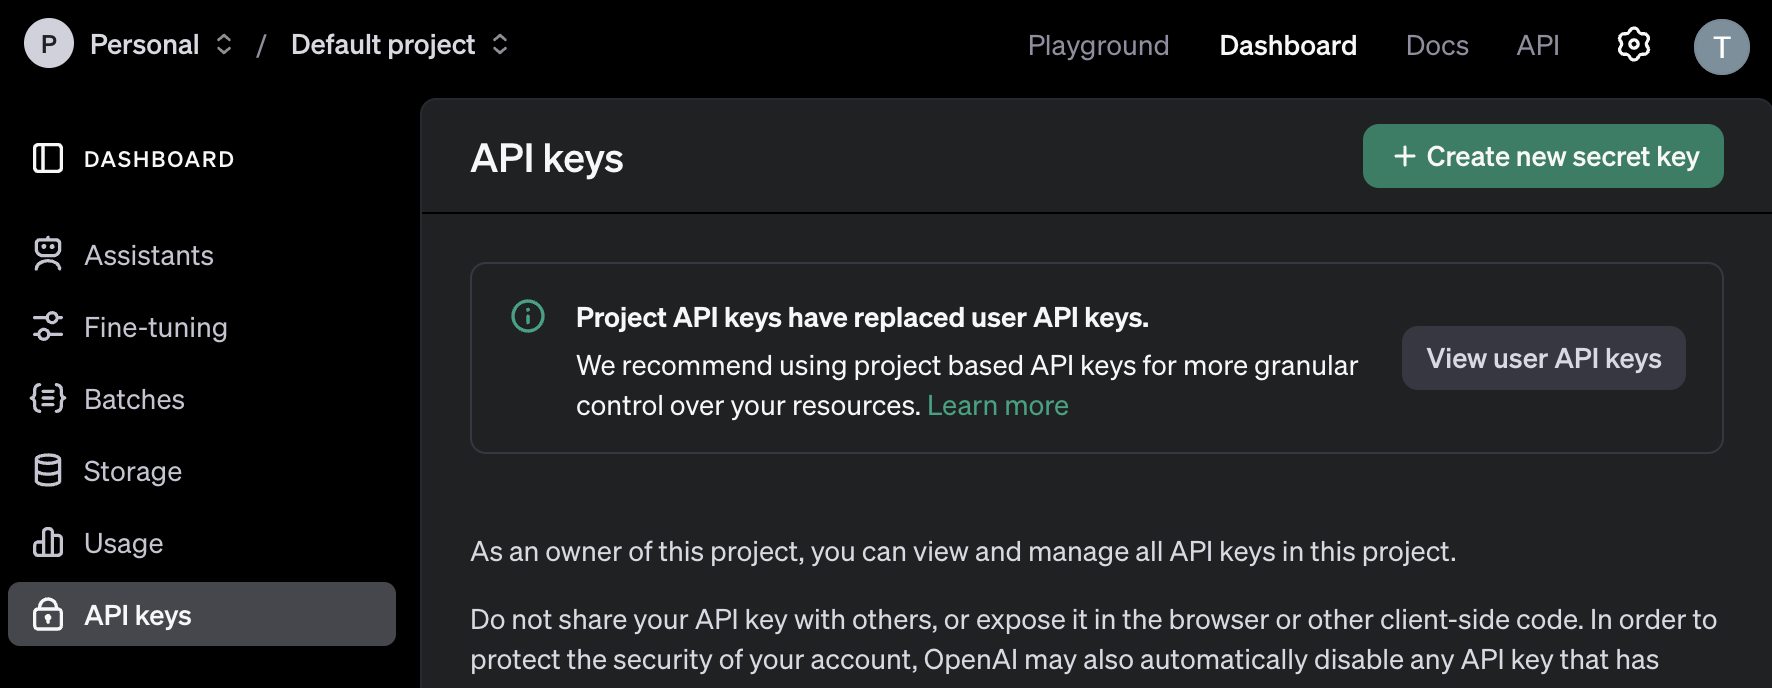
API 키 생성:
- OpenAI 대시보드에서 "API Keys" 섹션으로 이동합니다.
- 새 API 키를 생성하고, 이를 복사하여 GitHub Secrets에 추가합니다 (OPENAI_API_KEY).
5. GitHub Actions 워크플로우 파일 작성
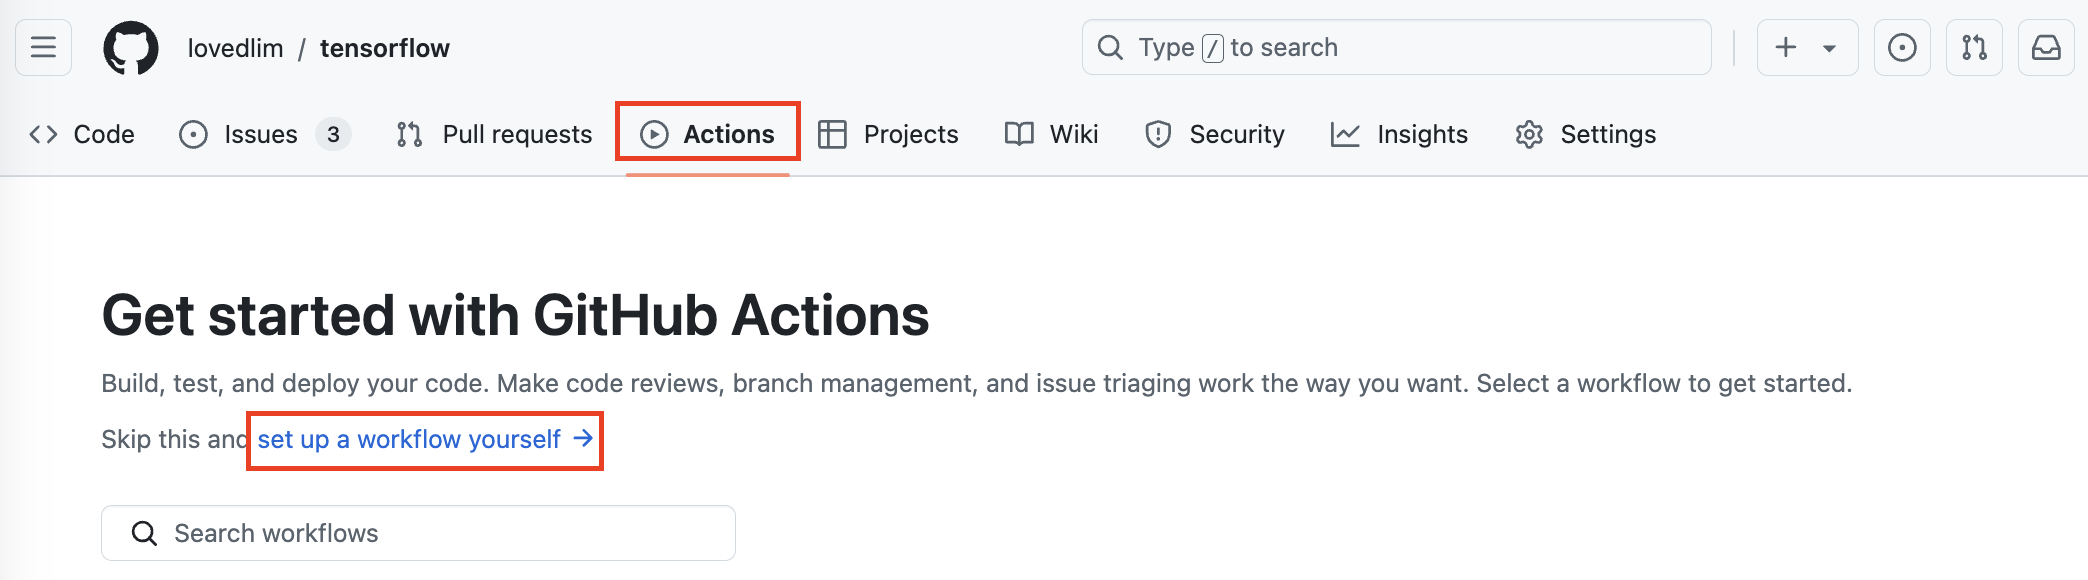
워크플로우 파일 생성:
-
Actions탭 - "set up a workflow yourself" 클릭 (자동 생성)
또는 리포지토리 루트에 .github/workflows 디렉토리를 직접 생성합니다. (수동)
-
해당 디렉토리에 issue-response.yml 파일을 생성합니다.
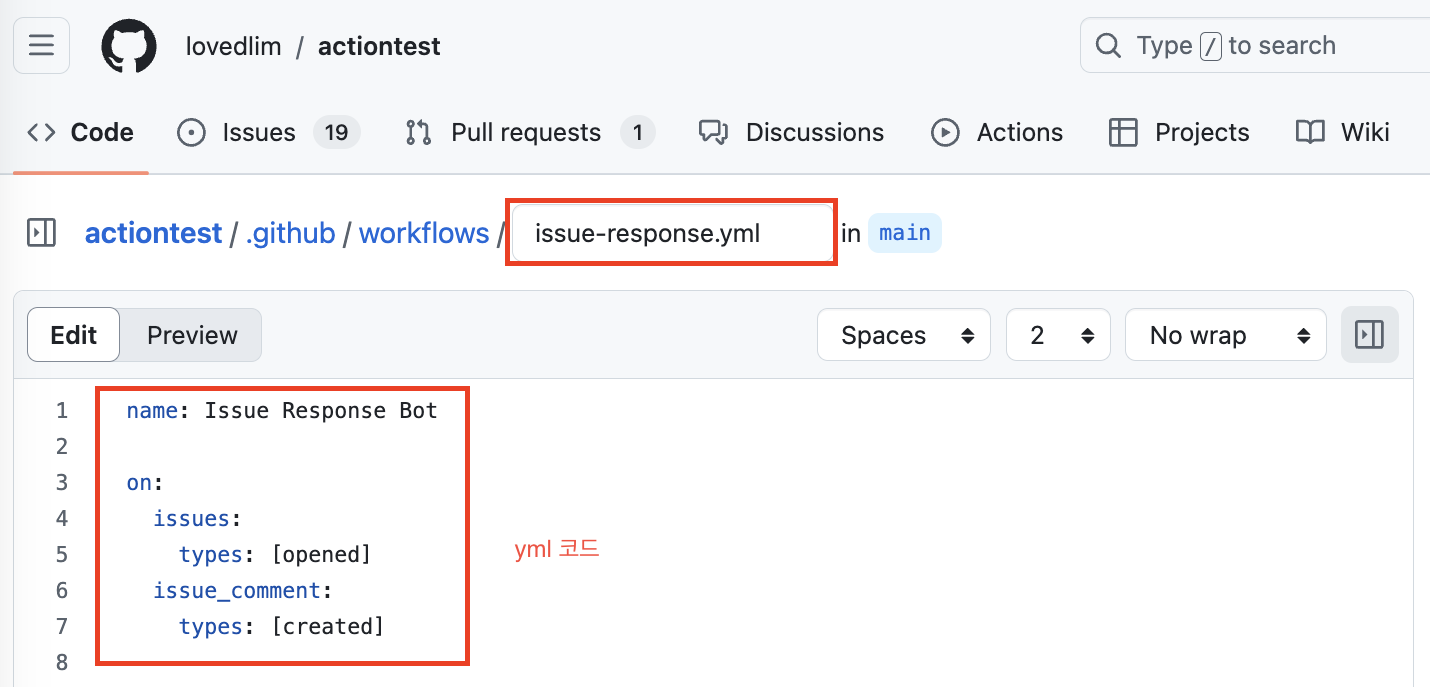
워크플로우 파일 내용 작성(yml 코드)
name: Issue Response Bot

on:
  issues:
    types: [opened]
  issue_comment:
    types: [created]

permissions:
  issues: write
  contents: read

jobs:
  respond:
    runs-on: ubuntu-latest

    steps:
      - name: Check out repository
        uses: actions/checkout@v4

      - name: Set up Python
        uses: actions/setup-python@v4
        with:
          python-version: '3.x'

      - name: Install dependencies
        run: |
          python -m pip install --upgrade pip
          pip install openai==0.28.0 requests

      - name: Generate Response
        env:
          OPENAI_API_KEY: ${{ secrets.OPENAI_API_KEY }}
          GITHUB_TOKEN: ${{ secrets.GITHUB_TOKEN }}
          GITHUB_REPOSITORY: ${{ github.repository }}
          ISSUE_NUMBER: ${{ github.event.issue.number }}
          COMMENT_BODY: ${{ github.event.issue.body || github.event.comment.body }}
          COMMENT_AUTHOR: ${{ github.event.issue.user.login || github.event.comment.user.login }}
        run: |
          python .github/workflows/respond_to_issue.py
6. Python 스크립트 작성
Python 스크립트 생성
- .github/workflows/ 디렉토리에 respond_to_issue.py 파일을 생성합니다.

스크립트 내용 작성
import os
import openai
import requests

# GitHub 환경 변수 설정
GITHUB_TOKEN = os.getenv('GITHUB_TOKEN')
REPO_NAME = os.getenv('GITHUB_REPOSITORY')
ISSUE_NUMBER = os.getenv('ISSUE_NUMBER')
COMMENT_BODY = os.getenv('COMMENT_BODY')
COMMENT_AUTHOR = os.getenv('COMMENT_AUTHOR')
OPENAI_API_KEY = os.getenv('OPENAI_API_KEY')

# OpenAI API 키 설정
openai.api_key = OPENAI_API_KEY

# 이슈의 제목, 본문, 그리고 모든 댓글 가져오기
def get_issue_and_comments():
    issue_url = f"https://api.github.com/repos/{REPO_NAME}/issues/{ISSUE_NUMBER}"
    comments_url = f"https://api.github.com/repos/{REPO_NAME}/issues/{ISSUE_NUMBER}/comments"
    headers = {"Authorization": f"token {GITHUB_TOKEN}"}

    # 이슈 정보 가져오기
    issue_response = requests.get(issue_url, headers=headers)
    print(f"Issue API response status: {issue_response.status_code}")

    if issue_response.status_code == 200:
        issue_data = issue_response.json()
        issue_title = issue_data.get('title', '')
        issue_body = issue_data.get('body', '')
    else:
        print("Failed to fetch issue data from GitHub API.")
        return None, None, None

    # 이슈의 모든 댓글 가져오기
    comments_response = requests.get(comments_url, headers=headers)
    print(f"Comments API response status: {comments_response.status_code}")

    if comments_response.status_code == 200:
        comments_data = comments_response.json()
        comments = [f"{comment['user']['login']} said: {comment['body']}" for comment in comments_data]
    else:
        print("Failed to fetch comments from GitHub API.")
        return issue_title, issue_body, None

    return issue_title, issue_body, comments

# ChatGPT API 호출
def get_chatgpt_response(title, body, comments, new_comment):
    try:
        # 프롬프트 생성: 제목, 본문, 기존 댓글, 새 댓글
        prompt = f"Title: {title}\n\nBody: {body}\n\nComments:\n"
        if comments:
            prompt += "\n".join(comments)
        if new_comment:
            prompt += f"\n\nNew comment from {COMMENT_AUTHOR}: {new_comment}\n\nRespond to the new comment:"
        else:
            prompt += "\n\nRespond to the issue:"

        response = openai.ChatCompletion.create(
            model="gpt-3.5-turbo",
            messages=[
                {"role": "system", "content": "You are a helpful assistant."},
                {"role": "user", "content": prompt}
            ],
            max_tokens=500  # 필요에 따라 조정
        )
        return response.choices[0].message['content'].strip()
    except Exception as e:
        print(f"Error calling OpenAI API: {e}")
        return None

# 이슈 댓글에 답글 추가
def comment_on_issue(response):
    if not response:
        print("No response to post.")
        return

    url = f"https://api.github.com/repos/{REPO_NAME}/issues/{ISSUE_NUMBER}/comments"
    headers = {"Authorization": f"token {GITHUB_TOKEN}"}
    data = {"body": response}
    response = requests.post(url, json=data, headers=headers)

    if response.status_code == 201:
        print("Response posted successfully.")
    else:
        print(f"Failed to post response. Status code: {response.status_code}, Response: {response.text}")

def main():
    issue_title, issue_body, comments = get_issue_and_comments()
    if issue_title and issue_body:  # 제목과 본문이 모두 있을 때만 응답 생성
        response = get_chatgpt_response(issue_title, issue_body, comments, COMMENT_BODY)
        print(f"Generated response: {response}")  # 디버깅용 출력
        comment_on_issue(response)
    else:
        print("No issue title or body found.")

if __name__ == "__main__":
    main()
7. 워크플로우 테스트 및 디버깅
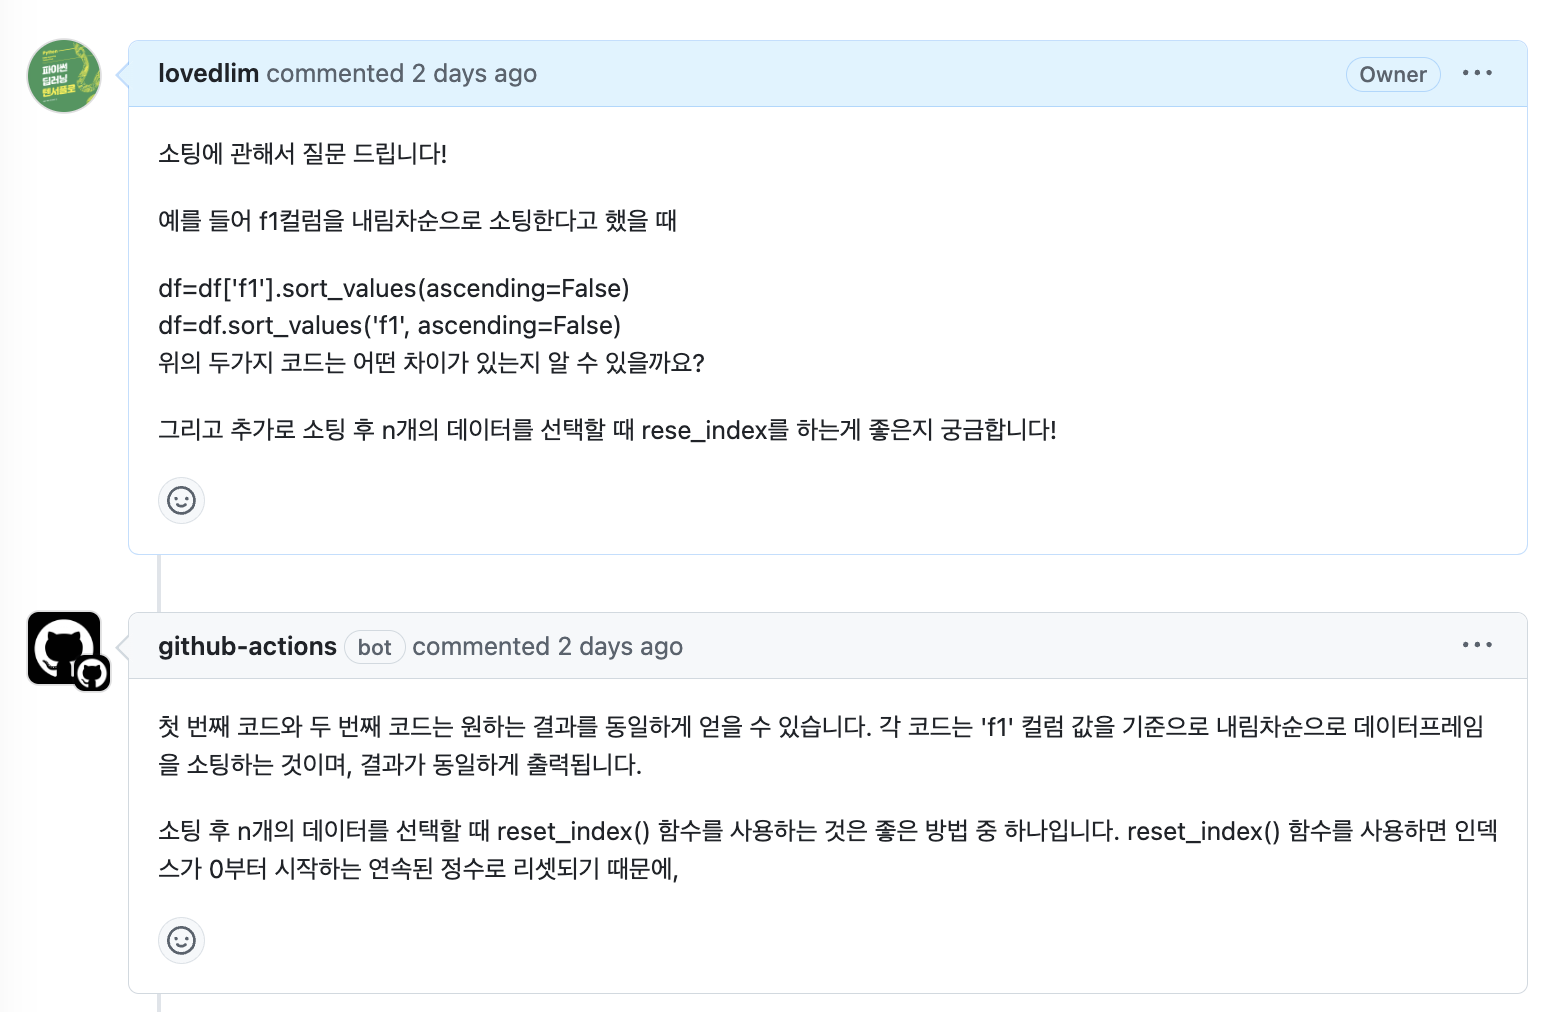
워크플로우 트리거 테스트
새로운 이슈를 생성하거나 기존 이슈에 댓글을 달아봅니다. 워크플로우가 트리거되고 봇이 자동으로 응답하는지 확인합니다.
토큰 개수
깃헙 액션 봇의 댓글을 확인해보면, 글자가 잘린 것을 확인할 수 있습니다. 이 부분은 respond_to_issue.py파일의 max_tokens=500를 500에서 더 크게 설정하면 됩니다. 참고로 gpt-3.5-turbo 모델의 경우 최대 4096 토큰을 처리할 수 있습니다.
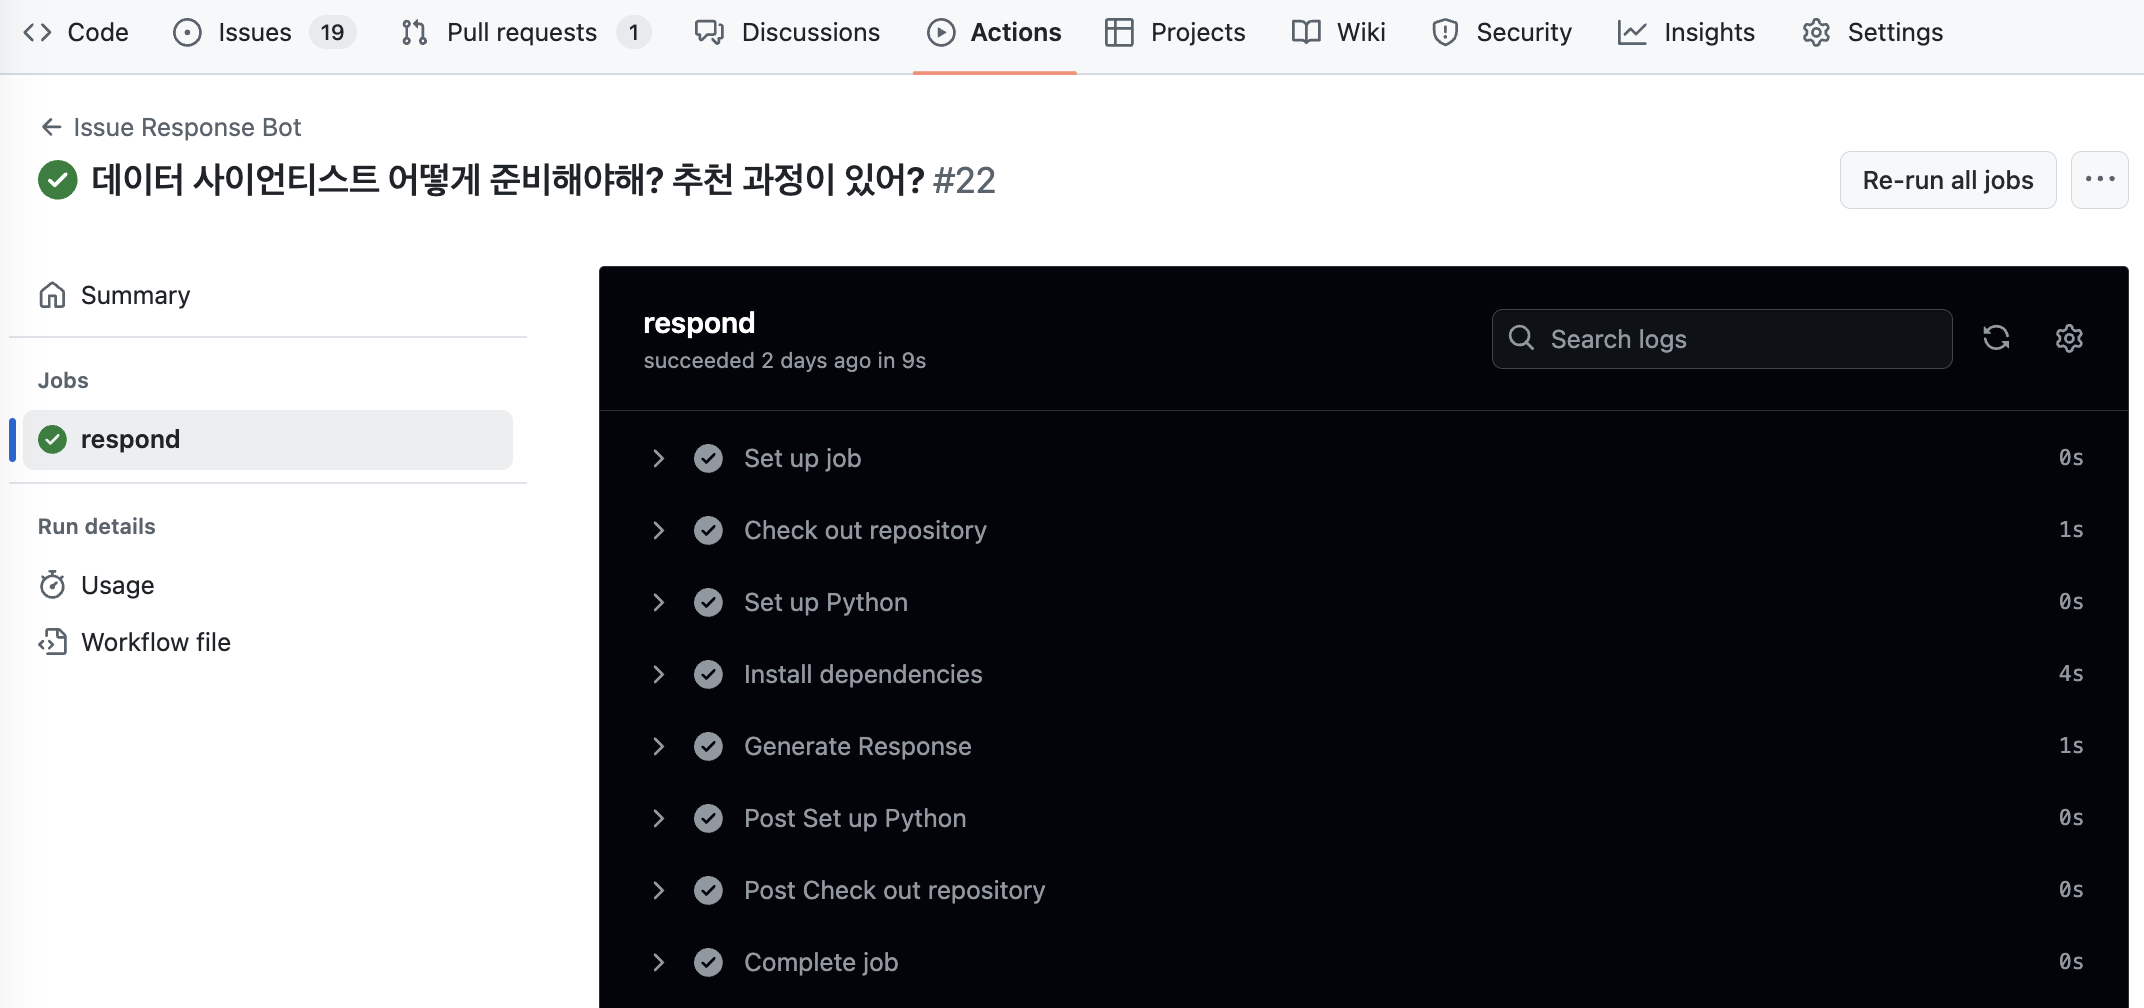
디버깅:
문제가 발생하면 GitHub Actions의 로그를 확인하여 디버깅합니다. OpenAI API 키나 GitHub 토큰이 올바르게 설정되었는지 확인합니다.
8. 추가 설정: 댓글에 대한 응답
기존의 이슈 생성 시 뿐만 아니라 댓글이 달릴 때마다 봇이 자동으로 응답하도록 설정하였습니다. 이를 통해 GitHub 이슈에서 대화를 관리하고, 반복적인 질문에 자동으로 대응할 수 있습니다.

추가 댓글에 대한 응답도 가능하도록 하였으나 추가 댓글이 질문이 아니라 "알겠어 고마워"와 같은 답변일 경우 이전 질문에 대한 답을 반복해서 하고 있습니다. 이 부분은 개선해야할 부분입니다.
9. 결론
이 튜토리얼에서는 GitHub Actions와 OpenAI의 ChatGPT API를 사용하여 자동으로 이슈와 댓글에 응답하는 봇을 만드는 방법을 배웠습니다. 이를 통해 프로젝트 관리와 커뮤니케이션을 자동화할 수 있으며, 더 나아가 다양한 자동화 작업에 활용할 수 있습니다. GitHub Actions와 API의 강력한 결합을 통해 여러분의 워크플로우를 더욱 효율적으로 만들어보세요!
