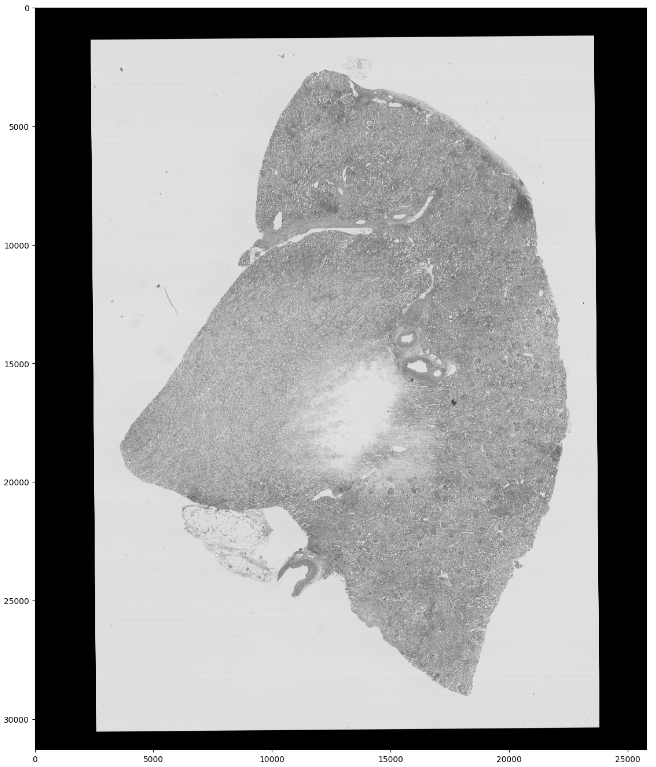
이미지 처리를 위해 모델을 학습시킬 때 이미지가 너무 커서 바로 사용하기 어려운 경우가 있다. RLE에 대한 글을 쓸때 사용했던 이미지도 원본은 거의 30k x 20k 픽셀정도 된다.
이렇게 이미지가 너무 크다면 학습이 느리기도 하고, 제대로 하기도 어렵다. 가장 큰 문제는 메모리 효율이 너무 안좋다. 이런 경우에는 적절한 크기로 이미지를 타일 형태로 잘라서 각각을 학습시키는게 더 낫다.
이번 포스트에서는 큰 이미지를 작은 크기로 나눠주고 저장하는 것 까지 진행한다. 사용하는 데이터는 2년 전 캐글 대회였던 HuBMAP - Hacking the Kidney에서 가져왔다.
이 대회에서 데이터는 .tiff 파일로 되어있다. 이 파일을 불러오기 위해 rasterio를 설치해준다.
pip install rasterio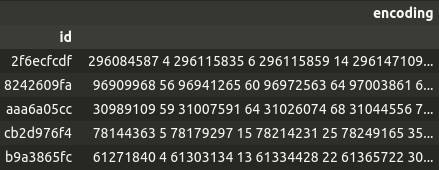
각 .tiff 파일은 인코딩 결과가 기록되어있는 csv 파일의 id를 파일명으로 가지고 있다. 이 id를 이용해 id와 일치하는 .tiff파일을 가져오고, 이미지를 같은 크기로 잘라내 각각 id를 prefix로 두고 저장한다. index가 파일 이름, id라고 할 때
import os
import rasterio
from rasterio.windows import Window

data = rasterio.open(os.path.join('path/to/train/images/', f"{index}.tiff"), num_threads = 'all_cpus')
목표 크기는 256 x 256으로 다른 필요한 변수들을 설정한다. 원본 이미지가 256에 맞게 잘리지 않기 때문에 부족한 부분은 패딩으로 처리해준다. (패딩 크기 = 목표 크기 - 자르고 남은 부분)
target_size = 256
image_shape = original_image.shape # [height, width]

pad_height = (target_size - image_shape[0] % target_size)
pad_width = (target_size - image_shape[1] % target_size)
원본 이미지에 패딩까지 더하면 256으로 다 나눠떨어지니 모든 이미지를 256x256에 맞게 잘라준다.
# 전체 타일 인덱스
height_indices = (image_shape[0] + pad_height) // target_size
width_indices = (image_shape[1] + pad_width) // target_size
이제 이미지들을 잘라주기만 하면 된다. 하나의 .tiff 파일에서 잘라낸 이미지 중 idx 번째 이미지를 불러온다면 잘라낸 이미지의 원점이 되는 지점은 idx를 전체 가로 인덱스로 나눠준 값을 기준으로 구할 수 있다. 그리고 원본 이미지에 패딩도 추가되었기 때문에 양쪽으로 패딩이 있다고 하면 절반씩 빼주어야한다.
hight_idx = idx // width_indices
width_idx = idx % width_indices

h0 = hight_idx * target_size - (pad_height//2)
w0 = width_idx * target_size - (pad_width//2)
자른 이미지와 마스크를 저장하기 위해 초기화 시켜준다. 파일들을 읽어보면 어떤 이미지는 band(channel과 비슷하다고 보면 된다)가 1인 경우도 있고 3인 경우도 있다. 그래서 자른 부분을 사용할 때 band가 3인 경우는 그대로 사용하고 1인 경우는 전체 band에 같은 값이 들어가도록 했다. 이미지는 band의 최대값은 3이므로 목표 크기인 256에 맞게 256 x 256 x 3로, 마스크는 256 x 256으로 만든다.
import numpy as np

img = np.zeros((target_size, target_size, 3), dtype=np.uint8)
mask = np.zeros((target_size, target_size), dtype=np.uint8)
사용하는 좌표는 이미지 사이즈보다 같거나 작아야한다. 그리고 자른 이미지에 패딩이 포함되어있다면 패딩부터 포함되도록 해준다.
height0, height1 = max(0, h0), min(h0 + target_size, image_shape[0])
width0, width1 = max(0, w0), min(w0 + target_size, image_shape[1])

img[(height0 - h0) : (height1 - h0), (width0 - w0) : (width1 - w0)] = \
	np.moveaxis(data.read(list(range(1, data.count+1)),
    					  window=Window.from_slices((height0, height1),
                          							(width0, width1))),
                0, -1) # rasterio의 read 메서드로 불러오게 된다면 [band 수, height, width] 로 불러오게 된다. 이미지 형식에 맞게 [height, width, band(channel)]로 바꿔준다.
마스킹 데이터도 있다면 같은 좌표로 마스크 배열도 만들어준다.
mask[(height0 - h0) : (height1 - h0), (width0 - w0) : (width1 - w0)] = \
	mask[height0 : height1, width0 : width1]
제일 위에 원본 이미지를 보면 아무것도 없는 까만 테두리와 하얀 배경 부분이 있다. 이 부분은 학습에 필요하지 않으니 삭제해줘야한다. 삭제해주는 방법은 cv2로 색 공간을 HSV로 바꿔주어 채도값이 특정 값보다 높은 픽셀 수가 임계값보다 적으면 저장하지 않도록 하는 것이다.
cs2는 RGB와 반대인 BGR로 저장되므로
hsv = cv2.cvtColor(img, cv2.COLOR_BGR2HSV)
h, s, v = cv2.split(hsv)
is_save = -1 if (s > s_threshold).sum() <= pixel_threshold else idx
이제 전체 코드를 pytorch의 Dataset 클래스로 만들어서 전체 과정이 반복되도록 합쳐주면 된다.
import os
import numpy as np

import cv2
import rasterio
from rasterio.windows import Window
from torch.utils.data import Dataset

target_size = 256
s_threshold = 40
pixel_threshold = 1000 * target_size ** 2

class FTUDataset(Dataset):
	def __init__(self, index, size=target_size, encs=None):
    	# rasterio로 데이터 가져오기
    	self.data = rasterio.open(os.path.join('path/to/train/images/', f"{index}"),
        						  num_threads = 'all_cpus')
        self.shape = self.data.shape
        self.size = size
        # 패딩 크기
		self.pad_height = (self.size - self.shape[0] % self.size)
        self.pad_width = (self.size - self.shape[1] % self.size)
        # 타일 수
        self.height_indices = (self.shape[0] + self.pad_height) // self.size
		self.width_indices = (self.shape[1] + self.pad_width) // self.size

        # 마스킹 데이터(RLE)가 있다면 추가, enc2mask 함수는 제일 위에 있는 RLE 포스팅 링크에
        self.mask = enc2mask(encs, (self.shape[1], self.shape[0])) if encs is not None else None


    def __len__(self):
    	return self.height_indices * self.width_indices


    def __getitem__(self, idx):
    	# 이미지 인덱스
        height_idx = idx // self.width_indices
        width_idx = idx % self.height_indices

        # 원점
        h0 = height_idx * self.size - (self.pad_height//2)
        w0 = width_idx * self.size - (self.pad_width//2)

        # 저장 배열 초기화
        img = np.zeros((self.size, self.size, 3), dtype=np.uint8)
        mask = np.zeros((self.size, self.size), dtype=np.uint8)

        # 이미지와 마스크 배열에 저장할 이미지 좌표 구하기 및 데이터 저장
        height0, height1 = max(0, h0), min(h0 + self.size, self.shape[0])
        width0, width1 = max(0, w0), min(w0 + self.size, self.shape[1])

        img[(height0 - h0) : (height1 - h0), (width0 - w0) : (width1 - w0)] = \
			np.moveaxis(data.read(list(range(1, self.data.count+1)),
    					  		  window=Window.from_slices((height0, height1),
                          									(width0, width1))),
            			0, -1)

        if self.mask is not None:
			mask[(height0 - h0) : (height1 - h0), (width0 - w0) : (width1 - w0)] = \
				mask[height0 : height1, width0 : width1]

        # 테두리 및 배경만 있는 이미지 체크
        hsv = cv2.cvtColor(img, cv2.COLOR_BGR2HSV)
        h, s, v = cv2.split(hsv)

        # 이미지 반환
        return img, mask, (-1 if (s > s_threshold).sum() <= pixel_threshold else idx)
이 데이터셋을 이용해 자른 이미지들을 저장해준다. 동시에 나중에 이 데이터를 학습에 사용할 때 전처리로 이미지 정규화를 해줄수 있기 때문에 전체 이미지의 채널 별 평균과 표준편차도 구해둔다.
import zipfile
import pandas as pd
from tqdm.auto import tqdm

TRAIN_CROPPED = 'train.zip'
MASK_CROPPED = 'masks.zip'
df_masks = pd.read_csv('/path/to/train.csv', index_col='id)

x_sum, x_ssum = [], []
with zipfile.ZipFile(TRAIN_CROPPED, 'w') as img_cropped, \
	 zipfile.ZipFile(MASK_CROPPED, 'w') as mask_cropped:
	for index, encs in tqdm(df_masks.iterrows(), total=len(df_masks)):
    	dataset = FTUDataset(index, encs=encs)
        for i in range(len(dataset)):
        	img, msk, idx = dataset[i]
            if idx < 0: # 검은 테두리거 흰 배경일 경우
            	continue

			x_sum.append((img/255.).reshape(-1, 3).mean(0))
            x_ssum.append(((img/255.)**2).reshape(-1, 3).mean(0))

            img = cv2.imencode('.png', cv2cvtColor(img, cv2.COLOR_RGB2BGR))[1]
            img_cropped.writestr(f'{index}_{idx:04d}.png', img)

            mask = cv2.imencode('.png', m)[1]
            mask_cropped.writestr(f'{index}_{idx:04d}.png', mask)

img_mean = np.array(x_sum).mean(0)
img_std = np.sqrt(np.array(x_ssum).mean(0) - img_mean**2)
실행하면 이 코드가 저장된 위치에 train.zip과 masks.zip이 저장되어있다.
참고: @Iafoss